Table of Contents >> Show >> Hide
- Why DIY Dining Chair Makeovers Are So Budget-Friendly
- 1. Classic Painted Wood Chairs
- 2. Reupholstered Seat Cushions
- 3. Cane or Rattan Chair Refresh
- 4. Two-Tone Wood and Paint Combination
- 5. Ombre or Color-Blocked Chairs
- 6. No-Sew Slipcovers and Chair Covers
- 7. Rug-Covered Seats for Extra Texture
- 8. Farmhouse Distressed Finish
- 9. Stenciled or Patterned Chair Backs
- 10. Mixed-and-Matched Thrift Store Chairs
- Practical Tips for Any DIY Dining Chair Makeover
- Real-Life DIY Dining Chair Makeover Experiences (500+ Words)
- Conclusion: Your Dream Dining Chairs Are Already in Your House
If your dining chairs look like they’ve survived three kids, two dogs, and the Great Spaghetti Incident of 2017… you are not alone. The good news? You don’t need a designer budget to give them a fresh, stylish new life. With a little paint, fabric, and creativity, you can pull off a dining chair makeover that looks straight out of a home decor magazine (or at least your Pinterest inspiration board).
DIYers across the U.S. constantly revive tired chairs with affordable tricks like chalk paint, thrift-store fabric, cushions made from rugs, and even slipcovers you can toss in the wash. Whether your style is farmhouse, modern, boho, or “I just want them not to be sticky,” there’s a makeover idea here you can totally handle on a weekend.
Why DIY Dining Chair Makeovers Are So Budget-Friendly
Replacing a full set of dining chairs can cost hundreds (or thousands) of dollars, especially if you want solid wood or designer styles. But most older chairs are structurally sound; they’re just dated, scratched, or covered in fabric that has seen better days. DIY projects let you keep the sturdy frame and change everything else.
Many tutorials show you how to transform chairs for less than $20 per seat using spray paint, chalk paint, or latex paint plus a topcoat, and low-cost fabrics like cotton blends, outdoor fabric, or even thrifted curtains. You’ll mostly invest time and a bit of elbow grease, not your entire paycheck.
1. Classic Painted Wood Chairs
The fastest glow-up for dated wood chairs is a fresh coat of paint. Whether you’re covering orange oak, dingy maple, or 90s honey stain, paint instantly modernizes the look.
How to do it
- Clean and lightly sand the chairs to remove grime and gloss.
- Use a bonding primer so paint grips to old finishes.
- Apply 2–3 thin coats of durable paint (acrylic, latex, or chalk-style), letting each coat dry fully.
- Seal with a clear topcoat for extra protection, especially on the seat and arms.
Neutral shades like white, greige, or black feel timeless, while color fans can go bold with navy, emerald, or deep teal. Painting all chairs the same shade unifies mismatched thrifted pieces instantly.
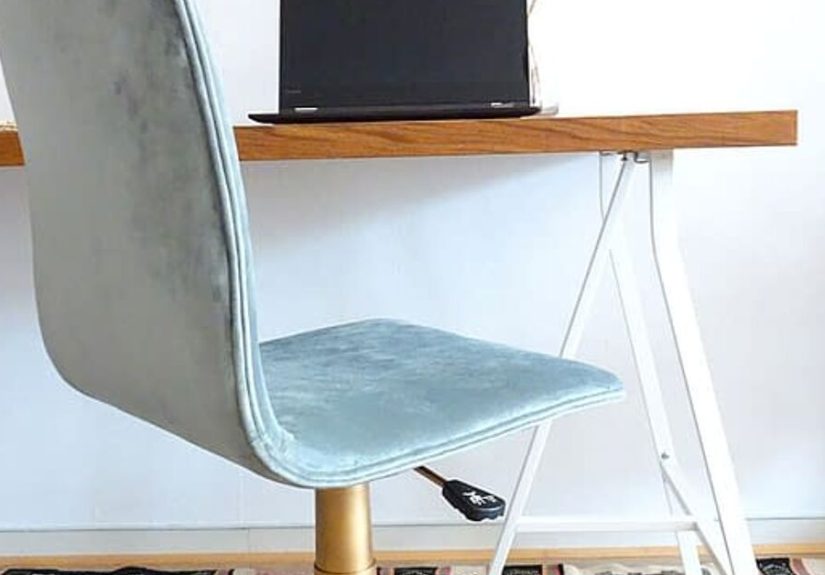
2. Reupholstered Seat Cushions
If your chairs have removable seat pads, you’re sitting on a makeover goldmine (literally unscrew four screws and you’re halfway done). New fabric plus fresh foam can turn a saggy, stained seat into something you’re proud to show off.
Basic reupholstery steps
- Flip the chair over, unscrew the seat, and remove it.
- Use pliers or a staple remover to pull off the old fabric and staples.
- Replace old foam with new high-density foam or add a layer of batting for comfort.
- Cut new fabric a few inches larger than the seat all around, pull it tight, and staple from the center outward on each side.
- Fold corners neatly and reattach the seat to the chair.
Choose durable upholstery, outdoor fabric, or performance fabric if you have kids, pets, or enthusiastic spaghetti eaters. Patterned fabric also hides stains better than solids.
3. Cane or Rattan Chair Refresh
Cane-back and rattan dining chairs have major vintage charm but can look tired or yellowed. A simple combo of paint and updated seat fabric can turn them into chic statement pieces.
Budget-friendly makeover idea
DIYers often:
- Clean and lightly sand the wood frame and cane.
- Paint the frame with white or soft gray for a farmhouse or coastal look.
- Pair it with a modern, neutral seat fabricthink linen-look gray or a subtle geometric print.
The contrast between classic cane and fresh fabric feels high-end, even if the chair started as a $10 thrift-store find.
4. Two-Tone Wood and Paint Combination
If you like the warmth of natural wood but still want a modern update, try a two-tone finish. Leave parts of the chair stained (like the seat or top rail) and paint the rest.
How to get the look
- Sand the areas you want to stain down to bare wood and apply a stain that complements your table.
- Paint the remaining sections in a coordinating colorblack, white, or charcoal look especially upscale.
- Seal both paint and stain with a clear topcoat for durability.
This technique works great for Windsor chairs, farmhouse ladder-backs, or classic spindle chairs where the contrast really stands out.
5. Ombre or Color-Blocked Chairs
Want your dining space to feel more playful? Ombre or color-blocked painted chairs are a fun twist. DIYers often paint each chair in a different shade of the same color family or paint just the legs, spindles, or seat for a subtle color-block effect.
Tips for success
- Stick to 3–4 coordinated colors so the room feels intentional, not chaotic.
- Use painter’s tape to create crisp lines between colors.
- Repeat one accent color in your table decor, rug, or curtains for a pulled-together look.
6. No-Sew Slipcovers and Chair Covers
If you’re nervous about stapling fabric or you want something washable, no-sew slipcovers are your new best friend. Many tutorials show how to drape fabric over chair backs and secure it with ties, fabric tape, or simple hemming.
Slipcovers are perfect if:
- You host messy holiday meals or kids’ craft sessions at the table.
- You like to change decor with the seasons (swap covers instead of repainting).
- Your chairs are comfortable but the upholstery is beyond saving.
7. Rug-Covered Seats for Extra Texture
One of the most creative budget chair makeover ideas on Hometalk-style projects is using a flat-woven rug instead of traditional upholstery fabric.
Why it works
- Flat rugs are extremely durable and designed to handle foot trafficso chair traffic is nothing.
- They add instant texture and pattern to an otherwise simple chair.
- You can often cover multiple seats with one inexpensive rug from a big-box store.
The process is similar to reupholstering with fabric: cut the rug to size, pull it tight over the cushion, and staple it underneath. Just make sure your staple gun is strong enough to handle the thickness.
8. Farmhouse Distressed Finish
If you love farmhouse or cottage style, a distressed paint finish can make even the plainest chairs feel charming and lived-in. DIYers often start with chalk-style paint, then sand the edges for a naturally worn look.
Key steps
- Paint the entire chair in a solid color (white, cream, or sage are popular).
- Once dry, lightly sand along edges, corners, and spindles where real wear would happen.
- Finish with wax or a matte clear coat to protect the look without adding shine.
Pair distressed chairs with a rustic farmhouse table, woven placemats, and simple linens for a cozy, collected feel.
9. Stenciled or Patterned Chair Backs
For a custom designer touch, add stenciled details to chair backs or seats. Patterns like medallions, florals, or geometric designs can turn a plain painted chair into a conversation piece.
Stencil success tips
- Use a repositionable stencil and very little paint on your brush or sponge to avoid bleeding.
- Stencil just one area (like the center of the chair back) to keep it classy, not overwhelming.
- Repeat the pattern somewhere else in the roommaybe on a tray, wall art, or napkinsto tie everything together.
10. Mixed-and-Matched Thrift Store Chairs
One of the most popular trends in dining spaces is the intentionally mismatched look. Instead of buying a matching set, you collect different chair styles from thrift stores or yard sales and unify them with paint or fabric.
The formula is simple:
- Stick to one main color for the frames (like black, white, or navy).
- Use coordinating seat fabrics across all chairs, even if the frames differ.
- Keep the overall scale similar so chairs feel related and comfortable around the same table.
This approach is incredibly budget-friendly because you can grab chairs one at a time whenever you find a bargain, then transform the whole collection once you’re ready.
Practical Tips for Any DIY Dining Chair Makeover
- Check the frame first. Tighten screws, glue loose joints, and make sure the chair is safe before you bother with paint or fabric.
- Clean thoroughly. Degreaser or a TSP substitute helps paint stick to older finishes coated in oils and polishes.
- Test your materials. Try paint and fabric on one chair first before committing to the whole set.
- Prioritize comfort. Fresh foam, added batting, or a slightly thicker cushion can turn a pretty chair into one you actually want to sit in for hours.
Real-Life DIY Dining Chair Makeover Experiences (500+ Words)
If you scroll through before-and-after photos on DIY blogs and Hometalk-style sites, you’ll notice a pattern: almost nobody regrets tackling their dining chair makeover. What they do regret is waiting so long to start.
Here’s how the process usually goes in real homes. First, there’s the “I can’t unsee this” moment. Maybe it’s during a holiday dinner when you finally notice how worn the seats look in photos, or the day you drop something under the table and get a close-up view of the underside of a chair. Suddenly, the scratches, stains, and faded fabric are all you can see.
Next comes the comparison stage. You browse new chairs online and realize that buying a full set would rival your monthly mortgage payment. So you turn to Pinterest, Instagram, or Hometalk, where everyday DIYers share their $5–$40 chair transformations. You see cane chairs turned bright white, thrift-store finds upholstered with bold modern prints, and chairs completely reshaped with new tufted backs. It’s hard not to think, “If they can do it, maybe I can, too.”
The first big win usually happens with the test chair. Most people pick the worst-looking chair or the one with a slightly wobbly leg and decide it’s the guinea pig. The sanding might be messier than expected, and there’s often a learning curve with the staple gun. But once that first chair is painted and reupholstered, it looks so dramatically better that the rest of the set suddenly feels non-negotiable.
Another common experience is realizing how forgiving DIY can be. Paint drips? Easy to sand and repaint. Fabric slightly crooked? Pop out a couple of staples and pull it tighter. Unlike a major renovation, a dining chair makeover offers a lot of room to experiment. Many DIYers say they gained confidence for bigger furniture projects after they saw how manageable chairs were.
Budget-wise, the savings are very real. People often pick up entire sets of chairs for under $100 at thrift stores or online marketplaces, then spend another $50–$100 on paint, foam, and fabric to make them look boutique-level. Compared with buying new, that can mean saving several hundred dollarsmoney you can put toward a better table, a new rug, or, let’s be honest, more decor that your partner swears you don’t need.
There’s also an emotional side to these projects. Some families hold onto heirloom dining sets that don’t match their current style. Giving Grandma’s chairs a modern fabric or crisp new finish lets you keep the memories without feeling like you live in a time capsule. Other DIYers talk about the satisfaction of seeing friends and family compliment chairs that used to be the “ugly ducklings” of the room.
Finally, dining chair makeovers tend to create momentum. Once the chairs look fresh, the table might get a new stain, the light fixture may get swapped, and suddenly the entire dining area feels cohesive and intentional. That snowball effect is powerful: one weekend project can be the push that transforms a tired space into a room you’re proud to host in.
In short, the real-life experience of a DIY dining chair makeover is less about perfection and more about progress. Your chairs don’t need to look like a catalog photo to be a win. If they’re cleaner, more comfortable, and more “you” than they were before, you’ve nailed iton a budget and with your own two hands.
Conclusion: Your Dream Dining Chairs Are Already in Your House
You don’t have to hunt down the perfect chairs in a showroomthey’re probably sitting at your table right now, waiting for a little attention. Whether you paint, reupholster, slipcover, or experiment with rugs and stencils, each of these budget-friendly makeover ideas can help you turn “please don’t look too closely” chairs into pieces you’re proud to show off.
Start with one chair, take your time, and remember: DIY is supposed to be fun. Worst case, you repaint. Best case, you’ll sit down to your next meal, look around, and think, “Yep. I did that.”