Table of Contents >> Show >> Hide
- How to Keep Any “Under $20” Project Actually Under $20
- The 25 Easy Weekend Projects Under $20
- 1) Install a Peel-and-Stick Door Sweep
- 2) Add Weatherstripping Around One Exterior Door
- 3) Caulk a Window Frame (Inside) for a Cleaner Look and Fewer Drafts
- 4) Replace a Bathroom Faucet Aerator
- 5) Deep-Clean a Dryer Lint Trap and Vent Area
- 6) Add Felt Pads to Chair and Table Legs
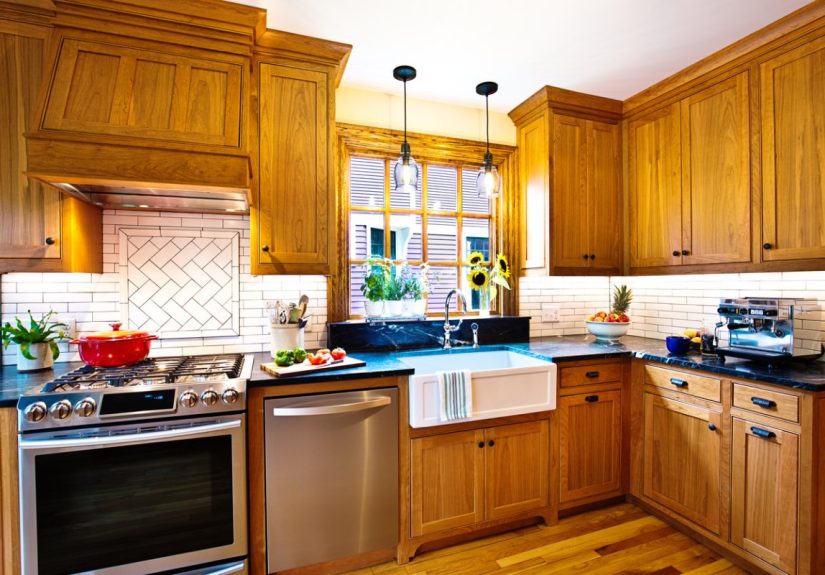
- 7) Swap to Bright, Warm LED Bulbs in One “Gloom Zone”
- 8) Fix a Wobbly Toilet Seat
- 9) Silence Cabinet Doors With Soft Bumpers
- 10) Refresh a Single Grimy Grout Line (Targeted, Not a Whole Bathroom Saga)
- 11) Replace a Light Switch Plate (or Two) for an Instant “New House” Illusion
- 12) Organize Cords With Clips, Hooks, or Binder Clips
- 13) Make a “Drop Zone” by the Door (Hooks + Tray)
- 14) Add Tension Rod Storage Under the Sink
- 15) Declutter One Drawer Using a “Keep / Move / Donate” Mini-Sort
- 16) Turn Glass Jars Into Matching Pantry Containers (No Aesthetic Tax Required)
- 17) Clean and Condition Wood Cutting Boards
- 18) Make a Simple Plant Propagation Station
- 19) Patch Tiny Nail Holes and Scuffs (The “Before Guests Arrive” Special)
- 20) Update One Piece of Hardware (Just One!)
- 21) Add a Simple Shelf Liner Where It Actually Matters
- 22) Create a Cleaning “Caddy” From a Dollar-Store Bin
- 23) Make a DIY Drawer Deodorizer (Baking Soda + Essential Oil Optional)
- 24) Test Your Smoke and Carbon Monoxide Alarms (and Replace Batteries If Needed)
- 25) Make a “No-Sand, No-Drama” Plan for Older Paint (Safety Upgrade)
- Quick Weekend Game Plan (So This Actually Gets Done)
- of Real-World Experience: What These Under-$20 Projects Feel Like
- Conclusion
- SEO Tags
Want your home to look more “put together” by Sunday nightwithout spending more than a single crisp $20 bill?
Good news: some of the highest-impact upgrades aren’t glamorous. They’re the tiny fixes and mini-makeovers that
quietly make everything work better: fewer drafts, smoother drawers, cleaner lines, brighter light, and storage that
stops your stuff from staging a nightly coup.
This list is built from practical DIY guidance and budget-upgrade playbooks commonly recommended by major U.S.
home-and-garden and how-to brands (think: Better Homes & Gardens, This Old House, Family Handyman, The Spruce,
plus government and safety resources like ENERGY STAR, the U.S. Department of Energy, EPA WaterSense, the CPSC, and
the CDC). The goal is simple: easy weekend projects with budget-friendly materials,
minimal tools, and results you can actually feel when you live in the space.
How to Keep Any “Under $20” Project Actually Under $20
- Shop your house first: leftover paint, jars, hooks, baskets, and screws count as “free.”
- Buy the smallest amount: sample-size paint, single tubes of caulk, or a small pack of bumpers.
- Borrow tools: if you don’t own a caulk gun or stud finder, check your local library or tool-lending program.
- Pick one “problem spot”: one door, one drawer, one closet shelf. Small wins stack fast.
- Don’t start the “while I’m at it” spiral: that’s how a $12 plan becomes a $212 cart.
The 25 Easy Weekend Projects Under $20
1) Install a Peel-and-Stick Door Sweep
If your door has a gap at the bottom, you’re basically paying your HVAC system to condition the outdoors.
A peel-and-stick sweep takes minutes, blocks drafts, and can reduce dust and bugs sneaking in.
Budget: $8–$18. Quick steps: clean the door, measure, cut with scissors/utility knife,
peel, press, and test for rubbing.
2) Add Weatherstripping Around One Exterior Door
Weatherstripping is one of those unsexy upgrades that makes your home instantly feel calmerquieter, warmer in winter,
cooler in summer. Do one door first and you’ll understand the hype.
Budget: $6–$20. Pro tip: close the door on a dollar billif it slides out easily, you’ve got leaks to seal.
3) Caulk a Window Frame (Inside) for a Cleaner Look and Fewer Drafts
A thin, smooth bead of paintable caulk can make trim look brand-new and reduce air leaks. This is basically makeup for your house,
except it also helps with comfort. Budget: $4–$12.
Quick steps: remove loose old caulk, wipe dust, apply a steady bead, then smooth with a damp finger or tool.
4) Replace a Bathroom Faucet Aerator
This is a five-minute upgrade that can reduce splash, improve the stream, and cut water use if you choose a water-saving model.
Budget: $3–$15. Quick steps: unscrew the old aerator (use a cloth + pliers gently),
rinse the threads, screw the new one on hand-tight.
5) Deep-Clean a Dryer Lint Trap and Vent Area
It’s not glamorous, but it’s the kind of weekend project that feels like you just gave your future self a hug.
Vacuum the lint trap housing and clean the trap with warm soapy water (fabric softener residue can reduce airflow).
Budget: $0–$10 (vacuum + brush).
6) Add Felt Pads to Chair and Table Legs
The sound of scraping chairs is the unofficial soundtrack of mild daily irritation. Felt pads cut noise,
protect floors, and make moving furniture weirdly satisfying. Budget: $4–$12.
Tip: clean the leg bottoms first so pads actually stick.
7) Swap to Bright, Warm LED Bulbs in One “Gloom Zone”
Pick one room that feels like it’s lit by a medieval candle and upgrade the bulbs. LEDs are low-cost now and can make a space feel cleaner and bigger.
Budget: $10–$20 for a small pack. Tip: look for “soft white” (around 2700K) for cozy, “bright white” for task areas.
8) Fix a Wobbly Toilet Seat
This is the simplest way to feel like a capable adult in under ten minutes. Tighten the bolts; if they’re stripped,
replace the hardware. Budget: $0–$10.
Tip: don’t over-tighten plastic hardwaresnug is enough.
9) Silence Cabinet Doors With Soft Bumpers
If your kitchen sounds like a percussion rehearsal every time someone gets a snack, bumpers are your friend.
Add stick-on bumpers to cabinet doors and drawers for a softer close. Budget: $3–$8.
10) Refresh a Single Grimy Grout Line (Targeted, Not a Whole Bathroom Saga)
Choose the worst-looking areaoften behind the sink or around the tub edge. A grout brush + cleaner can make tile look new.
Budget: $5–$15. Tip: ventilate and rinse well; don’t mix cleaning chemicals.
11) Replace a Light Switch Plate (or Two) for an Instant “New House” Illusion
Yellowed, cracked plates make a room look older than it is. New plates are cheap and surprisingly high-impact.
Budget: $1–$10.
Safety: turn off the switch circuit if you’re unsureplates are simple, but confidence is priceless.
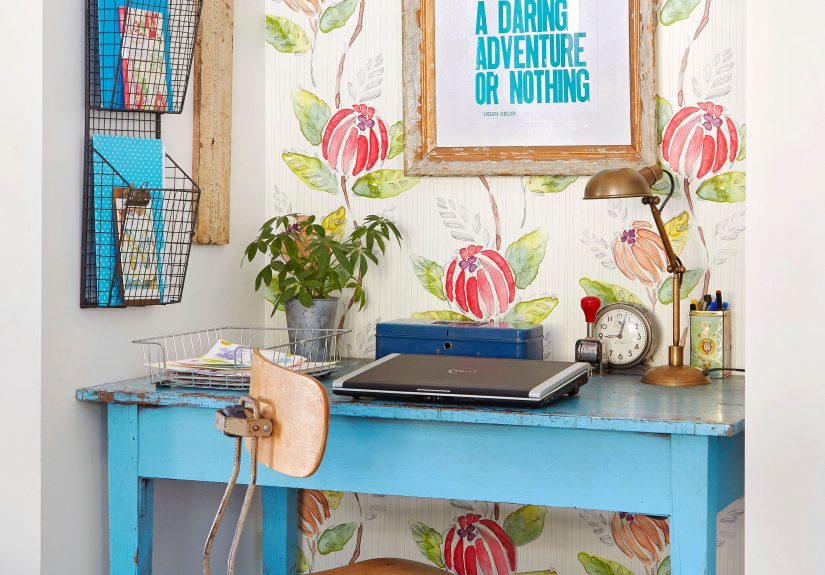
12) Organize Cords With Clips, Hooks, or Binder Clips
Cords attract dust and chaos like magnets. Use adhesive clips, cable ties, or binder clips to route chargers along a desk edge.
Budget: $0–$12. Bonus: label the ends with masking tape so you stop unplugging the wrong thing.
13) Make a “Drop Zone” by the Door (Hooks + Tray)
Create a tiny landing strip for keys, sunglasses, dog leash, and the mail. A small tray and a couple of hooks
can reduce daily clutter more than a motivational quote ever will. Budget: $10–$20.
14) Add Tension Rod Storage Under the Sink
A tension rod can hang spray bottles to free up shelf space and stop the “bottle avalanche” phenomenon.
Budget: $8–$18. Tip: measure the cabinet width first and keep the rod high enough for bottle triggers.
15) Declutter One Drawer Using a “Keep / Move / Donate” Mini-Sort
Pick one drawerjunk drawer, utensil drawer, sock drawer. Set a 30-minute timer. Sort fast, wipe the drawer,
and use small boxes or repurposed containers as dividers. Budget: $0–$10.
16) Turn Glass Jars Into Matching Pantry Containers (No Aesthetic Tax Required)
Save pasta sauce jars, remove labels, and use them for rice, beans, snacks, cotton balls, or screws.
Add simple labels with painter’s tape. Budget: $0–$6.
Tip: keep lids and jars paired so you’re not playing “find the soulmate lid” later.
17) Clean and Condition Wood Cutting Boards
Dry boards look tired and can crack. A bottle of food-grade mineral oil is inexpensive, and a quick oiling makes boards look new.
Budget: $5–$15. Quick steps: wash, dry fully, rub oil in, let it soak, wipe excess.
18) Make a Simple Plant Propagation Station
If you’ve got one healthy plant and a little optimism, you can grow more. Use small jars or glasses, label them,
and set them on a sunny sill. Budget: $0–$12.
Tip: change water regularly to keep roots happy (and the vibe less swampy).
19) Patch Tiny Nail Holes and Scuffs (The “Before Guests Arrive” Special)
A small tub of spackle and a putty knife can erase dozens of little wall crimes. Sand lightly once dry.
Budget: $6–$20.
Tip: if you have leftover paint, dab with a small brush for a seamless finish.
20) Update One Piece of Hardware (Just One!)
A new pull on a nightstand, a knob on a cabinet, or a handle on a dresser can shift the whole look. Start with one
to see if the style works before committing. Budget: $3–$20.
21) Add a Simple Shelf Liner Where It Actually Matters
Skip lining your whole life. Line the one cabinet where oils drip or spices spill. Shelf liner makes cleanup easier
and prevents items from sliding. Budget: $5–$15.
22) Create a Cleaning “Caddy” From a Dollar-Store Bin
One small caddy for your most-used supplies makes quick cleanups more likely. And when cleaning is easier,
it happens more often. (Science. Probably.) Budget: $2–$10.
23) Make a DIY Drawer Deodorizer (Baking Soda + Essential Oil Optional)
Stale drawers happen. Use a small breathable pouch (or coffee filter tied with string) filled with baking soda.
Add a drop of essential oil if you like. Budget: $1–$8. Tip: keep it away from direct contact with clothing.
24) Test Your Smoke and Carbon Monoxide Alarms (and Replace Batteries If Needed)
This one is more “responsible adult weekend project” than “cute decor moment,” but it’s powerful.
Press the test button, confirm you can hear it in bedrooms, and replace batteries if the sound is weak or chirpy.
Budget: $0–$12 for batteries. Note: many alarms have sealed 10-year batteriesstill test them regularly.
25) Make a “No-Sand, No-Drama” Plan for Older Paint (Safety Upgrade)
If your home was built before 1978, assume paint layers might contain lead until you know otherwise.
Your under-$20 “project” is planning: avoid dry sanding or scraping, keep kids/pregnant people away from paint-disturbing work,
and choose safe methods (or certified help) for anything that creates dust. Budget: $0–$20 (plastic sheeting, tape, cleaning supplies).
Quick Weekend Game Plan (So This Actually Gets Done)
- Pick two projects: one “comfort” upgrade (drafts, lighting) and one “visual” upgrade (hardware, spackle, plates).
- Set a hard stop time: DIY expands to fill the whole weekend if you let it.
- Do the messiest step first: cleaning, scraping loose caulk, vacuuming lintthen finish with the satisfying install.
- Take a before photo: it’s not vanity; it’s proof that your Saturday did something.
of Real-World Experience: What These Under-$20 Projects Feel Like
Here’s the honest part nobody puts on the packaging: most weekend DIY projects don’t fail because they’re hard.
They fail because they’re annoying in tiny waysyour tape won’t stick, your caulk line looks like a wiggly worm,
the hardware screw is “basically” the right size but actually isn’t, and you spend twelve minutes looking for the pencil you were
holding two minutes ago. That’s normal. It’s not a sign you should give up and become a person who lives with a wobbly toilet seat forever.
The most common experience with budget home improvement is this: the first 10% feels slow, the middle 80% feels like mild chaos,
and the last 10% suddenly makes everything worth it. When you install a door sweep, the difference is subtle until you realize the room
no longer has that cold “ankle breeze.” When you replace a switch plate, you don’t throw a party about ityet the wall looks cleaner every time you
walk past. When you add cabinet bumpers, you might not notice for an hour… until someone closes a door and it doesn’t slam like a dramatic movie exit.
Another real-life pattern: you’ll learn that prep is the whole game. Caulk looks professional when the old crumbly stuff is removed
and the surface is clean. Felt pads stay on when you wipe dust off the chair legs first. Spackle disappears when you apply thin layers and sand lightly
instead of trying to fill the Grand Canyon in one swipe. These are not glamorous lessons, but they’re the difference between “DIY disaster” and “wait, I did that?”
Expect a few “tool moments,” too. You don’t need a full workshop, but you do need the basics to behave: a decent screwdriver,
a utility knife, a tape measure, and a way to clean up (vacuum, rag, mild cleaner). The happy surprise is that once you own (or borrow) those basics,
more projects become “cheap and easy.” That’s why people who DIY even a little tend to keep goingmomentum is real.
Finally, the best part of these under-$20 wins is psychological: they shrink the scary feeling that home projects are expensive, risky, or only for “handy people.”
When you finish something small and useful in a single afternoon, your house feels more responsivelike it’s working with you, not against you.
And by Sunday night, you get that rare luxury: walking into a room and thinking, “Yep. That’s better.” No contractor. No debt. Just you, a plan,
and a $20 bill that survived the weekend.
Conclusion
You don’t need a huge budget to make your home feel noticeably better. Start with one draft-stopper, one clutter fix, or one tiny upgrade you’ve been ignoring.
The secret is consistency: small weekend projects add up fastand your future self will thank you every time a drawer slides smoothly,
a room feels brighter, or a door closes quietly like it has manners.