Table of Contents >> Show >> Hide
- Before You Dye Silk: What to Know First
- Method 1: Immersion Dyeing for Rich, Even Color
- Method 2: Silk Painting, Dip-Dyeing, or Ombre Dyeing
- Method 3: Natural Dyeing for Soft, Earthy Shades
- How to Rinse, Dry, and Care for Dyed Silk
- Which Silk Dyeing Method Is Best?
- Real-World Dyeing Experiences and Lessons Learned
- Conclusion
Silk has a reputation for being fancy, dramatic, and just a little high-maintenance. In fairness, it is the diva of the fabric world. But when it comes to dyeing, silk is actually one of the more rewarding fibers to work with. It absorbs color beautifully, develops rich depth, and can go from plain to “Where did you buy that?” in a single afternoon.
If you have a silk scarf, blouse, pillow cover, ribbon, or fabric yardage that looks a little too plain, don’t toss it into the land of boring neutrals just yet. Dyeing silk at home is completely doable, even for beginners, as long as you choose the right method and treat the fabric gently.
In this guide, you’ll learn three easy ways to dye silk: a classic immersion method for all-over color, a silk painting or dip-dye method for artistic results, and a natural dye method for soft, earthy tones. Along the way, you’ll also get practical tips, common mistakes to avoid, and real-life advice that can save your silk from becoming an accidental science experiment.
Before You Dye Silk: What to Know First
Why silk behaves differently
Silk is a protein fiber, not a plant-based fiber like cotton or linen. That matters because it responds especially well to dyes designed for protein fibers, especially acid dyes and some all-purpose dyes. The payoff is color that looks saturated, elegant, and far more expensive than your actual dye setup.
Start with the right silk
The best candidates are white, ivory, or very light-colored silk. A solid, dark original color is much harder to cover. If the item is labeled dry clean only, you can still dye it in many cases, but you should expect that the finish or hand feel may change slightly after washing and dyeing.
Prep work matters more than people want to admit
Yes, everyone wants to jump straight to the fun color part. But silk should be gently washed first to remove oils, finishes, perfume residue, or mystery life buildup. Use a mild detergent, rinse well, and leave the silk damp before dyeing. Damp silk usually takes color more evenly than bone-dry silk that enters the dyebath like a shocked Victorian ghost.
Basic supplies
- Rubber gloves
- Dedicated stainless steel pot, bucket, or basin
- Measuring spoons and cups used only for dyeing
- Mild detergent
- Dye appropriate for silk
- White vinegar or citric acid when your dye method calls for it
- Plastic table cover or old towels
One more important note: keep your dyeing tools separate from food tools. Your saucepan should not live a double life as both “Sunday soup pot” and “magenta silk laboratory.” Pick a lane.
Method 1: Immersion Dyeing for Rich, Even Color
If you want the easiest route to a beautiful solid color, immersion dyeing is your best friend. This method works especially well for scarves, pillowcases, silk fabric yardage, slips, and simple garments. It gives you the most even result and is usually the best choice for first-time dyers.
Best for
- Solid all-over color
- Refreshing faded silk
- Dyeing larger pieces evenly
What you’ll need
Use an acid dye made for silk or an all-purpose dye labeled safe for silk. Acid dyes tend to give the richest, most reliable color on silk. All-purpose dyes can still work well, especially for simple home projects, but the shade may be a little less intense or predictable depending on the product and process.
How to do it
- Fill a stainless steel pot or dye-safe container with enough water for the silk to move freely.
- Add your dye according to the product directions and stir thoroughly.
- Add the recommended acid source if needed, usually white vinegar or citric acid.
- Wet the silk completely and place it into the dyebath.
- Heat gradually for stovetop dyeing or use very hot water for bucket methods, depending on the dye instructions.
- Stir gently but regularly so the color develops evenly.
- Leave the silk in the bath until the color looks slightly darker than your goal, because wet fabric almost always looks deeper than dry fabric.
- Rinse from warm to cool water until the water runs mostly clear.
Why this method works
Immersion dyeing surrounds the fabric with color from every side, which helps eliminate pale streaks and random blotches. If you want a classic jewel-tone scarf, this is the method that gets you there without requiring an arts degree or the patience of a monk.
Tips for better results
- Keep the silk moving. Fabric that sits still too long can develop darker patches.
- Do not let the fabric bunch tightly in the pot.
- For darker shades, use more dye rather than longer guessing games.
- Test a scrap first if the exact color matters.
Common mistakes
The biggest beginner error is not using enough water. Silk needs room to float and move. Another common issue is weak heat. Many silk dyes develop better color in hot conditions, so lukewarm water usually leads to lukewarm results. Finally, don’t assume a quick vinegar rinse at the end will magically rescue poorly set color. Good dye choice, proper heat, and thorough rinsing matter much more.
Method 2: Silk Painting, Dip-Dyeing, or Ombre Dyeing
If immersion dyeing is the reliable straight-A student, this method is the creative cousin who shows up wearing dramatic earrings and somehow always looks amazing. Silk painting and dip-dyeing are easy ways to add personality, movement, and artistic flair to silk.
You can use silk dyes, silk paints, or diluted acid dyes specifically prepared for painting. This method is ideal when you want watercolor effects, soft gradients, stripes, or an ombre finish rather than one flat color all over.
Best for
- Scarves and wraps
- Decorative silk panels
- Ombre effects
- Hand-painted or brush-painted designs
Option A: Simple dip-dye or ombre
- Prepare your dye bath in a tall container or basin.
- Wet the silk first for smoother blending.
- Dip only part of the silk into the dye.
- Hold it at one level for a strong band of color, or slowly lower more fabric in stages for a gradient.
- Lift and re-dip sections if you want layered depth.
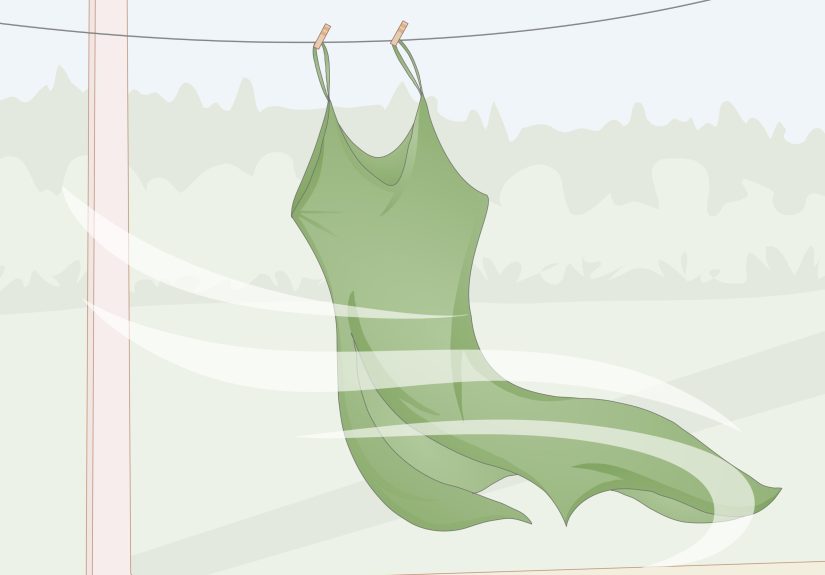
- Rinse gently and dry flat or hang carefully.
This is the easiest way to get an ombre scarf at home. A pale blush fading into berry, or soft blue shifting into charcoal, can look impressively boutique with surprisingly little drama.
Option B: Brush painting or silk painting
- Stretch the silk on a frame or tape it flat on a protected surface.
- Use a brush, sponge, squeeze bottle, or dropper to apply dye or silk paint.
- Work from light colors to dark colors.
- Let colors blend naturally for watercolor effects, or use resist techniques if you want crisp lines.
- Set the color as directed by the product, usually by steaming or heat-setting.
Why people love this method
It feels less like “doing laundry with opinions” and more like actual art. You can create one-of-a-kind gifts, custom accessories, or silk decor pieces that don’t look mass-produced. It also gives you more room for happy accidents, which is a nice way of saying that even small mistakes can turn into interesting design choices.
Tips for success
- Always protect the surface underneath because silk dye travels fast.
- Test your line work or brush pressure on a scrap first.
- Do not overload the silk with liquid if you want defined shapes.
- Follow the setting instructions carefully, especially for painted silk.
Painted silk often needs steam-setting or another finish step to lock in the color properly. Skip that part, and your “artistic masterpiece” may become “mysterious pastel blur” after rinsing.
Method 3: Natural Dyeing for Soft, Earthy Shades
If you like the idea of slow craft, organic-looking color, and the general romance of making dye from kitchen or garden materials, natural dyeing is a wonderful option. It is less predictable than commercial dyeing, but that is part of the charm. Think of it as the sourdough starter of textile color: beautiful, rewarding, and occasionally weird.
Best for
- Muted, vintage-looking color
- Experimenting with kitchen ingredients
- Small silk scarves, ribbons, and decorative projects
Popular natural dye sources
- Black tea or coffee for tan to brown tones
- Onion skins for golds and warm amber shades
- Avocado pits or skins for blush to dusty pink
- Turmeric for bright yellow
- Red cabbage for soft purples or blue-gray shifts depending on the process
How to do it
- Simmer your dye material in water to create a strong dye bath.
- Strain out the solids if you want a smoother result.
- Pre-wet the silk and, if desired, prepare it with a mordant or pre-treatment suitable for your chosen natural dye approach.
- Add the silk to the warm dye bath and simmer gently or keep hot without harsh boiling.
- Stir carefully for even color.
- Remove when the shade is slightly deeper than desired.
- Cool, rinse gently, and dry away from direct strong sunlight.
What makes natural dyeing different
Natural dyes usually produce softer, more lived-in shades than acid dyes. They can be wonderfully nuanced, but they are also less predictable and sometimes less colorfast. That means a perfect earthy rose one day might look more muted after repeated washing or sun exposure. In other words, natural dyeing is for people who like surprises, but preferably the good kind.
When to choose this method
Choose natural dyeing when mood matters more than precision. If you want an exact emerald green silk blouse for a wedding guest outfit, use a professional dye system. If you want a dreamy, handmade scarf in tea-stained bronze or avocado pink, natural dyeing is a delight.
How to Rinse, Dry, and Care for Dyed Silk
Finishing is where a lot of dye jobs either become successful or become a cautionary tale. Once the silk is dyed, rinse it gently in water that gradually cools down. Sudden temperature shocks can stress delicate fibers. Use a small amount of gentle detergent if needed to remove excess dye, then rinse again.
Do not wring silk like you are angry at it. Instead, press out water in a towel. Then either dry flat or hang carefully away from direct harsh sun. If ironing is needed, use the silk setting and press on the wrong side while the fabric is slightly damp or protected with a pressing cloth.
Avoid chlorine bleach and harsh alkaline treatments. Silk is gorgeous, but it does not appreciate chemical aggression.
Which Silk Dyeing Method Is Best?
The best method depends on the result you want:
- Choose immersion dyeing for bold, even, reliable color.
- Choose silk painting or dip-dyeing for artistic effects and ombre designs.
- Choose natural dyeing for softer shades, handmade character, and experimentation.
If this is your first project, immersion dyeing is usually the easiest win. If you already know you want a more expressive, one-of-a-kind result, painted or dip-dyed silk is a fantastic next step.
Real-World Dyeing Experiences and Lessons Learned
One thing that surprises many beginners is how quickly silk teaches you whether you planned well. Cotton often forgives a sloppy setup. Silk does not. If your pot is too small, your water is too cool, or your fabric isn’t fully wetted, silk tends to show it immediately. The upside is that once you understand a few basics, it becomes one of the most satisfying fabrics to dye because the color payoff is so dramatic.
A common first experience is trying to revive an old ivory silk scarf. People often expect a pale pastel and end up with something much richer because silk takes color so eagerly. That sounds like a problem, but it is actually a useful lesson: always start lighter than you think, especially with strong dyes. A tiny amount of dye can go a long way on silk, and the final dry color often looks more elegant than the wet fabric in the pot suggests.
Another frequent experience involves uneven color that seemed to come out of nowhere. In reality, it usually came from one of three things: the silk was not prewashed, the fabric sat folded in the bath too long, or the dyer got impatient and stopped stirring. Silk rewards calm, steady handling. When people slow down, use enough water, and let the fabric move freely, their second attempt is usually miles better than the first.
Dip-dyeing creates a different kind of learning curve. At first, many people try to control every millimeter of the gradient. Then they realize silk has its own ideas, and the most beautiful ombre effects often come from letting the dye feather naturally. A scarf that fades imperfectly from coral to peach can look far more sophisticated than a harsh, ruler-straight line ever would. Silk often looks best when it keeps a little softness and movement.
Natural dyeing brings its own memorable moments. Someone tries avocado pits expecting bright pink and gets dusty rose. Someone uses tea hoping for deep mocha and gets antique beige. That unpredictability can be frustrating if you want exact repeatable color, but it is part of why many makers fall in love with the process. Natural-dyed silk tends to feel personal. The color carries the memory of the ingredients, the season, even the water in your home.
Many experienced dyers also talk about the emotional shift that happens after a few projects. Silk stops feeling intimidating and starts feeling collaborative. You learn that not every piece needs to be perfect to be beautiful. A little marbling, a slightly darker edge, or a softer-than-planned hue can make the final fabric feel more handmade and unique. In fact, some of the most admired dyed silk pieces are the ones with visible character rather than machine-level uniformity.
The smartest practical lesson, though, is this: test first, especially if the silk item matters to you. A small swatch can save a favorite blouse, a special scarf, or a sentimental piece of fabric from becoming an accidental abstract artwork. Test the color, test the rinse, and test your patience. Silk likes people who respect the process. Luckily, once you do, it often rewards you with color that looks downright luxurious.
Conclusion
Dyeing silk at home does not have to be complicated. If you want rich, even color, go with immersion dyeing. If you want expressive style, try silk painting or dip-dyeing. If you want soft, organic tones with handmade charm, natural dyeing is a lovely path. The key is choosing a silk-friendly dye method, preparing the fabric properly, and treating the finished piece with care.
Silk may be delicate, but it is also surprisingly game for a glow-up. Give it the right dye bath, a little patience, and a gentle rinse, and it will reward you with depth, sheen, and drama in the very best way.