Table of Contents >> Show >> Hide
- Quick Safety Note (Worth Reading, Not Just Skimming)
- What a Sawbuck Does (And Why It Beats Cutting on the Ground)
- Design Checklist Before You Build Anything
- Way #1: The Fixed X-Frame Sawbuck (Simple, Sturdy, No-Fuss)
- Way #2: The Folding X-Frame Sawbuck (Stores Flat, Travels Well)
- Way #3: The Rack-Style Cradle Sawbuck (For Limbs, Poles, and “Bundle Cutting”)
- How to Choose the Right Sawbuck (A Practical Decision Guide)
- Safety Habits That Matter More Than the Design
- Maintenance and Longevity Tips
- Experience Section: The Real-World Lessons People Learn Fast (About )
- Conclusion
Cutting firewood sounds like a classic, cozy choreright up until you’re hunched over, chasing rolling rounds across the yard,
and wondering how your back got personally offended by a Saturday morning.
That’s where a sawbuck comes in: a simple firewood cutting stand that lifts logs to a comfortable height and keeps them from
doing the “escape-and-roll” routine.
This article breaks down three popular sawbuck designsa fixed X-frame, a folding X-frame, and a rack-style cradleso you can choose
the right build for your space, wood type, and how serious you are about “organizing the woodpile” becoming a personality trait.
It also covers smart design details (height, spacing, clearance) and the safety habits that matter most when power tools are involved.
Quick Safety Note (Worth Reading, Not Just Skimming)
Chainsaws and shop tools are inherently hazardous. If you’re under 18, build and use a sawbuck only with capable adult supervision,
follow your tool manuals, and consider a local chainsaw safety class offered by extension programs or community groups.
A sawbuck improves control, but it does not “childproof” a dangerous tool.
What a Sawbuck Does (And Why It Beats Cutting on the Ground)
A sawbuck is basically a purpose-built support stand for bucking wood into stove-length pieces.
Instead of cutting on the ground (hello, dirt-dulled chain) or balancing logs on random objects (hello, sketchy wobble),
the sawbuck holds wood at a steady working height so your cuts are cleaner and your posture is less “shrimp at a desk.”
A well-designed sawbuck helps you:
- Work faster by keeping logs in a consistent position.
- Work smarter by reducing bending, twisting, and awkward body positions.
- Work safer by limiting rolling and shifting while you’re cutting.
- Protect your tools by keeping chains and blades away from soil and rocks.
Design Checklist Before You Build Anything
Sawbuck plans are everywhere, but the best sawbuck is the one that fits your firewood routine.
Before you pick a design, make four quick decisions:
1) What kind of wood are you cutting?
- Rounds and short logs: A classic X-frame sawbuck is usually perfect.
- Long poles, branches, “limb spaghetti”: A rack-style cradle or bundle-friendly setup works better.
- Slab wood (from milling): A longer rack or wide cradle often wins.
2) How much space do you have?
- Tight storage: Folding designs shine.
- Dedicated wood area: A fixed, heavier stand can be sturdier and simpler.
3) How tall should it be?
Aim for a working height around knee-to-waist level for most adultshigh enough to reduce bending,
low enough to stay stable. If multiple people use it, build for the tallest regular user (shorter users can stand on a stable platform;
the tall user shouldn’t have to fold into origami).
4) How do you prevent “oops, I cut my stand”?
Great sawbucks are designed with built-in clearance so the saw can finish a cut without contacting legs, braces, or the ground.
Many builders add sacrificial rails (replaceable top pieces) so the sawbuck stays solid even if it takes a few “learning curve” nicks.
Way #1: The Fixed X-Frame Sawbuck (Simple, Sturdy, No-Fuss)
If you want the “pickup truck of sawbucks”reliable, uncomplicated, happy to get dirtystart here.
The fixed X-frame is the classic design: two X-shaped end supports connected by top rails (and usually a lower brace),
forming a shallow cradle for logs.
Best for
- Cutting typical stove-length rounds or short logs
- People who want maximum stability and don’t care about folding
- A semi-permanent setup near a woodpile
Build approach (high-level)
- Create two matching X-ends with wide, stable feet so the stand won’t rock.
- Connect the X-ends with top rails that form a cradle (a shallow “V” is common).
- Add a lower brace to reduce racking (side-to-side sway).
- Plan your cut zones so the saw can pass through a log without hitting structural members.
Smart details that make this design work
- Crosspiece spacing: For common U.S. firewood lengths, many people space supports
roughly one firewood-length apart (often in the 16–20 inch range), which helps keep pieces stable while cutting. - Wide stance: Don’t build a “tall skinny” sawbuck. A wider footprint is a quieter kind of safety.
- Replaceable contact points: If your top rails will eventually get chewed up, design them to be replaceable.
Pros and cons
- Pros: Very stable, easy to understand, fast to build, great for repeated use.
- Cons: Takes more storage space; heavier to move; not ideal for long, flexible limb bundles.
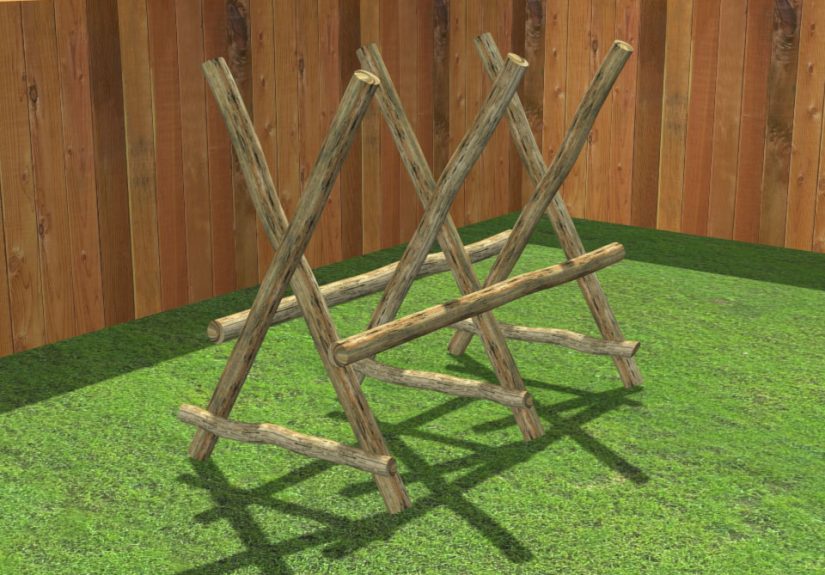
Way #2: The Folding X-Frame Sawbuck (Stores Flat, Travels Well)
Want a sawbuck that disappears when you’re done? Folding sawbucks use the same basic X-frame concept,
but connect key joints with bolts/pins so the whole structure folds flat for storage or transport.
This is a favorite for smaller yards, garages, sheds, and anyone who enjoys the phrase “compact footprint.”
Best for
- People with limited storage space
- Cutting sessions in different spots (driveway today, campsite tomorrow)
- DIYers who like adjustability and easy repairs
Build approach (high-level)
- Build two folding X-ends by allowing the legs to pivot at the crossing point.
- Use locking hardware (bolts, pins, or wing nuts) so the stand opens securely and closes easily.
- Add spread control so the legs don’t splay too faroften done with chains, straps, or rigid stops.
- Keep rails aligned so the cradle stays consistent each time you open it.
Upgrades that are surprisingly worth it
- Leg-stop chains (or straps): A simple limiter keeps your opening angle consistent, which keeps your stand level and predictable.
- Tapered or notched uprights: A small shaping detail can help the cradle accept larger-diameter logs without teetering.
- Weatherproofing: If it lives outside, treat it like outdoor furnitureseal, protect end grain, and store off wet ground when possible.
Pros and cons
- Pros: Folds flat, easy to move, great for occasional cutters, easy to replace parts.
- Cons: More hardware; moving joints can loosen over time; requires good stop/limiter design to stay stable.
Way #3: The Rack-Style Cradle Sawbuck (For Limbs, Poles, and “Bundle Cutting”)
If most of your “firewood” starts as branches, storm cleanup, or long poles, a standard X-frame can feel like trying to stack cooked spaghetti.
A rack-style cradle is longer, often more rectangular, and designed to support and contain awkward wood.
Some versions look like a low wood rack that happens to be perfect for cutting.
Best for
- Bundles of smaller limbs and poles
- Slab wood and long, flexible pieces
- People who want to cut multiple pieces without reloading constantly
Build approach (high-level)
- Create a long frame with multiple support points so wood doesn’t bounce or sag.
- Add side containment (rails or uprights) so pieces don’t roll off mid-cut.
- Design for tying down using straps or dedicated anchor points to hold bundles together.
- Include cut clearance below the wood so the tool can finish a cut without hitting the stand.
Why straps change everything
For limb bundles, the biggest problem isn’t the cuttingit’s the shifting.
A strap-friendly rack lets you cinch a bundle tight, make several cuts, re-tighten if needed,
and keep your work controlled and predictable. It’s not glamorous, but neither is chasing rolling sticks downhill.
Pros and cons
- Pros: Great control for awkward wood; efficient for lots of small pieces; fewer reloads.
- Cons: Longer build; larger footprint; may be overkill for simple rounds.
How to Choose the Right Sawbuck (A Practical Decision Guide)
Still undecided? Use the “what annoys you most” test:
- Annoyed by storage clutter? Pick the folding X-frame.
- Annoyed by wobble? Pick the fixed X-frame (and build it beefy).
- Annoyed by limb bundles shifting and rolling? Pick the rack-style cradle with strap points.
Safety Habits That Matter More Than the Design
A sawbuck is a safety tool, but only if you treat it like one.
Extension programs and safety agencies consistently emphasize the basics:
proper PPE, clear footing, good focus, and using tools as intended.
PPE: the unglamorous MVP
- Eye protection and hearing protection
- Sturdy footwear with good traction
- Work gloves for handling rough wood
- Leg protection (cut-resistant chaps or pants) when operating a chainsaw
- A helmet/hard hat is strongly recommended when there’s overhead hazard (and common in professional guidance)
Worksite setup that reduces “surprises”
- Level ground: If the sawbuck rocks before you start, it’ll rock more once the cutting begins.
- Clear the zone: Keep bystanders (and pets) far back and out of the cutting lane.
- Control the wood: If pieces can roll, clamp, strap, or change the support style.
- Stay rested: Fatigue makes every tool feel heavier and every decision slower.
Maintenance and Longevity Tips
Sawbucks live a rough life: outdoors, in sawdust, getting bumped, occasionally getting “kissed” by a blade.
A little maintenance keeps the stand predictable (and less likely to fail at the worst time).
- Check fasteners regularly (especially on folding designs).
- Replace sacrificial rails instead of ignoring damage.
- Seal exposed end grain if it’s stored outdoors.
- Store off wet ground to reduce rot and warping.
Experience Section: The Real-World Lessons People Learn Fast (About )
On paper, a sawbuck is just lumber and hardware. In real life, it becomes a tiny stage where the woodpile teaches lessonspolitely,
or not-so-politelydepending on how prepared you are.
Here are the most common “experience-based” discoveries people report after building (or borrowing) a firewood cutting stand.
The height is never “one size fits all”
Many first-time builders go tall because tall feels ergonomic. Then they load a heavier log and discover physics has an opinion.
The sweet spot tends to be “comfortable but grounded”: high enough to reduce bending, low enough that a shifting log can’t lever the whole stand into a wobble.
If multiple people cut wood at your place, the best compromise isn’t splitting the differenceit’s building for stability first,
then adjusting the work routine (like staging wood closer, or using a stable platform for a shorter adult under supervision).
“Sturdy” is a design feature, not a compliment
People often describe a new sawbuck as sturdy because it feels solid when empty. The moment you add uneven weightlike a crooked round,
or a long limb that bendsthe stand reveals whether it’s truly stable or just confident.
This is why wide feet, anti-racking braces, and consistent leg stops matter. If a sawbuck can twist, it eventually will.
And it’s always during the cut you were sure would be quick.
Small wood is the sneakiest problem
Big rounds are predictable: heavy, stable, and cooperative once settled. Small limb wood is chaos in lightweight form.
The first time someone tries to cut a pile of thin branches on a basic X-frame, they learn a truth as old as woodcutting:
if it can roll, it will roll. That’s why strap-friendly rack designs feel like a superpower for storm cleanup.
Cinch the bundle, cut a few pieces, re-tighten if needed, and you spend more time cutting and less time negotiating with sticks.
You will eventually nick the standplan for it
Even careful operators occasionally misjudge the last inch of a cut or work too close to a rail. Experienced builders don’t pretend that won’t happen;
they design for it. Replaceable top rails, sacrificial wear strips, and deliberate clearance zones turn an “oops” into a simple fix instead of a structural problem.
It’s the same mindset as using a cutting board in the kitchen: the board is supposed to take the damage so your counter doesn’t.
The best workflow is boring (and that’s good)
People who cut a lot of firewood tend to settle into routines that look almost dull: staging wood at a consistent height, keeping the area clear,
wearing the same protective gear every time, and checking stability before each session.
It’s not flashy, but it’s efficientand it leaves fewer chances for surprise. The “fun” part becomes how quickly the pile turns into neat stacks,
not how adventurous the process felt.
Weatherproofing is the difference between “tool” and “temporary project”
If a sawbuck lives outdoors, unprotected wood can degrade faster than people expectespecially where end grain soaks up moisture.
A little sealing, storing it off the ground, and tightening hardware occasionally can turn a one-season wonder into a multi-year workhorse.
And when the sawbuck lasts, the best part is psychological: you stop dreading the chore because setup is easy and predictable.
That’s the real win.
Conclusion
A sawbuck is one of those rare DIY projects that pays you back every single time you use it: less bending, less rolling, more control, and a cleaner workflow.
Choose a fixed X-frame if you want maximum stability, a folding X-frame if storage matters, or a rack-style cradle if your “firewood” is mostly limbs and long pieces.
Build for stability, design for clearance, and treat safety gear like part of the toolnot an optional accessory.