Table of Contents >> Show >> Hide
- What “Polishing Polyurethane” Really Means
- Before You Polish: The 3 Things That Decide Whether You’ll Succeed
- Tools and Supplies You’ll Actually Use
- 3 Ways to Polish Polyurethane
- Troubleshooting: Fixing the Usual Polyurethane Polish Problems
- Maintenance: Keep the Shine Without Re-Polishing Your Life Away
- Real-World Experiences: What People Commonly Run Into When Polishing Polyurethane
- Conclusion
Polyurethane is the bouncer of the wood-finish world: tough, protective, and not easily impressed.
But even the toughest finish can look a little… tired. Maybe your tabletop has the texture of an orange peel,
your cabinet door has swirlies from an “enthusiastic” sanding session, or your once-glossy surface now looks like it’s wearing a dull sweater.
Good news: polishing polyurethane is totally doableand you don’t need a wizard staff, just the right abrasives and a plan.
What “Polishing Polyurethane” Really Means
Polishing a polyurethane finish isn’t about adding a magical shine potion. It’s about refining the surface so light reflects evenly.
That usually means one (or both) of these:
- Leveling (removing tiny bumps, dust nibs, orange peel texture, and minor imperfections)
- Refining (using progressively finer abrasives and compounds to dial in the sheensatin, semi-gloss, or high-gloss)
Think of it like a haircut for your finish: you’re not changing who it isyou’re just helping it look like it slept eight hours.
Before You Polish: The 3 Things That Decide Whether You’ll Succeed
1) Cure time: dry is not cured
Polyurethane can feel dry to the touch long before it reaches full hardness. Polishing too soon is how you end up with gummy sandpaper,
hazy patches, and the emotional journey of “Why is everything worse now?”
As a practical rule of thumb, wait longer than you think you need. Many manufacturers and finishing pros commonly cite roughly
about three weeks for water-based finishes and about a month for oil-based finishes to reach a tougher, more polish-friendly cure.
Temperature and humidity matter toocooler, damper conditions slow everything down.
2) Film thickness: you can’t polish what you don’t have
Polishing removes material. If your finish is thin, you can burn through to stain or bare woodespecially on edges and corners.
If you’re aiming for a glass-smooth high-gloss look, it’s smart to build enough finish first (multiple coats), then polish the final cured film.
3) Identify your goal: satin glow or mirror shine?
Your process depends on the sheen you want:
- Satin/soft sheen: gentle abrasion + optional wax for a smooth, low-glare look.
- Semi-gloss: more leveling, then moderate refinement.
- High-gloss: careful leveling + finer sanding steps + compounds and polishing.
Tools and Supplies You’ll Actually Use
You don’t need everything on this list, but you do need the basics for your chosen method:
- Clean microfiber cloths (several)
- Painter’s tape (to protect edges and hardware)
- Sanding block or soft backing pad
- Wet/dry sandpaper (common polishing range: 600–2000 grit) or Micro-Mesh pads (higher grits)
- A spray bottle of clean water + one drop of dish soap (lubricant for wet sanding)
- Rubbing compound (cuts faster) and polishing compound (refines)
- Optional: swirl remover/finishing polish for the final “whoa” factor
- Optional power help: random orbital/DA polisher and foam pads
- For satin rub-out: synthetic finishing pads (or 0000 steel wool for certain situationsmore on that below)
3 Ways to Polish Polyurethane
Way 1: The “Silky Satin” Hand Rub-Out (Fast, forgiving, and classy)
If you want a smooth, professional-looking satin or soft semi-gloss sheenespecially on furniturethis is the method
with the highest reward-to-drama ratio. You’re not chasing a mirror; you’re chasing “expensive-looking calm.”
Best for
- Tabletops, shelves, cabinet doors
- Reducing minor haze, softening overly-glossy shine, evening out sheen
- Projects where you’d rather not break out machines
Steps
- Clean first. Remove dust and grime with a slightly damp cloth, then dry. Any grit left behind becomes surprise sandpaper.
- Protect edges. Tape sharp corners and edges if you’re prone to “just one more pass.”
-
Choose your abrasive.
- For many polyurethane finishes, a fine synthetic pad is a safe choiceespecially on water-based poly.
-
If using 0000 steel wool for a satin rub-out, do it gently and consider that steel fibers can leave residue.
On some water-based finishes (and in humid environments), leftover steel fibers can potentially cause tiny rust spots later if not cleaned thoroughly.
Synthetic pads avoid that headache.
-
Add a lubricant. A small amount of paste wax (or a wax recommended for finished wood) can lubricate the rub-out
and help produce a consistent sheen. You’re going for smooth, not “worked over.” -
Rub with the grain. Use light to moderate pressure, long strokes, and overlap your passes like mowing a lawn (but less sweaty).
Stop occasionally and wipe clean to check the sheen. - Buff lightly. Use a clean microfiber cloth to buff the surface to an even glow.
Pro tips
- Less pressure, more passes. Pressing hard is how corners get “custom refinished” back to bare wood.
- Even out sheen in zones. Work the whole surface, not just the spots you dislike, or you’ll create “patchwork satin.”
- Wax is optional. It can look great, but it’s not mandatory for polishing; it’s a finish “feel and sheen” enhancer.
Way 2: Wet Sand + Compound Polish (The path to high-gloss and “wow, that’s smooth”)
This is the classic “rub-out” approach: level the finish with progressively finer abrasives, then bring the shine back with compound.
It’s slow-ish, but it’s the most controlled way to fix orange peel, dust nibs, and fine scratchesespecially if you’re chasing a more reflective look.
Best for
- High-gloss or semi-gloss finishes
- Flattening orange peel texture and removing visible sanding scratches
- Showpiece furniture, guitars, decorative projects, and “I want it to look store-bought” surfaces
Steps
- Let it cure. If you can dent it with a fingernail, it’s not ready. (That test is oddly satisfying, but it’s not your friend here.)
-
Start with the least aggressive grit that works.
- If the surface is mostly smooth with a few nibs: try 1000–1500 grit.
- If there’s clear orange peel or noticeable texture: you may need 600–800 grit to level efficiently.
The goal is to level the high spots without digging trenches. Use a sanding block or soft backing pad for flat areas.
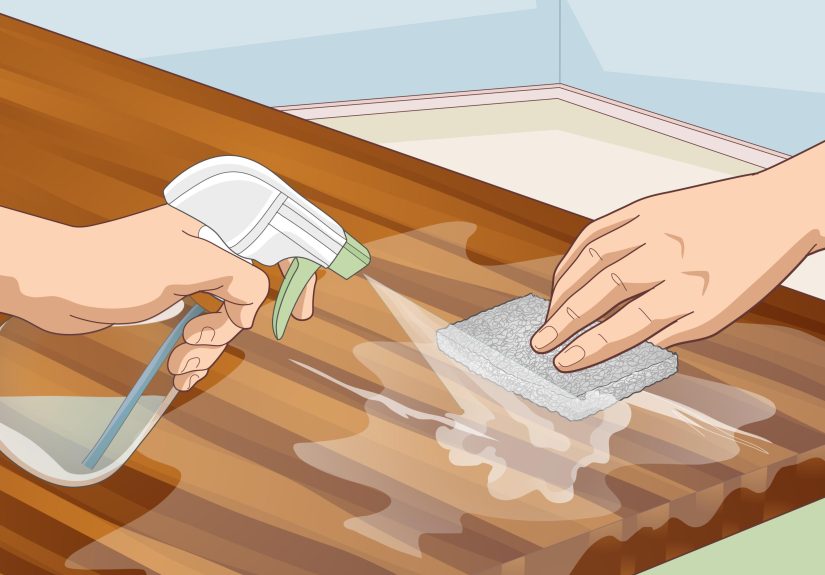
-
Use light lubrication. Mist the surface with water and a tiny drop of dish soap. Keep it damp, not flooded.
Wipe often so you can see what you’re doing. -
Sand in a consistent pattern. Use straight passes, overlap them, and check your progress every minute or two.
When the surface looks evenly dull (a uniform “matte”), you’ve leveled it. -
Step up through finer grits. A common progression is: 800 → 1000 → 1500 → 2000.
If you want extra pop, continue with higher micro-grits (like Micro-Mesh).
Each step removes the scratch pattern from the previous stepdon’t skip unless you enjoy mystery scratches. - Clean thoroughly. Dry the surface and remove slurry residue. Leftover abrasive gunk can re-scratch during polishing.
-
Apply rubbing compound. Use a clean microfiber cloth (or foam pad) and work in small sections.
Moderate pressure, then lighten up as it begins to clear. -
Follow with polishing compound. This refines the gloss further and reduces haze.
If you’re chasing a “car-show” shine, finish with a swirl remover or finishing polish. - Final buff. Use a fresh microfiber cloth. If it’s glossy enough to reflect your face, wave hello to yourself.
Common “why does it look cloudy?” causes
- You didn’t sand fine enough before compound (compound can’t erase deep scratches).
- The finish isn’t cured and is smearing instead of polishing cleanly.
- Residue left behind from sanding slurry or compound buildup.
Way 3: Machine Buffing with a DA/Random Orbital Polisher (Big surfaces, consistent shine, less elbow drama)
Hand polishing works, but on a large tabletop or a broad built-in panel, it can feel like you’re trying to pet a hippo with a toothbrush.
A dual-action (DA) polisher or random orbital polisher with the right foam pads can speed things up and help keep the sheen consistent.
Best for
- Dining tables, desks, large cabinet panels
- Evening out sheen across big areas
- Polishing after wet sanding (especially at 1500–2000 grit or higher)
Steps
- Prep like you mean it. Clean the surface, tape edges, and make sure the finish is cured and thick enough.
-
Choose the right pad.
- Cutting pad (firmer) for rubbing compound
- Polishing pad (medium) for polishing compound
- Finishing pad (soft) for swirl remover/final polish
- Work small sections. About 2 ft x 2 ft is a good starting zone. Spread compound first so you don’t “pepper-spray” your shop.
- Use light to moderate pressure. Let the pad and compound do the work. Too much pressure can create heat and increase burn-through risk.
-
Keep the tool moving. Overlap passes (like slow lawn mowing again), then wipe clean and inspect.
Repeat with finer compounds and softer pads. - Final wipe. Use a clean microfiber cloth for the last buff.
Machine buffing cautions (a.k.a. “how to not invent new problems”)
- Edges are danger zones. Tape them and avoid lingering there.
- Don’t chase perfection at full speed. A controlled approach beats aggressive polishing every time.
- Keep pads clean. A dirty pad is basically a scratch dispenser.
Troubleshooting: Fixing the Usual Polyurethane Polish Problems
Orange peel texture (bumpy finish)
Orange peel usually needs leveling, not just polishing. Start wet sanding at a grit that actually flattens the texture (often 600–800),
then work upward before compounds. If you only compound it, you’ll just get shiny bumps.
Swirl marks after polishing
Swirls often come from a pad that’s too aggressive, compound that’s too coarse for your final step, or residue.
Step down to a finer polish and a softer pad, and wipe clean between steps.
Burn-through (oops, that’s stain/wood)
If you hit wood, stop polishing that spot immediately. The true fix is usually to recoat the area (often the whole surface for best blending),
then let it cure again before polishing. Prevention is easier than repairtape edges and go gentle near corners.
It looks dull no matter what
If your polyurethane is a satin formulation, it contains flattening agents that naturally reduce gloss.
You can smooth it, but you may not get a mirror shine without a gloss topcoat or a different finishing plan.
Maintenance: Keep the Shine Without Re-Polishing Your Life Away
- Clean gently: a damp microfiber cloth and mild soap when needed. Dry after.
- Avoid residue-builders: some spray polishes can leave buildup that dulls over time.
- Use coasters and felt pads: not glamorous, but neither is ring-shaped sadness.
- Refresh strategically: if a surface gets noticeably worn, a light scuff and recoat is often more effective than endless polishing.
Real-World Experiences: What People Commonly Run Into When Polishing Polyurethane
Here’s the part nobody tells you until you’re already holding a sticky piece of sandpaper and bargaining with the universe.
In the real world, polishing polyurethane is less like “one perfect tutorial” and more like “a series of small decisions that add up.”
People often expect the compound to do all the work, but the finish usually looks great only after the surface is truly leveled first.
That’s why many DIYers report a breakthrough moment when they stop rushing the sanding steps. Once the scratch pattern is uniform and fine,
polishing suddenly feels almost unfairly effectivelike you discovered a cheat code.
Another common experience is realizing that edges are the final boss. Flat areas polish beautifully, then the corners go sideways.
Folks frequently learn (sometimes the hard way) that the best strategy is to tape edges early, lighten pressure near transitions,
and accept that “mirror gloss on a sharp corner” is a risky hobby. A lot of polished polyurethane projects that look flawless in photos
got that way because the maker treated the edges like they were made of eggshells.
People also tend to underestimate cure time. A finish can feel dry, look dry, and still behave like soft candy when you polish it.
The classic complaint is “it hazed up and won’t shine,” followed by “why is my sandpaper loading instantly?”
In many cases, the fix is boring but effective: wait longer, then try again with a lighter touch.
When the finish hardens fully, sanding slurry behaves more predictably and compounds clear better, which makes everything less frustrating.
On big surfaceslike desks and dining tablesmany report that hand polishing can lead to uneven sheen: glossy streaks, dull bands,
and the unmistakable look of “I polished only where my arms could reach comfortably.”
That’s where machine buffing (with the right pads and gentle technique) becomes popular: it helps keep the sheen consistent across the whole field.
Still, users often find that machines are not automatic perfection machines; pad choice matters, cleanliness matters,
and switching to a finer polish at the end is what turns “pretty good” into “wow.”
Finally, there’s a surprisingly positive “experience” people mention: once you polish polyurethane successfully once, you start seeing surfaces differently.
You notice light reflections, micro-texture, and how tiny scratches change the vibe of a finish.
It’s a bit like learning to taste notes in coffeesuddenly you can’t untaste it.
The upside is that your future projects improve fast, because you stop blaming the product and start controlling the process:
cure, level, refine, and only then chase shine. Polyurethane may be the bouncer, but with the right approach, it’ll absolutely let you into the VIP section.
Conclusion
Polishing polyurethane isn’t complicated, but it is picky. Let the finish cure, make sure you have enough thickness to work with,
then pick the approach that matches your goal: a quick satin rub-out, a full wet-sand-and-compound gloss build,
or machine buffing for big surfaces. If you go step-by-step (and treat edges with respect), polyurethane will reward you with a finish that looks
smoother, clearer, and more intentionallike you meant to do that all along.