Table of Contents >> Show >> Hide
- Why Pool Water Chemistry Matters (More Than You Think)
- Way #1: Test and Balance the Core Water Parameters
- Way #2: Maintain a Consistent Sanitizer Level
- Way #3: Use Circulation, Filtration, and Good Habits to Support Chemistry
- Real-World Experiences: What Pool Owners Learn the Hard Way
- Wrapping It Up: A Simple Chemistry Game Plan
If you’ve ever walked out to your pool and thought, “Why does this look like a giant bowl of miso soup?”… you, my friend, have a water chemistry problem. The good news: you don’t need a chemistry degree to keep your pool water clean, clear, and gentle on eyes and skin. You just need a simple routine and a basic understanding of how a few key chemicals work together.
In this guide, we’ll break pool water chemistry into three clear, doable strategies. You’ll learn how to balance pH and alkalinity, keep sanitizers in the right range, and use circulation and cleaning to support all that hard chemical work. Sprinkle in a few pro tips and real-life experiences, and you’ll be officially promoted from “pool owner” to “pool chemist-in-chief.”
Why Pool Water Chemistry Matters (More Than You Think)
Balanced swimming pool water chemistry is about more than just pretty blue water. When your water is properly balanced, you:
- Help sanitizers (like chlorine) work effectively to kill germs and algae.
- Prevent eye and skin irritation for swimmers.
- Protect your pool surfaces, liner, heater, and pump from corrosion or scale buildup.
- Reduce cloudy water, bad smells, and that “public pool at 5 p.m.” vibe.
Most residential pools follow similar target ranges for key parameters:
- pH: about 7.2–7.8
- Free chlorine: about 1–3 parts per million (ppm)
- Total alkalinity: around 80–120 ppm
- Calcium hardness: roughly 200–400 ppm
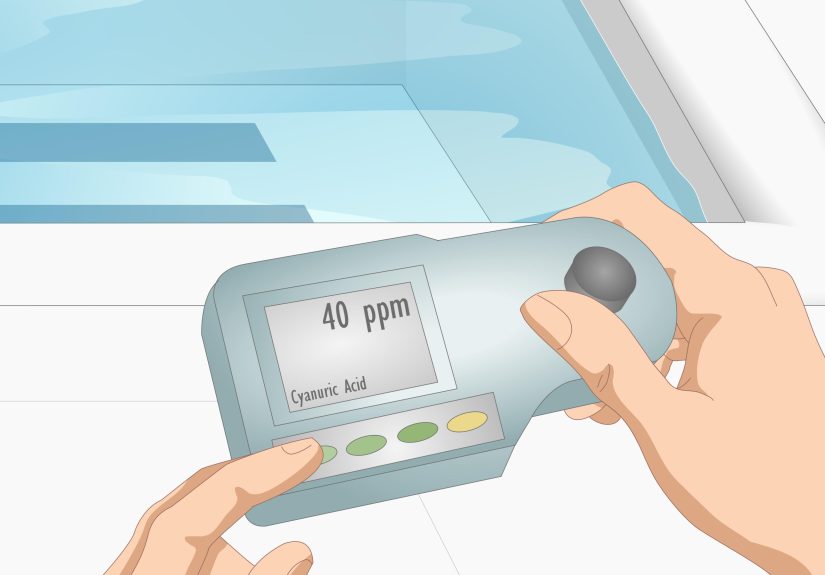
- Cyanuric acid (stabilizer): about 30–60 ppm for traditional chlorine pools, often 60–80 ppm for saltwater generators
Don’t stress about memorizing the numbers right now. As we go through each of the three main ways to maintain pool water chemistry, these ranges will make more and more sense.
Way #1: Test and Balance the Core Water Parameters
Think of this as the foundation of your pool chemistry. If pH, alkalinity, hardness, and stabilizer are wildly out of range, nothing else will behave. Chlorine won’t sanitize well, metals can stain, surfaces can corrode and you’ll spend too much money chasing problems.
Step 1: Test Your Pool Water Regularly
The first habit to build is consistent testing. For most backyard pools, testing at least 2–3 times per week in normal conditions is a good starting point, and more often during heat waves, after heavy rain, or when the pool is getting a lot of use.
You can use:
- Test strips: Fast and easy, good for a quick check.
- Liquid drop kits: More accurate and still simple once you’ve done it a few times.
- Digital meters: Convenient, but keep them calibrated and follow instructions.
When you test, focus on the “big four” first: pH, total alkalinity (TA), free chlorine, and sometimes calcium hardness and cyanuric acid if it’s been a while since you checked those.
Step 2: Get pH and Alkalinity in Range First
pH and alkalinity are like the thermostat and insulation of your pool chemistry. Total alkalinity buffers pH, helping it stay stable instead of bouncing all over the place with every splash, rainstorm, or chemical addition.
Common target ranges:
- pH: 7.2–7.8
- Total alkalinity: 80–120 ppm (some setups may run a bit lower or higher, but this is a solid starting point)
If your pH is low (acidic), the water can corrode metals and damage surfaces. If it’s high (basic), you get cloudy water, scale deposits, and your chlorine becomes lazy and ineffective. Total alkalinity that’s too low makes pH unstable; too high, and pH tends to drift upward and becomes hard to adjust.
Typical chemical adjustments many pool owners use (always follow product labels and safety directions):
- To raise total alkalinity: Add sodium bicarbonate (often sold as “alkalinity increaser” or plain baking soda).
- To lower total alkalinity and/or pH: Use muriatic acid or dry acid in carefully measured doses.
- To raise pH without moving alkalinity too much: Add soda ash (sodium carbonate), usually labeled as a pH increaser.
A good rule: adjust alkalinity first, then fine-tune pH. Make changes in small steps, retesting between doses instead of dumping in a huge amount and hoping for the best. (That is how you get to “Why does the pool look like milk?” very quickly.)
Step 3: Keep Calcium Hardness and CYA in Check
Calcium hardness measures how much dissolved calcium is in your water. Too little, and water becomes “hungry,” pulling minerals out of plaster, grout, and sometimes metal components. Too much, and you get scale those crusty white deposits that cling to tile, heaters, and pipes.
Most experts suggest a range of about 200–400 ppm for many residential pools (lower end for vinyl and fiberglass, mid-range for plaster and concrete). To raise hardness, you typically add a calcium chloride product. If hardness is too high, the long-term fix is usually to partially drain and refill with lower-hardness water, then maintain more carefully going forward.
Cyanuric acid (CYA) is the “sunscreen” for chlorine. A proper level of stabilizer protects chlorine from being destroyed by sunlight. Too little, and you burn through chlorine quickly. Too much, and chlorine gets “over-protected” and less active, so you may need higher free chlorine levels to maintain the same sanitizing power.
Common target ranges:
- Traditional chlorine pool: roughly 30–60 ppm CYA
- Saltwater generator pool: often 60–80 ppm CYA
You can increase CYA by adding stabilizer products. If your CYA is sky-high from years of stabilized chlorine tablets, the solution is usually a partial drain and refill and then switching to a different sanitation strategy (like liquid chlorine or a salt system) to avoid climbing even higher.
Way #2: Maintain a Consistent Sanitizer Level
Now that your basic water balance is set, it’s time to focus on sanitizers. This is what keeps your pool safe killing germs, preventing algae, and stopping your pool from turning into a frog-friendly ecosystem.
Choosing and Managing Your Sanitizer
Most backyard pools use one of two primary sanitizers:
- Chlorine: The most common, available as tablets, liquid, granules, or generated from salt (saltwater pools).
- Bromine: More common in hot tubs and spas; less popular for full-size outdoor pools in the U.S.
For standard chlorine pools, a typical target for free chlorine is 1–3 ppm, adjusted based on your CYA level and your pool’s specific needs. Heavier use, lots of sunlight, or high CYA can push that ideal chlorine number higher.
There are several ways to deliver chlorine:
- Tablets (trichlor): Convenient, slow-dissolving, but they add CYA over time and tend to lower pH.
- Liquid chlorine or regular unscented bleach (proper strength): Fast-acting, doesn’t add CYA, but requires more frequent dosing.
- Calcium hypochlorite (cal-hypo): Adds both chlorine and calcium; useful if calcium is low, not great if calcium is already high.
- Salt chlorine generators: Create chlorine from salt in the water, very convenient but still require testing and balancing like any other pool.
Daily and Weekly Sanitizer Routines
For most pools, a good sanitizer routine looks something like this:
- Daily or every other day: Check free chlorine with a test strip or drop kit, especially in hot weather or peak swim season.
- Adjust as needed: Add liquid chlorine, adjust tablet feeder, or tweak salt generator output to keep levels in range.
- After big swim parties, storms, or heavy debris: Consider “shocking” or superchlorinating the pool to burn off contaminants.
Shocking usually means raising free chlorine temporarily to a higher level to break down chloramines (the smelly byproducts that cause “chlorine smell”) and fight off algae or contamination. Use a shock product appropriate to your pool type and follow label directions closely.
Remember: “set and forget” doesn’t work well with sanitizers. They’re constantly being used up by sunlight, swimmers, sweat, sunscreen, leaves, rain, and anything else that ends up in the pool. Consistent testing and small corrections are way easier and cheaper than emergency algae battles.
Way #3: Use Circulation, Filtration, and Good Habits to Support Chemistry
Here’s the secret many new pool owners discover the hard way: chemicals alone can’t fix everything. Even perfect chlorine and pH numbers struggle if your water just sits there, warm and stagnant, with a layer of sunscreen and leaves floating on top.
Keep Your Pump and Filter Running Enough
Most pools need the pump running long enough each day to turn over all the water at least once often 8–12 hours during peak season, depending on pool volume, filter size, and climate. Some owners split this into multiple shorter runs (morning and evening) to save energy or take advantage of off-peak electricity rates.
Good circulation helps:
- Distribute chemicals evenly throughout the pool.
- Push debris toward skimmers and main drains.
- Prevent “dead spots” where algae loves to start growing.
Check that your return jets are angled slightly downward and around the pool to create a gentle circular flow. This helps mix chemicals efficiently and keeps fine debris moving toward the filter.
Stay on Top of Skimming, Brushing, and Vacuuming
Chemicals work better when the water doesn’t have to fight through a layer of leaves, pollen, and mystery gunk. Build these simple habits into your weekly routine:
- Skim the surface with a net to remove leaves, bugs, and floating debris.
- Brush walls and steps to break up biofilm and prevent algae from sticking.
- Vacuum the floor manually or with an automatic cleaner to remove settled dirt.
- Backwash or clean the filter according to manufacturer instructions to maintain good flow and filtration efficiency.
If your filter pressure climbs significantly above its clean baseline, it’s signaling that it’s time to clean or backwash. Ignoring a clogged filter means poor circulation, which can quickly undo all your careful chemical balancing.
Practice Simple “Swimmer Hygiene” Rules
No one loves being the rule enforcer, but a few basic guidelines can dramatically reduce the chemical load on your pool:
- Encourage a quick rinse or shower before getting in it removes sweat, lotions, and dirt.
- Ask swimmers not to swim if they’re sick with diarrhea or other stomach issues.
- Keep food and drinks out of the water (yes, that includes “just a sip” of soda on a floatie).
- Use the bathroom and take kids for frequent bathroom breaks.
Every bit of sweat, sunscreen, and “stuff” swimmers bring into the water is something your sanitizer has to fight. Less contamination means you use fewer chemicals and spend less time troubleshooting problems.
Real-World Experiences: What Pool Owners Learn the Hard Way
Most pool owners don’t start as water chemistry pros. They learn by trial, error, and the occasional green surprise. Here are some practical lessons and experiences that tend to repeat themselves from yard to yard.
1. “I Ignored the Pool for a Week, and It Got Its Revenge”
One of the most common stories goes like this: The weather is good, the pool is perfect, and life gets busy. Maybe you skip testing and cleaning for a week. When you finally wander out, the water looks dull, a bit cloudy, or slightly tinted green. It doesn’t happen overnight it creeps up.
The chemistry behind this is simple. Chlorine slowly gets used up by sunlight and organic matter. If you don’t keep adding more, it eventually falls below the level needed to prevent algae. Once algae gets a foothold, it multiplies quickly, especially in warm water. At that point, you’re not just topping off chlorine you’re shocking, brushing, and babysitting the pool for several days.
The takeaway: a five-minute test-and-adjust routine every couple of days is way easier than a full-blown algae recovery. Future you will thank you for staying consistent.
2. “I Trusted the Tablets Too Much”
Another classic experience: relying solely on chlorine tablets in a floater or feeder all season long. Tablets are convenient, but they often contain stabilizer (CYA). Over time, every tablet adds more CYA to the water, and the levels slowly climb.
At first, everything seems fine: the water looks clear, and chlorine readings look normal. But as CYA gets very high, chlorine becomes less effective. You might see persistent algae, cloudy water, or chlorine readings that “look fine” but don’t behave that way in real life.
Eventually, many pool owners discover that the only way out is a partial drain and refill to bring CYA back into range then shifting to a more balanced approach, like using a mix of liquid chlorine and tablets or switching to a salt system. The lesson: tablets are a tool, not a full strategy. Regularly testing CYA and adjusting your plan can save a lot of frustration.
3. “My Pool Looked Fine… Until It Didn’t”
Water can look okay on the surface and still be out of balance. A pool might stay clear even when pH is drifting high or low, calcium is creeping out of range, or alkalinity is slowly shifting. The effects show up later as scale on tile, rough plaster, heater damage, or chronic eye irritation for swimmers.
This is where regular testing and record-keeping shine. Many experienced pool owners keep a simple notebook or app log of their test results. Over time, patterns appear: maybe your pH always drifts up, or your chlorine drops faster after heavy bather loads. Understanding your pool’s personality lets you anticipate what it needs instead of always reacting to problems.
4. “Rain, Heat Waves, and Parties Change Everything”
If there’s one thing almost everyone learns: your pool doesn’t behave the same in every season or situation. Heavy rain can dilute chemicals and drop your chlorine level. Long hot spells and intense sun chew through chlorine faster. A birthday party with ten kids in and out of the water all day is basically a chemistry stress test.
Experienced owners get in the habit of testing more often and adjusting more aggressively before and after these events. That might mean raising chlorine slightly in advance of a big swim day, shocking the pool afterward, or double-checking pH and alkalinity after a storm. You don’t have to be obsessive just a bit proactive.
5. “Small, Smart Habits Beat Big, Dramatic Fixes”
Ultimately, successful pool care isn’t about mastering complicated formulas. It’s about building simple habits:
- Test two or three times a week and write down the results.
- Adjust pH and alkalinity in small steps instead of big swings.
- Keep a consistent sanitizer level rather than “rescue dosing.”
- Run the pump enough and keep the filter clean.
- Skim, brush, and vacuum on a regular schedule.
Once those basics are in place, everything else gets easier. Your pool stays clearer, your chemicals work better, and your weekends involve more floating and less fighting with a test kit.
Wrapping It Up: A Simple Chemistry Game Plan
Keeping your swimming pool water chemistry in shape doesn’t have to be complicated. Focus on three main things:
- Balance core parameters: Keep pH, alkalinity, calcium hardness, and CYA in the recommended ranges so everything else behaves.
- Maintain sanitizer levels: Use chlorine or another sanitizer consistently, test often, and shock when needed to handle heavy use or contamination.
- Support chemistry with good habits: Run the pump, clean the filter, skim and brush regularly, and encourage swimmers to follow simple hygiene rules.
Get those three pieces working together and your pool rewards you with sparkling, inviting water all summer long without constant emergencies or mystery problems. You’ll know what your test results mean, how your pool reacts to weather and use, and exactly what to do when something starts to drift out of range.
In short: chemistry doesn’t have to be scary. In your backyard, it’s just another name for “more swim time, less stress.”