Table of Contents >> Show >> Hide
- Quick refresher: tiller vs. cultivator (and why it matters)
- Before you till anything: the 7 non-negotiables
- 1) Check soil moisture (the “soil ball” test)
- 2) Clear the area like you’re about to vacuum a LEGO room
- 3) Know what’s underground
- 4) Dress for the job (not for an inspirational garden photo shoot)
- 5) Keep kids, pets, and bystanders far away
- 6) Start shallow, then go deeper
- 7) Never unclog or adjust with the engine running
- Way #1: Break new ground and create a brand-new garden bed
- Way #2: Mix in compost and amendments to refresh existing beds (the soil-improvement move)
- Way #3: Prep and level a plantable surface for lawns, seedbeds, and landscape projects
- Common mistakes that make tillers feel “bad” (even when they’re not)
- Basic tiller upkeep that prevents mid-project drama
- Choosing the right tiller for the job (so you don’t buy/rent regret)
- Conclusion: a tiller is powerfuluse it like a pro, not like a pogo stick
- Extra: of Real-World Tiller Experiences (and what they teach)
- SEO Tags
A garden tiller is basically a blender for dirtexcept you don’t want to hit “purée” on a rock the size of a grapefruit.
Used the right way, a tiller can save your back, speed up bed prep, and help you mix in soil-improving goodies like compost.
Used the wrong way, it can turn your yard into a lumpy mess (and your arms into noodles).
This guide breaks down three practical, real-life ways to use a tillerwith step-by-step tactics, specific examples,
and the “please don’t do that” mistakes that make people swear off tillers forever. We’ll also talk about
when not to till, because healthy soil isn’t just about powerit’s about timing and restraint.
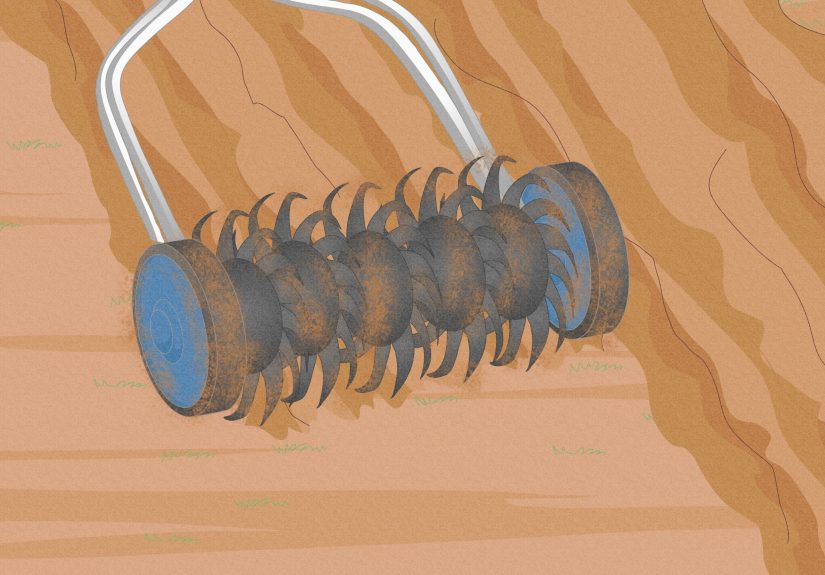
Quick refresher: tiller vs. cultivator (and why it matters)
People use these words interchangeably, but they’re not the same job:
- Tilling = deeper soil work (often 4–8 inches) to break ground, incorporate amendments, or prep a new planting area.
- Cultivating = shallow soil stirring (usually 1–3 inches) to manage small weeds and loosen the surface between rows.
Many machines can do bothif you adjust the depth and use the right technique. Think of it like cooking: you can “stir”
or you can “whisk aggressively,” but you probably shouldn’t whisk your soup with a power drill every week.
Before you till anything: the 7 non-negotiables
1) Check soil moisture (the “soil ball” test)
The sweet spot is soil that’s moist but not wet. Grab a handful and squeeze:
if it forms a sticky ball that holds its shape, it’s too wet. If it crumbles apart, you’re good.
Tilling wet soil is how you create clods that feel like sun-baked bricks later.
2) Clear the area like you’re about to vacuum a LEGO room
Rake out sticks, landscape fabric scraps, irrigation parts, and especially rocks. A tiller can fling debris or jam fast,
and “fast” is not the vibe you want near spinning tines.
3) Know what’s underground
Don’t till where you suspect utility lines, invisible dog fences, or low buried irrigation. In many places, calling
a utility locating service is standard before digging or tilling. If you’re not sure, treat “not sure” as “no.”
4) Dress for the job (not for an inspirational garden photo shoot)
Wear sturdy closed-toe shoes or boots, long pants, and eye protection. Hearing protection is smart toomany tillers are loud enough
to make your ears ring. Skip loose clothing and dangling drawstrings.
5) Keep kids, pets, and bystanders far away
A tiller is not a spectator sport. Keep the area clear, and don’t let anyone hover behind you “helping” by being in your way.
If you’re a teen, make sure a responsible adult is supervising and handling fuel, maintenance, and any heavy machine decisions.
6) Start shallow, then go deeper
The most common beginner mistake is setting the tiller to max depth and wrestling it like an angry shopping cart.
Take a shallow pass first to open up the surface, then deepen on later passes.
7) Never unclog or adjust with the engine running
If something jams, stop the machine. Follow the manual. Let moving parts stop completely.
If your tiller has a spark plug wire you can disconnect for safety during maintenance, do it.
Way #1: Break new ground and create a brand-new garden bed
This is the “biggest win” use of a tillerespecially if you’re converting turfgrass into a vegetable bed, digging into compacted soil,
or starting a garden in a spot that’s basically been a lawn since the invention of lawn chairs.
When this is the right move
- You’re converting lawn to planting space (vegetables, flowers, native bed).
- The soil is compacted and hard to dig by hand.
- You need to mix in a lot of compost or organic matter before planting.
Step-by-step: turning lawn into a bed (without losing your sanity)
- Mark the bed. Use string, spray paint, or a garden hose outline. A rectangle is easiest, but curves are fine if you enjoy raking.
- Moisten the soil, then wait. If it hasn’t rained, water the area well. Tilling a few days after a good soak is easier than
trying to chew through dry ground. - Set a shallow depth for your first pass. Your first goal is to “open” the top layer and start breaking the sod.
Don’t go for full depth yet. - Make slow, controlled passes. Overlap each pass slightly. If the tiller bucks or skips, slow down and reduce depth.
You’re guiding itnot arm-wrestling it. - Increase depth gradually. After the first pass, deepen the setting and repeat. Most garden beds do well with
about 6–8 inches of loosened, amended soil for planting. - Rake out roots and clumps. Especially in turf conversion, you’ll pull out grass roots and thick sod pieces.
(If you leave them, they will happily attempt a comeback tour.) - Mix in compost, then do a final smoothing pass. Spread compost and incorporate it evenly. Finish by raking the bed level.
Example: a 10×12-foot “first garden” bed
Let’s say you’re building a 10×12 vegetable bed. After watering and waiting for the soil to be workable, you do:
a shallow pass to slice and loosen sod, a second pass at medium depth, and a third pass closer to planting depth.
Then you rake out roots, spread a couple inches of compost, and do one more light pass to mix it in.
You finish with a rake to create a smooth seedbed and shape the edges.
Pro tip: consider the tiller type
For breaking new ground, a rear-tine tiller is often easier to control and better suited for tough sod.
A front-tine tiller can work in smaller areas and around obstacles, but may feel like more “work” in hard soil.
If you’re renting, describe your soil and the jobrental shops hear “my yard is basically concrete” every day.
Way #2: Mix in compost and amendments to refresh existing beds (the soil-improvement move)
This is where tillers shine in moderation. If you’ve got a tired bed, compacted top layer, or you’re adding compost or a soil amendment,
a tiller can blend materials into the root zone fastlike folding chocolate chips into cookie dough, except the dough is dirt and the chips are compost.
What you’re trying to achieve
- Even distribution of compost or soil conditioner through the top several inches.
- Better structure (more crumbly soil, less brick-like clumping).
- Improved drainage and root growth in compacted or heavy soils.
How deep should you mix?
A common target is blending compost into the top 6–8 inches of soil for garden beds, especially when you’re building fertility
or improving texture. If you’re just refreshing an established bed, you may only need a shallower pass.
Step-by-step: compost incorporation without overdoing it
- Start with a soil test if you can. If you’re considering lime, sulfur, or heavy fertilizer changes, testing helps you avoid guessing.
(Guessing is expensiveand occasionally dramatic.) - Spread compost evenly. Many gardeners use roughly 1–3 inches, depending on how depleted the bed is and what the compost is like.
- Till shallow first. Do one light pass to start blending, then a second pass slightly deeper if needed.
- Stop when it’s mixed. The goal isn’t powder. You want a crumbly, mixed layernot soil dust.
- Finish with mulch. Mulch helps reduce crusting, holds moisture, and can lower how often you feel tempted to till again.
Bonus use inside Way #2: shallow cultivation for weed control
If your machine can run shallow, you can use it like a cultivator between rows to disturb tiny weeds before they become villains.
Keep it shallow to avoid slicing crop roots and to avoid waking up buried weed seeds. This is one reason smaller tillers and cultivators
stay popular: they’re nimble and less disruptive when the garden is already planted.
A reality check: tilling isn’t always the “healthiest” choice
Tilling can help short-termespecially in compacted or clay-heavy soilbut frequent deep tilling can disrupt soil structure and beneficial soil life,
and can also bring weed seeds to the surface. If your beds are already loose and productive, you might get better long-term results from
compost top-dressing and mulch rather than frequent tilling.
Way #3: Prep and level a plantable surface for lawns, seedbeds, and landscape projects
The third great use of a tiller is seedbed prep and surface leveling. Think: renovating a worn lawn patch,
preparing a new area for grass seed, smoothing a future flower meadow, or loosening and leveling soil after a construction project.
When this is the right move
- You’re starting a new lawn from seed or doing a full renovation (not just overseeding).
- You need to incorporate compost or fertilizer into the seedbed before final grading.
- You’re leveling low spots and want a smoother surface before planting.
Step-by-step: a clean seedbed people actually want to walk on
- Remove existing vegetation (as appropriate). For lawn renovation, this might mean killing or removing the existing grass first.
You’re aiming to reduce competition so new seed has a chance. - Till shallow to moderate depth. For seedbed prep, many projects do well with loosening the top few inches and mixing in amendments.
You don’t always need the full “garden bed” depth. - Make parallel passes. Straight lines are your friend. Overlap a little to avoid stripes of untouched soil.
- Rake and grade. Use a landscape rake to smooth the surface. Fill low spots; knock down high spots.
The goal is a surface that’s level enough for even watering and mowing later. - Firm the seedbed. This surprises people: after loosening, you often want to firm the surface slightly so seed has good contact.
You can do this by lightly rolling or letting watered soil settle. You’re aiming for “firm but not compacted.”
Example: renovating a bumpy backyard patch
Imagine a backyard area with dips where water pools. You’d mark the area, remove dying turf, till shallow to loosen and blend in compost/topsoil,
rake soil into low spots, then rake again for smoothness. After seeding, you’d keep the surface consistently moist until germination, then transition
to deeper, less frequent watering.
Important note for lawns
Tilling isn’t always necessary for lawn improvement. For some lawns, aeration and topdressing may be a better fit than tilling,
especially if you’re not doing a full renovation. Use the tiller when you truly need to rebuild the seedbed or mix amendments into the soil.
Common mistakes that make tillers feel “bad” (even when they’re not)
- Tilling wet soil and creating clods that won’t break down later.
- Going too deep too fast, causing bucking, stalling, and frustration.
- Skipping multiple passes when converting sodone pass rarely finishes the job.
- Not removing debris (rocks, twine, landscape fabric), leading to jams or flying objects.
- Over-tilling established beds and damaging soil structure or bringing up weed seeds.
- Turning with tines engaged, which can gouge the surface and fight your steering.
Basic tiller upkeep that prevents mid-project drama
You don’t need to become a small-engine wizard, but a few habits save you time:
- Check oil and fuel before starting (and refuel only when the engine is cool).
- Inspect tines for damage and remove wrapped roots/strings after use.
- Clean soil off the machine so it doesn’t harden into a cement sculpture.
- Store properly (dry place, fuel handled per the manual, and away from kids).
Choosing the right tiller for the job (so you don’t buy/rent regret)
Front-tine tillers
Often lighter and easier to maneuver in small gardens. Great for already-worked soil, small plots, and closer work around obstacles
but they can be more labor-intensive in hard, compacted ground.
Rear-tine tillers
Usually better for breaking new ground and sod because they’re built for tougher conditions and often track more steadily.
They’re bigger, heavier, and typically easier to control when the soil fights back.
Mini cultivators
Perfect for shallow work: between rows, small beds, and quick weed control. If your goal is “stir the top layer,” this may be the smartest tool.
Conclusion: a tiller is powerfuluse it like a pro, not like a pogo stick
The best tiller technique is less about horsepower and more about timing, depth control, and purpose.
Use a tiller to (1) break new ground for fresh beds, (2) mix in compost and amendments to improve soil, and (3) prep and level seedbeds for lawns
and landscape projects. Test moisture first, start shallow, keep safety front and center, and don’t till “just because you can.”
If you treat tilling as an occasional toolrather than a weekly habityour soil structure, worms, and future you will all be happier.
And your shoulders will stop sending complaint emails.
Extra: of Real-World Tiller Experiences (and what they teach)
Experience #1: “The Clay Brick Surprise”
A lot of gardeners discover the hard way that clay soil has moods. One common story goes like this:
someone gets excited on the first warm spring weekend, wheels out a tiller, and starts chewing into soil that’s still wet underneath.
The machine doesn’t glideit smears. The soil rolls up into heavy clods that dry into rock-like chunks.
The lesson most people take away: the “soil ball test” isn’t a cute tip, it’s the difference between fluffy soil and a lumpy mess.
Waiting an extra day or two feels annoying, but breaking clods with a rake for the next month feels worse.
Experience #2: “Sod Is Basically Nature’s Carpet”
First-time bed builders often assume a single deep pass will turn grass into a perfect garden bed.
What usually happens instead is a shredded mat of roots that tries to re-knit itself into a lawn.
Gardeners who’ve done it a few times tend to use a smarter rhythm: water the area, wait a few days, do a shallow pass,
rake out the thickest chunks, then deepen on later passes. They also accept that sod conversion is a two-part job:
tilling breaks it up, but raking out the roots is what prevents the grass from staging a comeback.
Experience #3: “Compost Confetti (aka the Windy-Day Mistake)”
Mixing compost with a tiller feels instantly satisfyingdark, crumbly soil is the garden equivalent of fresh bedsheets.
But many gardeners learn to avoid doing this on a windy day with dry compost. Fine compost can blow around,
and the tiller can kick up dust that makes breathing unpleasant. The better move: lightly moisten dry compost (or wait for calmer weather),
wear eye protection, and mix in stages rather than racing through it. People also notice that a little restraint goes far:
once compost is evenly blended, extra passes don’t “improve” the soilthey just chop it finer and can invite more weeds later.
Experience #4: “The Mystery Vibration”
Another classic moment: the tiller suddenly starts vibrating or clanking like it’s auditioning for a heavy metal band.
Usually it’s a rock wedged in the tines, a hidden chunk of concrete, or string/twine wrapped around rotating parts.
Experienced users stop immediately, shut the machine down, and clear the obstruction safelybecause pushing through can damage the tiller
or cause a dangerous jerk. The broader lesson: tillers are fast, but they’re not mind readers. A slow, careful first pass
(and a quick walk-through to clear debris) prevents most “surprises.”
Experience #5: “Leveling Isn’t Tilling”
When people use a tiller to level ground for grass seed, the common win is realizing that the tiller is only step one.
The real leveling happens after: raking, grading, filling low spots, and lightly firming the seedbed for good seed contact.
Gardeners who get great lawn germination usually talk less about the tiller itself and more about the follow-up
smooth surface, consistent moisture, and patience during establishment.