Table of Contents >> Show >> Hide
- Before You Repair a Paint Chip, Diagnose It First
- Way 1: Use a Paint Pen for Tiny, Clean Chips
- Way 2: Use Brush-On Touch-Up Paint for Small to Medium Chips
- Way 3: Prime, Fill, Wet-Sand, and Repaint Deep Chips
- Way 4: Choose a Smart Spot Repair or Professional Repaint
- How to Pick the Right Method Fast
- Mistakes That Make Car Paint Chip Repair Look Worse
- How to Make Your Repair Last
- Conclusion
- Real-World Experiences and Lessons From Repairing Car Paint Chips
- SEO Tags
A car paint chip always starts the same way: one tiny nick, one optimistic shrug, and one month later you are leaning over the hood wondering when your vehicle joined the polka-dot era. The good news is that many paint chips are fixable at home. The even better news is that you do not need a full body shop setup, a dramatic movie montage, or a friend named “Tony” who claims he can paint anything.
The trick is choosing the right repair method for the size and depth of the damage. A tiny chip on the door edge does not need the same treatment as a crater on the hood that has already invited rust to the party. In this guide, you will learn four practical ways to repair car paint chips, when each one works best, and how to avoid turning a small blemish into a larger, shinier mistake.
Before You Repair a Paint Chip, Diagnose It First
Not every paint chip is created equal. Some are tiny surface nicks that only need color and clear coat. Others go deeper, exposing primer or bare metal. If the chip has a reddish-brown stain, bubbling around the edges, or a rough texture, rust may already be forming. That matters because deeper chips need more prep, not more enthusiasm.
Start by washing the area well and checking the chip in bright light. If you see only a small dot with clean edges, a paint pen or brush-on touch-up may be enough. If you see exposed metal, flaking paint, or a chip wider than a pencil eraser, you will usually get better results with sanding, primer, and a more careful rebuild. And if your car has a matte finish or a large cluster of chips across a highly visible panel, a professional repair may be the smarter move.
Basic supplies that help almost every repair
- Exact-match touch-up paint by factory paint code
- Wax and grease remover or another paint-safe cleaner
- Microfiber cloths
- Painter’s tape
- Fine applicators, micro brushes, or a touch-up pen
- Sandpaper in fine grits for feathering and leveling
- Primer and clear coat when the chip is deeper
One more thing: always work in a shaded, mild-temperature spot. Direct sun, freezing temperatures, and high wind are all enemies of a smooth repair. Your paint deserves better than being applied while the hood is hot enough to fry an egg.
Way 1: Use a Paint Pen for Tiny, Clean Chips
Best for
Pinhead-size to rice-grain-size chips with no rust, no flaking paint, and no large crater around the damage.
Why this method works
A paint pen is the fastest, simplest option for minor chips. It is especially useful on door edges, hood edges, and small spots that are noticeable up close but not severe enough to justify sanding half the panel. Think of it as first aid for your paint, not reconstructive surgery.
How to do it
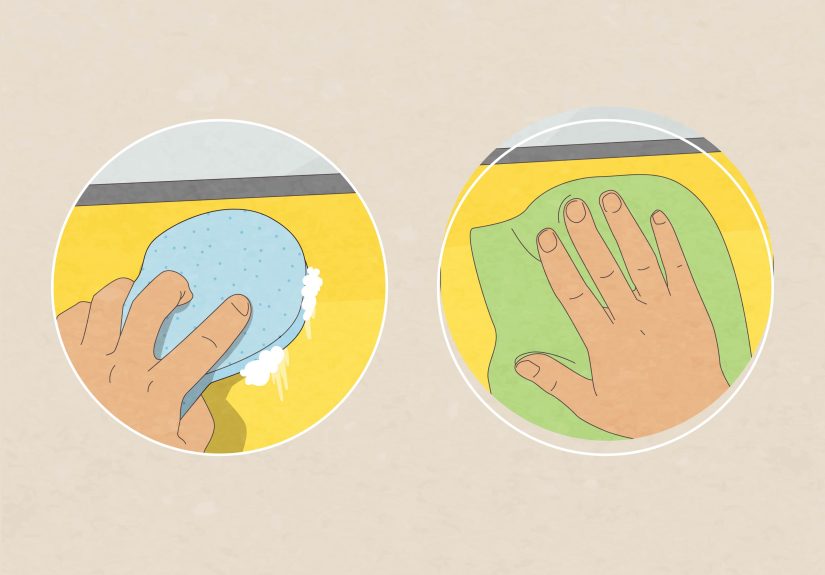
- Wash and dry the area thoroughly.
- Use a paint-safe cleaner to remove wax, oils, and residue.
- Shake the pen well and test it on cardboard first.
- Lightly dab the chip rather than dragging the pen like a marker.
- Let the coat dry, then build with additional thin layers if needed.
- Add clear coat if your touch-up system uses a separate clear layer.
The key word here is dab. A common mistake is coloring over the chip like you are outlining a poster. That usually leaves a blob, streak, or raised ridge that looks worse than the original damage. Small chips need tiny deposits of paint, placed carefully and allowed to level.
Paint pens are great when the chip is truly minor. They are much less impressive when used on larger damage, where they can create a lumpy little volcano. If your repair starts looking like a glossy breadcrumb, move on to a more controlled method.
Way 2: Use Brush-On Touch-Up Paint for Small to Medium Chips
Best for
Small to medium chips, clusters of chips on the same panel, or damage that needs more precision than a pen can provide.
Why this method works
Brush-on touch-up paint gives you more control over how much paint goes into the chip. With a fine brush or micro applicator, you can fill the damaged area from the center outward and avoid smearing color all over the surrounding finish. This method is often the sweet spot for DIYers because it is more refined than a pen but less complicated than a full sand-prime-paint repair.
How to do it
- Clean the area and remove any loose paint at the chip edge.
- Very lightly feather rough edges if necessary.
- Dip only a tiny amount of paint onto the applicator.
- Touch the center of the chip and let the paint flow outward.
- Allow proper drying time between coats.
- Repeat until the chip is filled just enough to blend, not bulge.
- Apply clear coat if your repair system includes it.
This method is ideal when you want a cleaner finish on an obvious panel like a hood or front fender. You are not trying to paint an entire circle over the chip. You are filling a missing section of paint, slowly, in thin layers. That difference matters.
Brush-on touch-up also works well when the factory color has metallic or pearl content. Those finishes can be tricky, and a rushed repair often makes the mismatch more noticeable. Thin layers help the color settle more naturally. If the shade still looks off, stop and reassess before piling on more paint and creating a tiny metallic muffin top.
Way 3: Prime, Fill, Wet-Sand, and Repaint Deep Chips
Best for
Deeper chips that expose primer or bare metal, chips with light rust beginning, or damage with a visible crater that simple touch-up paint cannot hide well.
Why this method works
When a chip goes deeper than the top color layer, the job is no longer just about hiding a dot. It is about rebuilding the damaged spot so paint can bond properly and moisture stays out. This method takes more time, but it produces the best DIY result on serious chips.
How to do it
- Wash, dry, and degrease the damaged area.
- Mask the surrounding paint so you keep the repair controlled.
- Remove loose paint, oxidation, and any light rust.
- Feather the chip edge gently with fine sandpaper.
- Apply primer only if the chip has reached bare metal or needs a bonding base.
- If the crater is pronounced, use a suitable filler primer or spot putty very sparingly.
- Once cured, level the repair with very fine wet sanding.
- Apply the color coat in multiple thin layers.
- Finish with clear coat and allow full cure before polishing or protecting.
This method rewards patience. The chip must be clean, stable, and smooth before the new paint goes on. If you skip prep and paint directly over corrosion or flaking edges, the repair may look decent for a few weeks and then fail right on schedule. Water loves shortcuts.
Deep-chip repairs also benefit from resisting the urge to go too wide. Sand only as much as needed to smooth the damage and feather the edge. Over-sanding can make a repair zone bigger than the original chip, which is a deeply irritating way to lose an afternoon.
Once the repair cures, many people lightly polish the surrounding area for a more blended look. Follow the paint product instructions carefully here. Fresh paint is not the time for aggressive buffing or “I saw a guy do this online” energy.
Way 4: Choose a Smart Spot Repair or Professional Repaint
Best for
Large clusters of chips, chips with rust bubbling under the finish, highly visible damage on premium finishes, matte paint, or any repair where color and texture matching matter more than saving time.
Why this method works
Sometimes the smartest DIY decision is recognizing when not to DIY. A front bumper peppered with road rash, a hood full of impact marks, or a matte-finish panel with visible damage usually needs professional blending and refinishing. Body shops can match color more precisely, correct texture, and repair larger areas so the result looks intentional rather than “surprisingly homemade.”
This is also the right move when the chip damage is part of a bigger issue. If you see bubbling paint, scaling rust, or damage along rocker panels and lower body sections, the repair may require more than cosmetic touch-up. And if your vehicle suffered sudden widespread damage from a covered event, it may be worth comparing the repair cost with your insurance deductible.
There is no shame in handing the job to a professional. The point of car paint repair is a protected, attractive finish, not proving that you can balance a micro brush like a circus performer.
How to Pick the Right Method Fast
- Tiny chip, clean edges, no rust: Paint pen
- Small or medium chip, visible but tidy: Brush-on touch-up paint
- Deep chip to primer or metal: Primer, fine sanding, and layered repaint
- Many chips, rust bubbling, matte paint, or show-area damage: Professional spot repair or repaint
If you are torn between two methods, choose the more conservative repair first. You can always step up later. It is harder to undo an overbuilt blob of paint than it is to add one more thin coat.
Mistakes That Make Car Paint Chip Repair Look Worse
Using the wrong paint code
“Black” is not one universal black. “White” is not one universal white. Factory paint codes exist for a reason. An almost-right match often looks very wrong on a sunny day.
Skipping surface prep
Wax, road film, and oil interfere with adhesion. If you do not clean the surface properly, the new paint may not bond well or level smoothly.
Applying one thick coat
Thick paint tends to sit high, dry unevenly, and attract your eye to the repair. Thin layers are slower, but they almost always look better.
Ignoring rust
A paint chip that exposes metal is not just a cosmetic issue. Moisture can get underneath, and corrosion can spread. The sooner you seal it, the better.
Trying to fix matte paint like glossy paint
Matte finishes are a different beast. Spot corrections that work on glossy clear coat usually do not blend the same way on matte surfaces.
How to Make Your Repair Last
Once the chip is fixed, the job is not over. Keep the vehicle washed, especially in salty or dirty conditions. Avoid harsh household cleaners. After the repair has fully cured according to product directions, protect the area with wax, sealant, or another finish-safe protectant. Then keep an eye on new damage and repair it early. Paint chips are like weeds in the garden of car ownership: easier to deal with when they are tiny and not yet emotionally offensive.
Conclusion
The best way to repair car paint chips is not always the fanciest one. A paint pen can be perfect for a tiny nick. Brush-on paint is excellent for small to medium chips that need control. Deep chips call for sanding, primer, and patience. And some jobs belong in professional hands, especially when the damage is widespread, rusty, or located on a hard-to-match finish.
In other words, good paint-chip repair is really about matching the method to the damage. If you pick the right approach, use the exact paint code, and work in thin layers, you can make those annoying little blemishes far less noticeable and help protect the metal underneath. Your car may never write you a thank-you note, but it will stop looking like it lost a gravel fight.
Real-World Experiences and Lessons From Repairing Car Paint Chips
One of the most common experiences people have with car paint chips is underestimating how much the location changes the repair. A tiny chip on the lower door can be barely noticeable after a basic touch-up, while that exact same chip on the front edge of the hood somehow becomes the star of the entire vehicle. That is why many owners learn early that visibility matters just as much as size. If the damage sits right at eye level or on a flat, sunlit panel, even a decent repair needs more patience and better blending.
Another common lesson is that color match is everything. Many first-time DIY repairs look disappointing not because the paint was applied badly, but because the color was only close instead of exact. This shows up most often with metallic silver, pearl white, and darker shades that shift in sunlight. People often expect touch-up paint to look perfect the moment it dries, but real-world results are usually better when the factory code is correct, the coats are thin, and expectations stay realistic. “Much less noticeable” is a success. “Invisible from every angle at noon” is a tougher assignment.
A lot of drivers also discover that paint tends to look different wet than dry. A repair may seem too bright at first, then settle down as it cures. Other times it dries darker than expected. This surprises people who try to judge the result too early and then overapply more paint. The smarter experience-based approach is to let the product flash and cure as directed, step back, and check the panel later in different light. Hurrying the verdict is how small chips become little raised monuments to impatience.
There is also a practical lesson about tools. Many people start with the brush that comes in the bottle cap and quickly realize it is a bit like painting eyelashes with a broom. Fine micro applicators, a steady hand, and good lighting usually improve results more than buying ten extra products. Likewise, clean microfiber towels matter. Using an old rag feels thrifty until it leaves lint, haze, or light scratches around the repair.
Seasonal conditions come up again and again in real-world chip repair. Owners who work in direct sun often end up fighting paint that dries too quickly. Owners who work in cold garages wonder why the finish takes forever to settle. The best experiences usually come from slow, boring, ideal conditions: shade, mild temperatures, clean surface, no wind, no rushing. Glamorous? No. Effective? Absolutely.
Finally, many people learn that the best chip repair habit is not technique but timing. The sooner a chip is cleaned and sealed, the easier the fix. Once rust starts, or once a cluster of chips builds across the hood, the repair becomes more expensive, more noticeable, and more frustrating. The owners who stay happiest with their paint are usually not the ones who perform museum-quality touch-ups. They are the ones who notice damage early, use the right method for the chip, and understand that preserving the finish is often more important than chasing perfection.