Table of Contents >> Show >> Hide
- 1. Start by Sorting Supplies Into Real Categories
- 2. Use Clear, Labeled Containers So You Can See What You Own
- 3. Create Zones Based on How You Actually Work
- 4. Go Vertical With Pegboards, Shelves, and Wall Storage
- 5. Use Drawers, Dividers, Jars, and Photo Boxes for Tiny Items
- 6. Build Portable Project Kits and a Grab-and-Go Cart
- 7. Use a Simple Reset Routine to Keep the System Working
- Why Organized Craft Supplies Make Creativity Easier
- Experiences From Real-Life Craft Organization
- Conclusion
Note: This article is written in fresh, original copy for web publishing and is based on real-world organizing practices widely recommended by leading U.S. home and craft sources.
If your craft supplies have reached the point where glitter appears in rooms you have never entered, welcome. You are among friends. A messy craft stash is not proof that you are lazy. It is proof that you are creative, optimistic, and maybe a little too trusting of “temporary” piles. The good news is that organizing craft supplies does not require a magazine-worthy studio, custom cabinetry, or a dramatic soundtrack. It just takes a smart system.
The best craft organization ideas all share a few simple truths: keep what you use most easy to reach, make supplies visible, label what you store, and use vertical space before your table disappears under the weight of ribbon, paint pens, and mystery buttons from 2018. Whether you have a full craft room, a hallway closet, or one determined rolling cart parked beside the dining table, these seven strategies can help you create a setup that is tidy, practical, and much easier to maintain.
1. Start by Sorting Supplies Into Real Categories
The fastest way to fail at craft organization is to skip straight to buying containers. Pretty bins are not a system. They are just attractive places to hide confusion. Before you label anything, spread out your supplies and sort them into categories that match how you actually craft.
Think in useful groups, not vague ones. “Craft stuff” is not a category. “Watercolor supplies,” “sewing tools,” “gift wrap,” “scrapbook paper,” “glue and adhesives,” and “kids’ art materials” are categories. If you work on several types of projects, you can create broader families and then subgroups underneath them.
Useful ways to sort
- By material: fabric, yarn, paper, beads, vinyl, paint
- By tool: scissors, punches, rulers, cutters, needles, glue guns
- By project type: card making, quilting, embroidery, jewelry making
- By person: adult supplies, kids’ supplies, shared supplies
- By frequency: daily-use items, seasonal items, backup stock
This step usually reveals two important truths. First, you probably own eight black markers but cannot find one when you need it. Second, some supplies deserve to leave the building. Dry glue sticks, broken crayons, bent paintbrushes, and scraps too tiny to be useful do not need premium real estate. Decluttering before you store saves space and makes the final setup easier to keep neat.
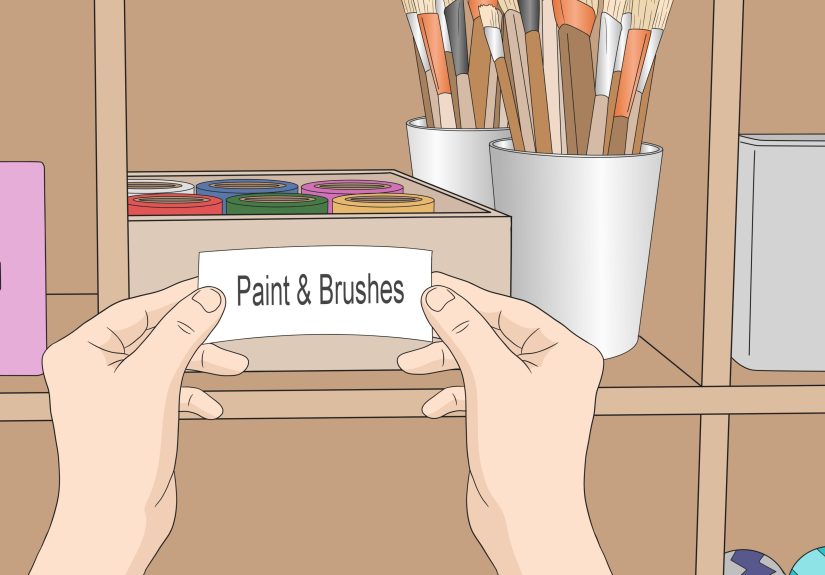
2. Use Clear, Labeled Containers So You Can See What You Own
If you have ever bought more washi tape because you could not find the washi tape you already had, visibility is your new best friend. Clear containers make it easier to spot what is inside at a glance, and labels finish the job. This combo sounds almost annoyingly simple, but it works because it cuts down on the two biggest enemies of organization: guessing and digging.
Use clear bins for medium and large supplies, small boxes for specialty items, and lidded containers for anything that likes to spill, tangle, or escape. Label the front, not the top, if the bins live on shelves. That way you can read them without playing container Jenga.
What works well in clear storage
- Ribbon spools and trims
- Acrylic paint bottles
- Scrapbook embellishments
- Buttons, beads, and sequins
- Hot glue sticks and adhesives
- Small sewing notions
Labels do not need to look fancy. A label maker is great, but painter’s tape and a marker can still save your sanity. The real goal is consistency. When every container has a name, everyone in the house knows where things belong. That includes you on a Sunday night when you are searching for floral wire with the urgency of a person defusing a bomb.
3. Create Zones Based on How You Actually Work
One of the smartest ways to organize craft supplies is to stop thinking only about items and start thinking about workflow. In other words, where do projects begin, where do they get messy, and where do they finish? When supplies are stored near the place they are used, setup is faster and cleanup feels much less dramatic.
Try dividing your space into zones. Even a tiny corner can have mini zones. For example, you might have a cutting zone, a wrapping zone, a sewing zone, and a paper-craft zone. If your space is shared with other activities, your zones can live inside portable containers rather than permanent furniture.
Example zone setup
- Main work zone: scissors, rulers, pens, adhesive, cutting mat
- Paper zone: cardstock, stickers, stamps, punches, envelopes
- Sewing zone: thread, pins, measuring tape, needles, fabric scissors
- Paint zone: brushes, palettes, paints, cups, drop cloths
- Gift-wrap zone: tape, tags, ribbon, tissue paper, bags
This is especially helpful for households where several people make different things. The person who quilts should not need to excavate through slime supplies to find rotary blades. Give every activity a home, and you will waste less time moving piles around just to begin.
4. Go Vertical With Pegboards, Shelves, and Wall Storage
Tables fill up fast. Walls, on the other hand, are often standing there with nothing to do. Vertical storage is one of the most effective ways to organize craft supplies because it frees up your work surface while keeping tools visible and close at hand.
Pegboards are a craft-room classic for a reason. They are flexible, affordable, and easy to adjust when your needs change. You can hang scissors, rulers, thread, baskets, and even small shelves. Open shelving is also useful for bins, jars, and project boxes, especially when you want everything easy to see. If you are short on wall space, use the back of a door, the side of a bookshelf, or a slim rolling unit next to your desk.
Great candidates for vertical storage
- Scissors and cutting tools
- Ribbon, twine, and trim
- Embroidery hoops
- Paintbrushes and markers
- Fabric bundles or yarn in magazine holders
- Small baskets for adhesives and notions
The visual benefit matters too. When supplies are displayed neatly, the room feels more inspiring and less like a storage closet that gave up. You may even remember to use materials you forgot you owned. Imagine that: buying less because your wall reminded you about the twelve perfectly good glue bottles already in your house.
5. Use Drawers, Dividers, Jars, and Photo Boxes for Tiny Items
Every crafter has a category of tiny supplies that behaves like confetti with bad intentions. Buttons, beads, pins, clips, snaps, charms, googly eyes, paper clips, sewing feet, machine needles, and random hardware all need boundaries. Otherwise, they migrate.
This is where smaller storage formats really shine. Drawer units, shallow trays, divided boxes, photo cases, and jars are ideal for little items because they keep things separated without wasting space. The key is to match the container to the item size. Do not put six eyelets in a bin the size of a microwave. That is how chaos gets ideas.
Best small-item solutions
- Drawer dividers: perfect for pens, blades, clips, and tools
- Photo boxes: ideal for embellishments, stamps, and thread packs
- Clear jars: good for buttons, pom-poms, clothespins, and ribbon scraps
- Tackle-style boxes: handy for beads, jewelry parts, and findings
- Zip pouches: useful for hardware, templates, and project leftovers
Store these containers inside a larger category zone so they do not become a separate mystery department. For example, all sewing notions can live in one drawer tower, while paper embellishments stay together in labeled photo cases. Tiny supplies are manageable when they are grouped by purpose and size instead of scattered across fifteen “safe places.”
6. Build Portable Project Kits and a Grab-and-Go Cart
Not everyone crafts in one dedicated room. Some people spread out at the kitchen table, move to the couch, and then somehow end up trimming cardstock beside the laundry basket. For flexible spaces, portable storage is a lifesaver. Project kits and rolling carts let you keep supplies organized without turning your entire home into a satellite craft campus.
Create project kits for crafts you do often. Put all the essential supplies for one activity in a handled bin, zip pouch, or lidded case. That might mean a crochet kit, watercolor kit, card-making kit, or kids’ rainy-day craft box. When everything travels together, you can start faster and clean up without hunting for half the pieces later.
What to include in a project kit
- Main tools for that craft
- The core materials you use every time
- A small trash bag or cleanup cloth
- Project notes, templates, or instructions
- A pouch for in-progress pieces
A rolling cart works beautifully as a mobile command center. Keep your most-used items on it: scissors, tape runner, glue, pens, clips, cutting tools, and current projects. If you have a family of makers, each person can even have a shelf or bin on the cart. It is practical, compact, and much easier to wheel away than a full-size desk when dinner needs to happen like a normal household event.
7. Use a Simple Reset Routine to Keep the System Working
The truth about organizing craft supplies is that the hard part is not setting up the system. The hard part is keeping it from slowly turning back into a glittery archaeological dig. The solution is not perfection. It is a short, repeatable reset routine.
Spend five to ten minutes after each session putting things back where they belong. Return tools to their hooks, toss dried-up materials, restack paper, and drop leftovers into the right project bin. Once a month, do a slightly deeper reset. Check labels, combine duplicates, donate what you no longer use, and restock basics before they vanish mid-project.
A realistic craft-space maintenance checklist
- Put away tools immediately after use
- Empty surface clutter before starting a new project
- Return supplies to labeled homes
- Keep a donation box for materials you no longer use
- Review seasonal or specialty items every few months
A good organizing system should make cleanup easier, not more complicated. If you notice that you keep avoiding one step, adjust it. Maybe the shelf is too high, the bin is too deep, or the labels are too vague. Organizing is not a one-time performance. It is a living setup that should support the way you create right now.
Why Organized Craft Supplies Make Creativity Easier
There is a practical side to all of this, of course. Organized craft supplies save time, reduce duplicate purchases, protect delicate materials, and make it easier to finish what you start. But there is also a creative benefit. When your tools are visible, your favorite materials are within reach, and your workspace is not crowded by unrelated clutter, it becomes much easier to start.
That matters because creativity often depends on momentum. If beginning a project requires twenty minutes of searching for thread, clearing a chair, and opening six mystery bins, your motivation may pack up and leave before you even find the glue gun. A well-organized space lowers that friction. It gently says, “Go ahead. Make the thing.”
Experiences From Real-Life Craft Organization
I learned the value of organizing craft supplies the hard way, which is the traditional crafting method. For years, I treated every open surface like a temporary holding zone. Ribbon lived in one basket until it exploded into three bags. Paintbrushes hid inside mugs like they were trying to blend into the furniture. Paper scraps multiplied in drawers with the confidence of something paying rent. Every project started with optimism and ended with me muttering, “I know I have that somewhere.”
The turning point came when I needed one tiny pack of embroidery needles and spent half an hour opening boxes that contained everything except embroidery needles. I found gift tags, old stickers, six nearly empty tape rolls, and enough loose buttons to clothe a doll army. What I did not find was the actual item I needed. That was the moment I realized the mess was not just annoying. It was slowing me down and making crafting less fun.
Once I started sorting supplies by category, things changed fast. I made a sewing bin, a paper bin, a wrapping bin, and a catchall tray for everyday tools. Suddenly, I could start a project without going on a scavenger hunt. Clear bins helped most of all. I did not have to rely on memory anymore, which was great because my memory had apparently retired without notice. Labels helped too, even the handwritten ones. Fancy labels are nice, but readable labels are what actually save the day.
The biggest surprise was how much better I felt in the space. Before organizing, the room always looked like I was in the middle of seven different ideas and losing to all of them. After organizing, it felt calmer and more inviting. I wanted to sit down and make something because the setup no longer overwhelmed me. Even a quick fifteen-minute project felt possible because I could grab what I needed and clean up fast.
I also noticed that I wasted less money. When supplies are visible, you stop buying duplicates out of panic or forgetfulness. I had thought I was “running out” of cardstock, tape, and elastic. It turned out I was actually running out of patience because those items were buried under unrelated clutter. Seeing what I owned made me use it more creatively too. Materials I had forgotten about suddenly became part of new projects.
Another lesson was that organization only works when it matches real life. Systems that look beautiful but take too many steps do not last. The solutions that stuck were simple: open bins for everyday tools, drawer dividers for little things, project kits for hobbies I take to other rooms, and a quick reset at the end of each crafting session. Nothing fancy. Just practical. That is what keeps the space usable.
So if your supplies are currently living in assorted bags, mystery boxes, and what can only be described as “creative weather,” do not feel bad. Most craft clutter starts with enthusiasm, not failure. A few smart changes can make your supplies easier to find, easier to use, and much easier to put away. And that means more time actually crafting, which is the whole point.
Conclusion
The best way to organize craft supplies is not to copy someone else’s perfect room down to the matching labels and photogenic jars. It is to build a system that fits your space, your hobbies, and your actual habits. Sort by category, use clear labeled containers, create work zones, store upward instead of outward, contain tiny items, build portable kits, and keep everything going with a short reset routine.
When your craft supplies have a real home, creativity becomes easier to start and much easier to enjoy. Less searching. Less rebuying. Less chaos. More making. And fewer moments where you discover glitter in your coffee, which is really the dream.