Table of Contents >> Show >> Hide
- Why Make Your Own School Planner?
- Step 1: Pick Your Planner Style (Before You Pick Your Pens)
- Step 2: Gather Supplies (Use What You Have, Upgrade What You Love)
- Step 3: Decide What Pages You Actually Need (The “No Guilt” Rule)
- Step 4: Build Your Layouts (Templates You Can Copy)
- Step 5: Make It Digital-Friendly (Even If It’s Paper)
- Step 6: Print and Test (Don’t Print 200 Pages on Day One)
- Step 7: Bind It (DIY or Print Shop)
- Step 8: Set Up Your Planner Like a System (Not a Scrapbook)
- Step 9: Use Two Simple Productivity Tools Inside Your Planner
- Common Mistakes (And How to Avoid Them)
- FAQs
- Conclusion: Make a Planner That Fits Your Real Life
- Real-World Planner Experiences (And What They Teach You)
Store-bought planners are like “one-size-fits-all” hoodies: comfy in theory, weirdly baggy in the arms in real life.
If you’ve ever bought a planner, used it for exactly eight days, and then turned it into a very expensive coaster,
you’re not alone. The fix isn’t more motivationit’s a planner that actually matches your school life.
This step-by-step guide shows you how to make a school planner from scratch (or close enough) with layouts that fit
your classes, your deadlines, and your attention span. You’ll end up with something that feels custom because… it is.
Why Make Your Own School Planner?
A DIY school planner gives you three superpowers:
- Control: You decide what mattersassignments, practice, work shifts, club meetings, sleep, all of it.
- Clarity: Your schedule isn’t floating in your brain like a bunch of untitled browser tabs.
- Consistency: When a planner reflects how you really work, you’re more likely to keep using it.
The goal isn’t “make it pretty.” The goal is “make it usable,” and if it turns out pretty too, that’s a bonus.
Step 1: Pick Your Planner Style (Before You Pick Your Pens)
Option A: Binder Planner (3-ring)
Best if you like flexibility. You can add, remove, or rearrange pages anytime. It’s also the easiest format to build
with basic supplies (paper + hole punch + binder).
Option B: Discbound Planner
Pages “snap” onto discs and can be moved around like a binder, but it opens flatter and often feels lighter.
Great if you love reorganizing (or if your brain does that thing where you rearrange instead of starting homework).
Option C: Spiral/Coil-Bound Planner
Best if you want something that lays flat and stays together. Less flexible than a binder, but super sturdy and
backpack-friendly. You can DIY this with a binding machineor let a print shop handle it.
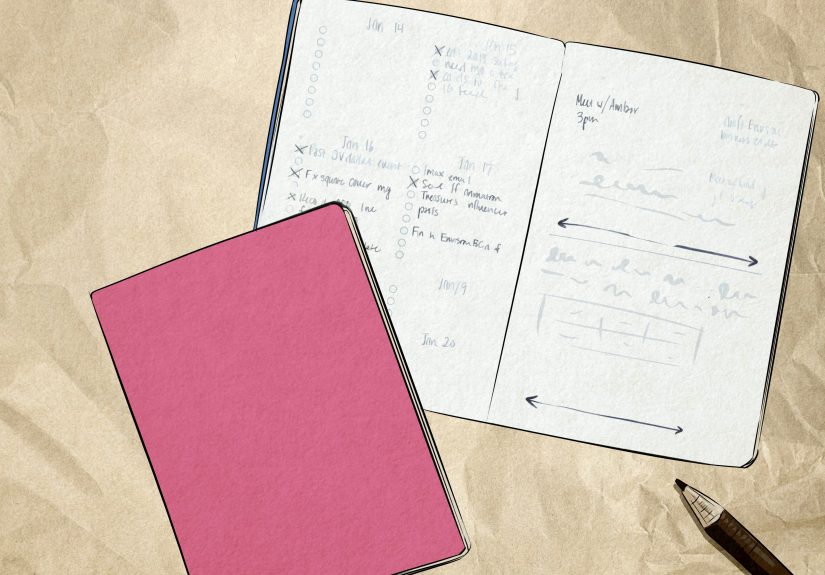
Option D: Bullet-Journal Style (Notebook)
Best if you want a simple system that can evolve over the year. Instead of printing pages, you build your layouts
directly in a notebook using an index and quick “bullets” for tasks, events, and notes.
Quick decision tip: If you change your mind often, choose a binder or discbound system. If you want
“set it and forget it,” go coil-bound. If you want maximum customization with minimal printing, go notebook-style.
Step 2: Gather Supplies (Use What You Have, Upgrade What You Love)
You do not need a craft room. Start simple and add extras only if they make the planner easier to use.
Essentials
- Paper (regular is fine; slightly thicker paper feels nicer and reduces ink bleed)
- Pen/pencil + highlighter (one is enough, you don’t need the whole rainbow… unless you want it)
- Ruler (for clean lines) or a straight-edged notebook
- Binder/discs/notebook (whatever format you chose)
- Hole punch (if using a binder) or access to a print shop (if coil-binding)
Nice-to-Haves
- Dividers or tabs (Monthly / Weekly / Assignments / Notes)
- Stickers or washi tape (optional, but can make “checking things off” oddly satisfying)
- Clear front cover + sturdy back cover (especially for binders and coil-bound planners)
- Sticky notes (for temporary reminders you don’t want permanently inked)
Step 3: Decide What Pages You Actually Need (The “No Guilt” Rule)
The easiest way to abandon a planner is to stuff it with pages you never use. So give yourself permission to be picky.
Here are the most useful “core pages” for studentschoose the ones that match your life.
Core Pages (Highly Recommended)
- Semester Overview: a big-picture calendar for exams, due dates, trips, games, performances
- Monthly Calendar: a month-at-a-glance view for deadlines and major events
- Weekly Spread: your main command center (classes + study blocks + life stuff)
- Assignments Tracker: a running list so nothing disappears into the void
- Notes Pages: because your teacher will say “this will be on the test” when you least expect it
Optional Pages (Pick Based on Your Goals)
- Grade Tracker: helpful if you like seeing progress in numbers
- Project Planner: break big assignments into steps (outline, research, draft, edit)
- Habit Tracker: sleep, hydration, reading, workouts, practicewhatever supports your routine
- “To-Do Parking Lot”: a page for random tasks so they stop living in your head rent-free
- Goals Page: academic goals and personal goals, written in a clear, measurable way
The No Guilt Rule: If you don’t use a page for two weeks, remove it or redesign it. Your planner works for you,
not the other way around.
Step 4: Build Your Layouts (Templates You Can Copy)
4A) Semester Overview (1–2 Pages)
Create a “semester on one page” (or two pages) layout. This is where you list:
- Exam dates and major quizzes
- Project due dates and presentations
- College test dates, tournaments, performances, travel days
- Important personal stuff (birthdays, family events, appointments)
Pro move: Add a symbol legend. Example: ★ exam, ● project due, ▲ practice/game, ♥ personal event.
4B) Monthly Calendar (2 Pages Per Month)
Keep it clean and readable. Each day box should fit at least:
- One deadline
- One event
- A tiny reminder (like “start essay”)
Example: If your history paper is due on the 28th, write “History paper DUE” on the 28thand add
“Outline” on the 21st and “Draft” on the 24th. That’s how you stop deadlines from jump-scaring you.
4C) Weekly Spread (Your Most Important Page)
Your weekly spread should answer one question: “What am I doing and when?” Start by blocking in:
- Non-negotiables: classes, commute, practices, shifts, recurring clubs
- Study blocks: specific times for homework and long-term projects
- Life blocks: meals, rest, social time (yes, schedule fun on purpose)
Weekly layout idea (simple + effective):
- Left column: “This Week’s Priorities” (3–5 items)
- Middle: Mon–Sun with 3 lines each (Top task, Due dates, Events)
- Right column: “Study Plan” (which subject gets attention on which day)
4D) Assignments Tracker (The “Nothing Slips” Page)
Make a table with these columns:
- Class
- Assignment
- Due Date
- Estimated Time (30 min? 2 hours? be honest)
- Status (Not started / In progress / Done)
Specific example: “English Compare/Contrast Essay Due Feb 12 3 hours In progress.”
Now you know it’s not “some essay thing,” it’s a real task you can actually plan.
4E) Daily Pages (Optional, But Great for Busy Weeks)
If you like daily pages, keep them lightweight:
- Top 3 tasks (the only list that truly matters)
- Appointments/events
- Quick notes
If you prefer a bullet-journal approach, use quick “bullets” to mark tasks, events, and notes so you can scan fast.
Step 5: Make It Digital-Friendly (Even If It’s Paper)
Paper planners are amazing… until your teacher changes the due date. A simple hybrid approach solves that:
- Use your planner for planning and daily action.
- Use a digital calendar for hard deadlines and scheduled events (with reminders).
Then, once a week, do a quick sync: copy upcoming deadlines from your calendar into your weekly spread,
and copy your planned study blocks into your calendar if you want reminders.
Step 6: Print and Test (Don’t Print 200 Pages on Day One)
Print a “mini version” first: one monthly page + one weekly spread + one assignments tracker. Use it for a week.
You’ll learn what needs more space and what needs less.
- Tip: Leave a wider left margin if you’re hole-punching or binding.
- Tip: If you print double-sided, check that your weekly pages align the way you want.
- Tip: Color is fun, but black-and-white is often easier (and cheaper) to maintain.
Step 7: Bind It (DIY or Print Shop)
Binder Method
- Stack pages by section: Semester → Monthly → Weekly → Assignments → Notes
- Hole-punch and add dividers
- Label tabs so you can flip quickly
Discbound Method
- Punch pages using a discbound punch (or buy pre-punched paper)
- Snap pages onto discs in your preferred order
- Test turning pagesif they catch, reduce thickness or adjust paper weight
Coil/Spiral or Comb Binding (Print Shop Friendly)
If you want a clean, professional finish, many print shops offer binding options. Coil/spiral binding is great for
laying flat, and comb binding can be useful if you want the ability to add or rearrange pages later.
Bring your pages as a PDF, tell them your preferred binding type, and consider adding a sturdier front and back cover
so your planner survives the semester.
Step 8: Set Up Your Planner Like a System (Not a Scrapbook)
A planner only works if you have a routine for using it. Try this simple setup:
Daily (3–5 minutes)
- Check today’s top 3 tasks
- Write any new assignments immediately (future-you will say thank you)
- Cross off what’s done (tiny dopamine is still dopamine)
Weekly (15–25 minutes)
- Review upcoming deadlines and events
- Choose 3–5 weekly priorities
- Block study time for your hardest classes first
- Schedule at least one fun/rest block so your week isn’t just “work and vibes”
Monthly (10 minutes)
- Transfer big due dates into the next month
- Adjust your goals and habits based on what’s working
Step 9: Use Two Simple Productivity Tools Inside Your Planner
Tool 1: Time Blocking (So Your Plans Have a Place to Live)
Instead of “Do math homework,” write: “Math homework Tue 6:00–6:45.” This turns wishes into a schedule.
Start with short blocks you can actually finish.
Tool 2: Pomodoro Sessions (So You Start, Not Stare)
When you’re stuck, set a timer for 25 minutes and do one focused sprint. Then take a short break.
Your planner can even include tiny checkboxes: □ Pomodoro 1 □ Pomodoro 2 □ Pomodoro 3.
Common Mistakes (And How to Avoid Them)
- Mistake: Making pages too complicated.
Fix: If you can’t fill it out in under 2 minutes, simplify. - Mistake: Only using the planner when you’re “caught up.”
Fix: Use it most when you’re behind. That’s when it helps the most. - Mistake: Perfectionism (a.k.a. “I messed up a line so the planner is ruined”).
Fix: Cross it out. Add a sticker. Move on. You’re building a tool, not a museum exhibit. - Mistake: Tracking too many things at once.
Fix: Track one habit for two weeks. If it helps, keep it. If it annoys you, delete it.
FAQs
What if I don’t have a printer?
Use a notebook-based planner. You can draw a simple weekly layout with a ruler, or create a “rolling to-do list”
plus a weekly schedule page. If you want printed pages, local print shops can print from a PDF.
How long does it take to make a DIY planner?
A basic planner can be built in an hour (especially with simple templates). A fully customized system might take
a weekend. The smart approach is to build a small version, test it, then expand.
Should I make it daily, weekly, or both?
Weekly is the best starting point for most students. Add daily pages only if your days are packed or you want
more space for detailed to-dos.
Conclusion: Make a Planner That Fits Your Real Life
Your planner should feel like a helpful sidekick, not a judgmental spreadsheet with a personality. Start simple.
Use the pages that support your schoolwork and your well-being. Review weekly. Adjust without guilt.
And remember: the best planner is the one you actually open.
Real-World Planner Experiences (And What They Teach You)
Students who stick with a planner usually don’t start with a perfect systemthey start with a useful one.
A common experience is going all-in on day one: color-coded everything, twelve trackers, a goals page that looks
like a motivational poster… and then week two hits like a pop quiz in sock form. The lesson? Your planner has to
match your bandwidth. When life gets busy, the “minimum effective planner” wins: a weekly spread, an assignments
tracker, and a notes page.
Another experience many students share is realizing that “writing it down” isn’t enough. They’ll list ten tasks
for Tuesday and still feel overwhelmedbecause lists don’t show time. That’s when time blocking changes everything.
The moment a student writes “Bio reading: 4:30–5:00” instead of “Bio reading (someday),” the task becomes doable.
Even better, short blocks build confidence. A 30-minute study block that gets finished feels like momentum. Momentum
is basically motivation’s cooler cousin.
Students also discover that a planner is secretly a stress detector. If the weekly spread looks like a game of
Tetris played by a caffeinated squirrel, something has to give. Many students use that moment to adjust:
break big projects into steps, start earlier, or reduce commitments during heavy exam weeks. This is the planner’s
underrated superpower: it shows you what your brain tries to ignore.
There’s also a super relatable experience: forgetting to use the planner… and then feeling like you “failed.”
The fix isn’t shame; it’s a reset ritual. Students who succeed often have a simple “re-entry plan” for when they
fall off: open planner, write today’s date, list top 3 tasks, check upcoming deadlines, done. No backfilling.
No rewriting the past week like it’s a director’s cut. Just restart.
Finally, many students find that the planner becomes more useful when it includes real life, not just school life.
Scheduling meals, workouts, breaks, and one fun thing on the weekend makes the week feel survivable. It’s not about
turning your life into a robot routineit’s about creating enough structure that you can relax without guilt.
When a student’s planner includes rest on purpose, they’re more likely to follow through on work and
recover afterward. That’s not laziness. That’s strategy.
If you take one lesson from these experiences, make it this: your planner should evolve. Treat every week like a
tiny experiment. Keep what helps. Delete what doesn’t. Your future self will thank youand might even stop buying
“fresh start” planners every semester.