Table of Contents >> Show >> Hide
- Why Make a Living Moss Toadstool?
- Understanding the Living Materials
- Tools and Materials
- How to Make a Chicken Wire and Moss Toadstool
- Adding Plants Without Creating a Horticultural Argument
- Care and Maintenance
- Troubleshooting Common Problems
- Design Variations
- Practical Experience Notes: What This Project Teaches You
- Conclusion
- SEO Metadata
A chicken wire and moss toadstool living sculpture transforms a shady corner of the garden into something that looks delightfully borrowed from a fairy tale. Built from flexible wire mesh, moisture-holding moss, and a few discreet supports, this oversized mushroom can become a soft, green focal point beneath trees, beside a woodland path, or near a covered patio.
The project is inexpensive, customizable, and surprisingly forgiving. Chicken wire does not demand engineering credentials, moss does not require mowing, and a slightly crooked cap usually adds character. The main challenges are shaping a stable frame, keeping sharp wire ends under control, sourcing moss responsibly, and placing the finished sculpture where living material can thrive.
This guide explains how to build, install, and maintain a moss toadstool while avoiding common problems such as sagging caps, exposed mesh, dried moss, and wind-related mushroom migration.
Why Make a Living Moss Toadstool?
Wire-frame topiary has long been used to create animals, geometric forms, seasonal displays, and other living sculptures. A toadstool is especially beginner-friendly because its basic structure consists of only two recognizable shapes: a domed cap and a sturdy cylindrical stem.
Unlike a rigid statue, a living garden sculpture changes with the weather. Moss becomes vivid after rain, softens as it establishes, and may develop subtle differences in color and texture. The wire gradually disappears, leaving what appears to be a mushroom that took an enthusiastic wrong turn during evolution.
A chicken wire mushroom also works well in small landscapes. It adds height without occupying much planting space, introduces a woodland theme, and can disguise an awkward bare patch where lawn grass struggles because of shade.
Understanding the Living Materials
Living moss versus dried sphagnum moss
These materials perform different jobs. Long-fiber sphagnum moss is commonly used inside wire forms because it holds moisture, packs easily, and creates a surface into which pins or small plants can be inserted. It may be sold dried and will not necessarily become a green living carpet.
Living sheet moss is the visible outer layer. Mosses are nonvascular plants that absorb moisture across their surfaces rather than through conventional roots. They attach using small structures called rhizoids, so they can grow on soil, bark, stone, and other stable surfaces when environmental conditions are suitable.
For the most natural result, use damp sphagnum as the structural filling and press responsibly sourced living moss over it. Preserved craft moss can create immediate color, but it will not grow and may fade outdoors.
Choose moss suited to the site
Mosses vary. Some favor soil, while others naturally grow on wood or rock. Locally adapted moss already growing in conditions similar to those around the sculpture generally has a better chance of establishing than an unidentified decorative product.
Purchase live moss from a reputable grower or collect a small amount only from private property with permission. Never remove moss or other plants from national parks or protected natural areas. Even a thin moss colony can shelter tiny organisms, retain water, and contribute to its surrounding ecosystem.
Tools and Materials
- One-inch galvanized chicken wire or flexible poultry netting
- Heavy-duty wire cutters
- Needle-nose pliers
- Leather work gloves and eye protection
- Long sleeves for handling cut wire and plant material
- Galvanized tie wire, landscape staples, or UV-resistant zip ties
- Long-fiber sphagnum moss, coconut fiber, or another moisture-holding filler
- Responsibly sourced living sheet moss
- A large bowl, planter, or basin for shaping the cap
- Two or three bamboo stakes, metal rods, or narrow wooden stakes
- Floral pins or biodegradable jute twine
- A bucket of clean water and a spray bottle
- Optional small shade-loving plants
Galvanized wire resists corrosion better than untreated steel, although constant moisture will eventually shorten its life. Vinyl-coated mesh may last longer and visually disappears beneath greenery, but it can be more stubborn to shape.
How to Make a Chicken Wire and Moss Toadstool
1. Decide on the proportions
A manageable first sculpture is approximately 24 to 30 inches tall with a cap 20 to 28 inches wide. The stem should be wide enough to support the cap without looking like it skipped leg day. An 8- to 10-inch stem diameter usually creates a balanced appearance.
Choose the installation site before construction. Partial to full shade, protection from intense afternoon sun, convenient access to water, and shelter from strong wind will make maintenance easier.
2. Form the rounded cap
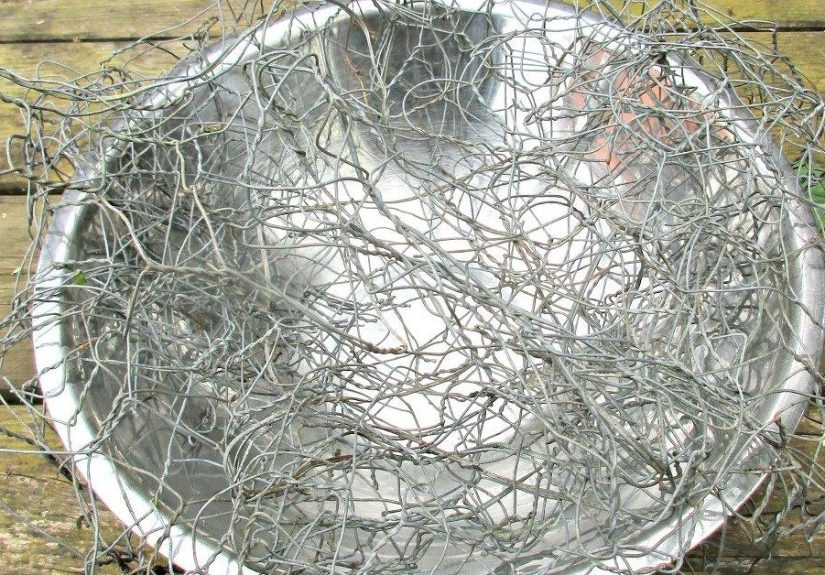
Cut a square of chicken wire several inches wider than the desired cap. Center it over an upside-down bowl or round planter and gently press the mesh downward around the form. Work from the center outward, making small bends rather than one dramatic fold.
Remove the bowl and refine the dome by hand. Turn the outer edge inward to create a shallow rim. For a thicker, more substantial cap, cut a second piece of mesh and shape it into a flatter underside. Join the two pieces around the perimeter with short lengths of tie wire.
Tuck every cut wire end inward with pliers. A beautiful garden mushroom loses some of its charm when it behaves like an angry cheese grater.
3. Fill the cap
Soak dried sphagnum moss in clean water until it becomes flexible, then squeeze out excess moisture. It should feel damp rather than dripping. Pack it between the upper and lower wire layers, beginning at the rim and moving toward the center.
Keep the filling fairly firm so it does not slump after watering, but avoid compressing it into a solid brick. If only one wire layer is used, place the moss against the inside of the dome and fold the lower edges inward to hold it.
4. Build the stem
Cut a rectangular piece of chicken wire and roll it into a cylinder. Overlap the edges by two or three mesh openings and fasten them with tie wire or outdoor-rated zip ties. Make the lower portion slightly wider than the top for better stability.
Line the visible outer portion with damp sphagnum. The center can remain hollow if stakes will pass through it, or it can be loosely filled with coconut fiber, moss, or lightweight natural material. Avoid heavy garden soil unless the frame is reinforced; wet soil adds considerable weight and may cause the stem to collapse.
5. Connect the cap and stem
Set the cap on the stem and check the silhouette from several directions. When the proportions look right, secure the two pieces together with tie wire at four or more evenly spaced points.
Run two or three stakes through the cap’s underside and down the stem. These internal supports help prevent the top from sliding, spinning, or blowing away. Leave enough stake below the stem to anchor the sculpture at least 8 to 12 inches into firm ground.
6. Apply the living moss
Moisten the sheet moss and lay small sections over the frame with the green side facing outward. Overlap the edges slightly so the wire remains hidden as the pieces settle. Press each section firmly against the damp substrate.
Hold the moss in place with floral pins, landscape staples, or loops of jute twine. Space the fasteners closely around curves and the underside of the cap. Dark thread or clear monofilament can also be wrapped around the sculpture, but it should not cut deeply into the moss.
Patch thin areas with smaller fragments rather than stretching large sheets. Stretching usually creates gaps once the moss dries and contracts.
7. Install and water thoroughly
Position the toadstool on level soil and drive the internal stakes securely into the ground. Add angled landscape staples around the base if the location is exposed. Test the structure with a gentle push; it should remain steady without wobbling.
Mist the entire sculpture, then water slowly enough for moisture to penetrate the outer moss and reach the sphagnum beneath. Check the ground afterward to make sure runoff has not loosened the base.
Adding Plants Without Creating a Horticultural Argument
Small plants can turn the mushroom into a mixed living sculpture, but select them according to the same conditions the moss requires. Miniature ferns, selaginella, and certain moisture-loving ground covers may suit a shaded, humid location. Confirm that any species is appropriate for the local climate and is not invasive.
Succulents are often used in wire-frame projects because their shallow roots fit into moss-filled structures. However, most succulents need brighter light, faster drainage, and less frequent watering than living moss. Combining them may force one half of the arrangement to live in the other half’s bad neighborhood.
If a succulent-covered toadstool is the goal, treat sphagnum primarily as a planting support, incorporate a gritty growing medium around the roots, and place the sculpture where it receives suitable light. For a lush woodland toadstool, skip drought-loving plants and concentrate on moss.
Care and Maintenance
Watering
Keep newly installed moss consistently damp while it settles against the substrate. In mild weather, this may require misting once a day for the first several weeks. Hot, dry, or windy conditions can require more frequent attention.
Established moss can tolerate periods of dryness by becoming dormant, but repeated severe drying may cause transplanted edges to die back. Water in the morning so the sculpture can absorb moisture without remaining saturated through every cool night.
Light and temperature
Bright shade or filtered morning light is generally preferable to intense afternoon sun. If the moss repeatedly turns pale or crisp despite adequate watering, the sculpture may need a cooler, more sheltered location.
During freezing weather, avoid handling frozen moss because brittle sections can break. In climates with harsh winters, a portable sculpture can be moved to a protected shaded area, although locally adapted moss may remain outdoors successfully.
Feeding and cleaning
Moss usually does not need conventional fertilizer. Strong fertilizer can encourage algae, weeds, or unwanted plant growth and may damage sensitive moss. Remove fallen leaves by hand or with a blower on its lowest setting. Pull weeds early, before their roots become entangled with the frame.
Inspect ties, stakes, and wire several times a year. Replace rusted connections and trim loose ends. Galvanized chicken wire slows corrosion but does not defeat time, water, and oxygen forever.
Troubleshooting Common Problems
The moss turns brown
Brown moss may be dormant rather than dead. Move the sculpture away from strong sun, water it thoroughly, and observe it over the following weeks. If sections crumble or fail to recover, replace them with moss suited to the site.
The cap starts sagging
A sagging cap usually indicates insufficient wire support, overly heavy filling, or loose internal stakes. Add a second mesh layer beneath the cap, reinforce the center with crossed wire, and remove any waterlogged soil.
Moss keeps falling off
The surface may be too dry, smooth, or loosely packed. Rehydrate the sphagnum, press the living moss firmly into contact, and add more pins or twine. Good contact is more important than generous wishes.
Animals investigate the sculpture
Birds may borrow loose fibers for nests, while squirrels may explore the filling. Secure the moss with closer stitching and avoid adding food-based decorations. Minor wildlife remodeling is part of creating garden art from natural materials.
Design Variations
Create a family of three mushrooms in different heights for a stronger landscape feature. A broad, low cap looks storybook-friendly, while a tall, narrow stem creates a more elegant silhouette. Natural stones around the base help the sculpture blend into a woodland planting.
For a spotted toadstool effect, attach pale stones, bark circles, or small pieces of light-colored preserved lichen substitute to the cap. Avoid paint that could wash into the moss. A simple arched doorway made from bark can turn the stem into a fairy house, assuming the fairies accept the building inspection.
The same construction method can produce acorns, snails, woodland animals, or abstract topiary shapes. Begin with rounded forms and advance to complicated anatomy only after making peace with the springy personality of chicken wire.
Practical Experience Notes: What This Project Teaches You
The first practical lesson is that shaping the frame deserves more time than stuffing it. A cap that looks perfectly round from above may appear flat or lopsided at eye level. Set the unfinished form on its stem, step back, and inspect it from the path or seating area where it will usually be viewed. Small adjustments made before adding wet moss are much easier than major corrections afterward.
Wire also has a memory. It arrives rolled and often tries to return to that shape while being cut. Unrolling it on the ground and weighing the corners down for a few minutes makes the material easier to manage. Working in small bends produces a smoother dome than squeezing the whole sheet at once. Heavy gloves reduce dexterity slightly, but that inconvenience is preferable to discovering how many sharp ends can occupy one square foot of poultry netting.
The next surprise is how much heavier the sculpture becomes when wet. Dry sphagnum feels almost weightless; saturated sphagnum does not. A cap that seems stable on the workbench can lean after its first deep watering. Internal stakes should therefore be treated as structural necessities rather than optional accessories. In loose or sandy soil, longer metal rods or a wider base make a noticeable difference.
Moss placement rewards patience. Large sheets provide quick coverage, but smaller overlapping pieces conform better to rounded edges. The underside of the cap usually requires extra fasteners because gravity remains unimpressed by artistic ambition. Once pinned securely, the separate patches begin to read as a continuous surface, especially after repeated misting settles the fibers.
Site selection often determines whether the project becomes low-maintenance garden art or a demanding green pet. A protected area beneath a deciduous tree may provide filtered light and natural rainfall, while a breezy patio can dry the moss within hours. Watching the sculpture through one sunny day reveals more than a complicated watering schedule. If it dries from one side first, rotate it or relocate it before increasing irrigation.
Expect the appearance to evolve. Freshly assembled moss can look patchy, bulky, or excessively tidy. Rain compresses the surface, weather softens the color differences, and naturally adapted moss may begin attaching to the moist material beneath. Leaves, tiny seedlings, and the occasional investigating bird will add evidence that this is part of a garden rather than a sealed decoration.
Maintenance becomes easier when repairs are made early. A lifted corner can be repinned in seconds; ignored for a month, it may become a large dry patch. Loose ties, leaning stems, and emerging wire deserve the same quick attention. Keeping a handful of spare pins and tie wire near the garden tools turns repairs into a two-minute job.
Most importantly, the sculpture does not need mechanical perfection. Slight asymmetry makes a handmade toadstool more convincing, and variations in moss texture create depth. The most successful result is not the smoothest or most symmetrical mushroom. It is the one positioned securely, matched to its environment, and allowed to mature naturally.
Conclusion
A chicken wire and moss toadstool living sculpture combines simple construction with the unpredictable beauty of living material. Build a strong wire skeleton, use damp sphagnum as a supportive core, apply legally sourced moss with firm surface contact, and anchor the finished mushroom securely. With shade, moisture, and occasional repairs, the sculpture can become an enchanting feature rather than a short-lived craft project.
Note: Wear gloves, eye protection, and long sleeves while cutting wire or handling sphagnum and other plant material. Sphagnum has occasionally been associated with a fungal infection called sporotrichosis, so cover cuts, wash your hands after working, and seek medical advice if a persistent skin lesion develops. Always follow local rules when sourcing natural materials.