Table of Contents >> Show >> Hide
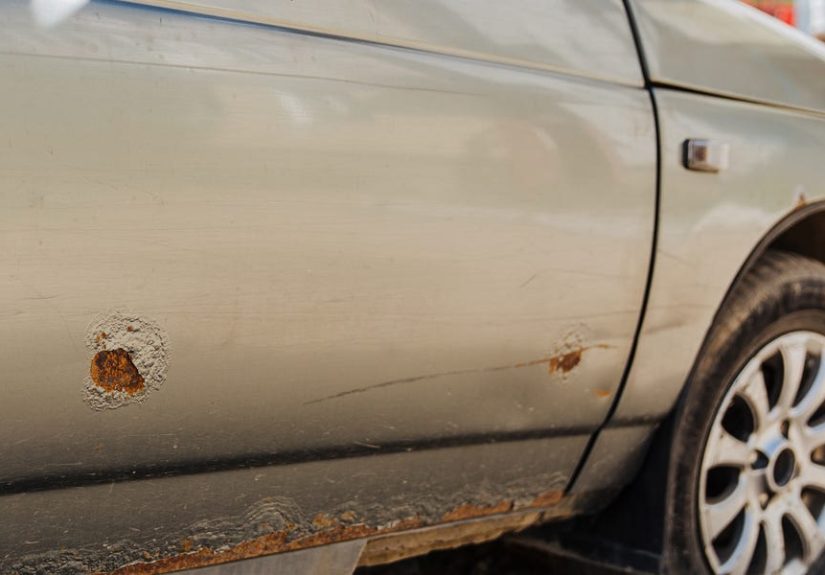
One day your car looks shiny and proud. The next day, you spot a little brown freckle on the wheel well and suddenly
you’re Googling “is my car about to disintegrate.” Relax. Rust is serious, but it’s not an automatic death sentence
for your rideif you catch it early and treat it correctly.
In this guide, we’ll walk through how to stop rust on a car step by step, from tiny surface spots to more advanced
rust that needs filler. We’ll also cover how to prevent rust so you’re not doing this every winter. Think of it as
rust repair for normal humans, not just body-shop pros.
Why Cars Rust (And Why You Shouldn’t Ignore It)
Rust is just iron plus oxygen plus moisture having a party. Your car’s body and frame are mostly steel, so anytime
bare metal is exposed to water and oxygenespecially in the presence of road saltyou get oxidation (rust).
Road-salt-heavy climates and coastal areas are especially tough on vehicles, and rust can progress from cosmetic to
dangerous over time, weakening panels, suspension components, and even frames.
Safety agencies and manufacturers have issued recalls and technical bulletins because severe frame corrosion can
cause suspension arms to detach or crossmembers to fail, leading to loss of control.
That’s the extreme end of the spectrum, but it’s why treating rust early is such a big deal.
The Three Main Types of Car Rust
-
Surface rust: Light orange or brown discoloration on top of the paint or on exposed metal (like
chips, scratches, or hardware). Mostly cosmetic and easiest to fix. -
Scale rust: Rust has eaten through paint and begun to roughen and pit the metal. You’ll often see
bubbling paint, flaky metal, and thicker rust scale. -
Penetrating rust: The “uh-oh” stage. Holes have formed in the metal, or structural parts (rocker
panels, frame sections, crossmembers) are deeply corroded. This can be a safety issue.
The earlier you stop rust on your car, the more likely you can handle it in your driveway with sandpaper, primer,
and touch-up paint, instead of asking a body shop for a new quarter panel (and a new line of credit).
Step-by-Step: How to Stop Rust on a Car
Below is a DIY-friendly process that’s very similar to what pro guides and product manufacturers recommend for
exterior rust repair.
1. Inspect and Map Out the Rust
- Wash and dry the car so you’re not mistaking dirt for rust.
- Look carefully around wheel arches, rocker panels, door bottoms, trunk lid edges, and the roof near the windshield.
- Check underneath: frame rails, suspension mounting points, brake lines, and the exhaust.
Circle areas of concern with painter’s tape or snap pictures so you remember where to come back. If you see big
holes, soft metal you can push through, or heavy rust on structural parts, that’s a sign it’s time to involve a
professional shop or at least get an inspection.
2. Gather Your Rust-Repair Tools and Materials
For typical surface or small scale rust on body panels, you’ll usually need:
- Safety glasses, dust mask or respirator, and gloves
- Masking tape and masking paper or plastic
- Sandpaper (80–120 grit for heavy rust, 180–320 grit for smoothing, 600–1000 grit for final finish)
- A wire brush or wire wheel attachment
- Rust dissolver or rust converter (optional but helpful)
- Body filler (for small pits and shallow holes)
- Wax and grease remover (pre-paint cleaner)
- Automotive primer (preferably rust-inhibiting or epoxy)
- Color-matched automotive paint (spray can or touch-up system)
- Clear coat (for glossy, protected finish)
You can find DIY kits that bundle primer, color, and clear coat for your exact paint code, plus body filler and
sandpaper assortments designed for rust repair.
3. Mask and Prepare the Area
- Use masking tape and plastic or paper to cover nearby panels, trim, and glass.
- Leave extra room beyond the visible rust so you can feather the paint edge later.
- If you can, remove nearby trim pieces or badges to expose hidden rust under them.
Good prep makes the difference between “did you spray this in your driveway?” and “wow, that looks factory.”
4. Remove the Rust Completely
The goal is simple: no rust left behind. Any rusty metal you leave will keep spreading under your fresh paint job,
just slower and sneakier.
-
Sand or grind off the rust: Start with coarse sandpaper (80–120 grit) or a small grinding disc
to take the rust down to shiny metal. Work slowly and avoid digging grooves into the panel. -
Feather the paint edges: As you sand, taper the surrounding paint so there’s a smooth transition
from bare metal to existing paint. -
Deal with pits: For scale rust with pits, keep sanding and brushing until the loose rust is gone.
Deep pits may later be filled with body filler. -
Optional rust converter: On areas where it’s hard to remove every trace of rust, a rust converter
can chemically convert remaining rust into a more stable compound and create a paintable surface. Follow the
product’s directions closely.
5. Clean and Fill (If Needed)
Once the metal is bare (or as close as you can get), clean it thoroughly with wax and grease remover. This step
ensures primer sticks instead of sliding off on invisible oils.
If you’ve got shallow pits or small depressions:
- Mix body filler according to directions.
- Spread thin layers over the damaged area, slightly higher than the surrounding metal.
- Sand smooth with 180–320 grit once it cures, preserving the shape of the panel.
For actual holes or large rusted-out sections, DIY patch panels and fiberglass can work for cosmetic fixes, but
structural rust really calls for cutting out the bad metal and welding in new steel. That’s pro territory for most
people.
6. Prime, Paint, and Clear Coat
This is where things start looking like a car again, not a science project.
-
Prime the area: Use an automotive primer rated for bare metal or rust repair. Apply several light
coats, letting each flash off per directions. Sand lightly with 400–600 grit to smooth the surface. -
Apply base coat (color): Spray multiple thin coats of color-matched paint, moving the can in
steady passes and overlapping slightly. Allow each coat to tack up before the next. -
Add clear coat: Once the color is uniform, lay down clear coat in several light-to-medium coats
for shine and protection. -
Final wet-sanding and polishing (optional): After everything cures fully, you can wet-sand with
1000–2000 grit and buff to blend the repair into the surrounding paint.
7. When to Call a Professional
DIY rust repair is perfect for small surface rust, minor bubbling, and cosmetic fixes. But get a pro opinion if:
- Rust involves suspension mounting points, frame rails, or crossmembers.
- The rear subframe, control arm mounts, or rocker panels have visible holes.
- Brake lines or fuel lines show heavy corrosion.
- Rust keeps returning quickly in the same area.
Manufacturers and safety agencies classify serious corrosion in these zones as a potential safety hazard, which is
why some vehicles have corrosion recalls or extended warranties for frames and underbodies.
How to Prevent Rust From Coming Back
Once you’ve stopped rust on your car, your next mission is making sure it doesn’t reappear like a bad sequel. Rust
prevention is mostly about cleanliness, protection, and smart habits.
1. Wash the Undercarriage Regularly
Road salt, de-icing chemicals, and coastal air accelerate corrosion. Regularly washing the underside of your car
especially after winter storms or beach tripshelps remove salty residue before it can do damage.
2. Wax and Seal the Paint
A good wax job isn’t just about shine. Wax creates a sacrificial layer that helps protect the clear coat and paint
from moisture and contaminants. Many car-care guides suggest waxing every few months, or using modern ceramic
coatings for longer-lasting protection.
3. Repair Paint Chips and Scratches Quickly
Tiny rock chips are rust’s favorite entry points. Touch them up as soon as possible:
- Clean the chip.
- Use a rust remover or converter if you see bare, discolored metal.
- Apply primer, then touch-up paint, then clear coat.
It’s a small job that can save a big headache later.
4. Consider Undercoating or Rust-Proofing Treatments
In snow-belt states and salty environments, many owners swear by annual underbody treatmentseither wax-based
undercoating or lanolin/oil-based sprays. These products creep into seams and crevices, displacing moisture and
forming a barrier between metal and the elements.
Professional rust-proofing services often include:
- Washing and drying the undercarriage
- Spot-treating any existing rust
- Spraying undercoating on the frame, wheel wells, and floor pans
- Injecting cavity wax into rocker panels and body cavities
5. Park Smart and Store Smart
- Whenever possible, park in a garage or under cover.
- Avoid long-term parking on damp grass, dirt, or gravel that traps moisture.
- For stored vehicles, keep them clean, dry, and well-ventilated, and consider a breathable car cover.
Common Rust-Repair Mistakes to Avoid
-
Just painting over rust: Spraying color over rusty metal is like putting a bandage on a leaking
pipe. It hides the problem for a minute, but the rust keeps eating underneath. -
Not removing all loose rust: Scale and flakes left on the surface will keep flaking under your
filler and paint. -
Skipping primer: Primer helps paint bond and seals the metal. Going straight to color is asking
for poor adhesion and faster rust return. -
Using household paint or random spray cans: Automotive paints are engineered to flex, survive
UV, and handle weather. Interior wall paint isn’t. -
Ignoring structural rust: If rust is affecting the frame, suspension mounts, or brake lines,
don’t rely on DIY cosmeticsget a professional inspection.
Real-World Rust-Repair Experiences and Lessons Learned
Rust repair looks intimidating on paper, but once you talk to people who’ve actually done it, a few themes keep
popping up: patience, preparation, and knowing your limits.
Many drivers’ first experience with rust is those tiny bubbles that show up around the rear wheel arches. At first,
it’s easy to shrug and say, “It’s just cosmetic.” Folks on enthusiast forums and social media will tell you that’s
how they ended up with palm-sized holes a couple of winters later. What looked like a quarter-sized bubble turned
out to be the tip of the iceberg, with rust quietly spreading behind the paint and into the inner lip of the
fender.
The people who are happiest with their DIY rust repairs almost always describe taking more time than they planned.
They start with a Saturday project and end up spending the whole weekend sanding, feathering paint edges, cleaning
with wax and grease remover, re-masking, and re-spraying. By Monday, though, they have a repair that’s smooth to
the touch and nearly invisible unless you press your nose right up to the panel. The key detail in those success
stories is that they didn’t stop at “good enough” after the first round of sanding. They went back, felt the
surface with their fingers, and corrected little ridges and low spots before they ever opened a can of paint.
Another highly repeated lesson comes from drivers in snowy states and Canadian provinces: undercoating early is way
cheaper than fixing rot later. People who undercoat new or nearly new vehicles with wax-based or lanolin-based
products often report only light surface rust after many salty winters, while neighbors who skipped it are patching
rocker panels and arguing with inspectors. Yearly touch-ups in high-spray areas like wheel wells and the front
subframe become part of their fall routine, just like swapping to winter tires.
Then there are the “learned the hard way” brake-line and frame stories. It’s more common than it should be for
someone to crawl under their car after failing a safety inspection and realize a brake line has swollen with rust
or a frame rail has perforated near a suspension mount. In these cases, the owner’s biggest regret is ignoring
early warning signs: a flaky frame they could see without jacking up the car, or soft, scabby-looking rocker panels
they kept promising to “deal with next year.” Once rust has eaten deeply into structural components, DIY options
become very limited, and the conversation shifts from “how to stop rust” to “is this car worth saving at all?”
The most encouraging experiences come from people who mix DIY and professional help. They tackle small surface rust
spots, chips, and wheel-arch bubbles at home using sandpaper, converter, filler, and touch-up paint, gaining skill
and confidence along the way. But they don’t hesitate to pay a shop for welding in new panels, replacing rotted
rocker sections, or installing new brake and fuel lines when corrosion reaches critical areas. That hybrid strategy
lets them keep older cars going safely for many extra years without swallowing the cost of a full restoration.
Finally, nearly everyone who’s fought rust on a car agrees on this: prevention is way less stressful than repair.
Once you’ve put in hours grinding and sanding, the idea of a quick underbody rinse, a coat of wax, and fast touch-up
paint suddenly feels like a bargain. Rust isn’t something you eliminate forever, but with regular cleaning,
protective coatings, and timely fixes, you can keep it from turning your vehicle into a “rust bucket” long before
its mechanical parts are worn out.
Conclusion: Take Rust Seriously, Not Personally
Rust is not a judgment on you as a car ownerit’s just chemistry doing what chemistry does. The good news is you
can slow it down dramatically. Spot rust early, remove it thoroughly, seal and paint the metal, and then adopt
rust-prevention habits like washing the undercarriage, waxing the paint, and repairing chips quickly.
When you combine smart DIY rust repair on cosmetic issues with professional help for structural corrosion, you give
your vehicle a much longer, safer life. Your car may never be completely immune to rust, but it also doesn’t have
to become the next “rust bucket wreck” in a scary inspection photo.