Table of Contents >> Show >> Hide
- What “French Country Chic” Really Means (So Your DIY Has a Target)
- Shop Facebook Marketplace Like a French Antique Dealer (Minus the Beret)
- From “Used” to “Chic”: Prep Work That Makes the Finish Look Expensive
- Paint & Finish “Recipes” for French Country Chic
- The “Chic” Part: Styling Your Finished Piece So It Looks Collected, Not Crafted
- Three Facebook Marketplace Makeovers (With Specific, Doable Moves)
- Common Mistakes That Make French Country DIY Look “Crafty” Instead of “Chic”
- Quick Finish Checklist (Print This in Your Brain)
- Real-World “Experience” Lessons DIYers Learn Doing Facebook Marketplace French Country Flips
- Conclusion
Facebook Marketplace is basically a digital barn sale where the listings range from “vintage mirror” to
“couch with a mysterious vibe (bring a truck).” And hidden in that chaos is your French country chic dream:
furniture with good bones, a little age, and just enough “life experience” to look charming once you give it
the right makeover.
French country chic isn’t about turning your home into a themed restaurant called Le Baguette.
It’s about mixing rustic and refinedweathered finishes and soft colors, curvy silhouettes and natural textures,
antiques (or things that convincingly pretend to be antiques), and a space that feels collected over time.
This guide walks you from Marketplace hunt to final stylingwithout ending up with a piece that screams
“I watched one DIY video and panicked.”
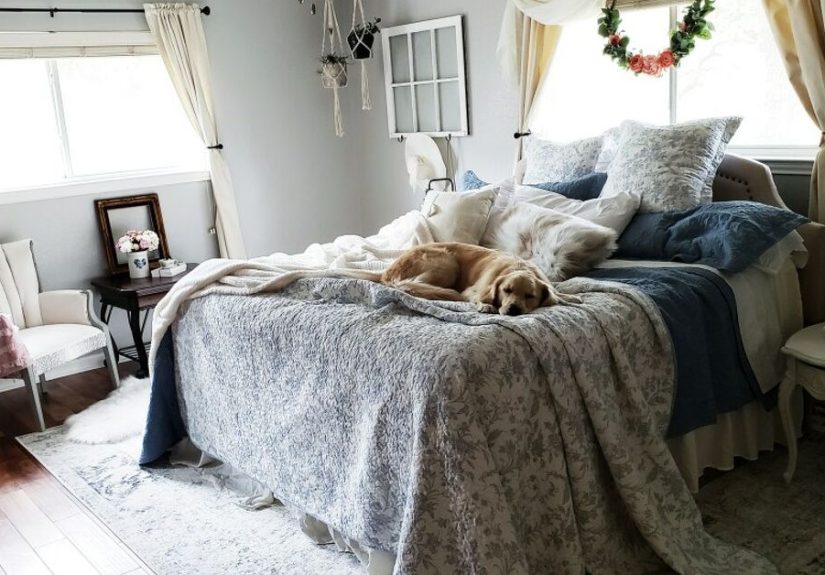
What “French Country Chic” Really Means (So Your DIY Has a Target)
French country style is often described as a blend of rustic and refined: relaxed, lived-in, and elegant without
being fussy. Think warm neutrals, soft blues, muted greens, weathered wood, antique-inspired furnishings,
and charming details that feel old-world but welcoming.
Key French country elements to aim for
- Soft, warm color palettes: creamy whites, oatmeal, pale gray, country blue, muted sage, and gentle taupes.
- Weathered finishes: distressed edges, rubbed corners, and layered patina that looks earned, not attacked.
- Curves and classic shapes: cabriole legs, scalloped aprons, cane, spindle backs, and furniture that isn’t boxy.
- Natural textures: linen, cotton, wicker, woven baskets, stoneware, and warm woods.
- Patterns with history: toile, ticking stripes, subtle floralsused thoughtfully (not wallpapering your life).
- Metal accents: iron, antique brass, and aged finishes that ground the softness.
The secret is balance: a refined piece (like a curvy dresser) gets rustic treatment (like a gently aged finish),
then is styled with soft textiles and a couple of imperfect vintage accents. If everything is distressed and
“shabby,” you drift away from French country and into “craft store aisle 7.”
Shop Facebook Marketplace Like a French Antique Dealer (Minus the Beret)
Marketplace success is 50% search strategy and 50% showing up before someone else who owns three sanding blocks
and a competitive spirit. Your goal is to find pieces with strong structure and good proportionsbecause paint can
fix a finish, but it can’t fix a collapsing drawer or a chair that wobbles like it’s practicing jazz.
Search terms that actually work
- Furniture types: “dresser,” “buffet,” “sideboard,” “console,” “nightstand,” “armoire,” “cabinet,” “vanity,” “table.”
- French country-friendly keywords: “curved,” “vintage,” “antique,” “provincial,” “cane,” “spindle,” “farm table,” “solid wood.”
- Great value code words: “needs TLC,” “painted,” “scratches,” “dated,” “grandma’s,” “moving sale.”
- Brand clues (sometimes): older Ethan Allen, Drexel, Thomasville, Henredon, or solid-wood basics from any era.
Quick inspection checklist (before you hand over money)
- Stability: push gently on corners; if it sways dramatically, you’re buying a project and a personality.
- Drawers and doors: do they open smoothly? Minor sticking is fine; broken runners can be a bigger fix.
- Smell test: heavy smoke or musty odors can be stubborn to remove.
- Water damage: swelling, bubbling veneer, or soft spots (especially on tops and bottoms).
- Veneer vs. solid wood: veneer is workable, but you’ll need gentle sanding and smart prep.
- Bug evidence: tiny holes, sawdust-like piles, or active pests are a “no thank you.”
Safety first: smart ways to buy and sell locally
If you’re meeting someone in person, choose a public, well-lit locationmany police departments and cities offer
“safe exchange zones.” Bring another person if you can, keep your personal info private, and trust your instincts.
For payments and messages, stay alert for common scam patterns like overpayment schemes, odd payment requests,
or pressure to move the conversation off-platform.
- Meet in public: police station parking lots, coffee shops, or other high-traffic areas.
- Bring backup: a friend or family member; at minimum, share your plan and location.
- Watch payment red flags: avoid suspicious overpayments or unusual “courier” links and requests.
- Get more photos: ask for closeups of damage and joints; if they refuse, consider it a clue.
From “Used” to “Chic”: Prep Work That Makes the Finish Look Expensive
The biggest difference between “French country charm” and “why is my paint peeling like a sunburn?” is prep.
Paint is not a magic spell. It’s more like a relationship: you have to do the groundwork, or it will leave you.
Step 1: Remove hardware and label everything
Take off knobs, pulls, hinges, and removable feet. Put screws in labeled bags. If you’re working on a dresser,
label drawers on the underside so you don’t end up playing “drawer roulette” later.
Step 2: Clean like you mean it
Furniture holds onto invisible grimepolish residue, kitchen grease, hand oils. Wash with a degreasing cleaner and
let it dry fully. If the piece feels slick or waxy, your paint may struggle unless you remove that residue.
Step 3: Light sanding (the glow-up, not the demolition)
For many paint jobs, you don’t need to sand to bare wood; you do need to scuff the surface so primer/paint can grip.
A light sanding with fine grit (often around 220) works well for smoothing and adhesion. Wipe away dust with a tack
cloth or damp rag afterward.
Step 4: Repair and refine the details
- Tighten joints: wood glue and clamps can revive wobbly chairs and legs.
- Fill dings: wood filler for deep scratches and dents; sand smooth once cured.
- Fix the top: if the surface is rough, spend extra time hereit’s the first thing people touch.
A quick (important) note about older paint and lead safety
If you’re working with older furniture or painted surfaces and you’re not sure what’s under the finish, be cautious:
disturbing old coatings can create hazardous dust. Public health guidance commonly recommends avoiding DIY removal
of lead-based paint and taking precautions to prevent exposureespecially around children and pregnant people.
When in doubt, consider professional lead-safe help or choose pieces that don’t require aggressive sanding or stripping.
Paint & Finish “Recipes” for French Country Chic
French country chic finishes are typically soft-matte, slightly aged, and touchablelike the furniture has a story,
but not a dramatic one. You have two common routes: chalk-style paint with wax, or a more traditional paint system
with primer and a protective topcoat. Both can look authentic if you do them intentionally.
Recipe 1: Classic Chalk-Style Paint + Wax (soft matte, easy charm)
- Paint: Apply thin coats. Let the first coat dry fully; add a second coat where coverage needs it.
- Distress (optional): Once dry, gently sand edges and high-touch spots (corners, drawer fronts) for natural wear.
- Wax seal: Rub in a clear wax (or lightly tinted wax) to protect and soften sheen. Buff to your preferred glow.
- Cure time: Waxed finishes can feel dry quickly, but they often take longer to fully curetreat gently at first.
Chalk-style paint is popular because it can be forgiving and gives that velvety, old-world finish. Wax adds protection
and a subtle depth that reads “antique shop,” not “freshly painted in the driveway.”
Recipe 2: Primer + Furniture Paint + Protective Topcoat (durable and polished)
- Prime strategically: Use a bonding primer when the surface is glossy, stained, or previously finished.
- Paint in thin layers: Brush for texture, roller for smoother finish, or spray for ultra-sleek results.
- Sand lightly between coats: Fine sanding between coats helps a smoother “pro” finish.
- Topcoat: Add a clear protective layerespecially for tabletops, coffee tables, and high-use furniture.
Many protective topcoats have recommended temperature and humidity ranges for best drying and adhesion. Translation:
if it’s extremely humid, your finish may take longer to cure and can feel tacky.
French country color ideas that rarely fail
- Creamy “linen” white: warm white that avoids the stark “hospital hallway” vibe.
- Country blue: soft and dustybeautiful on buffets, dressers, and cabinets.
- Muted sage or olive-gray: works with wood tones and antique brass, and feels timeless.
- Greige (gray-beige): modern-friendly but still soft and classic.
How to distress without looking like you fought the furniture
The most believable distressing happens where real life happens: corners, edges, drawer pulls, and feet. Avoid random
sanding patches in the middle of flat surfaces (unless you’re going for “my cat redecorated”). Use fine to medium grit
and build slowly. You can always add more wear; you can’t easily un-sand your enthusiasm.
The “Chic” Part: Styling Your Finished Piece So It Looks Collected, Not Crafted
French country chic is half finish and half styling. The right hardware, textiles, and accents can make a simple
Marketplace piece look like it came from an estate sale with a handwritten tag that says, “circa forever.”
Swap hardware for instant French country character
- Antique brass or aged gold: warm and traditional, especially on creamy whites and muted blues.
- Porcelain knobs: classic, cottage-friendly, and great for dressers or nightstands.
- Glass knobs (sparingly): charming on a small piece, but don’t turn every drawer into a disco ball.
- Iron pulls: add contrast and a rustic grounding note, especially in kitchens or entryways.
Add textiles that whisper “Provence”
Linen, toile, ticking stripes, and soft florals are French country staples. A simple way to add toile without
overwhelming the room: line drawers with toile paper, use toile pillows on a neutral chair, or add a small toile
lampshade. If you use toile, let it be the stardon’t pair it with three competing patterns unless you enjoy chaos.
Use the “three textures” rule
To make a piece look styled, layer three textures nearby: for example, a woven basket, a ceramic vase, and a linen
runner. The mix keeps the look warm and dimensionalvery French country, very “I meant to do this.”
Three Facebook Marketplace Makeovers (With Specific, Doable Moves)
Makeover #1: The basic pine dresser → French country buffet
What you buy: a sturdy pine dresser with flat drawer fronts (often underpriced because it looks “plain”).
French country plan: paint + hardware + subtle aging + styling.
- Paint in a warm linen white for a soft, antique base.
- Lightly distress drawer edges and cornerswhere hands would naturally wear it down.
- Add antique brass cup pulls for a classic, collected look.
- Line drawers with toile paper for a hidden “French wink.”
- Style the top with a vintage mirror, a stoneware vase, and a small stack of cookbooks.
Makeover #2: Ladder-back dining chairs → relaxed French country set
What you buy: mismatched wooden dining chairs that are sturdy but visually dated.
French country plan: unify the finish, soften the look, upgrade the seats.
- Tighten joints; glue and clamp if needed so the chairs feel solid.
- Paint chairs a muted gray-beige or soft cream to unify different wood tones.
- Lightly sand edges for a gently worn look (not a “shredded” look).
- Reupholster seats in ticking stripe or a subtle floral for that countryside charm.
- Pair with a natural wood table for contrastFrench country loves a mix of painted and natural finishes.
Makeover #3: Small side table → French country nightstand
What you buy: a little side table with one drawer and slightly curvy legs.
French country plan: elevate with color and a single “antique” detail.
- Paint in a dusty country blue for soft personality.
- Add one special detail: a small stencil on the drawer front, an aged glaze, or a carved appliqué.
- Swap to a porcelain knob or aged brass pull.
- Style with a linen lampshade, a small tray, and one lived-in booknot an entire library.
Common Mistakes That Make French Country DIY Look “Crafty” Instead of “Chic”
- Over-distressing: if every edge is sanded down to the wood, it looks theatrical, not natural.
- Too-cool whites: bright, icy whites can read modern; French country usually looks warmer and softer.
- Skipping prep: greasy surfaces and glossy finishes are the fastest route to peeling paint.
- Busy styling: French country is layered, but it still breathes. Leave negative space.
- Everything matches: the charm comes from a mixpainted wood + natural wood + iron + linen, not a full set.
Quick Finish Checklist (Print This in Your Brain)
- Buy the right bones: sturdy, classic shape, fixable flaws.
- Clean thoroughly and let dry.
- Lightly sand for adhesion; remove dust.
- Repair, fill, and smooth where needed.
- Prime if necessary (especially glossy or stained surfaces).
- Paint thin coats; sand lightly between coats if going for a smoother finish.
- Distress gently and logically.
- Seal with wax or topcoat; respect cure time before heavy use.
- Upgrade hardware and style with textiles + natural textures.
Real-World “Experience” Lessons DIYers Learn Doing Facebook Marketplace French Country Flips
Let’s talk about the part people don’t always put in the pretty reveal photos: the learning curve. Even if you do
everything “right,” Marketplace DIY has a way of humbling you in very specific, very educational ways. Here are
common experiences DIYers report (and how to handle them) when taking Marketplace finds to French country chic.
1) The listing photos are… optimistic
You show up expecting “minor wear,” and discover a top that looks like it hosted a tap-dancing competition.
The key is not to panic. Most cosmetic damage is fixable: shallow scratches can be filled, sanded, and painted;
deeper gouges may need a stronger filler and extra smoothing. The experience lesson: always budget time
for surprise prep. French country finishes actually forgive a lot because a gentle patina is part of the look
but you still want the surface smooth enough that it feels intentional, not accidental.
2) The “mystery shine” problem (aka: Why won’t my paint stick?)
Many secondhand pieces have layers of polish, wax, or cleaning products that leave an invisible slick film.
DIYers often learn this the hard way when paint beads up or scratches off too easily. The fix is almost always the same:
clean thoroughly, scuff sand, and use a bonding primer when needed. The experience lesson: prep is your
insurance policy. It’s not the glamorous step, but it’s the step that keeps your French country dresser from
turning into a “distressed” piece… for the wrong reasons.
3) Distressing is easystopping is the skill
A lot of DIYers start distressing and think, “Ooo, satisfying,” and then suddenly the piece looks like it survived
three centuries and a bar fight. The French country approach is gentle: a little wear on corners and edges, subtle
rub-through where hands naturally touch, and maybe one or two spots that hint at layers. The experience lesson:
distress in rounds. Step back after each round, look from across the room, and stop while you still
think, “Maybe I could do a tiny bit more.” That’s usually the perfect stopping point.
4) The cure-time trap
DIYers often finish a piece at night and want to load it up with baskets, lamps, and life by breakfast.
Then the top sticks, dents, or develops a weird tacky feeling. Many finishes feel dry before they are fully cured.
Waxed finishes, in particular, may need extra time before they reach their tougher, more resilient stage. The experience
lesson: handle like a fresh manicure. Use the piece gently at first, avoid heavy objects, and don’t
scrub it right away.
5) Styling is where French country “clicks”
DIYers often say the paint job looked “fine” until they added the right hardware, a linen runner, and one good vintage
accessorythen suddenly it looked expensive. French country chic is a total look: warm metal, soft textiles, natural
textures, and a little time-worn character. The experience lesson: save budget for the finishing touches.
A $12 set of aged brass pulls and one thrifted ceramic pitcher can do more than another layer of paint.
If you’re new to this, take comfort: every DIYer has at least one moment where they stare at a half-sanded table and
wonder if they’ve made a terrible life choice. Then the finish comes together, the hardware goes on, and suddenly you
have a French country piece that looks like it belonged to someone who owns a chateau (or at least a really charming
toaster). That’s the magic of Marketplace DIY: a little grit, a little vision, and a lot of satisfaction.
Conclusion
Turning Facebook Marketplace finds into French country chic DIY is less about fancy supplies and more about smart choices:
buy sturdy pieces, prep carefully, use soft colors and gentle aging, and finish with warm hardware and natural textures.
You’re not just saving moneyyou’re creating furniture with personality and a look that feels timeless.