Table of Contents >> Show >> Hide
- What Is Jelly Cube Slime?
- Quick Safety Notes (Read This Before You Craft)
- Supplies You’ll Need
- How to Make Jelly Cube Slime: 11 Steps
- Troubleshooting (Because Slime Has Moods)
- Storage and Cleanup
- Fun Variations (Same 11 Steps, New Personalities)
- 500-Word Experience Section: The “Stuff People Learn After Batch #1” Stories
- Experience #1: “I added activator and it turned into a sad rubber ball.”
- Experience #2: “My cubes looked perfect… then my slime disappeared overnight.”
- Experience #3: “It was super sticky until I stopped touching it every five seconds.”
- Experience #4: “We made it at a party and the cleanup was… memorable.”
- Experience #5: “The texture was best on day two.”
- Conclusion
Jelly cube slime is the sensory craft that feels like it has a tiny bubble-wrap party happening inside it.
It’s stretchy like classic slime, but packed with soft “cubes” that pop and squish when you squeeze them.
The best part: you can make it at home with a no-powdered-borax approach, a few common supplies,
and a little patience (plus a willingness to accept that your kitchen may briefly look like a craft store exploded).
What Is Jelly Cube Slime?
“Jelly cube slime” is usually a clear or lightly tinted slime base mixed with small sponge cubes.
Those cubes soak up some slime, get extra squishy, and create that satisfying pop-pop texture when you press them.
Some people try water beads for a similar “jelly” feel, but sponge cubes are the safer, easier, less-drama option for most homes.
Quick Safety Notes (Read This Before You Craft)
- Not food: Don’t taste it. Keep it away from little kids and pets.
- Hands first: Wash hands before/after play. Slime loves clean hands the way cats love ignoring you.
- Skin check: If you have sensitive skin, wear gloves or take breaks. Stop if irritation happens.
- Avoid powdered borax recipes: Many internet recipes use stronger activators. This guide sticks to a gentler approach.
- Skip water beads: Water beads can be dangerous if swallowed or put in ears/nose, and they can expand. Stick with sponge cubes.
Supplies You’ll Need
Think of this as your “slime mise en place.” (Yes, we’re fancy now.)
Core ingredients
- Clear school glue (PVA glue): Clear glue gives the best jelly-cube look.
- Baking soda: Helps the slime set up when used with the right activator.
-
Contact lens solution: Must include boric acid or sodium borate on the label to work as an activator.
(If yours doesn’t, it may not activate.) - Water: Optional, for thinning and clarity.
- New, clean sponge: A plain soft kitchen sponge (no soap, no scrubby side) or plain melamine foam (no added cleaners).
Optional “make it extra” add-ins
- Food coloring (or washable liquid watercolor)
- Glitter (if you enjoy sparkles living in your home forever)
- Glycerin (a few drops can boost gloss and stretch)
- Slime-safe scent (keep it mild; skip essential oils if skin is sensitive)
Tools
- Mixing bowl
- Spoon or spatula
- Measuring spoons
- Scissors or a plastic knife (for cutting sponge)
- Airtight container or zip-top bag (for storage)
How to Make Jelly Cube Slime: 11 Steps
-
Step 1: Protect your workspace.
Lay down wax paper, a silicone mat, or a trash bag you can wipe. Slime is friendly, but it is also clingy. -
Step 2: Wash and dry your hands.
This sounds boring until you realize “mystery crumbs” instantly turn your slime into “confetti you didn’t ask for.” -
Step 3: Cut your sponge into cubes.
Use a brand-new plain sponge. Remove any scrubby layer. Cut into small cubesabout
¼ to ½ inch is a sweet spot. Smaller cubes feel more “crunchy,” bigger cubes feel more “pop.” -
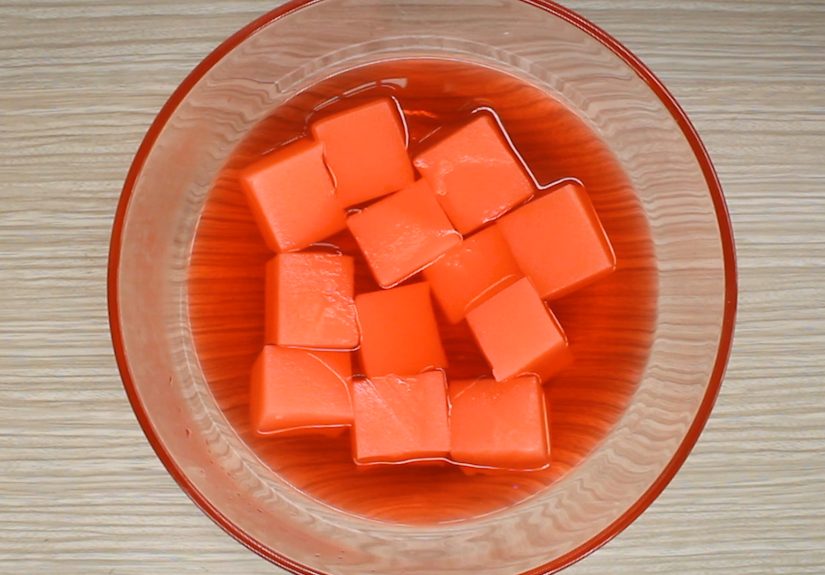
Step 4 (Optional): Tint the cubes for that jelly look.
In a cup, mix a few tablespoons of water with 1–2 drops of food coloring. Toss in the sponge cubes and gently stir.
Let them soak for a minute, then squeeze out excess liquid. (Yes, it’s oddly satisfying.) -
Step 5: Pour glue into your bowl.
Start with about ½ cup clear glue. You can scale up later, but first batches are like first pancakes:
you learn a lot. -
Step 6: Add a splash of water (optional, but helpful).
Add 1–2 tablespoons water if you want a clearer, stretchier base. Stir until smooth.
(Too much water can make activating slowerso keep it modest.) -
Step 7: Mix in baking soda.
Add ½ teaspoon baking soda and stir thoroughly. No dry pocketsthose turn into weird gritty surprises later. -
Step 8: Add color and sparkle (optional).
Add a drop or two of coloring, a pinch of glitter, or a few drops of glycerin. Mix well.
If you add glitter, accept your new identity: “Person who owns glitter now.” -
Step 9: Activate slowly with contact lens solution.
Add 1 teaspoon contact solution, stir for 10–15 seconds, then repeat in small increments.
The mixture will start pulling away from the bowl and thickening into slime. Go slowtoo much activator can make it rubbery. -
Step 10: Knead until smooth.
Pick up the slime and knead it for 1–2 minutes. If it’s sticky, add a few drops of contact solution and knead again.
If it feels stiff, knead longer first before adding anythingsometimes it just needs time to come together. -
Step 11: Fold in your “jelly cubes.”
Add sponge cubes a little at a time and gently knead them in.
Start with a small handful. If you add too many cubes, they can absorb slime over time and leave the base feeling firmer.
Once mixed, squeeze slowly to feel that jelly-cube pop. Congratulations: you made the craft equivalent of satisfying bubble tea.
Troubleshooting (Because Slime Has Moods)
If your slime is too sticky
- Knead longer firstwarm hands can improve texture.
- Add contact solution a few drops at a time, kneading between additions.
- Make sure your contact solution actually contains the needed activating ingredients on the label.
If your slime feels rubbery or stiff
- You may have added too much activator. Try kneading in a small drizzle of glue to loosen it.
- Add cubes more gradually next timeextra cubes can make the slime feel firmer as they absorb.
- Let it rest in a sealed container for a few hours; texture often improves.
If your cubes “drink” the slime overnight
- This is normalsponges absorb. Use fewer cubes next time.
- Refresh by kneading in a little more clear glue (then re-activate slowly if needed).
If your slime looks cloudy
- Too much mixing can add bubbles. Let it rest in a sealed container for 24–48 hours to clear up.
- Using clear glue (and not overdoing water) helps.
Storage and Cleanup
Store jelly cube slime in an airtight container or zip-top bag. Keep it away from heat and sunlight.
If it starts to smell weird, looks moldy, or changes color in a suspicious way, toss it and make a fresh batch.
For cleanup, warm water and soap usually work. If slime sticks to fabric, chill it (ice helps), then gently peel and wash.
Fun Variations (Same 11 Steps, New Personalities)
- Galaxy Jelly Cubes: Black slime base + silver glitter + purple/blue cubes.
- Watermelon Pop: Pink base + green cubes (or green base + pink cubes).
- Clear “Ice” Cubes: Keep the base clear and use white sponge cubes for a frosty look.
- ASMR Crunch: Use smaller cubes and a thicker base for more “pop” per squeeze.
500-Word Experience Section: The “Stuff People Learn After Batch #1” Stories
If you’ve ever watched someone make slime online and thought, “Wow, that looks easy,” welcome to the club.
Batch #1 is where you collect your most valuable slime wisdomusually in the form of “Oops.”
Here are the most common real-life moments people run into when making jelly cube slime, plus what they do next time.
Experience #1: “I added activator and it turned into a sad rubber ball.”
This happens when activator goes in too fast. A lot of first-timers pour, stir twice, and panic.
The fix is boring but powerful: slow additions and patience kneading.
Many crafters learn to treat activator like hot sauceeasy to add more, annoying to undo.
If it does go rubbery, the usual move is to knead in a little glue to soften it,
then re-activate gradually only if it becomes too sticky.
Experience #2: “My cubes looked perfect… then my slime disappeared overnight.”
Sponge cubes are thirsty. They soak up the slime base over time, which is what makes them feel “jelly.”
But if you add a mountain of cubes, they’ll absorb so much that your slime can feel firmer the next day.
People who love the crunch often adjust by doing one of two things:
(1) using fewer cubes, or (2) making a slightly larger batch of base slime so there’s extra to share.
A common trick is to keep a tablespoon or two of plain clear slime base in a separate container,
then mix it in later if the texture tightens.
Experience #3: “It was super sticky until I stopped touching it every five seconds.”
Slime likes commitment. If you keep poking it while it’s half-activated, it clings like it’s auditioning for a role as tape.
People who get the best texture usually mix until it starts pulling from the bowl,
then knead continuously for a full minute or two before deciding it needs more activator.
Warm hands also change the feel, so the slime that seems sticky in the bowl can improve once it’s kneaded.
Experience #4: “We made it at a party and the cleanup was… memorable.”
Jelly cube slime is awesome for groups, but the winning party strategy is simple:
set up a “slime station” (wipes, paper towels, a trash bag, and a bowl of warm soapy water).
People who plan ahead also label containers with names and colorsbecause two blue slimes in identical cups
can start a friendship-ending debate faster than you’d think.
Experience #5: “The texture was best on day two.”
This is surprisingly common. Letting slime rest in an airtight container can improve stretch and clarity,
and the cubes get even squishier as they absorb more base. A lot of slime fans intentionally make jelly cube slime
a day before they want to play with it, then do a quick “refresh knead” right before squeezing and popping it.
Bottom line: the first batch teaches you how your ingredients behaveyour glue brand, your contact solution, your cube size,
and even your room temperature. Once you’ve done it once, batch #2 feels easier, cleaner, and way more satisfying.
And yes, you’ll still find a rogue sponge cube on the floor later. It’s basically a rite of passage.
Conclusion
Jelly cube slime is a simple, high-reward DIY: a clear slime base, sponge cubes, and a slow-and-steady activation process.
Follow the 11 steps, start small, and adjust like a slime scientist. When you nail the texture, you get a stretchy slime
with poppable cubes that feels equal parts relaxing and ridiculously fun.