Table of Contents >> Show >> Hide
- Why an Amiga and a Modern TV Don’t Naturally Get Along
- The Traditional Fixes: External Scalers, Converters, and the “Why Is This So Expensive?” Phase
- The Plot Twist: HDMI from Inside the Amiga (Thanks, Raspberry Pi)
- What You Gain: Pixel-Perfect Output, Lower Drama, and Easier Modern Life
- Compatibility: Which Amigas Can Join the HDMI Party?
- Internal HDMI vs External Upscaler: A Quick Reality Check
- A Modern Twist: “New Amiga” HDMI Exists… But It’s a Different Thing
- Practical Tips for a Happy HDMI Upgrade
- So Why Does This Upgrade Feel So “Right”?
- Real-World Experiences: What It’s Like Using an HDMI-Equipped Amiga (500+ Words)
- Conclusion: The Amiga Still Has Tricks Left
If you’ve ever tried to plug a classic Commodore Amiga into a modern TV, you’ve learned a timeless truth:
time travel is real, and it’s powered by “No Signal.”
The Amiga’s video output was a flex in its daysharp RGB, clever display tricks, and graphics that famously found their way into real-world video
production. But today’s flat panels and capture gear tend to look at 15 kHz-era signals the way your phone looks at a floppy disk: with polite confusion.
HDMI is the modern default, and that’s where the fun begins.
Enter an unexpectedly elegant hack: a Raspberry Pi daughterboard setup that taps the Amiga’s video at the source and spits out clean, digital HDMI.
It’s the kind of upgrade that feels slightly illegal (it’s not), slightly magical (it is), and extremely satisfying when your Workbench boots up on a 4K screen.
Why an Amiga and a Modern TV Don’t Naturally Get Along
Classic Amiga models were built for the display ecosystem of the late ’80s and early ’90sthink CRT monitors, analog standards, and signals that
prioritize compatibility with the era’s broadcast and home video norms. Many Amigas output RGB that’s gorgeous on the right hardware, but the timing
and scan rates are often outside what modern TVs expect.
Modern displays typically prefer “computer-like” progressive signals and standardized HDMI timings. Meanwhile, vintage machines love quirky modes,
non-standard refresh behavior, and resolutions that were never designed to survive the journey into a 65-inch living room panel with motion smoothing
turned on “Sports Stadium.”
So the usual solutions involve some kind of translation layer: convert analog to digital, scale it, deinterlace it (sometimes), and persuade your TV
that yes, this is video, not a cry for help.
The Traditional Fixes: External Scalers, Converters, and the “Why Is This So Expensive?” Phase
The classic route is an external converter or upscaler. These devices take in retro-friendly signals (often RGB/SCART, component, composite, or S-Video),
and output HDMI in a format modern displays like. High-quality options can look fantastic and keep your Amiga unmodified.
For example, modern retro-focused video processors emphasize low-latency output, strong deinterlacing options, and scaling modes designed to preserve
crisp pixels (instead of smearing them into a watercolor). Some even provide features like automatic sampling/phase handling and standardized HDMI timings
aimed at broad display compatibility.
The upside: you don’t need to open your Amiga, you can swap the scaler between systems, and you get a “universal adapter” for retro video life.
The downside: cost can climb quickly, and you’re still converting analog signalsmeaning cable quality, noise, and sync quirks can become part of the adventure.
Which is why an internal HDMI pathespecially one that grabs the Amiga’s video digitally before it becomes analoghas such a strong “ohhhh, that’s clever”
appeal.
The Plot Twist: HDMI from Inside the Amiga (Thanks, Raspberry Pi)
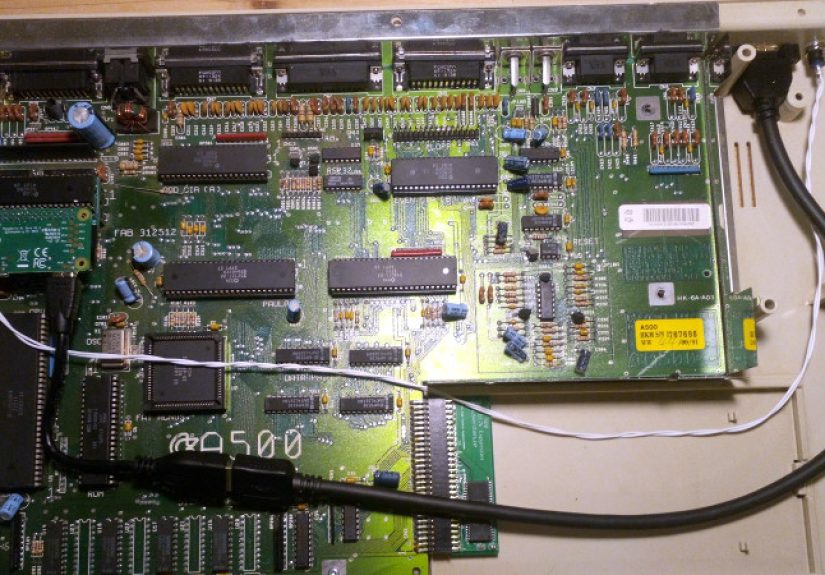
The headline idea is simple: use a Raspberry Pi (often a Pi Zero-class board) as a tiny, purpose-built video processor. A specialized daughterboard
taps the Amiga’s video signals directly from the chipsetparticularly around the Denise chip on OCS/ECS-era machinesand routes those signals into the Pi,
which then outputs HDMI.
In other words, you’re not asking an external box to “interpret” a decades-old analog output. You’re capturing the Amiga’s video closer to where it’s born,
then generating a clean HDMI signal from that data. The result is often described as “pixel-perfect,” because it’s sampling the picture with tight timing control
rather than re-scaling a noisy analog feed after the fact.
The specific approach highlighted in the well-known retro hardware write-up centers on an upgrade designed by a community developer (c0pperdragon), using
a Raspberry Pi Zero and the RGBtoHDMI software ecosystem to render the Amiga’s graphics through the Pi’s HDMI output.
What “RGBtoHDMI” Actually Means (And Why It’s a Big Deal)
RGBtoHDMI isn’t just “a converter.” It’s a project built around extremely accurate sampling of oddball retro video formats. The typical architecture combines:
a Raspberry Pi Zero, a small “HAT” board (often with a CPLD for timing/sampling help), and custom firmware that does the heavy lifting with precision.
The “secret sauce” is that it’s built to handle non-standard video timingsexactly the kind of thing that makes vintage computers vintage. It was originally
associated with other classic systems, but it’s been extended through profiles and hardware adapters to support many machines.
In the Amiga-focused daughterboard approach, the goal is the same: feed the Pi the right signals, keep timing stable, and let the Pi produce HDMI output that
modern displays can digest without choking.
Is There FPGA/CPLD Involved?
Sometimes yes, sometimes “just enough logic to behave like yes.” The broader RGBtoHDMI ecosystem commonly uses a small CPLD on the interface board to assist
with sampling and timing.
But the Amiga daughterboard highlighted in the classic write-up is notable because the design discussion emphasizes that it can be done with simpler supporting
logicenough to prepare signals for the Piwhile still leveraging the RGBtoHDMI software approach on the Pi side.
Translation: the “brains” are primarily in the Pi firmware/software stack, while the adapter’s job is to present clean, correctly-timed inputs. The exact
implementation can vary by board revision and by which Amiga model you’re targeting.
What You Gain: Pixel-Perfect Output, Lower Drama, and Easier Modern Life
A good HDMI mod isn’t just about “getting a picture.” It’s about getting a picture you actually want to look atsharp, stable, and faithful to the original
pixel grid. When you capture digitally (or as close to digitally as practical), you reduce the usual analog headaches: noise, cable quality roulette, and the
occasional “why is the left side of the screen slightly haunted?”
Practically, that means:
- Sharper Workbench text that looks like it was meant to be read by human eyes in this century.
- Cleaner capture and streaming potential (because HDMI plays nicely with modern capture devices).
- Low-latency feel that matters for games and demos (the classic write-up highlights low latency as a key appeal).
- A reversible path in many buildsparticularly compared with permanent case modsdepending on the exact adapter and how you route the HDMI connection.
Compatibility: Which Amigas Can Join the HDMI Party?
This is where retro projects become retro projects: everything is possible, but not always equally convenient.
OCS/ECS-era models (Amiga 500/500+ and friends)
Many of the most popular daughterboard-style solutions focus on Amiga models that use a socketed Denise chip in a DIP form factor. That makes it easier to
design a “between-the-chip-and-the-socket” pickup board and keep installation relatively straightforward for experienced hobbyists.
Community notes around the RGBtoHDMI ecosystem also point to expanded support for different color depths over time, reflecting ongoing improvements and tuning.
Amiga 600 and “Why Are You Like This?” form-factor issues
The Amiga 600 complicates things because its Denise chip uses a different package, which often requires specialized pickup approaches. The project documentation
discusses solutions involving adapters or designs that may require more hands-on work depending on the board approach.
So, yes, HDMI is possible, but the “plug-and-play-ish” experience depends heavily on which specific board design you choose and whether it targets your exact chipset.
Big-box Amigas (A2000/A3000 and video-slot life)
Big-box machines introduce a different advantage: some have a video slot that can be used for internal capture/output boards. There are projects that plug into
the video slot and use a Raspberry Pi Zero to process the Amiga’s display in real time and provide HDMI output.
As always, there are caveatscertain chipsets, resolutions, and color depths can impose limits depending on the board and the Amiga model. Some documentation
explicitly notes partial support scenarios and constraints tied to chipset differences.
Internal HDMI vs External Upscaler: A Quick Reality Check
If you’re deciding between a Raspberry Pi daughterboard approach and an external scaler, here’s the honest trade-off:
Choose the internal Raspberry Pi daughterboard path if you want:
- Maximum sharpness with a “pixel-perfect” vibe.
- Cleaner modern workflows (HDMI monitors, HDMI capture, fewer adapters).
- A neat, integrated setup that feels like the Amiga got a secret 2026 upgrade.
Choose an external scaler if you want:
- No internal modifications (and the comfort of leaving vintage plastics unbothered).
- One device for many systems (Amiga today, something else tomorrow).
- Broad input flexibility (composite/S-video/RGB/component, depending on the scaler).
There isn’t a universal “best.” There’s only what matches your tolerance for tinkering, your budget, and whether you enjoy saying things like
“timing adjustment” for fun.
A Modern Twist: “New Amiga” HDMI Exists… But It’s a Different Thing
It’s worth separating two meanings of “Amiga with HDMI”:
- Original hardware upgraded (like the Raspberry Pi daughterboard/RGBtoHDMI approaches).
- Modern recreations/emulation boxes built to look and feel like an Amiga, but running on modern internals.
For example, recent coverage of a full-size Amiga-style remake highlights a modern HDMI-equipped system built around contemporary hardware and emulation,
complete with preinstalled games and USB-loading support. It’s nostalgia with convenience baked injust not the same as upgrading the actual original machine.
If your goal is “play Amiga games on HDMI with minimal fuss,” those modern devices can be compelling. If your goal is “make my real Amiga speak fluent HDMI,”
the daughterboard route is where the magic lives.
Practical Tips for a Happy HDMI Upgrade
Without turning this into a solder-scented epic, here are the practical considerations that matter most before you buy parts or pick a board:
- Know your chipset and model. OCS/ECS vs AGA changes the signal landscape, and not every adapter targets every configuration.
- Plan your Pi choice. Many builds use a Pi Zero-class board, and RGBtoHDMI releases have included official Pi Zero 2 W support in stable updates.
- Decide on “internal HDMI port” vs “cable out.” Some external-solution notes discuss routing signals via ribbon cable that can carry power too, avoiding extra supplieshandy if you want flexibility.
- Keep reversibility in mind. Many enthusiasts prefer upgrades that can be removed later without permanent case surgery.
- Think about capture/streaming. If you want to record demos or stream retro sessions, native HDMI output can simplify your setup dramatically.
The best part of this ecosystem is that it’s community-driven: documentation evolves, board revisions improve reliability, and compatibility expands as people test
real machines (and discover new ways for old timing signals to surprise them).
So Why Does This Upgrade Feel So “Right”?
Because it respects what the Amiga was: a machine with a reputation for strong visuals, clever design, and a community that refuses to let it fade quietly into
museum status. This HDMI approach doesn’t replace the Amiga experienceit translates it, cleanly, into the language modern displays understand.
It’s also a perfect example of retro computing culture at its best: practical, open, and slightly obsessed with doing things properly. Not “close enough.”
Not “it technically works if you squint.” Properly.
Real-World Experiences: What It’s Like Using an HDMI-Equipped Amiga (500+ Words)
People who go down the “Raspberry Pi daughterboard HDMI” path often describe the first successful boot as a tiny personal victory parade. Not because it’s
impossible to get an Amiga on a modern screenexternal scalers have done that for yearsbut because it feels like the machine has been upgraded without losing
its identity. You still hear the familiar drive sounds (or the modern storage equivalent), you still get the same Workbench vibe, but now it’s presented with
a crispness that doesn’t require a CRT, a stack of adapters, and a prayer.
One common “aha” moment is Workbench text. On a typical analog-to-HDMI chain, fine fonts can look slightly soft depending on the scaler, the sampling phase,
and how your TV handles sharpening. With a pixel-perfect style output, the edges look more deliberateless like a photo of a screen and more like the screen
itself. If you’re the kind of person who enjoys arranging icons into suspiciously perfect grids, this is basically an emotional support feature.
Games and demos are where the upgrade becomes instantly obvious. Scrolling backgrounds and finely dithered artwork are a great stress test for any conversion
pipeline. Users frequently note that clean digital output makes these effects look “as intended,” especially on modern panels that can otherwise amplify noise
or misinterpret sync. And because low latency is part of the appeal, action-heavy titles tend to feel responsive rather than “floaty,” which matters more than
people expect until they try it.
Another practical win: capture and sharing. Retro enthusiasts love documenting their builds, recording gameplay, or showing off a newly discovered demo that
somehow squeezes more out of a machine than physics should allow. HDMI output generally plays nicer with modern capture devices than analog chains do, so the
path from “Amiga screen” to “video file” can be much simpler. That simplicity also reduces the number of variables when troubleshooting. If your picture looks
wrong, you’re less likely to spend three hours discovering the problem was a bargain-bin adapter cable that was manufactured from sadness.
There’s also a subtle lifestyle shift: you stop treating “using the Amiga” like a special event that requires assembling a temporary display shrine.
Instead, it becomes something you can do casuallyboot it up, tinker for 20 minutes, and shut it downbecause it’s now compatible with the same monitor or TV
you already use. That convenience is exactly why some people pick internal HDMI mods instead of (or in addition to) external scalers: it makes the Amiga feel
present, not preserved.
Finally, many hobbyists enjoy that this upgrade sits at the intersection of old and new in a very satisfying way: an ’80s computer sending video through a
tiny modern single-board computer that’s acting like a translator. It’s not trying to “modernize the Amiga into something else.” It’s just letting the Amiga
be the Amigaonly now it can show off on modern screens without needing a time machine or a broadcast monitor rescued from a TV station basement.
Conclusion: The Amiga Still Has Tricks Left
“Amiga now includes HDMI” sounds like a punchlinelike someone duct-taped a modern port onto a beloved classic and hoped for the best. But the Raspberry Pi
daughterboard approach is smarter than that. It’s a thoughtful, community-built solution that respects the machine’s original strengths, solves a real modern
usability problem, and delivers a result that feels surprisingly polished.
Whether you choose an internal HDMI upgrade or an external scaler, the bigger story is the same: the Amiga isn’t just retroit’s still actively evolving in
the hands of people who care. And honestly, that might be the most Amiga thing of all.