Table of Contents >> Show >> Hide
- 1) Understand the Two Temperatures That Matter: Stone (Floor) vs. Air (Dome)
- 2) Preheat Longer Than You Think… Then Verify Like a Pro
- 3) Dough That Loves High Heat (and Doesn’t Betray You)
- 4) Stretching & Shaping: Thin Center, Protected Rim
- 5) Mise en Place: The Backyard Pizza Station That Saves Your Sanity
- 6) Launching: The 10-Second Skill That Changes Everything
- 7) Bake & Turn: The Rhythm That Prevents Burning
- 8) Toppings: Less Moisture, More Magic
- 9) Troubleshooting: Fix the Problem, Not Your Entire Personality
- 10) Maintenance & Safety: Keep the Oven Fun (and Keep Your Eyebrows)
- Conclusion: Small Oven, Big Results
- Real-World Outdoor Pizza Oven Experiences (Because Theory Doesn’t Feed a Crowd)
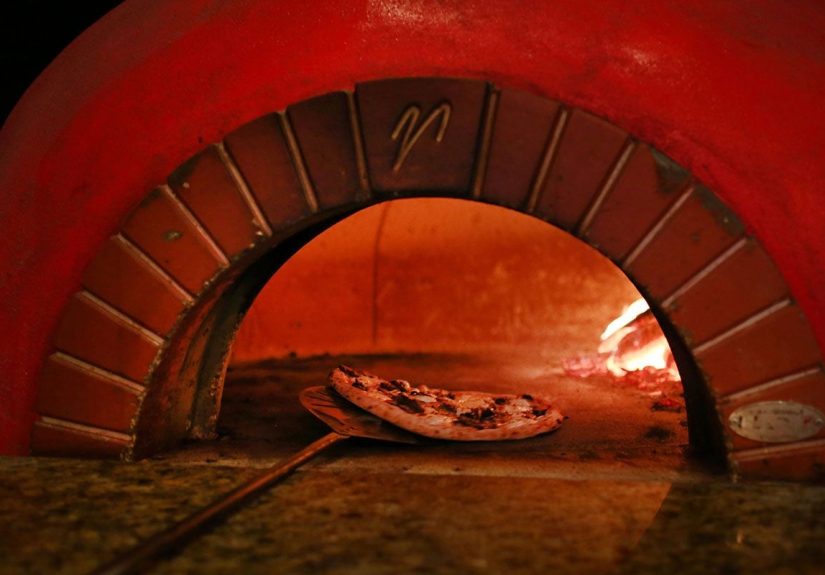
Outdoor pizza ovens are basically time machines: you start in your backyard, blink twice, and suddenly you’re in Naples
arguing (lovingly) about “leoparding” on the crust. The catch? These ovens cook so fast that they will absolutely roast
your mistakes in under 90 secondssometimes with a side of smoke and regret.
The good news: once you understand a few core principlesheat management, dough behavior at high temps, and the sacred
“launch and turn” rhythmyou’ll go from “Why is the bottom charcoal and the top raw?” to “Who invited the neighborhood?”
This guide breaks down practical, real-world techniques for getting consistently great pies with gas, wood, or hybrid outdoor ovens.
1) Understand the Two Temperatures That Matter: Stone (Floor) vs. Air (Dome)
Here’s the sneaky truth about outdoor pizza ovens: the air temperature you see on a built-in gauge is not always the same as the
temperature of the stone (or baking floor) your dough actually touches. And the floor temperature is the difference between:
crispy leopard spots and sad scorched crackers.
Easy target ranges (use these as a starting point)
- Neapolitan-style: ~750–850°F on the stone for most home ovens (fast bake, 60–120 seconds).
- NY-style / “a little longer” bakes: ~650–750°F on the stone (more time for toppings to cook through).
- Thin-crust with heavier toppings: aim slightly lower (or manage flame) so the top finishes without torching the bottom.
Don’t treat those numbers like laws carved into marblewind, fuel, oven design, and the size of your fire all matter.
Treat them like a GPS: helpful direction, not an unbreakable prophecy.
2) Preheat Longer Than You Think… Then Verify Like a Pro
Most outdoor pizza ovens need a real preheat for the stone to “charge up.” Many brands suggest around 15–20 minutes, but in actual use,
some ovens may need substantially longer to get the floor truly readyespecially in cool weather or if you’re aiming for high-heat Neapolitan-style pies.
The winning move is simple: preheat, then measure the stone.
The tool that makes you instantly better
An infrared thermometer is the cheat code. Point it at multiple spots on the stone (center and near the flame)
so you understand your oven’s hot zones. Built-in thermometers can be useful, but they don’t always tell you the full story of the cooking surface.
Preheat checklist
- Preheat on high (or build a lively fire) until the stone is in your target range.
- Scan 3–4 spots on the stone with an infrared thermometer.
- If one area is dramatically hotter, plan your turning pattern to avoid burning one side.
- Between pizzas, let the stone recover back into range before launching the next pie.
Pro tip: recovery time matters. Launching pizza #2 onto a stone that hasn’t rebounded is how you get the dreaded
“pale bottom / overcooked top” combo (also known as: the emotional rollercoaster).
3) Dough That Loves High Heat (and Doesn’t Betray You)
Outdoor pizza ovens are hot enough to punish dough formulas that work fine in a home oven. In general, for very high-heat baking,
avoid adding sugar and oil to your dough. Those ingredients brown faster and can push your crust from “beautiful char” to “campfire souvenir”
before the pizza finishes.
Hydration: the “easy mode” range
Hydration is the amount of water compared to flour by weight. For outdoor pizza ovens, a sweet spot for many home pizzaiolos is
60–70% hydration. Higher hydration can yield a lighter, airier rimbut it’s also stickier and easier to tear when you’re learning.
Fermentation: flavor + handling
If you want better flavor and a dough that stretches more easily, use time as an ingredient. A cold ferment (in the fridge)
for 24–72 hours can build complexity and improve texture. Then let the dough warm up before stretching so it relaxes.
Rest is not lazinessit’s gluten management
If your dough keeps snapping back like it’s haunted, it’s usually tight gluten. Rest the dough at room temperature before shaping,
and if it fights you mid-stretch, pause for 10–15 minutes and try again. You’ll feel it soften and cooperate.
4) Stretching & Shaping: Thin Center, Protected Rim
The goal is a thin center (so it cooks fast) and a slightly thicker rim (so it puffs). Start by pressing from the center outward,
pushing gas toward the edge. If you’re new, skip the dramatic “toss in the air” routine. Your ceiling fan does not deserve that kind of stress.
Two beginner-friendly shaping methods
- Bench stretch: press and stretch on a lightly floured counter, then move to the peel.
- Knuckle stretch: lift the dough and gently stretch over your knuckles, rotating as you go.
If you tear a hole: pinch it closed and keep going. Pizza is forgiving. Your pride will recover.
5) Mise en Place: The Backyard Pizza Station That Saves Your Sanity
Outdoor ovens cook fast. That means you need your toppings ready before you launchbecause once the pizza is in the oven,
you’re basically in a 90-second cooking show.
Set up like this
- Dough balls: covered, at room temp, pre-portioned.
- Sauce: in a bowl with a ladle (go light).
- Cheese: prepped and drained if needed.
- Toppings: sliced, dried, and within arm’s reach.
- Tools: launching peel, turning peel, infrared thermometer, brush, heat-resistant gloves.
The #1 party mistake is trying to “prep as you go.” The #1 party solution is: prep like a professional, then act casual about it.
6) Launching: The 10-Second Skill That Changes Everything
Launching is the moment where your beautiful pizza becomes either a perfect circle… or a calzone you didn’t consent to.
The trick is reducing friction, moving confidently, and not letting the dough glue itself to the peel.
What to dust the peel with (and why)
Many people use a light dusting of flour. Others prefer semolina (or a flour/semolina blend) because the coarse grains act like tiny ball bearings.
Avoid overdoing it: excess dust burns on the stone and can leave bitter flavors.
The “jiggle test” (do this every time)
- Build your pizza quickly.
- Give the peel a small shake: the dough should slide freely.
- If it sticks, lift the edge and add a tiny bit more dust underneaththen jiggle again.
- Launch immediately (don’t let a topped pizza sit and soak through).
Wood vs. metal peels
- Wood peel: often easier for launching because dough is less likely to stick.
- Metal peel: great for retrieving and sometimes launching, especially if perforated (less contact = less sticking).
Think of launching like pulling a tablecloth without wrecking the dishes. Smooth motion, confident hands, minimal panic.
7) Bake & Turn: The Rhythm That Prevents Burning
Outdoor pizza ovens often have directional heat (especially gas models with a side flame). That means you’re not “baking” so much as
“negotiating with fire.” Turning is how you negotiate successfully.
The golden rule: turn early, then turn often
Start turning within the first 15–30 seconds, then rotate the pizza every 20–30 seconds for even coloring.
A small turning peel makes this dramatically easier than trying to spin a pizza with a full-size peel.
Two simple heat playbooks
- Gas ovens: preheat on high. Launch. Reduce flame if the top is browning too fast. Increase again between pizzas to recharge the stone.
- Wood-fired ovens: build a coal bed and keep a live flame rolling up the dome. Push the fire to the side/back so the pizza bakes in reflected heat,
then turn frequently to balance the side closest to the flame.
If you keep getting burned edges: it’s usually (1) too-hot stone, (2) too-high flame during the bake, or (3) not turning soon enough.
Fix those three and you’ll feel like you unlocked a secret level.
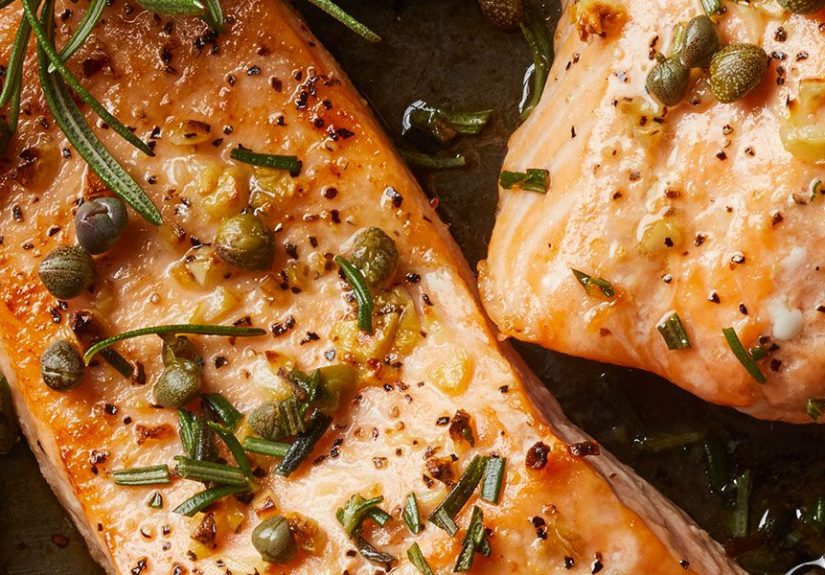
8) Toppings: Less Moisture, More Magic
High heat is great for blistering crustbut it’s also great at turning wet toppings into a steamy puddle that undermines your base.
The best outdoor pizza toppings strategy is: keep it light, keep it dry, finish fresh.
Practical topping rules that actually work
- Go lighter on sauce: a thin layer is enough. Too much sauce = soggy center.
- Manage fresh mozzarella: drain it well; consider using low-moisture mozzarella for more predictable results.
- Pre-cook watery veggies: mushrooms, zucchini, spinach, and onions often behave better after a quick sauté.
- Use post-bake additions: basil, arugula, prosciutto, burrata, hot honeyadd after baking for maximum flavor and minimum chaos.
Want a specific example? Try a “smart Margherita”:
low-moisture mozzarella during the bake, then add a few torn pieces of well-drained fresh mozzarella and basil after. You get the melt AND the creamy freshness,
without turning your crust into a sponge.
9) Troubleshooting: Fix the Problem, Not Your Entire Personality
| What’s happening | Most likely cause | Fast fix |
|---|---|---|
| Bottom burns before top finishes | Stone too hot; pizza sits too long in one spot | Lower stone temp target; launch then reduce flame; turn sooner and more often |
| Top burns, bottom is pale | Stone not fully preheated / not recovered between pies | Wait for stone to rebound; scan surface temp; shorten topping load time |
| Pizza sticks to the peel | Too much time on peel; not enough dust; wet sauce/toppings soaking through | Do the jiggle test; dust lightly with flour/semolina; build fast and launch immediately |
| Dough tears while stretching | Dough too cold; gluten too tight; too high hydration for skill level | Let dough warm and rest; reduce hydration slightly; handle gently |
| Dough snaps back (shrinks) | Not rested enough; gluten tension | Rest 10–15 minutes mid-shape; bring dough to room temp longer |
| Uneven bake / one side scorches | Directional flame/hot spot; not turning enough | Rotate every 20–30 seconds; learn your hot zone and start the pizza away from it |
10) Maintenance & Safety: Keep the Oven Fun (and Keep Your Eyebrows)
A clean oven works better, but “clean” in pizza-oven world usually means “burned off and brushed out,” not “soaped up like a bathtub.”
Let the oven cool, then brush loose debris from the stone. Avoid dumping water on a hot stonethermal shock is not your friend.
Safety essentials
- Heat protection: use heat-resistant gloves and long-handled tools.
- Clear zone: keep kids, pets, and party guests out of the “I can feel my arm hair crisping” radius.
- Fuel basics: check propane connections; keep wood stored dry; never use indoor-only fuel setups outside their intended use.
- No sketchy mods: avoid unsafe third-party modifications that can create hazards.
The goal is repeatable pizza nights, not a dramatic story that starts with “So anyway, the flame was kind of… whooshy.”
Conclusion: Small Oven, Big Results
If you remember just four things, make them these:
measure the stone temperature, use dough that fits high heat, launch fast with the jiggle test,
and turn early and often. Do that and you’ll get crisp bottoms, airy rims, and toppings that cook through instead of burning on top.
And yesyour first few pies might look like modern art. That’s normal. Outdoor pizza ovens have a learning curve, but it’s the most delicious curve you’ll ever study.
Real-World Outdoor Pizza Oven Experiences (Because Theory Doesn’t Feed a Crowd)
Let’s talk about what actually happens when you start cooking pizza outdoorsespecially when friends are watching, the sun is setting, and someone
says, “Oh wow, you’re making them from scratch?” (Translation: they will be emotionally invested in your success.)
The most common “first cook” experience is discovering that outdoor ovens don’t forgive hesitation. In a home oven, you can casually open the door,
check the crust, wander back, and pretend you meant to do that. Outside, you launch the pizza and immediately realize you need a plan:
where are you going to set the peel, where are your toppings, and why does the pizza already look half-done 30 seconds in?
Here’s another classic: you preheat, you feel confident, and your first pizza comes out with a gorgeous top… and a bottom that could sand a piece of wood.
That’s usually the moment people learn the difference between “the oven is hot” and “the stone is the right hot.” Many new owners rely on the
built-in thermometer, then later discover an infrared thermometer is like turning on the lights in a dark room. Suddenly, you can see the real problem:
the stone might be 900°F near the flame and 650°F at the front. Once you know that, you stop guessing and start steering.
Launching is the other big “experience milestone.” Most people begin with a pizza that sticks mid-launch and folds into itself like it’s trying to become a calzone.
The fix typically comes from a few small habit changes:
(1) build faster, (2) jiggle-check before you walk to the oven, and (3) keep toppings lighter so the dough doesn’t soak through.
When you finally nail a clean launch, it’s weirdly satisfyinglike parallel parking on the first try while someone’s watching.
Then there’s the “party pacing” lesson. Outdoor pizza is social food, and social food has a rhythm. If you’re making multiple pies, you’ll notice:
the first pizza is the stress pizza, the second pizza is the confidence pizza, and by the third you start experimenting (“What if we do sausage AND mushrooms?”).
The experienced move is to plan a simple progression:
start with a low-moisture, low-drama pizza (like pepperoni or a basic cheese),
then move into fresher or wetter toppings once you’re dialed in. This keeps early bakes predictable and lets you adjust heat and turning technique
without fighting a swampy topping situation.
Weather creates experiences too. Wind can make flames behave differently, and cold air can extend preheat and recovery times.
People often learn to position the oven out of direct wind and to give the stone a little extra time between pizzas.
A small brush and a turning peel become your “calm tools”you brush off burnt flour, you rotate the pie, you regain control.
Finally, there’s the moment you realize outdoor pizza isn’t just about pizza. Once you’re comfortable, you start using the oven like a high-heat cooking tool:
blistering peppers, roasting veggies, or finishing cast-iron sides while the stone recharges. That’s when the oven stops being a gadget and becomes
a real part of your backyard cooking life.
If any of this sounds like a lot, here’s the reassuring truth: almost everyone goes through the same learning curve, and the curve is short.
With a few sessions of deliberate practicetemperature checks, clean launches, consistent turnsyou’ll be making pizzas that look (and taste)
like you know somebody in the pizza business.