Table of Contents >> Show >> Hide
- Quick navigation
- Before you start: the 2-minute vent reality check
- The 10 ugly air vent cover upgrades
- 1) The easiest win: paint them the same color as the wall (or floor)
- 2) Swap builder-basic white for a modern finish
- 3) Go thicker, flatter, and sturdier for floors
- 4) Replace rusty bathroom vents with rust-resistant options
- 5) Upgrade return grilles to a cleaner, more intentional pattern
- 6) Add a “frame” effect with trim for a built-in look
- 7) Try a decorative metal pattern that matches your style
- 8) Go flush-mount for the “where did the vent go?” effect
- 9) Use a wood register for a seamless hardwood match
- 10) Go custom: linear slot diffusers, oversized grilles, or made-to-fit covers
- DIY refresh: how to repaint old vent covers (without regret)
- Buying guide: picking covers that look good and work well
- Keep it HVAC-friendly: common mistakes to avoid
- Real-life vent makeover experiences (500+ words of lessons learned)
- Conclusion
Every house has at least one tiny detail that quietly ruins the vibe. Sometimes it’s a light switch plate.
Sometimes it’s that one crooked cabinet handle. And very often? It’s the sad little air vent cover that looks
like it survived three paint jobs, a vacuum battle, and a bad decision in 1997.
The good news: upgrading ugly vent covers is one of the most underrated “small change, big payoff” moves in
home design. You’re not remodeling a kitchen. You’re not opening walls. You’re simply making the things you
see every day look intentionalwhile still letting your HVAC system do its job.
Below are 10 smart, stylish, and practical air vent cover upgradesplus tips on picking the right type, avoiding
airflow mistakes, and getting a clean finish that doesn’t chip the first time someone walks over it.
Quick navigation
- Before you start: the 2-minute vent reality check
- The 10 ugly air vent cover upgrades
- DIY refresh: how to repaint old vent covers (without regret)
- Buying guide: picking covers that look good and work well
- Keep it HVAC-friendly: common mistakes to avoid
- Real-life vent makeover experiences (500+ words of lessons learned)
- Conclusion + SEO JSON
Before you start: the 2-minute vent reality check
Not all vents are the same, and treating them like they are is how people accidentally “upgrade” their home into
a hot-and-cold mess. Here’s what to check before you buy anything shiny:
1) Is it a supply register or a return grille?
Supply registers blow conditioned air into the room. They often have a damper you can open/close.
Return grilles pull air back to the HVAC system, and they should generally stay unobstructed.
(Translation: a return grille isn’t the place for a “cute” cover that blocks airflow.)
2) Measure the opening (not just the visible face)
Vent sizes are usually listed by the duct opening (the hole), not the outside flange. Grab a tape measure and
note the length and width of the opening. This single step prevents 90% of “Why doesn’t this fit?!” drama.
3) Decide what your upgrade is supposed to do
- Purely visual: new finish, better style, cleaner lines.
- Functional: sturdier for floors, rust-resistant for baths, better airflow direction, easier cleaning.
- Both: the sweet spotpretty and practical.
The 10 ugly air vent cover upgrades
These are ordered from “quickest glow-up” to “architectural main character energy.” Mix and match based on your
style, budget, and how much time you want to spend thinking about air moving through metal.
1) The easiest win: paint them the same color as the wall (or floor)
If your vent cover is structurally fine but visually offensive, painting it to match the surrounding surface is the
fastest way to make it disappear. For walls and ceilings, a color-match paint job can turn “random rectangle” into
“what vent?” For floors, consider a finish that blends with wood tones or goes intentionally contrasty (matte black
on white oak looks sharp).
Pro move: Use thin coats so you don’t glue the louvers shut or clog the damper. Your vent cover is not
a pancake; it should not have “layers.”
2) Swap builder-basic white for a modern finish
Standard white vents are fine… until they turn yellow, chip, and start looking like a forgotten refrigerator. A simple
replacement in a better finish instantly elevates the room:
- Matte black: clean, modern, hides dust surprisingly well.
- Brushed nickel: great if your door hardware is silver-toned.
- Oil-rubbed bronze: warm, traditional, especially nice with wood trim.
- Brass: adds “designer detail” energy in small doses.
This is especially effective in hallways, entryways, and powder roomsplaces where people stand around long enough
to notice the little stuff.
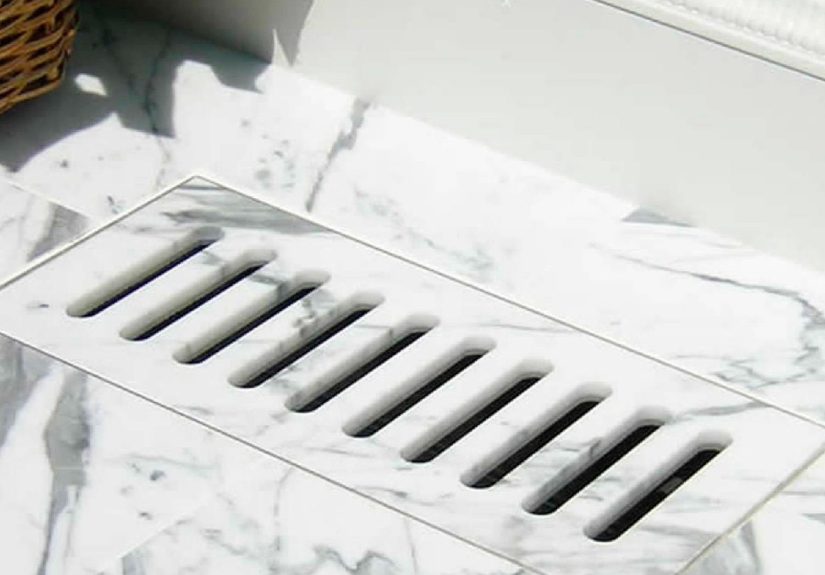
3) Go thicker, flatter, and sturdier for floors
Floor registers take abuse: shoes, chair legs, toys, and the occasional “why are we dragging the sofa like that?”
moment. Upgrading to a heavier-gauge metal register makes the cover feel more premium and reduces bending or warping.
Design bonus: A low-profile, flat-louver style looks cleaner than the tall, clunky “mini-blinds for air”
look common in older builder-grade covers.
4) Replace rusty bathroom vents with rust-resistant options
Bathrooms are where vent covers go to suffer. Moisture + time = rust, flaking paint, and that orange-brown “patina”
nobody asked for. A rust-resistant register (often powder-coated steel or aluminum) is a practical upgrade that also
stops the cycle of repainting every year like it’s a hobby.
Best places: baths, laundry rooms, mudrooms, and any space where wet towels exist purely to test your patience.
5) Upgrade return grilles to a cleaner, more intentional pattern
Return air grilles tend to be larger, more visible, and more awkwardly placed (because homes love a challenge).
A modern return grille with a simple patternlike angled slats, a tight grid, or a minimalist bar designcan make the
whole wall feel more finished.
Important: Return grilles need breathing room. Choose a design with plenty of open area and avoid
decorative overlays that restrict airflow.
6) Add a “frame” effect with trim for a built-in look
If your vent cover sits on a wall that already has trim details (wainscoting, board-and-batten, built-ins), consider
a vent cover that looks framedor add subtle trim around it so it belongs. This is a classic trick in older homes:
instead of hiding functional details, you make them look intentional.
Think of it like putting a picture frame around your vent. Except the picture is… air. And the art critic is your
HVAC technician.
7) Try a decorative metal pattern that matches your style
Decorative vent covers come in patterns ranging from vintage scrollwork to geometric modern grids. Used thoughtfully,
they can read like jewelry for the roomespecially in entryways, dining rooms, and formal living spaces.
- Traditional homes: ornate patterns, antique brass, cast-iron looks.
- Modern homes: clean rectangles, narrow slots, simple grids.
- Farmhouse/cottage: soft geometric patterns, warm metals, subtle texture.
Tip: Repeat the style in at least two places so it looks like a design choice, not a one-off impulse buy.
8) Go flush-mount for the “where did the vent go?” effect
Flush-mount vents sit level with the floor (or close to it), which looks sleek and high-endespecially with hardwood
flooring. They’re popular in design-forward renovations because they feel integrated rather than stuck-on.
Best places: living rooms, dining rooms, primary bedroomsanywhere you want a smooth, uninterrupted floor look.
If your style leans modern or minimalist, this is a huge visual upgrade.
9) Use a wood register for a seamless hardwood match
Wood floor registers can blend beautifully with hardwood floors, especially when the stain matches. The vent becomes
part of the floor instead of a contrasting metal rectangle that yells “HVAC WAS HERE.”
Practical note: Wood needs to be well-finished and properly fitted. In high-moisture areas, stick with metal
to avoid swelling or finish wear.
10) Go custom: linear slot diffusers, oversized grilles, or made-to-fit covers
If your vent location is awkward (hello, giant return grille in the middle of the wall), custom options can turn a visual
problem into a feature. Linear slot diffusers create a modern, architectural line. Oversized returns can look intentional
when centered and symmetrical. Made-to-fit covers solve weird sizes and restore old homes without “close enough” gaps.
When it’s worth it: open-concept spaces, high-end renovations, historic homes, or any time the vent is too
visible to ignore.
DIY refresh: how to repaint old vent covers (without regret)
Painting old vent covers is one of the best budget upgradesif you prep correctly. The goal is a smooth finish that
doesn’t chip, doesn’t gum up moving parts, and doesn’t look like you frosted it.
Step-by-step (the sane version)
- Turn off the HVAC so you’re not blowing dust around while working.
- Remove the cover carefully; score paint edges first if it’s stuck to the wall.
- Clean it thoroughly with warm soapy water and a brush, then dry completely.
- Lightly sand to remove flakes and help paint adhere (especially on glossy or rusty areas).
- Prime (when needed), especially if you have bare metal or rust showing.
- Apply thin coats of paintspray paint often gives the smoothest finish on louvers.
- Let it cure fully before reinstalling so the finish doesn’t stick or scuff.
Two quick “don’t do this” warnings
- Don’t paint over heavy grime and expect a miracle. Paint is not a cleaning product with ambition.
- Don’t seal shut the moving parts. If your register has a damper, keep paint light around the slider and hinges.
If your home is older
If you’re working on a house built before 1978, older paint can contain lead. That doesn’t mean “panic,” but it does mean
“use the right precautions and don’t casually create dust.” If you’re unsure, treat old paint as potentially lead-based and
follow lead-safe practices.
Buying guide: picking covers that look good and work well
Pick the right style for the right location
- Floors: durable metal, low-profile louvers, strong frame.
- Walls: cleaner patterns, slimmer profiles, easier alignment.
- Ceilings: subtle designs that blend, especially if painted to match.
- Bathrooms/laundry: rust-resistant materials and finishes.
Match your home’s “metal story”
Your vent covers don’t have to match every hinge and knob perfectly, but they should agree on the general vibe.
If your space is mostly black hardware, a random shiny chrome vent will look like it got lost on the way to another house.
Don’t forget the small details
- Matching screws: tiny detail, huge polish.
- Clean edges: a neat fit looks high-end; gaps look accidental.
- Consistent orientation: align slats the same direction in a room for a calmer visual.
Keep it HVAC-friendly: common mistakes to avoid
Vent covers are design detailsbut they’re attached to a system that keeps you comfortable and can be expensive to repair.
Here’s how to avoid turning a style upgrade into an airflow problem:
1) Don’t block vents with rugs, furniture, or “creative hiding”
It’s tempting to cover an ugly floor register with a rug. It’s also tempting to ignore oil changes. Both have consequences.
Keep airflow paths clear. If a vent is in an inconvenient spot, consider a different style (like a sturdier, flatter register)
rather than covering it up.
2) Don’t “decorate” return grilles into suffocation
Return airflow matters. If you install a dense decorative cover over a return, you may increase resistance and reduce system
performance. For returns, prioritize open area and easy cleaning over intricate patterns.
3) Don’t rely on closing vents to “save money”
People love closing vents in unused rooms because it feels logical. Many HVAC pros advise against it because it can create
pressure and balance issues. If you want room-by-room control, zoning (done correctly) is the grown-up solution.
4) Avoid paint buildup that glues parts together
If you paint a vent cover, keep coats thin and moving parts clean. A stuck damper slider is the DIY equivalent of putting a
hat on your air and saying, “Try harder.”
Real-life vent makeover experiences (500+ words of lessons learned)
Because vent upgrades are small, people often treat them like a throwaway weekend projectuntil they realize the vents are
everywhere and the details add up fast. Here are some common “real-life” experiences homeowners run into, plus what they learn
along the way (usually while sitting on the floor with a screwdriver, questioning their life choices).
The “I thought they were all the same size” experience: Someone buys a cart full of vent covers online, feeling
productive and powerful. The box arrives. The first one doesn’t fit. The second one is close, but the screw holes don’t align.
The third one fits… if you hold it at a mysterious angle. The lesson is always the same: measure the opening, not the old cover,
and expect slight variations in older homes. Many people end up keeping a simple notes list“living room floor: 4×10, hallway wall:
6×12”and suddenly the project becomes calm instead of chaotic.
The “paint fixed it… until it didn’t” experience: Spray-painting old registers looks amazing on day one. Then someone
walks across the floor register in a gritty shoe and leaves a scratch. Or a chair slides and nicks the edge. Homeowners who love
the painted look usually learn two follow-up habits: (1) choose a tougher coating or a durable metal spray paint, and (2) let the
finish cure fully before reinstalling. The people who get the best long-term results treat vent covers like any other high-touch
surfaceprep matters more than enthusiasm.
The “why is there so much dust?” experience: Pulling a cover off the wall can reveal a little dust museum inside the
duct opening. Many homeowners report that once they upgrade covers, they suddenly notice the vents moreand that leads to better
maintenance. The funny part is the psychology: a nicer-looking grille makes people want to keep it clean. A quick wipe every few
months becomes normal, and the room looks fresher with almost no extra effort. It’s not that upgraded vents magically create less
dust; it’s that they finally stop being invisible.
The “I accidentally made the return vent worse” experience: One of the most common missteps is treating a big return
grille like a decorative opportunity. Someone adds a fancy overlay or chooses a pattern that’s too dense because it looks “designer.”
Then the room feels stuffy, or the system seems louder, or dust collects in a new weird way. The fix is usually simple: pick a return
grille with generous open area and a clean pattern, and keep décor away from it. People often discover that the best return grille is
the one that looks intentionalbut doesn’t call attention to itself.
The “this tiny change made the room feel finished” experience: This is the most satisfying one. Homeowners will repaint
a room, update lighting, swap hardwareand still feel like something is “off.” Then they replace old yellowed vents with matte black or
paint-matched covers, and suddenly the room feels done. It’s the design equivalent of hemming your pants: nobody applauds the stitching,
but everyone notices the overall polish. Vent upgrades often become the gateway project that convinces people small details are worth it.
And maybe that’s the real takeaway: vent covers aren’t exciting, but they’re visible. When you upgrade them thoughtfullymatching finishes,
keeping airflow clear, choosing durable materialsyou get a home that looks more intentional without spending “new kitchen” money. Not bad
for a project that mostly involves measuring rectangles and pretending you enjoy hardware store lighting.
Conclusion
Ugly air vent covers are one of those sneaky little design problems that quietly drag down a room. The fix doesn’t have to be complicated.
Whether you paint existing registers, swap in a better finish, go flush-mount, or choose a decorative pattern that fits your home, you’re
improving both the look and the “finished-ness” of the space.
Keep it simple: measure carefully, don’t block returns, avoid thick paint buildup, and choose materials that make sense for the room.
Do that, and your vents can finally stop being the awkward background extra in every photo of your “newly updated” room.