Table of Contents >> Show >> Hide
- Why You’ll Love These Bars
- Main Keyword + LSI Keywords (Naturally, Not Weird)
- Recipe Overview
- Ingredients
- Equipment You’ll Want (No, You Don’t Need a Culinary Degree)
- Step-by-Step: How to Make Creme Brulee Cheesecake Bars
- Troubleshooting (Because Cheesecake Has Opinions)
- Flavor Variations (Same Concept, Different Mood)
- Make-Ahead, Storage, and Food Safety
- FAQ: Quick Answers Before You Panic-Google
- Serving Ideas (Because Presentation Is Half the Fun)
- Experience Notes (Extra of Real-Life Kitchen Wisdom)
- Conclusion
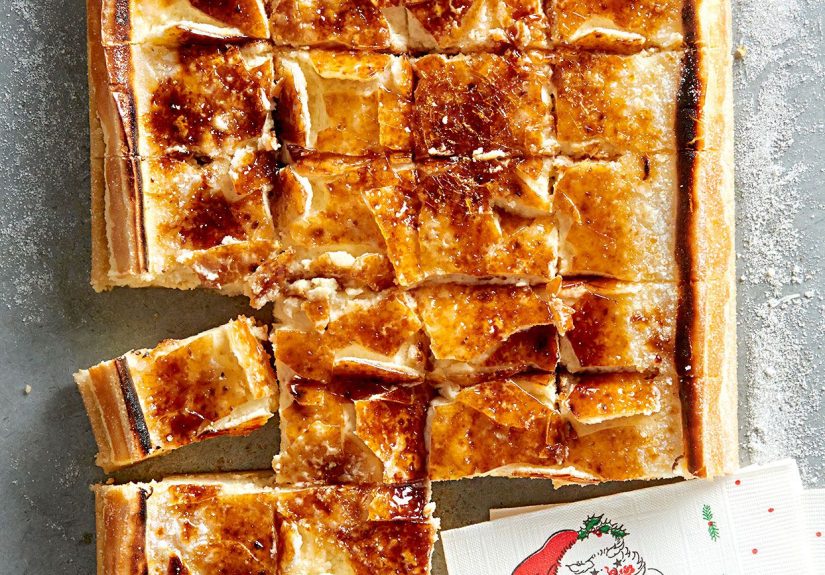
If crème brûlée and cheesecake had a tiny, fancy baby that fit neatly in your hand, it would be these
creme brulee cheesecake bars. You get a buttery cookie-like crust, a thick vanilla cheesecake layer,
and that iconic crackly caramelized sugar top that makes everyone go, “Wait… you made THIS at home?”
(Yes. Yes you did. And you deserve applause.)
This guide walks you through the full process with the “why” behind each stepso your bars turn out creamy,
smooth, and sliceable, with a brûléed top that shatters like dessert ASMR.
Why You’ll Love These Bars
- All the drama of crème brûlée with less fuss (no ramekins required).
- Cheesecake texture that behavesfirm enough to slice, creamy enough to swoon.
- Make-ahead friendly: bake today, brûlée right before serving.
- Party-perfect: easy to transport, easy to serve, hard to forget.
Main Keyword + LSI Keywords (Naturally, Not Weird)
You’ll see phrases like creme brulee cheesecake bars, crème brûlée topping,
cheesecake bar recipe, caramelized sugar crust, and vanilla bean cheesecake
throughout this postbecause people actually search for those, and because they’re accurate (unlike my promise to “only eat one”).
Recipe Overview
Yield, Time, and Difficulty
- Yield: about 12–16 bars (depending on how “generous” your slices are)
- Active time: ~30 minutes
- Bake + cool + chill: ~6 hours total (mostly hands-off)
- Difficulty: easy-to-moderate (the torch is the “fun part”)
The secret to confident cheesecake bars is patience: bake gently, cool slowly, chill thoroughly,
then brûlée right before serving. Think of it as dessert with a schedule.
Ingredients
For the Crust
- 1 1/2 cups graham cracker crumbs (or finely crushed vanilla wafers)
- 2 tablespoons granulated sugar
- 6 tablespoons unsalted butter, melted
- Pinch of salt
For the Cheesecake Layer
- 24 ounces cream cheese, room temperature
- 3/4 cup granulated sugar
- 2 tablespoons all-purpose flour (or 1 tablespoon cornstarch) for stability
- 1/2 cup sour cream, room temperature
- 2 teaspoons vanilla extract
- 1 teaspoon vanilla bean paste (optional but delicious)
- 2 large eggs, room temperature
- 1 large egg yolk (adds crème brûlée vibes and richness)
- Pinch of salt
For the Brûlée Topping
- 1/3 to 1/2 cup granulated sugar (amount depends on pan size and how “crackly” you want it)
Optional Flavor Boosters
- 1/2 teaspoon lemon zest (brightens richness without tasting “lemony”)
- 1/2 teaspoon espresso powder (subtle, grown-up depthstill kid-friendly)
- 1/4 teaspoon cinnamon (cozy but not overpowering)
Equipment You’ll Want (No, You Don’t Need a Culinary Degree)
- 8×8-inch or 9×9-inch baking pan
- Parchment paper (for lifting the bars out cleanly)
- Mixing bowls + rubber spatula
- Hand mixer or stand mixer (low speed is your friend)
- Fine-mesh sieve (optional, but it makes the filling extra smooth)
- Kitchen torch (best for the brûlée top)
No torch? You can broilcarefully. But a torch gives better control and keeps the cheesecake cold while the sugar caramelizes.
Step-by-Step: How to Make Creme Brulee Cheesecake Bars
1) Prep the Pan
- Preheat oven to 350°F.
- Line your pan with parchment paper, leaving overhang on two sides so you can lift the bars out later.
- Lightly grease the parchment (helps corners release like a dream).
2) Make the Crust
- Mix graham crumbs, sugar, salt, and melted butter until it looks like damp sand.
- Press firmly into the pan (use a flat-bottomed cup to pack it tight).
- Bake 10–12 minutes until lightly golden and fragrant.
- Remove from oven and let cool. Reduce oven temperature to 325°F.
Why pre-bake? It helps the crust stay crisp instead of turning into “soft crumb soup” under the filling.
3) Mix the Cheesecake Filling (Smooth, Not Foamy)
- Beat cream cheese on low-medium until smooth (about 1–2 minutes). Scrape the bowl often.
- Add sugar and flour (or cornstarch). Mix just until combined.
- Add sour cream, vanilla extract, vanilla bean paste, and salt. Mix until smooth.
- Add eggs and yolk one at a time, mixing on low just until incorporated.
- Optional: strain the batter through a sieve for ultra-silky texture.
Key rule: don’t whip in lots of air. Air bubbles = puffing, sinking, and cracks. We want “luxury hotel cheesecake,” not “science fair volcano.”
4) Bake Low and Slow
- Pour filling over the cooled crust and smooth the top.
- Bake at 325°F for 35–45 minutes, depending on pan size and oven.
- Look for: set edges + center that still has a gentle jiggle (not liquidy slosh).
5) Cool Gradually (Crack Prevention = Temperature Management)
- Turn off the oven, crack the door, and let the pan sit inside for 20–30 minutes.
- Remove and cool at room temperature for about 45–60 minutes.
- Refrigerate for at least 4 hours (overnight is even better).
Cheesecake is basically a custardgentle heat sets it, and gentle cooling keeps it from panicking and cracking.
6) Slice Like a Pro
- Lift chilled cheesecake out using parchment overhang.
- Use a sharp knife warmed under hot water, wiped dry between cuts.
Clean cuts matter because these bars are already showing off. Don’t give them smudged eyeliner.
7) Brûlée the Top (The “Wow” Moment)
- Right before serving, sprinkle a thin, even layer of granulated sugar on each bar (or across the whole slab before slicing).
- Torch in small circles until the sugar melts, bubbles, and turns deep golden amber.
- Let sit 1–2 minutes to harden into a crackly crust.
Pro move: Do two thin layers instead of one thick snowdrift of sugar. It caramelizes more evenly and is easier to shatter (in the best way).
Troubleshooting (Because Cheesecake Has Opinions)
My cheesecake cracked. Did I ruin it?
Not at all. Bars crack less than round cheesecakes, but it can happen if the batter was overmixed or baked a bit too long.
The brûlée topping is basically edible camouflage. Plus, “rustic” is a vibe.
My bars are too soft to slice.
They likely need more chill time. Cheesecake firms up as it cools. Chill overnight for clean slices.
Also make sure you baked until the edges were set and the center only gently jiggled.
The sugar burned in spots.
Torch farther away and keep the flame moving. Sugar goes from “golden perfection” to “campfire memory” quickly.
Use a thin, even layer and circle the torch like you’re drawing tiny invisible donuts.
The caramel topping got sticky.
Sugar attracts moisture. For maximum crunch, brûlée right before serving.
If you need to prep ahead, store bars unbrûléed and torch at the last minute.
Flavor Variations (Same Concept, Different Mood)
Vanilla Bean Dream
Use vanilla bean paste and a little extra vanilla extract. The speckles make it look fancy without requiring a tuxedo.
Chocolate Crust Upgrade
Swap graham crumbs for chocolate cookie crumbs. The brûlée top + chocolate base tastes like a dessert plot twist.
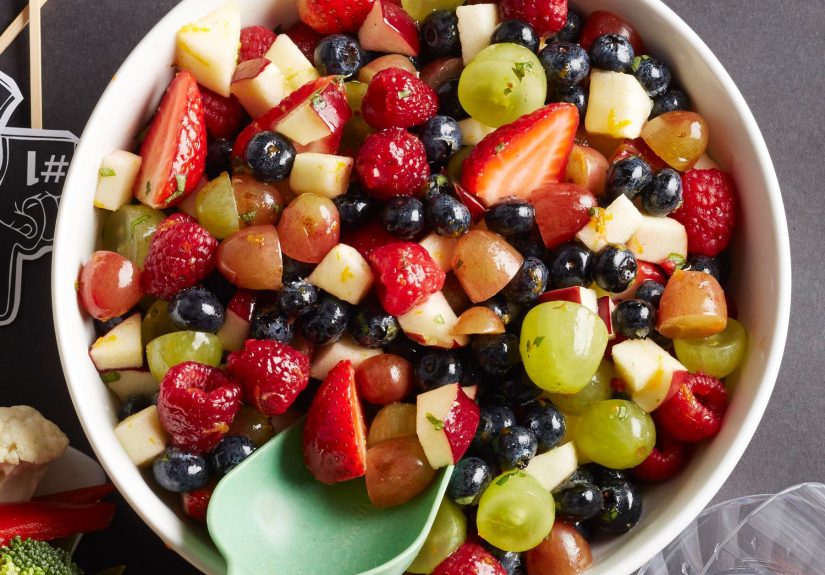
Berry Finish
Serve with fresh raspberries or strawberries on the side. Tart fruit balances the richness and makes plates look “restaurant.”
Espresso Kiss
Add espresso powder to the batter for depth. It won’t scream “coffee,” it’ll whisper “I have excellent taste.”
Make-Ahead, Storage, and Food Safety
Make-Ahead Plan
- Day 1: bake, cool, chill overnight.
- Day 2: slice and brûlée right before serving.
How to Store
- Store bars (without brûlée topping) tightly covered in the fridge for up to 4–5 days.
- Keep the brûléed sugar topping for the moment you’re ready to serve for best crunch.
Can You Freeze Cheesecake Bars?
Yes. Freeze the chilled, unbrûléed bars in a single layer until firm, then wrap well and store up to
1–2 months for best quality. Thaw overnight in the fridge. Torch the sugar after thawing.
How Long Can They Sit Out?
Because these contain dairy and eggs, keep them out no more than about 2 hours at room temperature,
then return to the fridge. If it’s a warm room, shorten that window. (Cheesecake is delicious, but it is not a countertop decoration.)
FAQ: Quick Answers Before You Panic-Google
Do I need a water bath?
Not for bars. Baking at 325°F and cooling slowly gives you a creamy texture without the “hot tub logistics.”
If your oven runs hot, consider placing a shallow pan of hot water on the rack below to add gentle moisture.
Can I brûlée under the broiler instead of using a torch?
You can, but it’s riskier. Chill the bars very cold first, sprinkle sugar, then broil briefly while watching like a hawk.
The goal is caramelized sugar, not “toasted cheesecake.”
What sugar is best for the topping?
Regular granulated sugar works great. Superfine also works and melts faster, but you don’t need specialty sugar to get a crisp crust.
Serving Ideas (Because Presentation Is Half the Fun)
- Classic: Serve plain and let the crackly top be the star.
- Fancy: Add a few berries and a tiny mint leaf (mint is basically edible confetti).
- Cozy: Pair with hot chocolate or coffee for “dessert night at home” energy.
- Celebration: Cut smaller squares for a dessert platterthese are rich, and a little goes a long way.
Experience Notes (Extra of Real-Life Kitchen Wisdom)
Making creme brulee cheesecake bars is one of those baking experiences that feels like a magic trick:
the ingredients are normal, the steps are straightforward, and then suddenly you’re holding a dessert with a caramel-glass top that
sounds like a tiny window breaking when you tap it. The first time most people try these, the “experience” usually falls into three parts:
(1) the mixing confidence, (2) the chilling impatience, and (3) the torch-induced victory lap.
The mixing part is where you learn the biggest cheesecake lesson: smooth does not mean whipped. It’s very tempting to turn the mixer up
and beat the batter until it looks extra fluffy. But fluff is a trap. Air expands in the oven and can cause puffing, sinking, or little bubbles
that bake into texture. The best experience is when you beat the cream cheese just enough to erase lumps, scrape the bowl like it owes you money,
and keep the eggs on low speed. You’ll notice the batter looks glossy and thickmore like satin than foam.
Then comes chilling: the part where your fridge becomes the most powerful appliance in the house. People often ask, “Can I cut them early?”
You can, but you’ll get messy edges and a softer center. The better experience is waiting until the bars are fully cold, because the
texture transforms from “soft custard” to “clean, creamy slice.” If you’ve ever tried to cut warm cheesecake and ended up with a knife that looks
like it lost a battle with frosting, you already know why chilling is a non-negotiable.
Finally, the torch moment is pure joy. If you’ve never used a kitchen torch, this is a safe, satisfying intro:
you sprinkle sugar, you light the flame, and you watch the crystals melt into glossy caramel. The experience teaches you controlkeep the torch moving,
don’t hover in one spot, and trust thin layers. Many home bakers find that brûléeing individual squares is less stressful than doing the
whole slab, because you can focus on even coverage without racing the clock. Another practical lesson: the sugar top hardens quickly,
so you can torch a few pieces, let them set, and serve immediately while the crunch is at its peak.
The most memorable “oh wow” experience is usually the contrast: cold, creamy cheesecake underneath and warm-ish crackly caramel on top.
It’s not complicated, but it feels special. And that’s the real win of this recipethese bars aren’t just dessert; they’re a little kitchen event.
The kind where someone hears the first crack of the sugar crust and suddenly everybody wants “just a tiny bite” (which, as we all know, is a lie).