Table of Contents >> Show >> Hide
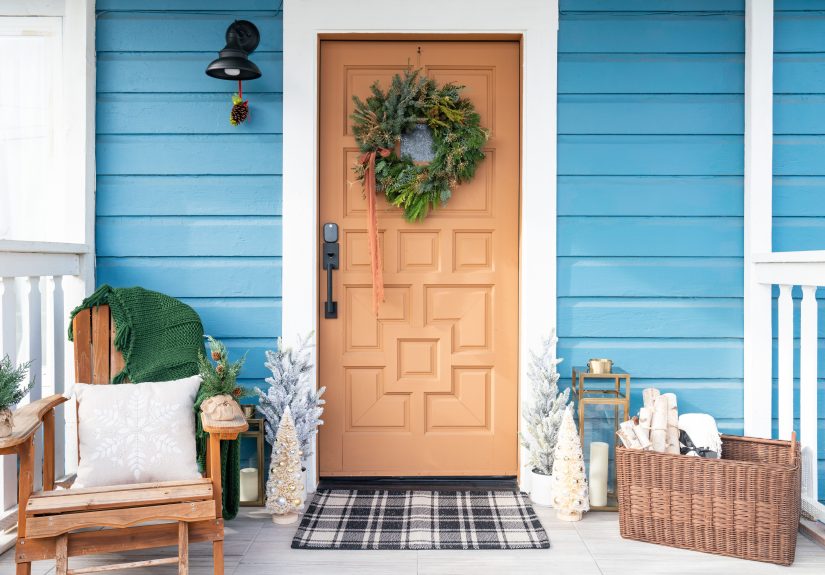
Few things say “welcome to my home” like a beautiful wreath on the front door.
And when that wreath is handmade from rustic grapevine and elegant laurel leaves,
it looks like you hired a professional decoratorwithout paying professional prices.
In this guide, we’ll walk through exactly how to make a DIY grapevine and laurel door wreath,
with practical tips, styling ideas, and real-life tricks to keep it looking gorgeous all year.
Why Choose a Grapevine and Laurel Wreath?
Grapevine wreaths are the workhorses of door decor. The twisted vines create a sturdy,
natural-looking base that pairs well with almost any stylefarmhouse, modern, cottage, or classic.
Laurel greenery adds a timeless, slightly Mediterranean feel that reads “grown-up decor” rather
than “glue-gun explosion.”
Together, grapevine and laurel give you:
- Texture and depth from the vines and layered greenery.
- Year-round versatilityjust swap out accents like flowers or ribbon by season.
- Easy customization with minimal supplies and simple techniques.
- Budget-friendly decor that looks like it came from a boutique, not a bargain bin.
Supplies You’ll Need
Before you start, gather everything in one spot so you’re not hunting for the wire cutters
with hot glue strings stuck to your fingers.
- 1 grapevine wreath base (14–18 inches is ideal for a standard front door)
- Laurel greenery (real or faux laurel stems or garland)
- Additional greenery (eucalyptus, ferns, or olive branches, optional)
- Accent pieces (faux flowers, berries, seed pods, or seasonal picks)
- Ribbon (wired ribbon works best for bows)
- Floral wire (22–24 gauge)
- Floral tape (optional but helpful)
- Wire cutters
- Scissors
- Hot glue gun and glue sticks
- Wreath hanger or over-the-door hook for display
Step-by-Step: How to Make a Grapevine and Laurel Door Wreath
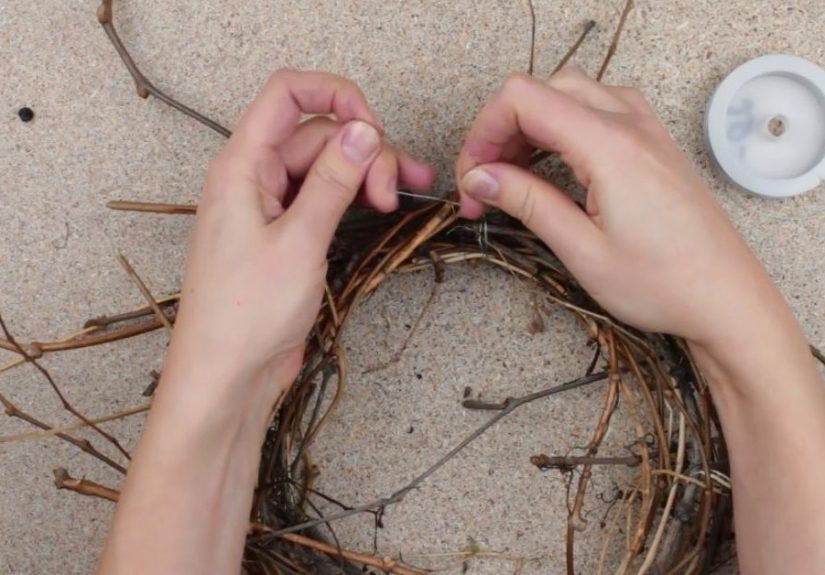
1. Prep the Grapevine Base
Lay your grapevine wreath flat on a table and give it a quick shake or tap to remove loose bits of vine.
If the base feels stiff or brittle, you can lightly mist it with water or, if it’s made from freshly cut vines,
soak the vines before they’re formed into the wreath so they’re more flexible and less likely to snap.
Check the wreath for a “front.” One side usually looks a little flatter and neaterthis is the side you’ll decorate.
2. Plan Your Design
Before you attach anything, set the greenery and accents roughly where you think they should go.
This “dry layout” makes it easier to tweak the design before committing with wire or hot glue.
Decide on a layout style:
- Asymmetrical: Greenery concentrated on one side or one lower corner.
- Half-moon: Greenery covering the bottom half, vines exposed on top.
- Full coverage: Greenery and florals all the way around for a lush, full look.
3. Add the Laurel Greenery
Cut laurel stems into smaller pieces, 6–10 inches long. Tuck the stems into the gaps in the grapevine,
following the direction of the vine’s natural curve. This gives the wreath a sense of movement rather
than a “spiky” look.
Once you like the placement, secure each stem by wrapping a small piece of floral wire around the stem
and the wreath base. Keep the wire on the back side when possible so it’s hidden from view.
4. Layer in Supporting Greenery
To keep your wreath from looking flat, layer in 1–2 additional types of greenery, such as eucalyptus,
olive, or fern fronds. Choose pieces in slightly different shades of green and with different leaf shapes
so the wreath looks more natural and dimensional.
Place these pieces behind or slightly above the laurel, angling them in the same direction as the laurel leaves.
Secure them with floral wire or a dab of hot glue where needed.
5. Add Florals or Seasonal Accents
This is where your wreath goes from “nice” to “oh wow.” Choose accents based on the season:
- Spring: Soft florals like peonies, hydrangeas, or ranunculus in pale pinks, creams, and greens.
- Summer: Bright florals, small daisies, or lavender stems.
- Fall: Berries, mini pumpkins, or seed pods in warm oranges, golds, and burgundies.
- Winter: Pinecones, berries, and a touch of evergreen mixed into the laurel.
Group accents in clusters of three for a more professional look. Attach them with hot glue and reinforce
heavier pieces with floral wire.
6. Make and Attach the Bow (Optional but Highly Recommended)
If you like a more polished look, add a ribbon bow. Wired ribbon holds its shape best:
- Cut a length of ribbon (around 24–36 inches) for the bow loops.
- Create several loops back and forth in your hand, like a ribbon “accordion.”
- Pinch the center and tie it tightly with floral wire.
- Cut a separate piece for the tails and wire it to the back of the bow center.
- Fluff the loops until the bow looks full and balanced.
Attach the bow to the wreath with the same wire, wrapping it around the grapevine base.
Popular spots include the bottom center, slightly off to one side, or just under a cluster of florals.
7. Fluff, Secure, and Final Checks
Hold the wreath up at eye levelpreferably on the door or a hookand step back.
Look for any gaps, uneven areas, or stems sticking out at odd angles.
- Bend wired stems to follow the curve of the wreath.
- Add extra greenery or a small cluster of leaves where the base is showing too much.
- Trim any hot glue strings so they don’t catch the light.
8. Hang Your Wreath Safely
To hang your wreath, use a wreath hanger that goes over the top of the door,
an adhesive hook rated for the wreath’s weight, or a magnetic hanger if you have a metal door.
Make sure the wreath sits at about eye leveltoo high and it feels disconnected, too low and it feels heavy.
Styling Ideas for Different Seasons
One of the best things about a grapevine and laurel wreath is that you can treat it like a reusable base.
The greenery can stay, while the accents and ribbon rotate with the seasons.
Spring Refresh
Keep the laurel greenery, and add:
- Soft pastel flowers
- A light linen or gingham bow
- Small bird or nest accents for a cottage feel
Summer Brights
Swap in:
- Bold florals (sunflowers, zinnias, or wildflower mixes)
- A striped or floral bow
- Simple wooden “hello” or “welcome” sign wired into the center
Fall Cozy
Layer warm tones on top of the laurel:
- Mini pumpkins, faux wheat, and berry picks
- Rust or plaid ribbon
- A small wooden tag with “gather” or “thankful” written on it
Winter and Holiday
Transform your laurel wreath into a holiday showpiece by adding:
- Evergreen sprigs and pinecones
- Red berries or ornaments
- Velvet or satin ribbon in deep red, green, or navy
Care, Maintenance, and Storage Tips
A little care goes a long way in keeping your wreath looking crisp instead of tired and dusty.
-
Avoid harsh sun and direct weather. Even faux greenery can fade in intense sun.
If your porch gets full, direct light, consider hanging the wreath slightly under cover or rotating it seasonally. -
Dust regularly. Use a soft brush, feather duster, or a cool hairdryer setting to
gently blow dust off the leaves and flowers. -
Spot-fix damage. If a flower falls off or a stem loosens, a quick dab of hot glue
usually brings it back to life in seconds. -
Store properly. When you’re ready to switch wreaths, place this one in a wreath storage bag,
large plastic bag, or a labeled box. Hang it on a closet rod or a wall hook in a cool, dry space to prevent
crushing and fading.
Common Mistakes (and How to Avoid Them)
-
Using only one type of greenery. Mixing at least two textures of greenery
(like laurel and fern) makes the wreath look more high-end. - Ignoring the back of the wreath. Any wire ends should be bent inward or trimmed so they don’t scratch your door.
-
Overloading with heavy accents. Too many big flowers or ornaments can drag the wreath down and look unbalanced.
Use large items sparingly and anchor them securely with both wire and glue. -
Skipping the “step-back” test. Always step back several feet and look at the wreath in context with
the door color and surrounding trim before calling it finished.
Real-Life Wreath-Making Experiences and Tips
If you talk to people who make wreaths regularlywhether they’re hobby crafters or small business ownersalmost
everyone has a “first grapevine wreath” story. It usually starts with, “I thought this would take 15 minutes,”
and ends with, “Okay, but now I want to make one for every door in the house.”
One common experience is underestimating how much greenery you’ll need. Laurel leaves look full,
but once you start cutting and layering pieces along the wreath form, you’ll realize they disappear quickly.
A good rule of thumb is to buy more greenery than you think you needespecially if you want a lush,
designer-style wreath. Leftovers can always be used in mini wreaths, candle rings, or table centerpieces.
Another lesson many DIYers learn: wiring instead of gluing everything gives you flexibility.
A wreath that’s wired together can be “redecorated” later. Maybe you start with simple laurel and white florals,
then decide to add berries for fall or swap to navy ribbon when you repaint the front door.
When stems are attached with wire, you can snip, rearrange, and refresh the look without starting from scratch.
People also discover how much the door color matters. A leafy laurel wreath on a white or light gray door feels fresh
and airy. The same wreath on a dark navy or black door looks dramatic and elegant. If your current door color
doesn’t give enough contrast, you can add a ribbon in a contrasting color or mix in lighter or darker florals so
the wreath doesn’t visually disappear.
Storage is another area where experience teaches fast. Many crafters start by stuffing finished wreaths
into any available box, then pull them out next season to find crushed bows and flattened greenery.
After doing this once or twice, most people switch to hanging wreaths on a wall, using garment racks,
or investing in a couple of wreath bags or boxes. Labeling the outside of the bag or box with “Spring Laurel Wreath”
or “Green Grapevine Everyday Wreath” makes next year’s decorating much easier.
Lastly, there’s the emotional side of wreath making. A handmade wreath becomes part of your home’s story.
Maybe you and a friend or your kids made it together and now they point to it every time they walk in.
Or maybe it’s the first thing guests compliment when they arrive: “Did you make that?”
That little moment of pride is a big part of why people keep coming back to DIY projects like this.
Over time, you’ll probably find your “signature style.” Some people gravitate toward neutral laurel and
soft green palettes, while others love bold colors or seasonal themes. The beauty of a grapevine and laurel
door wreath is that it can evolve with you: new ribbons, different florals, fresh accentsall built on the
same sturdy base you created yourself.
So the next time you walk up to your front door, imagine it framed by your own DIY grapevine and laurel wreath.
It’s a small project with a big impactone that can change the entire feel of your entryway and quietly tell
everyone who visits, “Someone here cares about the details.”