Table of Contents >> Show >> Hide
- Why shoes overwhelm small spaces (and why “just buy a rack” doesn’t always work)
- Do this first: the 10-minute shoe audit that makes every DIY idea work better
- Pick the right storage style for your space
- 12 easy DIY shoe storage ideas for small spaces
- DIY Idea #1: The over-the-door “shoe wall” upgrade
- DIY Idea #2: Slim floating ledge shelves for flats and slides
- DIY Idea #3: A narrow flip-down shoe cabinet look (without a full remodel)
- DIY Idea #4: Under-bed rolling trays with dividers
- DIY Idea #5: The crate bench that does triple duty
- DIY Idea #6: PVC “honeycomb” shoe cubbies (surprisingly stylish)
- DIY Idea #7: Tension rods in a closet for a shoe “slot” system
- DIY Idea #8: A behind-the-door slim shelving tower
- DIY Idea #9: Pegboard shoe station (a.k.a. “shoe valet”)
- DIY Idea #10: A “stair-step” vertical shoe rack for tight corners
- DIY Idea #11: The “hidden under-console” shoe shelf
- DIY Idea #12: Stackable clear boxes (but make them practical)
- Where to place shoe storage in a small home (so it stays organized)
- Make it last: small habits that keep shoes from multiplying on the floor
- Budget and materials: what these DIY shoe storage ideas usually cost
- Safety note (especially important for teens and first-time DIYers)
- Real-life experiences: what people learn after trying small-space shoe storage
- Conclusion
If shoes had a hobby, it would be sprawling. One pair becomes three, three becomes “I swear I only own a reasonable amount,” and suddenly your tiny entryway looks like a sneaker convention. The good news: you don’t need a huge closet (or a reality show budget) to get your floors back. You need a smart, small-space strategyand a few DIY shoe storage ideas that actually fit real life.
This guide covers simple, space-savvy builds and hacks you can do with basic materials, plus layout tips so your storage doesn’t become “a pile… but with a shelf under it.” You’ll get options for renters, dorm rooms, narrow hallways, and cramped closetsalong with specific examples, quick measurements, and a few laughs, because your shoes have taken enough from you already.
Why shoes overwhelm small spaces (and why “just buy a rack” doesn’t always work)
In small homes, the shoe problem isn’t just the number of pairsit’s the traffic pattern. Shoes collect where people stop: by the door, next to the couch, under the bed, in that one corner that somehow became a “shoe corner” without anyone voting on it.
Most off-the-shelf racks fail for small spaces because they:
- Use precious floor area (the same area your feet need to walk).
- Store shoes in a single layer when you need vertical storage.
- Don’t handle mixed shoe types (boots, heels, kids’ shoes, sneakers) without turning into chaos.
The best small-space shoe storage is built around two goals: use vertical space and reduce friction (meaning it’s easy enough that people actually use it).
Do this first: the 10-minute shoe audit that makes every DIY idea work better
Before you drill a hole or paint a board, do a quick shoe audit. It’s not a lectureit’s a shortcut.
- Sort into three groups: “Daily,” “Sometimes,” and “Seasonal/Occasional.”
- Set a door-zone limit: pick a number that fits your space (often 2 pairs per person is plenty for the entryway).
- Decide on visibility: if you forget shoes exist unless you see them, choose open storage; if clutter stresses you out, choose closed storage.
This is the difference between “organized” and “organized for three hours.”
Pick the right storage style for your space
1) Vertical and visible (best for daily shoes)
Think wall racks, behind-the-door systems, slim shelving, and stacked tiers. The benefit is speed: shoes are easy to grab and easy to put away. The trade-off is you’ll see themso it looks best when you keep to a limit (your future self says thanks).
2) Hidden and tidy (best for small entryways that need to look “calm”)
Slim shoe cabinets, storage benches, lidded bins, and drawer-style solutions reduce visual clutter. Great for narrow halls, shared living spaces, or when you want your front door to feel like an entrancenot a footwear obstacle course.
3) Under-bed and out-of-season (best for tiny closets)
Under-bed trays and rolling bins are undefeated for storage-per-square-foot. If you label compartments, you’ll stop buying “another pair of black flats” because you forgot you already own three. (Not judging. Just… spiritually observing.)
12 easy DIY shoe storage ideas for small spaces
Each idea below includes the “why it works,” the footprint, and a simple build approach. If you’re a teen or new to DIY, use the no-power-tool optionsor ask an adult to help with cutting and drilling for safety.
DIY Idea #1: The over-the-door “shoe wall” upgrade
Best for: renters, dorms, kids’ rooms, tiny closets
Footprint: uses zero floor space (just the back of a door)
Over-the-door organizers are popular because they turn a forgotten surface into storage. To make it feel less “college move-in day,” upgrade it:
- Choose a sturdy organizer with deeper pockets for sneakers.
- Add adhesive felt pads where it touches the door to reduce noise.
- Assign zones: top = occasional, middle = daily, bottom = kids’ shoes or slippers.
Pro tip: Put heavier shoes lower so the organizer hangs straighter and the door closes smoothly.
DIY Idea #2: Slim floating ledge shelves for flats and slides
Best for: narrow walls, closet sidewalls, behind a bedroom door
Footprint: as little as 4–6 inches deep
Make shallow ledge shelves from 1×4 boards (or similar scrap wood) so shoes sit toe-forward. Space the shelves about 7–8 inches apart for flats and sandals, and a bit more for sneakers.
- Cut boards to your wall width (even 18–24 inches can help).
- Add a thin front lip strip so shoes don’t slide off.
- Paint the shelves the wall color for a built-in look.
This is a classic small-space move: storage that reads like decor.
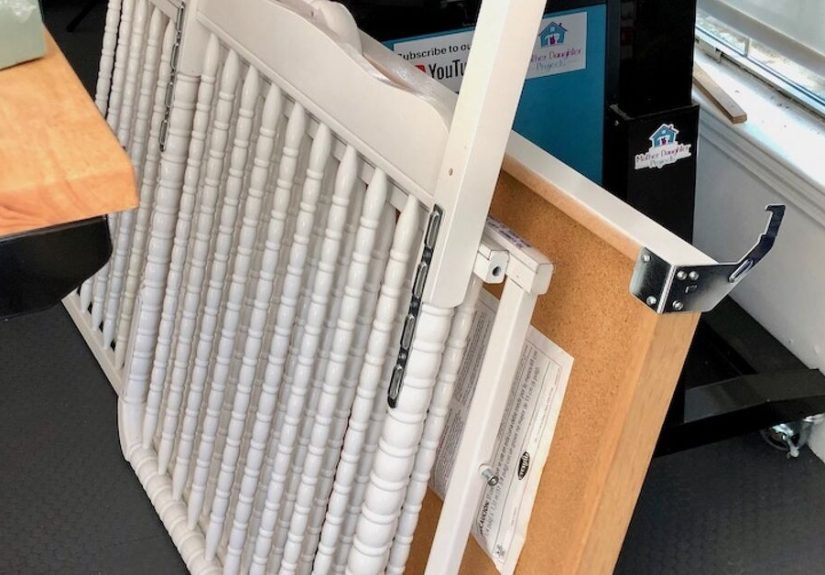
DIY Idea #3: A narrow flip-down shoe cabinet look (without a full remodel)
Best for: tiny entryways and hallways where depth is the enemy
Footprint: often around 7–10 inches deep
Slim, wall-mounted shoe cabinets are beloved in small spaces because they store multiple pairs while staying shallow. If you DIY the look, build a shallow box cabinet with angled shelves insideor use a slim cabinet system and personalize it (paint, new knobs, cane/rattan-style fronts, or a wood top ledge for keys).
Small-space rule: keep cabinet depth under about a foot so your hallway still feels walkable.
DIY Idea #4: Under-bed rolling trays with dividers
Best for: seasonal shoes, backup sneakers, “special occasion” pairs
Footprint: uses under-bed dead space
Build two low trays with casters (or use flat bins on sliders). Add simple dividers using thin wood strips or sturdy cardboard so shoes stay paired. Label by category (boots, dress shoes, gym shoes) so you don’t have to excavate to find what you need.
- Measure bed clearance first (many frames offer 5–8 inches; some offer more).
- Make trays slightly narrower than the bed frame so they roll easily.
- Consider breathable compartments if you’re storing shoes long-term.
DIY Idea #5: The crate bench that does triple duty
Best for: entryways without closets, apartments, families
Footprint: typically 12–16 inches deep
Stack sturdy wooden crates sideways to create cubbies, then secure them together (screws or brackets are best; ask an adult for help). Add a wood top and a cushion, and you’ve got:
- A seat for putting shoes on
- Organized cubbies below
- A “landing zone” that stops the floor pile from forming
For a cleaner look, add labeled bins to some cubbies and keep the rest open for daily shoes.
DIY Idea #6: PVC “honeycomb” shoe cubbies (surprisingly stylish)
Best for: closets, laundry rooms, mudrooms
Footprint: customizable; great for vertical stacking
Cut wide PVC pipe into equal sections and glue them into a honeycomb cluster (like a beehive, but for sneakers). It’s modular and space-efficient.
- Works best for flats, sandals, and sneakers.
- Paint the outside for a cleaner look.
- Keep it low or anchor it so it doesn’t tip.
If PVC isn’t your vibe, the same concept works with sturdy cardboard tubesless durable, but renter-friendly and lightweight.
DIY Idea #7: Tension rods in a closet for a shoe “slot” system
Best for: tiny closets, awkward corners
Footprint: uses vertical space with minimal depth
Install tension rods (or slim dowels on brackets) in parallel rows so shoes rest between them. It’s especially good for heels (the heel sits between rods) and for keeping pairs separated.
This approach is great when shelves feel bulky and you need airflow and quick access.
DIY Idea #8: A behind-the-door slim shelving tower
Best for: bedrooms and entryways where every inch matters
Footprint: narrow and tall
A slim, tall shelf (even repurposed from a narrow bookcase) can hold a surprising number of pairs if you angle shoes slightly and reserve one shelf for “taller” pairs. To DIY:
- Add small front rails (thin strips) so shoes don’t tumble off.
- Mount anti-tip hardware for safety.
- Put the most-used shoes at mid-height (easy grab zone).
DIY Idea #9: Pegboard shoe station (a.k.a. “shoe valet”)
Best for: garages, mudrooms, utility closets
Footprint: wall-mounted, adjustable
Pegboard isn’t just for tools. Add sturdy pegs or small shelves and store shoes off the floor. It’s adjustable, so it grows with changing shoe types (sports seasons, kids’ sizes, weather).
Bonus: it’s easy to clean under, which is a polite way of saying your floor will stop collecting mysterious grit.
DIY Idea #10: A “stair-step” vertical shoe rack for tight corners
Best for: studio apartments, corners, closet edges
Footprint: small base, tall storage
Build a narrow, stepped rack that stacks shoes upward like a mini staircase. The angled design improves visibility, which matters in small spacesif you can’t see it, you’ll forget it, and then you’ll buy another pair. (Again: no judgment, only understanding.)
DIY Idea #11: The “hidden under-console” shoe shelf
Best for: entryways with a small table or console already
Footprint: adds storage without adding furniture
If you have a console table near the door, add a simple lower shelf (or a slim rack) under it. Shoes disappear visually, but stay close to where they’re used.
Design tip: Use a boot tray underneath for wet weather so the shelf stays clean.
DIY Idea #12: Stackable clear boxes (but make them practical)
Best for: collectors, seasonal rotation, protecting nicer shoes
Footprint: stacks upward; works on shelves or floors
Clear boxes are popular because you can see what’s inside without opening everything. To keep them from becoming “a tower of regret,” use a system:
- Label by category (work, gym, dress, sandals).
- Keep daily shoes out of boxes for speed.
- Choose boxes that allow airflow or open them occasionally for freshness.
Where to place shoe storage in a small home (so it stays organized)
Storage placement matters as much as storage itself. A brilliant shoe rack placed in the wrong spot becomes… modern art. Here’s how to place it strategically:
- Entryway: store only daily shoes and guest-friendly pairs. Add a tray for wet shoes.
- Closet: store “sometimes” shoes in vertical shelves or boxes with labels.
- Bedroom: under-bed storage is great for seasonal rotation.
- Garage/mudroom: pegboard, open racks, and easy-to-clean solutions win here.
If you share space with family or roommates, create one simple rule: shoes live in one home base. Random piles usually happen because the “home base” is unclear or inconvenient.
Make it last: small habits that keep shoes from multiplying on the floor
- The 60-second reset: once a day, put away stray pairs. It’s quick and prevents pile creep.
- Seasonal swap: keep current-season shoes accessible; store off-season pairs under the bed or in labeled bins.
- Airflow matters: if shoes are damp, let them dry before closed storage to reduce odor.
- One-in, one-out (optional but powerful): if your storage is full, something leaves before something arrives.
Budget and materials: what these DIY shoe storage ideas usually cost
Costs vary by region and what you already have, but here’s a realistic range:
- Under $20: tension rod systems, upgraded over-the-door organizers, basic bins, crate/cubby hacks using reclaimed materials.
- $20–$60: floating shelves, slim shelving towers, rolling under-bed trays (DIY), pegboard stations.
- $60–$150: bench builds, slim cabinet-style solutions, more finished-looking entryway furniture builds.
Want the best deal? Use what you have: leftover boards, old bookcases, crates, and even sturdy cardboard can become a legit small-space shoe storage solution.
Safety note (especially important for teens and first-time DIYers)
If a project requires cutting wood, drilling into walls, or mounting heavy pieces, ask an adult to help and use proper safety gear. Always secure tall furniture with anti-tip hardware, avoid overloading doors with too much weight, and make sure any wall-mounted shoe storage is anchored into studs or appropriate wall anchors.
Real-life experiences: what people learn after trying small-space shoe storage
Here’s the funny thing about shoe storage: the “best” solution on paper can fail in real life, and the simplest idea can become the hero of your home. Based on common small-space organizing experiences, a few patterns show up again and again.
First, visibility is a personality test. Some people thrive with hidden storageslim cabinets, bins, and boxesbecause visual calm reduces stress. Others need open shelves because “out of sight” quickly becomes “I forgot these exist,” which leads to duplicate purchases and those awkward moments where you discover three nearly identical pairs of black sneakers. If you’re the forgetful type, open storage with a strict limit works better than closed storage with endless capacity.
Second, the entryway is not a warehouse. In small homes, the front door zone is precious. People who succeed long-term usually keep only daily shoes by the door and rotate everything else elsewhere. A “two-pair rule” (one daily pair + one backup) sounds strict, but it’s often the difference between a clear floor and a shoe avalanche. Families sometimes make it easier by assigning a single cubby per person for daily pairs and placing a small basket nearby for “temporary” shoeslike sports cleats or rain bootsthat need to dry out first.
Third, mixed shoe types break weak systems. Flats stack easily; boots do not. Heels are oddly shaped; kids’ shoes multiply like they’re sponsored by a secret shoe union. People often report that a simple shelf works for a few weeks until weather changes or a different shoe type enters the rotation. The fix is to build flexibility into the system: one taller shelf for boots, adjustable pegboard hooks, or a combination setup (open rack for sneakers + bin for sandals + tray for wet shoes).
Fourth, friction kills habits. If storage is hard to usetoo high, too tight, too fussyshoes won’t go there. A pretty solution that requires you to play shoe Tetris every morning tends to lose. The most-loved small-space solutions are usually the ones that are quick: slide shoes into a pocket, drop them into a cubby, or place them on a shallow shelf that doesn’t require bending and rearranging.
Fifth, the “one minute reset” is real magic. Many people find that if they do a tiny reset dailyjust returning stray shoes to the storage spotclutter never has a chance to build momentum. It’s like brushing your teeth: the small habit prevents the big problem. And for anyone sharing a home, labeling helps more than you’d expect. A small label like “Gym,” “Work,” or “School” reduces decision fatigue and makes it easier for everyone to participate without asking, “Where does this go?” ten times a day.
Finally, people often say the best upgrade isn’t the storage itselfit’s adding a landing zone: a tiny tray for keys, a hook for bags, a spot to sit, or a mat that signals “shoes go here.” When your entryway has a clear purpose, shoes stop wandering. They still try, of course. But you’ll be ready.
Conclusion
The easiest shoe storage idea for small spaces DIY isn’t one magic projectit’s the right mix of vertical space, low-friction habits, and a storage style that matches how you actually live. Start with a quick shoe audit, choose one solution that fits your entryway flow, and build from there. Your floor deserves a comeback tour.