Table of Contents >> Show >> Hide
- What Makes a “French Butter Croissant” So Special?
- Before You Start: Tools, Temperature, and a Tiny Reality Check
- Ingredients (Makes 12 Large Croissants)
- Timeline: The Three-Day Plan That Saves Your Sanity
- Step-by-Step: Classic French Butter Croissants
- Day 1: Make the dough (keep it intentionally under-kneaded)
- Day 2: Make the butter block (your butter’s “passport photo”)
- Lock-in: wrap the butter inside the dough
- Lamination: 3 letter folds = 81 layers (and a new personality)
- Day 3: Roll, cut, and shape
- Proof: warm, humid, and not a sauna
- A simple home “proof box” trick
- Egg wash + bake
- Troubleshooting: When Your Butter Gets “Ideas”
- Make-Ahead, Storage, and Reheating
- Variations (Because Croissants Are a Gateway Pastry)
- of “Real Kitchen” Experience (a.k.a. What People Learn After Batch One)
- Conclusion: Your New Weekend Flex
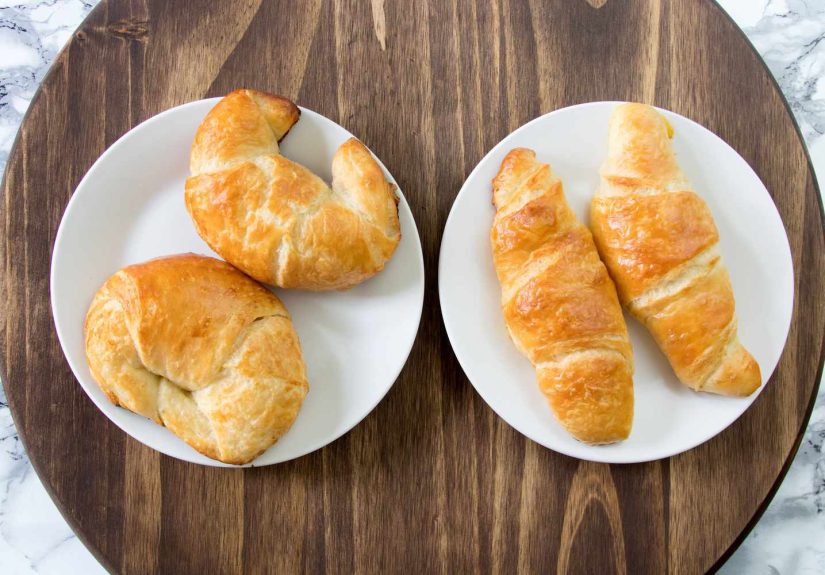
A French butter croissant is basically a magic trick you can eat: shatteringly crisp outside, absurdly tender inside, and a honeycomb crumb that looks like it belongs in a pastry museum. The catch? You don’t “mix and bake” croissants. You schedule them. You plan. You chill. You fold. You chill again. Thensomewhere between your third letter-fold and your fourth snackyou realize you’ve become the kind of person who owns a ruler for pastry reasons.
This recipe is a classic, all-butter, laminated croissant method built from the best practices shared by major U.S. baking authorities and test kitchens. It’s written for home ovens, real refrigerators, and countertops that also serve as your mail-sorting station. If you can keep butter cool, measure with intention, and resist the urge to “just keep rolling” when the dough fights back, you’re in excellent shape.
What Makes a “French Butter Croissant” So Special?
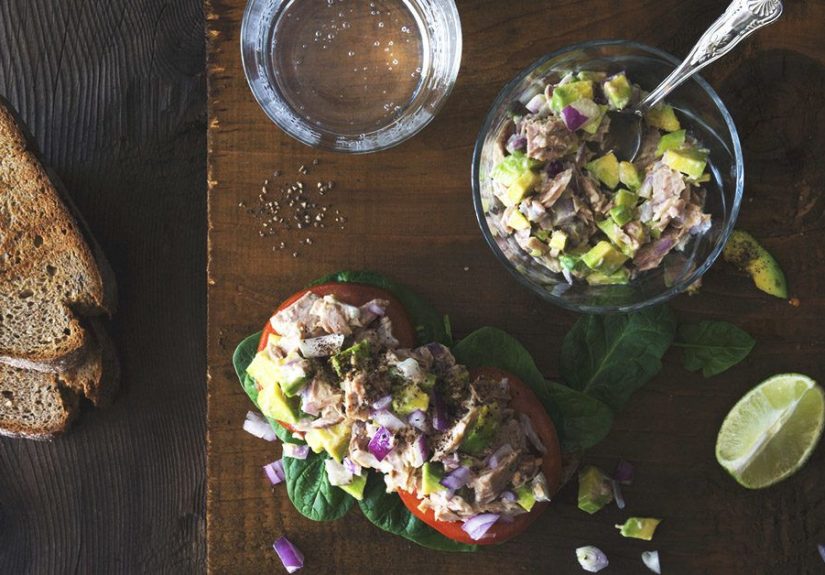
Two things: lamination and butter quality. Laminating means you encase a butter slab inside yeasted dough, then roll and fold repeatedly to create alternating layers. In the oven, the butter’s water content turns to steam, lifting those layers into flaky sheets while butterfat crisps and perfumes everything. The goal is contrast: a crackly shell and an interior that looks like airy, glossy honeycomb.
“French butter” in a croissant usually points to higher-fat butteroften European-style butter in the U.S., typically around 82–85% butterfat. More butterfat can mean better pliability at cool temps and a richer bite. Translation: fewer butter blowouts, more buttery glory.
Before You Start: Tools, Temperature, and a Tiny Reality Check
Tools that make life easier
- Kitchen scale (croissants love accuracy)
- Rolling pin (a French pin is nice, but any sturdy pin works)
- Bench scraper (for squaring edges and moving dough)
- Ruler or tape measure (yes, you’re that person now)
- 2 sheet pans + parchment paper
- Pastry brush (egg wash + brushing off flour)
- Instant-read thermometer (optional, but extremely helpful)
The golden rule: butter and dough should feel like teammates
If your butter is too cold, it cracks and shatters through the dough. If it’s too warm, it smears and disappears into the dough (which bakes up bready instead of layered). You want butter that is firm but pliablelike modeling clay you can bend without drama.
Work cool, pause often
A slightly cool kitchen is your best friend. If your space runs warm, your refrigerator becomes a “reset button.” The moment the dough feels squishy, oily, or resistantwrap it, chill it, and let it calm down. Croissant dough responds beautifully to patience and poorly to bravado.
Ingredients (Makes 12 Large Croissants)
Dough (Détrempe)
- 500 g all-purpose flour (about 4 cups; ideally ~11–12% protein)
- 60 g granulated sugar (about 1/3 cup)
- 10 g fine salt (about 1 3/4 tsp)
- 10 g instant yeast (about 3 tsp) or 15 g active dry yeast (about 5 tsp)
- 240 g cold whole milk (1 cup)
- 60 g cold water (1/4 cup)
- 50 g unsalted butter, melted and cooled (about 3 1/2 Tbsp)
Butter Block (Beurrage)
- 280 g European-style unsalted butter (about 2 1/2 sticks)
- Optional “training wheels”: 10–15 g flour (1–2 Tbsp) mixed into butter for slightly more stability
Egg Wash
- 1 large egg
- 1 Tbsp water or milk
- Pinch of salt
Timeline: The Three-Day Plan That Saves Your Sanity
- Day 1 (Evening): Mix dough, short room-temp puff, refrigerate overnight.
- Day 2 (Morning/Afternoon): Make butter block, lock-in, complete 3 turns with chilling between, refrigerate overnight.
- Day 3 (Morning): Roll, cut, shape, proof, bake, eat at least one standing up like a raccoon guarding treasure.
Can you compress it to two days? Yes. Should you? Only if you enjoy living dangerously and have a cool kitchen plus excellent self-control. The overnight rests deepen flavor and make handling easier.
Step-by-Step: Classic French Butter Croissants
Day 1: Make the dough (keep it intentionally under-kneaded)
- Mix dry: In a large bowl (or stand mixer bowl), whisk flour, sugar, salt, and yeast.
- Add liquids: Pour in cold milk, cold water, and melted/cooled butter. Mix until no dry flour remains. The dough should look a bit shaggycroissant dough doesn’t need a heroic knead right now.
- Brief knead: Knead just 2–3 minutes until it becomes a cohesive dough with no dry spots. It won’t be super smooth. That’s fine.
- Short warm rest: Cover and let sit at warm room temperature until slightly puffy, about 20–30 minutes. (You’re not chasing a full double here.)
- Flatten + chill: Press dough into a rectangle about 1 inch thick, wrap tightly, and refrigerate at least 6 hoursovernight is ideal.
Day 2: Make the butter block (your butter’s “passport photo”)
- Place butter between two sheets of parchment. Pound with a rolling pin until it’s a neat square about 7–8 inches wide, even thickness.
- Chill briefly if it gets soft, or let stand a few minutes if it’s rock-hard. You want firm but bendable.
Lock-in: wrap the butter inside the dough
- Roll chilled dough into a square about 12 inches wide. Place butter on top at a 45° angle (diamond-on-square).
- Stretch and fold each dough corner over the butter, sealing edges so butter is fully enclosed. Pinch seams closed.
- Lightly flour the surface as neededbut keep flour modest. Excess flour can mess with layer adhesion later.
Lamination: 3 letter folds = 81 layers (and a new personality)
You’ll roll the dough into a rectangle, fold it like a letter (thirds), then chill. Repeat until you’ve done three letter folds. Brush off excess flour before every foldthis matters more than it seems.
- Turn 1: Roll to a rectangle about 24 x 12 inches. Fold into thirds (like a business letter). Wrap and chill 45–75 minutes.
- Turn 2: Rotate dough 90°. Roll again to 24 x 12 inches. Fold into thirds. Wrap and chill 45–75 minutes.
- Turn 3: Rotate 90° again. Roll and fold one final time. Chill at least 2 hours, preferably overnight.
If the dough resists rolling or springs back, don’t wrestle it. Chill 10–15 minutes, then continue. “Force” is how layers get crushed and butter escapes like it’s fleeing a crime scene.
Day 3: Roll, cut, and shape
- Final roll: Roll dough into a long rectangle about 24 x 12 inches, roughly 1/4 inch thick. Trim edges for cleaner layers (optional but helpful).
- Cut triangles: Cut the rectangle into long triangles (about 4 inches wide at the base). A ruler helps keep them consistent, which helps them proof and bake evenly.
- Notch + stretch: Cut a small 1/2-inch notch in the center of each triangle base (optional). Gently stretch the triangle lengthwise so you get more rolls and a nicer spiral.
- Roll: Starting at the base, roll toward the tip with light tension (snug, not strangled). Place seam-side down on parchment-lined pans, spacing them well.
- Curve: Slightly curve the ends inward for that classic crescent look.
Proof: warm, humid, and not a sauna
Proof at 75–80°F (ideal) until very puffy, marshmallowy, and jiggly when you gently shake the panusually 3–5 hours. If you proof too warm, butter melts and you lose layers. If you underproof, you get tight, bready interiors.
A simple home “proof box” trick
- Put a mug of boiling water on the bottom rack of an OFF oven.
- Place croissants on a rack above it (uncovered or very loosely covered).
- Refresh the hot water as needed to maintain gentle warmth and humidity.
Egg wash + bake
- Preheat oven: Heat to 400°F.
- Egg wash: Whisk egg, water (or milk), and salt. Brush gently over the croissants. Try not to paint the exposed cut edges too heavilyegg wash can glue layers at the sides.
- Bake: Choose one of these common approaches:
- Option A (two-stage): Bake 15 minutes at 400°F, then reduce to 350°F and bake 10–15 minutes more until deep golden.
- Option B (steady): Bake at 400°F for 15–20 minutes until deeply browned and crisp.
- Cool briefly: Let stand 10–15 minutes before tearing in (unless you enjoy molten butter on your fingertipsno judgment).
Troubleshooting: When Your Butter Gets “Ideas”
Problem: Butter leaks out during baking
- Likely cause: Dough or butter got too warm during lamination or proofing.
- Fix next time: Chill more often; proof cooler; make sure butter is pliable but not soft.
- Save the batch: Keep baking. Leaky croissants can still taste fantasticjust a bit less lofty.
Problem: Dough tears while rolling
- Likely cause: Gluten is tight or butter is too cold.
- Fix: Wrap and chill 10–15 minutes to relax; let butter warm slightly if it’s cracking.
Problem: Croissants are dense and bready
- Likely cause: Underproofed, or butter smeared into dough (lost layers).
- Fix: Proof longer at a controlled temp; keep dough cool during turns; don’t over-flour or over-knead early.
Problem: Layers look “glued” inside
- Likely cause: Too much flour left on dough during folds, preventing clean adhesion.
- Fix: Brush off excess flour before foldingevery time.
Make-Ahead, Storage, and Reheating
- Same-day best: Croissants are at peak crispness within hours of baking.
- Room temp: Store airtight 1–2 days.
- Freeze baked: Freeze airtight up to 1 month. Reheat at 350°F for about 8–12 minutes until crisp.
- Freeze dough (smartly): Freeze at one stage only (either after making the dough, after lamination, or after shaping). Thaw overnight in the fridge before proofing/baking.
Variations (Because Croissants Are a Gateway Pastry)
Pain au chocolat
Cut rectangles instead of triangles, add 1–2 batons of dark chocolate, roll up, proof, egg wash, bake.
Almond croissants (next-day glow-up)
Split day-old croissants, brush with simple syrup, fill with almond cream, top with sliced almonds, bake until toasted.
Ham & cheese croissants
After cutting triangles, add a thin slice of ham and a small amount of grated cheese near the base, then roll. (Don’t overfill. Croissants hate heavy baggage.)
of “Real Kitchen” Experience (a.k.a. What People Learn After Batch One)
Here’s what home bakers commonly discover the first time they make French butter croissants: the recipe isn’t hard in the way calculus is hard. It’s hard in the way a houseplant is hardbecause it’s less about one heroic action and more about a dozen small decisions that prevent tragedy.
The first big lesson is that temperature is the main character. Many people start out thinking, “I’ll just move quickly!” and then watch butter soften the moment it meets a warm countertop. The experienced move is the opposite: move deliberately. Roll a little, feel the dough, and if it starts to get stretchy-soft or oily, you pause. Into the fridge it goes. That pause is not failureit’s technique. A surprising number of “my croissants didn’t layer” stories begin with skipping that pause because someone felt personally challenged by a rectangle of dough.
The second lesson is that croissants reward straight edges and consistent sizing. This is why so many seasoned bakers keep a ruler nearby. When your dough is rolled evenly and cut into uniform triangles, the croissants proof at the same rate and bake at the same pace. That means fewer burnt tips, fewer pale centers, and fewer “this one is perfect but its siblings are… experimental.”
Third: proofing is where patience becomes flavor. People often underproof because the croissants “look bigger” and everyone is hungry. But laminated dough needs to feel airyjiggly, marshmallowy, and noticeably lighter. A gentle finger press should leave a dent that slowly returns. Many bakers also notice that the kitchen itself changes during proofing: the dough smells slightly sweet and yeasty, and the butter scent becomes more pronounced. That’s your signal that fermentation is building flavor while the layers stay intact.
Fourth: you’ll probably have one “butter incident.” Maybe a corner cracks. Maybe a small smear appears. This is normal. The best response is calm triage: chill, dust a tiny bit of flour on exposed butter if needed, and keep going. Croissants are precision pastry, yesbut they’re also surprisingly forgiving when you correct issues early instead of powering through.
Finally, there’s the emotional arc: skepticism at Day 1 (“Why is this dough so lumpy?”), cautious optimism at Day 2 (“Wait… I can see layers!”), and Day 3 triumph when the oven does its dramatic steam-powered lift. Even imperfect croissants are usually delicious, and most bakers report the same outcome: the first batch disappears fast, the second batch looks better, and by the third you’re casually discussing butterfat percentages like it’s sports analytics.
Conclusion: Your New Weekend Flex
French butter croissants are a craft project you can eat: controlled fermentation, deliberate lamination, and the kind of buttery payoff that makes store-bought options feel like a polite suggestion. Keep the dough and butter at similar (cool) consistency, brush off excess flour, proof patiently, and bake until deep golden. The layers will comeand when they do, you’ll hear that first crisp crackle and know the weekend was well spent.