Table of Contents >> Show >> Hide
- Why Build a Copper Trellis Instead of Wood or Wire?
- Step 0: Pick the Right Trellis Style for Your Plants
- Materials and Tools
- Design Planning: Measure Once, Cut Once, Avoid Crying
- Option A: Build a Soldered Copper Trellis (Strongest, Cleanest Look)
- Option B: Build a No-Solder Copper Grid Trellis (Bolts + Wing Nuts)
- Anchoring and Installation: The “Don’t Let It Tip Over” Chapter
- Plant Training Tips (Because Vines Don’t Read Instructions)
- Finishing Options: Shiny Copper or Patina Personality?
- Cost and Material Planning (So You Don’t Overbuy Like It’s a Sport)
- Common Mistakes (And How to Avoid Them)
- of Real-World “I’ve Been There” Experience
- Conclusion
If your climbing plants are currently doing that thing where they “politely” climb… right up your tomatoes, your mailbox, and your dignity,
it’s time to give them a structure that says, “We’re organized here.” A copper trellis does exactly thatwhile also looking like you own at least
one pair of gardening gloves that aren’t held together by hope and duct tape.
In this guide, you’ll learn how to build a long-lasting DIY copper trellis using common copper tubing and fittings (the same stuff plumbers use),
plus two assembly options: a rock-solid soldered build and a no-solder, bolt-together approach. Along the way, we’ll cover smart sizing,
anchoring, plant-friendly spacing, and a few hard-earned lessons that can save you money, time, and at least one “Why is my trellis leaning like
it just got off a carnival ride?” moment.
Why Build a Copper Trellis Instead of Wood or Wire?
Wood trellises are classic, affordable, and charminguntil they rot, warp, or become a snack for weather and time. Wire trellises are practical,
but they can look… utilitarian. Copper hits a sweet spot: it’s strong, weather-resistant, and downright good-looking.
- Long life outdoors: Copper doesn’t rust like steel and won’t rot like wood.
- Gets better with age: It develops a warm brown tone, and over time may shift toward a muted green patina.
- Strong for heavy vines: With the right diameter and anchoring, copper can support vigorous climbers.
- Design-flexible: You can make a simple ladder, a grid panel, a freestanding tower, or an archy showpiece.
One important note: copper is an essential plant micronutrient, but excessive copper in soil can be harmful. A copper trellis itself typically
isn’t the same issue as repeatedly applying copper-based products to soil or foliage. Still, it’s smart to avoid grinding copper into soil, and
keep runoff from aggressive patina chemicals away from beds you care about.
Step 0: Pick the Right Trellis Style for Your Plants
Before you buy copper pipe like you’re stocking a tiny plumbing store, match the trellis to what you’re growing and where it will live.
Trellises help keep plants off the ground, improve air flow, and make harvesting easierespecially for vining crops.
Three proven DIY copper trellis styles
- Grid panel (best all-purpose): Great for clematis, jasmine, passionflower, cucumbers, peas, pole beans. Mount to a wall,
fence, or posts. - Ladder pattern (fast + sturdy): A repeating “rung” design that supports vines while keeping materials simple.
- Freestanding tower or obelisk: Ideal when you need support in the middle of a bed (or you want a garden sculpture that also
works).
Spacing tip: Small tendrils and smaller leaves usually prefer a tighter grid so they can grab on easily. Aggressive vines with
big leaves can handle wider spacing. If you’re training edibles, sturdier support also keeps fruit cleaner and reduces disease pressure by
improving air circulation.
Materials and Tools
Materials (for a typical 6-foot-tall x 2-foot-wide grid panel)
- Copper pipe/tubing: Commonly 1/2-inch works well for many trellises; consider thicker diameter for taller or windier installs.
- Fittings (for soldered build): tees, elbows, couplings (quantities depend on your pattern).
- Lead-free solder (look for plumbing-safe, lead-free).
- Flux (paste or liquid, made for copper pipe).
- Mounting hardware: copper tube straps/pipe straps plus exterior screws; or masonry anchors if mounting to brick/concrete.
- Optional caps/finials: copper caps make the top ends look finished and reduce sharp edges.
Tools
- Measuring tape, marker, square
- Pipe cutter (clean cuts) or hacksaw (works, but deburr well)
- Deburring tool or round file
- Emery cloth/sanding pad or wire brush for cleaning joints
- Clamps
- For soldering: propane torch, heat-resistant gloves, fire-safe surface, spray bottle of water, and a small fire extinguisher (seriously)
- For no-solder build: drill, drill bits, center punch, stainless bolts + washers + wing nuts
Design Planning: Measure Once, Cut Once, Avoid Crying
Copper trellises look sleek because they’re straight, square, and consistent. The secret is planning. Sketch your trellis like you’re drawing a
city grid for extremely ambitious peas.
Recommended sizes (quick starting points)
- Wall panel: 24–36 inches wide; 60–84 inches tall
- Bed-end panel: 18–24 inches wide; 48–72 inches tall
- Privacy/screen trellis: 8–12 feet tall (requires thicker pipe + strong anchoring)
Rule of thumb: Bigger trellis = bigger wind load. If your area gets strong gusts, don’t just “wing it.” Use thicker pipe,
more anchors, and consider mounting to sturdy posts rather than a flimsy fence panel.
Option A: Build a Soldered Copper Trellis (Strongest, Cleanest Look)
Soldering (also called “sweating”) copper pipe creates strong, permanent joints. Once you’ve done a few practice joints, it’s surprisingly
approachableand deeply satisfying, like making a grilled cheese that doesn’t burn.
Step 1: Build a simple layout jig
The easiest way to keep everything straight is to assemble on a flat surface. You can make a quick jig from scrap 2x4s or use a plywood sheet
with guide marks. The goal is to hold the tubing in place while you solder, so your trellis stays square instead of turning into “modern art.”
Step 2: Cut copper to length
- Mark all cuts with a marker and a square.
- Cut with a pipe cutter for clean, straight ends.
- Deburr every cut end (inside and out). Burrs make joints fit poorly and can snag plant stems.
Step 3: Dry-fit the entire trellis
Assemble everything without flux or solder first. This is where you catch problems like “I cut 8 pieces the same length… and none of them were
the right length.” Adjust now, not after you’ve soldered it into a permanent monument.
Step 4: Clean and flux the joints
- Use emery cloth or a cleaning pad to scrub oxidation off the pipe ends (about 1 inch back).
- Clean inside the fitting cups too (a fitting brush helps).
- Apply a thin, even coat of flux to the pipe end and/or fitting interior.
This cleaning step matters. Solder doesn’t “glue” dirty copperit flows into clean, heated joints by capillary action. If you skip prep, your
joint will be weak, lumpy, and emotionally disappointing.
Step 5: Solder (work safely and steadily)
- Set up on a fire-safe surface. Keep a spray bottle and extinguisher nearby.
- Heat the fitting (not the solder). Move the flame around the joint so it warms evenly.
- Touch solder to the jointif it melts and gets drawn in, you’re at the right temp.
- Feed a small bead until you see a thin ring form around the seam.
- Let cool naturally; wipe excess flux residue after cooling.
Pro move: Solder from the bottom up if your design stacks sections. This helps keep previously soldered joints from reheating
too much while you work higher.
Step 6: Add finishing touches
- Cap open pipe ends so no one gets stabbed by a “harmless” garden project.
- Lightly sand any sharp edges.
- Optional: keep it shiny by polishing, or let it age naturally (many gardeners prefer the patina).
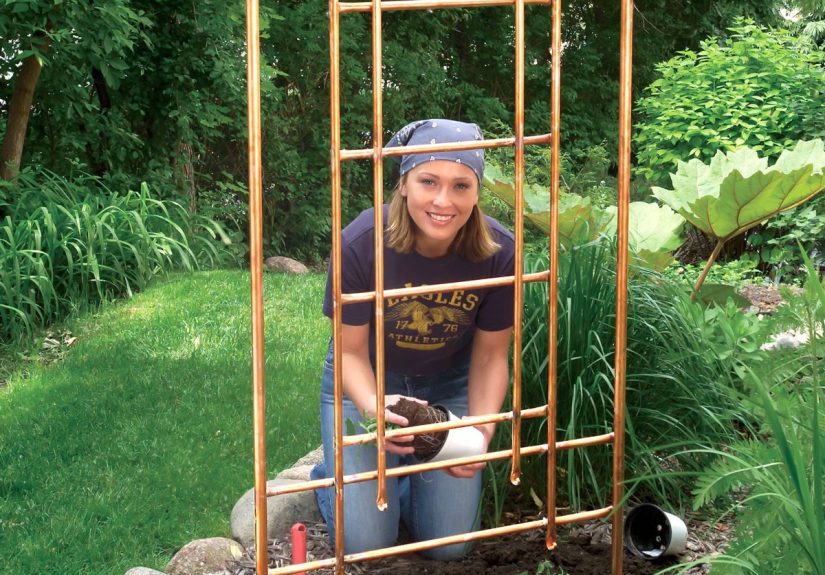
Option B: Build a No-Solder Copper Grid Trellis (Bolts + Wing Nuts)
Don’t want a torch? Totally fair. You can build a tall copper grid by drilling intersection points and bolting pipes together using
stainless fasteners. This approach is also nice if you want to disassemble or reconfigure the trellis later.
Step 1: Choose spacing and mark intersections
Lay out your design on paper first. Mark where horizontal and vertical pipes will intersect. Group similar pieces together so your marks
stay consistent across multiple pipes.
Step 2: Clamp and drill clean, aligned holes
- Clamp multiple horizontal pipes together with scrap wood as a backing.
- Use a center punch to prevent the drill bit from wandering on the curved pipe.
- Drill perpendicular to the pipe so your holes line up cleanly.
- Deburr holes with a file or flush cutters (copper is soft).
Step 3: Assemble the grid
- Lay horizontals down, then place verticals on top (or vice versa).
- Push bolts through intersections and secure with washers and wing nuts.
- Tighten firmlybut don’t crush the pipe. Copper is sturdy, not indestructible.
Step 4: Mount securely
Use pipe straps to mount to a fence, posts, or a wall. Space straps to prevent wobbleespecially for tall trellises. If you’re going above
typical fence height, use real structural supports and follow local rules and neighborly diplomacy.
Anchoring and Installation: The “Don’t Let It Tip Over” Chapter
A trellis only looks elegant when it stays upright. Anchoring matters more than fancy fittings.
If mounting to a wall or fence
- Use multiple pipe straps (top, middle, bottom at minimum).
- Mount into studs/posts when possiblenot just thin fence slats.
- Leave a small gap off the wall so vines have room to weave through.
If freestanding
- Use thicker pipe and a wider base for stability.
- Anchor legs with ground stakes, or set posts/feet more deeply if supporting heavy vines.
- In windy areas, treat a tall trellis like a sail: add bracing or anchor to posts.
Plant Training Tips (Because Vines Don’t Read Instructions)
Most climbers will eventually figure it out, but training early makes everything faster and neater.
- Start guiding when stems are young: Older stems can snap if you force them.
- Use soft ties: Plant tape, jute, or fabric strips; avoid thin wire that cuts stems.
- Encourage airflow: Spread growth across the grid to reduce crowding and mildew risk.
- Harvest-friendly layout: Keep fruiting vines accessibleyour future self will thank you.
Finishing Options: Shiny Copper or Patina Personality?
Fresh copper is bright and flashy. Outdoors, it naturally darkens and may develop a green patina over time. You can let nature do its thing, or
speed it up with a controlled patina process.
Natural aging
Easiest option: do nothing. Copper will darken to a warm brown and may slowly shift greener depending on climate and exposure.
Quick patina (use caution)
Many DIY patina methods use vinegar, salt, and sometimes ammonia. If you try this:
- Do it outdoors with gloves and eye protection.
- Keep solutions off soil and away from plants you care about.
- Rinse and dry thoroughly before installing near sensitive plantings.
The best “finish” is the one that matches your garden style and maintenance tolerance. If you want it to stay shiny, you’ll be polishing.
If you want it to look like it belongs in a fancy courtyard garden, let it age like a charming antique.
Cost and Material Planning (So You Don’t Overbuy Like It’s a Sport)
Copper isn’t the cheapest material, so planning your cuts is where you save the most money.
- Design around standard lengths: Map your cuts to minimize leftovers.
- Mix diameters strategically: Thicker pipe for the outer frame; smaller pipe for interior rungs can reduce cost and weight.
- Choose assembly method by budget: Soldered builds use more fittings; bolt-together grids use more hardware and drilling time.
Common Mistakes (And How to Avoid Them)
1) Skipping the dry fit
Dry fitting is the “measure twice” of copper projects. Don’t rush past it.
2) Not cleaning joints enough
Dirty copper = weak solder joints. Clean, flux, then solder. It’s a three-step ritual. Respect the ritual.
3) Under-anchoring tall trellises
A tall trellis needs serious support. If it’s more than about 6 feet, treat it like a small structurenot a decoration.
4) Making the grid too wide for the plant
Tiny tendrils need something to grab. If you want fast coverage, go tighter with spacing.
of Real-World “I’ve Been There” Experience
The first copper trellis I ever built was supposed to be a clean, simple gridsomething that would make my garden look intentional, like I
regularly drink iced coffee while deadheading roses. In reality, my first draft looked like a ladder drawn by someone riding a roller coaster.
The lesson: copper is forgiving, but it’s not psychic. If you want straight lines, you have to build straight linesmeaning you need a jig, a
square, and the patience to fix a mistake before it becomes permanent.
Here’s what surprised me most: the cutting phase matters more than you think. When you’re cutting a pile of identical pieces,
it’s tempting to rush. But even small inconsistencies add up. One pipe 1/8 inch short becomes a gap; a few gaps become a trellis that’s subtly
out of square; and suddenly you’re “adjusting” with your hands like you’re shaping a baguette. Once I started batching cutsmarking everything,
cutting in groups, and checking against a reference piecemy builds got faster and cleaner.
If you solder, the big “aha” moment is learning that heat control is the entire game. Early on, I overheated joints because I
thought more flame meant more better. Nope. Too much heat scorches flux, makes solder bead up instead of flowing, and can even weaken the joint.
The best joints came when I heated the fitting evenly and let the solder get drawn in like it had someplace to be. Also: keep a damp rag nearby
(after the joint cools a bit) to wipe away flux residue. It’s a small step that makes the trellis look crisp instead of sticky and smudged.
The second surprise: anchoring is half the build. The prettiest trellis in the world becomes yard clutter if it wobbles. I once
mounted a tall panel to a fence section that seemed soliduntil the vine filled in and caught wind. The fence flexed, the trellis flexed, and
everything started to sway together like a slow dance nobody asked for. Since then, I mount tall trellises into real posts, or I add extra straps
and fasteners so the load is shared. For freestanding designs, I’ve learned to widen the base or add bracing before the plant is heavy, not after.
Finally, a note on looks: fresh copper is gorgeous, but it doesn’t stay shiny for long outdoors. The first time it darkened, I had a mini moment
of “Did I ruin it?” Then it settled into this warm, earthy tone that looked even more at home in the garden. If you love the bright penny look,
plan on polishing. If you love the “timeless garden hardware” vibe, let it age naturally. Either way, the best compliment you can get is when
someone asks where you bought itand you get to say, casually, “Oh, this? I built it.”
Conclusion
A DIY copper trellis is one of those garden upgrades that’s practical and beautiful at the same time. It supports healthier growth, saves space
with vertical gardening, and adds a clean architectural look that plays nicely with everything from cottage gardens to modern minimalist beds.
Start with a simple grid or ladder pattern, build it square, anchor it like you mean it, and your plants will finally have a place to climb that
isn’t your entire yard.