Table of Contents >> Show >> Hide
- Why a Tree Bench Works (and Why Reclaimed Wood Makes It Better)
- Before You Start: Pick the Right Tree and the Right Reclaimed Wood
- Tools and Materials
- Design Options: The “Pizza Slice” Approach (Hexagon or Octagon)
- Step 1: Measure the Tree (and Plan for Growth)
- Step 2: Make a Full-Size Layout Template (This Saves Your Sanity)
- Step 3: Prep the Reclaimed Wood
- Step 4: Build Six Identical Bench Frames
- Step 5: Add Legs and Plan for Leveling
- Step 6: Dry-Fit Around the Tree (Do This Before Seat Slats)
- Step 7: Bolt the Sections Together (Stronger Than Just Screws)
- Step 8: Install the Seat Slats
- Step 9: Sand Smart, Not Forever
- Finishing for Outdoors: Pick Your Battle
- Tree-Friendly Maintenance Tips
- Troubleshooting: Common “Uh-Oh” Moments
- Real-World Experiences Building a Reclaimed Wood Tree Bench (About )
- Conclusion
- SEO Tags
A bench around a tree is the backyard equivalent of a group chat: everybody fits, nobody has to “scoot down,”
and the center of attention (the tree) gets to stay rooted in its main-character era.
If you’ve got reclaimed wood waiting for a second life, this project is a perfect matchrustic, practical,
and just complicated enough to feel impressive without requiring a woodworking wizard license.
This guide walks you through planning, prepping reclaimed lumber, building modular bench sections, leveling the bench
without angering your tree’s roots, and finishing it so it survives sun, rain, and that one friend who always
drags their feet like they’re sanding the ground for fun.
Why a Tree Bench Works (and Why Reclaimed Wood Makes It Better)
A tree bench creates a natural “pause spot” in a yardsomewhere you can sip coffee, watch pets zoom in circles,
or pretend you’re reading while actually eavesdropping on birds. Building it from reclaimed wood adds character:
nail holes, weathered grain, and old saw marks that scream, “I have stories,” without saying a word.
The key is designing the bench so it doesn’t touch or fasten to the tree. Trees grow, move with wind,
and expand seasonally. Your bench should be a friendly neighbor, not a clingy roommate.
Before You Start: Pick the Right Tree and the Right Reclaimed Wood
Choose a Tree That Won’t Turn Your Bench Into a Tilt-A-Whirl
- Healthy trunk: Avoid trees with obvious rot, large cavities, or major damage near the base.
- Enough space: You’ll want at least a few feet of clear ground around the trunk for seating and leg placement.
- Flatter is kinder: A steep slope is doable, but leveling will take longer and require adjustable feet or shims.
- Mind the roots: Plan a bench that rests on the surface rather than digging deep post holes.
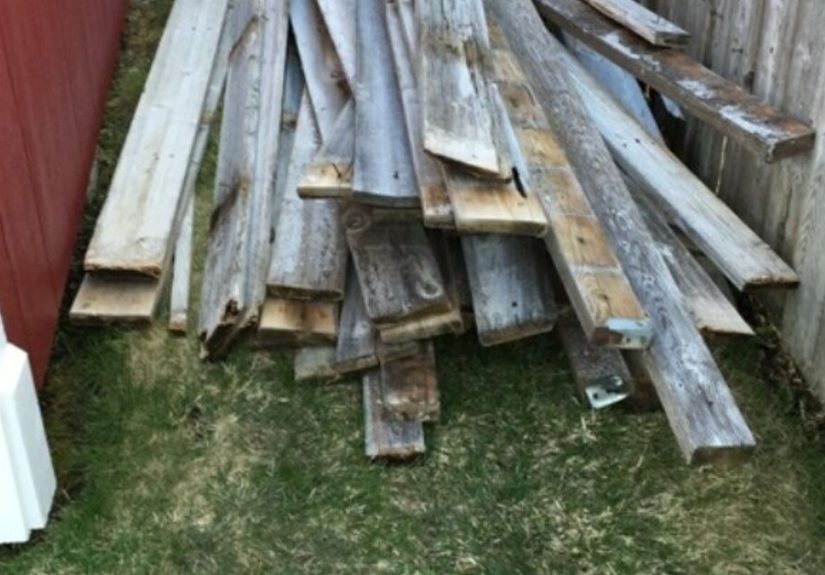
Reclaimed Wood: The Charm Is RealSo Are the Surprises
Reclaimed wood can be incredibly durable, but it can also come with hidden hardware, old finishes, or soft spots.
Inspect every board like you’re choosing avocados: squeeze gently, look closely, and don’t let optimism override logic.
- Avoid punky/soft wood: If you can dent it with a fingernail, it won’t hold up outdoors.
- Check for insects: Tiny holes and powdery dust can signal wood-boring pests.
- Plan for movement: Reclaimed boards may be drier or more “set” than new lumber, but outdoor humidity still moves wood.
Safety Note: Old Paint Might Mean Lead
If your reclaimed wood is painted (especially if you don’t know its age), treat it cautiously.
Sanding or scraping old coatings can create hazardous dust. If you suspect lead-based paint, follow lead-safe practices:
keep kids and pets away, contain dust, and use appropriate protective gear. When in doubt, don’t sand it at allencapsulate
with a suitable primer/paint system or choose different boards.
Tools and Materials
Tools
- Tape measure, pencil/marker, straightedge
- Miter saw (ideal) or circular saw with a guide
- Jigsaw (helpful for trimming odd shapes)
- Drill/driver + bits and countersink
- Clamps (more clamps = fewer regrets)
- Orbital sander (plus sanding discs)
- Pry bar/cat’s paw and nail pullers
- Metal detector (highly recommended for reclaimed wood)
- Level (a long one is best) and shims
Materials
- Reclaimed lumber for seat slats and rails (2×4, 2×6, or 5/4 deck boards are common)
- Leg stock (reclaimed 4x4s, or laminate 2x4s if needed)
- Exterior-rated screws (stainless steel or approved outdoor structural screws)
- Bolts + washers + nuts (stainless or hot-dip galvanized for joining sections)
- Exterior wood glue (optionaluse strategically; outdoors is tough on glue-only joints)
- Finish: penetrating oil/stain or spar/marine-grade topcoat (details below)
- Gravel or pavers (optional) for stable leg “pads” on soft soil
Design Options: The “Pizza Slice” Approach (Hexagon or Octagon)
Most DIY tree benches are built as a polygontypically hexagonal (6 sides) or octagonal (8 sides).
Why? Because it’s easier to build identical sections and bolt them together around the trunk. Think of it like
building a pizza: you make slices, then you assemble the whole pie around the tree.
Hexagon vs. Octagon
- Hexagon: Fewer parts, faster build, clean classic look. Miter cuts are straightforward.
- Octagon: Looks more “round,” slightly more comfortable flow, but more sections and more cuts.
In this guide, we’ll build a hexagonal, modular bench with six identical frames you can dry-fit,
level, then bolt together.
Step 1: Measure the Tree (and Plan for Growth)
Measure the trunk where the bench will sit. A common approach is measuring the diameter around
17 inches above the ground (roughly seat-frame height), because trunks flare and can be slightly oval.
Then add clearance so the bench never touches the bark.
- Slow-growing, mature tree: add about 2 inches of clearance total.
- Faster-growing tree: add 3 inches (or more) total.
Example: If your tree measures 18 inches across at bench height, plan an opening around 21 inches so you’ve got
breathing room. The bench should look intentionalnot like it’s slowly being swallowed by the trunk.
Step 2: Make a Full-Size Layout Template (This Saves Your Sanity)
Math is great, but a full-size template is betterbecause it accounts for real life: oval trunks, uneven ground,
and that one board that’s “definitely a 2×6” but measures like it was cut by vibes.
Template Method (Recommended)
- Lay down cardboard, rosin paper, or a sheet of cheap plywood near the tree.
- Draw a circle representing the tree’s diameter at bench height.
- Draw a second circle that’s bigger by your clearance amount (your “no-touch zone”).
- Divide the circle into 6 equal sections (every 60 degrees). Connect points to form a hexagon.
- Mark a second, larger hexagon outside the first to represent your seat depth (typically 14–18 inches deep).
Now you can measure the template lines directly for your cut lengths. This also helps you visualize leg placement
and check that the bench won’t collide with major roots or landscaping.
Step 3: Prep the Reclaimed Wood
De-Nail Like You Respect Your Saw Blades (Because You Should)
Reclaimed boards often hide nails, staples, or mystery metal fragments. Find them before your blade does.
Use a metal detector, then pull fasteners with a cat’s paw, nail puller, or pliers. Bent nails can be stubborn
work them out slowly to avoid splitting the board.
Clean and Flatten
- Scrub dirt/mildew: A stiff brush and mild cleaning solution works well. Let boards dry fully.
- Skip aggressive pressure washing: If you do use it, keep distance and work with the grain to avoid gouging.
- Flatten if needed: Plane lightly or sand to remove splinters and high spotsdon’t erase the character.
Pro tip: For seat slats, comfort matters. Keep the “rustic” look, but knock down sharp corners.
Nobody wants a bench that gives out free splinters like party favors.
Step 4: Build Six Identical Bench Frames
Each frame is a wedge-shaped section that will connect to its neighbors. You’ll build:
an inner rail (closest to the tree), an outer rail (outside edge), and
two side rails to connect them.
Basic Frame Geometry
- For a hexagon, your angled cuts are commonly 30 degrees on the ends of rails (so two sections meet cleanly).
- Build all six frames the same so they assemble like a set.
Build Steps
- Cut rails: Use your template measurements for inner and outer rails. Cut matching angles on each end.
- Dry-fit one section: Clamp it together without screws to confirm the angles match your template.
- Assemble: Pre-drill and fasten with exterior screws. Outdoor projects movepre-drilling reduces splitting.
- Add braces: Install at least one or two cross braces in each section to support seat slats.
Outdoor rule of thumb: use screws, not nails. Screws resist loosening as wood expands and contracts.
Choose corrosion-resistant hardware (stainless or properly rated coated fasteners), especially if you’re using cedar
or expect wet conditions.
Step 5: Add Legs and Plan for Leveling
Most tree benches end up slightly uneven unless you plan for it. Your yard is not a furniture showroom floor, no matter
how confidently your grass stands there.
Leg Placement
- Place legs near the outer corners of each section for stability.
- If the bench will be large or heavily used, add an additional leg closer to the inner rail on alternating sections.
- Keep legs off major surface roots whenever possibleshift a leg a few inches rather than compressing roots.
Leveling Options
- Best: Adjustable leveling feet (rated for outdoor use).
- Good: Composite shims (won’t rot like pine shims).
- Also good: Small pavers or compacted gravel pads under each leg.
Don’t sink legs deep into the ground unless you’re sure you won’t damage roots. A surface-supported bench is typically
kinder to the tree and easier to adjust later.
Step 6: Dry-Fit Around the Tree (Do This Before Seat Slats)
Carry the six sections around the tree and assemble them temporarily.
This is when you discover whether your template was brilliant or merely optimistic.
- Set all sections in place with an even gap around the trunk (your planned clearance).
- Clamp adjoining edges together.
- Check level across multiple directions.
- Adjust legs with shims/feet until the frames sit stable with no rocking.
If the bench feels “wobbly,” fix it now. Once the seat slats go on, the bench will feel more rigid,
but it won’t magically forgive a crooked leg.
Step 7: Bolt the Sections Together (Stronger Than Just Screws)
You can screw adjacent sections together, but bolts make a sturdier, longer-lasting connectionespecially outdoors.
Use washers so bolt heads don’t crush wood fibers, and snug everything firmly without over-tightening.
Bonus: Bolted sections are easier to remove later if you need to re-level, refinish, or give the tree more clearance as it grows.
Step 8: Install the Seat Slats
Seat slats are where reclaimed wood really shines. Mix grain patterns for a patchwork look, or keep it uniform for a calmer vibe.
Either way, leave small gaps (about 1/4 inch) between slats for drainage.
Seat Slat Tips
- Pre-sand edges: Round over corners slightly for comfort.
- Pre-drill: Reclaimed wood can be brittle; pre-drilling reduces splits.
- Stagger joints: If you’re piecing boards, don’t line up seams in one spot.
Keep the inner edge of the seat consistent with your clearance plan. If you accidentally drift inward, the tree will eventually
“correct” your mistake… by pushing on the bench with slow, unstoppable determination.
Step 9: Sand Smart, Not Forever
Your goal is comfort and safety, not turning reclaimed wood into factory-new boards.
Focus sanding on seat surfaces, edges, and anywhere hands will grab. Wear eye and hearing protection when cutting,
and control dustespecially if there’s any chance the wood has old coatings.
Finishing for Outdoors: Pick Your Battle
Outdoor finishes are a trade-off between maximum protection and minimum maintenance.
Here’s the honest truth: everything outside eventually needs touch-ups. The “best” finish is the one you’ll actually maintain.
Option A: Penetrating Oil or Exterior Stain (Lower Build, Easier Refresh)
- Look: Natural, matte-to-satin, highlights grain.
- Maintenance: Easier to recoatclean and apply again.
- Great for: People who don’t want peeling or sanding a topcoat later.
Option B: Spar/Marine-Style Varnish or Exterior Urethane (Higher Protection, Higher Maintenance)
- Look: Richer, glossier (unless you choose satin), “furniture-like.”
- Maintenance: Needs inspection; if it starts failing, you may need sanding and re-coating.
- Great for: Covered patios, or builders committed to annual checkups.
Finishing Steps (Works for Most Systems)
- Let the bench dry fully after any cleaning.
- Apply finish per manufacturer directions, working in shade if possible.
- Coat end grain thoroughly (it drinks moisture first).
- Allow full cure before heavy use“dry to touch” isn’t the same as “ready for a backyard party.”
Tree-Friendly Maintenance Tips
- Keep clearance: Re-check the gap around the trunk each year and adjust if needed.
- Don’t pile mulch against legs: Constant moisture speeds rot.
- Re-level seasonally: Freeze/thaw and soil settling can change leg height.
- Clean gently: Brush off debris; avoid harsh blasting that tears wood fibers.
Troubleshooting: Common “Uh-Oh” Moments
The bench rocks
Fix it at the legs. Add adjustable feet, use composite shims, or reset leg pads on compacted gravel/pavers.
Don’t “brace it into submission” with random screwsyou’ll just create a squeaky bench with confidence issues.
My angles don’t meet cleanly
Use the template and correct one section first. Small angle errors multiply around the circle. If you’re close, you can
widen bolt holes slightly for forgiveness, but don’t rely on that as your main plan.
Reclaimed wood keeps splitting
Pre-drill, use sharp bits, and consider slightly smaller screws or switching to structural screws designed for outdoor framing.
If boards are extremely dry and brittle, avoid fastening too close to edges.
Real-World Experiences Building a Reclaimed Wood Tree Bench (About )
The first time you build with reclaimed wood, you learn a special kind of humilitythe kind that arrives right on schedule,
usually the moment you hear a ping and realize your saw blade has just met a tiny, rusted nail that was hiding like it pays rent.
My “simple” tree bench started with an innocent stack of salvaged boards and the belief that I could “just pull the nails real quick.”
That belief lasted about seven minutes.
The smartest move I made was treating prep work as part of the build, not a chore I could rush. I laid every board out in the driveway,
ran a metal detector over them, and marked suspicious spots with a marker like I was mapping buried treasure. Then came the nail-pulling
marathon: cat’s paw, pliers, a stubborn-pry-bar dance, and the occasional dramatic pause to question my life choices. The upside?
Once the boards were clean, everything else went fasterand my tools stopped trying to file for workers’ comp.
Next came the “reclaimed wood personality test.” Some boards were straight enough to be seat slats immediately. Others were warped in a way
that felt almost artisticlike modern sculpture, except the sculpture was determined to make my bench look like a potato chip. I sorted
boards into roles: the flatter ones became seat slats (comfort matters), and the more character-filled pieces became bracing and hidden
structural parts where minor twists wouldn’t affect the final look. That one decision saved hours of fighting boards that didn’t want to be
furniture.
The tree itself also had opinions. On paper, a perfect hexagon seemed obvious. In real life, trunks aren’t always perfectly round, and the
ground definitely isn’t perfectly level. Dry-fitting the six sections around the tree before installing seat slats felt like cheatingin the
best way. I could tweak the clearance, shift a leg to avoid a surface root, and shim until the frames sat solid. If you skip the dry-fit,
you’ll still “finish” the bench… you’ll just also finish with a permanent wobble and a new hobby: apologizing to guests.
Finishing was its own lesson. I wanted that glossy, magazine-worthy look, but I also wanted to avoid a future where I’m sanding peeling
topcoat every spring. In the end, I leaned toward a finish that’s easy to refresh, because I know myself: I will absolutely recoat; I will
not lovingly strip a failing film finish while mosquitoes audition for a horror movie on my ankles. The bench has aged beautifully, and the
best part is how it changes the yard’s “flow.” People naturally gather there. Kids climb up to talk. Adults sit and stay longer than they
planned. And every time someone says, “Waityou built this?” the reclaimed wood gets to do what it does best: look effortlessly cool while
secretly requiring a lot of very unglamorous prep work.
Conclusion
A reclaimed wood tree bench is equal parts woodworking project and backyard upgrade. If you measure carefully, build in modular sections,
keep clearance around the trunk, and choose outdoor-rated hardware and finishes, you’ll end up with a bench that looks like it’s always
belonged there. It’s the kind of DIY that pays you back every time you sit downespecially when someone asks where you bought it and you
get to casually say, “Oh, this old thing? I made it.”