Table of Contents >> Show >> Hide
- Why Build Stairs Instead of Using a Ladder?
- Before You Build: Plan the Stair Style
- How Big Should Bunk Bed Stairs Be?
- Materials and Tools You Will Likely Need
- Step-by-Step: How to Build Bunk Bed Stairs
- Step 1: Measure the Bed Height and Sketch the Layout
- Step 2: Build the Stair Boxes from the Bottom Up
- Step 3: Add Internal Bracing
- Step 4: Decide on Storage or Solid Steps
- Step 5: Assemble the Stair Unit and Check for Square
- Step 6: Attach the Stairs Securely to the Bunk Bed
- Step 7: Sand Every Edge Like a Person Who Has Met Children
- Step 8: Finish for Durability
- Step 9: Add Anti-Slip Protection
- Bunk Bed Stair Safety Tips You Should Not Ignore
- Common Mistakes When Building Bunk Bed Stairs
- Design Ideas to Make Your Bunk Bed Stairs Better
- What the Experience of Building Bunk Bed Stairs Is Really Like
- Conclusion
If your bunk bed still uses a skinny ladder, you already know the truth: ladders are great for treehouses, pirate ships, and very small gymnasts. For everyday life, though, bunk bed stairs are usually the safer, friendlier, and far less toe-stubbing option. They are easier to climb, easier to descend in the dark, and much more useful when you build them with storage inside. In other words, they are the overachievers of bedroom furniture.
This guide walks you through how to build bunk bed stairs in a way that looks polished, feels sturdy, and makes actual sense in a real bedroom. We will cover planning, measurements, materials, step-by-step construction, safety details, and finishing touches. We will also talk honestly about the part nobody puts in glamorous DIY photos: the awkward measuring, the sawdust in your socks, and the moment you realize one tread is off by a hair and suddenly you care very deeply about fractions.
If you want the short version before we grab the tools, here it is: the best bunk bed stairs are wide enough for secure footing, deep enough to feel like real steps, solidly fastened to the bed frame, smooth on every edge, and tough enough to survive years of climbing, jumping, and suspiciously energetic bedtime routines.
Why Build Stairs Instead of Using a Ladder?
Traditional bunk bed ladders save floor space, but stairs win on comfort, safety, and usefulness. A staircase gives kids a broader surface to step on, which matters a lot when they are sleepy, carrying a stuffed animal, or trying to climb one-handed with the confidence of a tiny action hero. Stairs also make the top bunk feel more accessible for adults who need to change bedding, read bedtime stories, or retrieve the one missing sock that has achieved legendary status.
Another major advantage is storage. Box-style bunk bed stairs can hide drawers, cubbies, or lift-top compartments. That means the staircase does double duty as furniture. In a small room, that is not just smart design. That is sweet, sweet square-footage revenge.
Before You Build: Plan the Stair Style
There are two common ways to build bunk bed stairs:
1. Open Stringer Stairs
These look more like miniature house stairs, with angled side stringers supporting individual treads. They are lighter visually and can look beautiful, but they require more precise layout and cutting. If your measurements are off, the whole staircase tattles on you.
2. Box or Storage Stairs
These are made from stacked rectangular step boxes. They are easier for many DIYers to build, naturally sturdy, and perfect for adding drawers or cubbies. For most bunk beds, this is the best route. It gives you broad steps, enclosed structure, and fewer opportunities to mess up a complicated stringer cut.
For this article, we are focusing on box-style bunk bed stairs because they are practical, sturdy, and ideal for family use.
How Big Should Bunk Bed Stairs Be?
This is where the project stops being “cute idea” and becomes actual math. Do not panic. It is friendly math.
Start by measuring the total height from the finished floor to the top bunk access point. Then decide how much floor space you can realistically give the staircase. Real stairs are more comfortable when the rise is moderate and the tread depth is generous. For bunk beds, borrowing that same logic makes the climb feel far more natural.
A good target is a stair rise of about 6 1/2 to 7 1/2 inches and a tread depth of about 10 to 11 inches. If your bedroom footprint is tight, you can go a bit more compact, but this is one place where stinginess is not charming. Tiny treads create awkward footing, and awkward footing turns “bedtime” into “why is everyone suddenly crying?”
Here is a simple example:
- Total climb to top bunk access: 50 inches
- Desired riser height: about 7.1 inches
- Number of risers: 7
- Number of treads: 6
- Tread depth: 10 inches
- Total stair run: about 60 inches
That layout creates a much more comfortable climb than a near-vertical ladder. The trade-off is obvious: stairs take up more room. So before you cut anything, test the footprint with painter’s tape on the floor. It is much easier to move tape than plywood.
Materials and Tools You Will Likely Need
Materials
- 3/4-inch plywood for stair sides, tops, risers, and internal dividers
- 1×2 or 1×3 cleats for interior support
- Wood glue
- 1 1/4-inch and 2-inch wood screws
- Wood filler
- Edge banding or solid wood trim for exposed plywood edges
- Drawer slides and drawer boxes, if adding storage
- Anti-slip tread material, clear grit additive, or stair tread covers
- Primer and paint, or stain plus clear protective finish
- Bolts, brackets, or structural fasteners to anchor the stairs to the bunk bed
Tools
- Tape measure
- Speed square or framing square
- Circular saw or table saw
- Jigsaw for detail cuts
- Drill/driver
- Clamps
- Sander and sandpaper
- Stud finder if anchoring near a wall
- Level
Step-by-Step: How to Build Bunk Bed Stairs
Step 1: Measure the Bed Height and Sketch the Layout
Measure from the floor to the point where the top stair will meet the bunk bed frame. Then sketch the staircase from the side. This helps you divide the height evenly and see whether the run will fit your room. Do not skip this stage. Sketches prevent heartbreak, or at least reduce it to mild annoyance.
Also decide on stair width. For most bunk bed stairs, 18 to 24 inches works well. Wider stairs feel more secure and give you better storage space, but they also eat more floor area.
Step 2: Build the Stair Boxes from the Bottom Up
The easiest method is to build each step as a rectangular box and stack them in ascending order. Each box should be strong enough to support body weight without flexing. Use 3/4-inch plywood for the sides and top, and add internal cleats or partitions so the top panel is supported properly.
For example, if your bottom step is 24 inches wide, 10 inches deep, and 7 inches tall, cut two side pieces, one top, one bottom if needed, and front/back panels. Assemble with wood glue and screws. Repeat for the next step, increasing the depth and height according to your layout.
If you are building the stairs as one continuous cabinet unit, you can also cut two full zigzag side panels and install horizontal tread panels between them. That approach looks cleaner, but stacked boxes are often easier for DIYers to keep square.
Step 3: Add Internal Bracing
This is where the project becomes furniture instead of cardboard cosplay. Every step box should have interior support. Use cleats beneath the tread, center dividers on wider steps, and screws driven into solid material rather than just relying on edge fastening.
The goal is no wobble, no flex, and no dramatic sound effects when someone steps up. If the staircase creaks like an old pirate ship, add more bracing before you move on.
Step 4: Decide on Storage or Solid Steps
Storage stairs are popular because they make excellent use of dead space. You can add:
- Pull-out drawers on the stair faces
- Open cubbies on the side
- Lift-top compartments under the treads
If this is your first build, open side cubbies are the easiest. Drawers look fantastic, but they add another layer of precision. And precision is wonderful right up until the drawer refuses to close by exactly 1/8 inch forever.
Step 5: Assemble the Stair Unit and Check for Square
Dry-fit all the steps before final assembly. Use clamps, check for square, and make sure the top stair meets the bunk bed cleanly. If the stairs lean, rock, or twist, fix that now. Once painted, bad geometry does not become charming. It becomes obvious.
Secure the individual step units together with glue and screws. Pre-drill your holes to reduce the chance of splitting and to keep everything aligned.
Step 6: Attach the Stairs Securely to the Bunk Bed
This is the most important part of the entire build. Your stairs should not just sit next to the bed looking confident. They need to be mechanically fastened to it. Use heavy-duty brackets, bed bolts, or structural screws in locations that tie into solid framing members of the bed.
If the bunk bed is also attached to the wall, even better. The stair unit and the bed should behave like one stable structure. Avoid flimsy hardware, tiny screws, or wishful thinking.
Step 7: Sand Every Edge Like a Person Who Has Met Children
Sharp corners and splintery edges have no place on bunk bed stairs. Ease over all exposed edges with sandpaper or a router round-over bit. Sand the treads smooth, but do not make them slick. You want “comfortable,” not “ice rink in socks.”
Fill screw holes, sand again, and inspect by hand. Your hand will notice what your eyes miss.
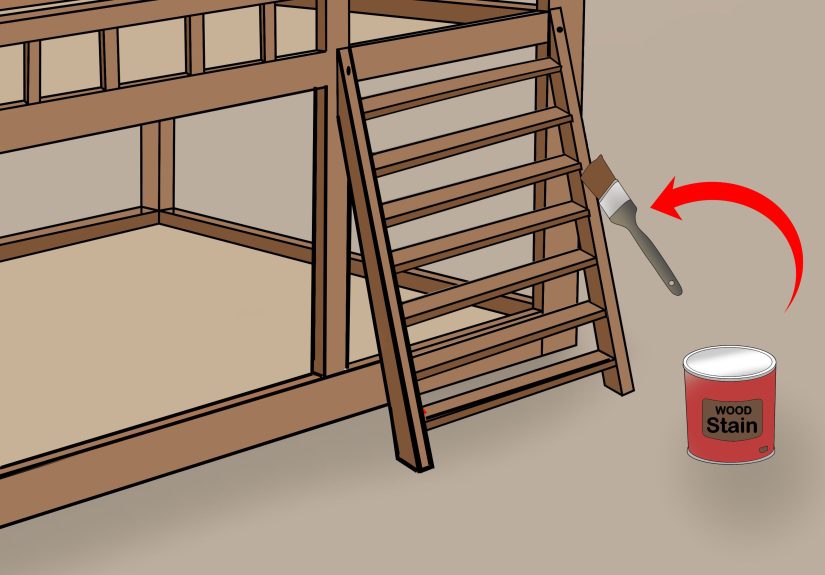
Step 8: Finish for Durability
You have two good options: paint or stain-and-clear-coat. Paint hides plywood seams well and works beautifully in kids’ rooms. A durable enamel or cabinet/furniture-grade paint holds up better than a flimsy wall paint. If you prefer a wood look, stain the wood and protect it with a tough polyurethane or similar furniture finish.
Whatever route you choose, prep matters. Sand thoroughly, remove dust, and let each coat cure properly. Rushing the finish is the DIY equivalent of baking a cake and yanking it out at minute twelve because you are “pretty sure it’s done.” It is not done.
Step 9: Add Anti-Slip Protection
Bunk bed stairs should have traction. This is especially important for painted wood, which can become slippery with socks. You can use clear anti-slip grit additive in paint, adhesive stair treads, low-profile tread covers, or a textured strip near the front of each step.
This is one of those small details that makes the finished project feel thoughtful and safe instead of merely attractive on the internet.
Bunk Bed Stair Safety Tips You Should Not Ignore
A staircase helps, but it does not erase bunk bed safety rules. The top bunk still needs strong guardrails, and the stair opening should not create a weird fall hazard. Make sure the top step lands in a way that allows easy transfer onto the bed without forcing a sideways scramble.
- Keep the stairs rigid and firmly attached
- Use broad, non-slip treads
- Round over edges and remove splinters
- Do not leave large dangerous gaps between the top stair and bed frame
- Make sure the top bunk has proper guardrails
- Use the upper bunk only for children old enough to climb safely
- Consider a wall-side installation if it improves stability and reduces fall exposure
If the bed is for younger children, think like a safety inspector with trust issues. That mindset is very useful here.
Common Mistakes When Building Bunk Bed Stairs
Making the Treads Too Small
Narrow steps might save floor space, but they make the climb awkward. If the tread cannot comfortably fit a foot, it is not really a stair. It is a strongly worded suggestion.
Forgetting the Finished Height
Paint, floor coverings, and tread thickness can all affect the final fit. Measure from finished surfaces whenever possible.
Skipping the Bed Connection
Freestanding stairs beside a bunk bed are not enough. They need to be secured to the bed frame.
Leaving Sharp Edges
Furniture for children should be smooth, rounded, and snag-free. Splinters are terrible guests.
Choosing Looks Over Traction
A glossy finish may look fancy, but safe footing matters more than showroom drama.
Design Ideas to Make Your Bunk Bed Stairs Better
- Drawer stairs: perfect for pajamas, books, and toy storage
- Open cubbies: easier to build and great for baskets
- Built-in handrail: especially helpful for younger climbers
- Matching trim: helps the stairs look integrated with the bunk bed
- Wall sconce or motion light nearby: makes nighttime climbing safer
- Color contrast on tread edges: subtly improves visibility
The best-looking bunk bed stairs do not feel tacked on. They look like they were meant to be part of the bed from the beginning.
What the Experience of Building Bunk Bed Stairs Is Really Like
Building bunk bed stairs is one of those projects that sounds simple when you first say it out loud. “I’m just making a few steps,” you think. And then five hours later, you are on the floor with a tape measure in your mouth, debating whether 10 inches is spiritually different from 9 7/8 inches. Welcome. You are doing real woodworking now.
Most DIYers find the first stage surprisingly fun. Sketching the staircase, picturing hidden storage, and imagining how much better it will look than a plain ladder feels exciting. It is the sort of project that promises both form and function, which is DIY catnip. Then the reality arrives: every single step has to match, every angle has to line up, and the unit has to meet the bunk bed like they have been best friends since birth.
The most satisfying moment usually comes during the dry fit. Suddenly the pile of plywood panels stops looking like leftovers from a cabinet shop and starts looking like an actual staircase. You set the first box in place, stack the next one, and for the first time the room makes sense. That is the magic point where the project stops being theoretical.
There is also usually a humbling phase. Maybe a panel is cut backward. Maybe one box is out of square by just enough to annoy you every time you walk past it. Maybe you realize too late that adding drawer hardware means you should have accounted for clearances earlier. None of this means the project is failing. It means you are building something real, and real projects have opinions.
Once sanding begins, the emotional tone changes again. You start fussy. You become pickier. Then you run your hand over a rounded edge and think, “Okay, yes, that feels right.” Sanding bunk bed stairs is not glamorous, but it is the stage that makes the entire build feel intentional. Sharp plywood corners say “garage project.” Smoothed edges say “custom furniture.”
Finishing day is often the biggest patience test. Paint needs drying time. Clear coats need curing time. Dust appears out of nowhere like it has been personally offended by your schedule. But when the final coat goes on and the stairs stop looking like raw construction parts, the whole build levels up.
The best experience of all comes after installation. You fasten the stairs to the bed, step back, and the room suddenly feels smarter. The bunk bed looks more built-in. The top bunk feels more usable. The space under or inside the stairs starts holding books, blankets, or secret kid treasures immediately. And the first time someone climbs the steps without wobbling, slipping, or performing a circus stunt, you know the extra effort was worth it.
That is why this project is so satisfying. You are not just building stairs. You are solving access, storage, comfort, and safety in one shot. Not bad for a weekend spent arguing with plywood.
Conclusion
If you want a bunk bed that feels safer, more comfortable, and more custom, stairs are absolutely worth building. The smartest approach is usually a box-style staircase with deep treads, strong internal bracing, secure attachment to the bed frame, and a durable finish that can survive years of use. Add storage if you can, anti-slip protection no matter what, and enough patience to measure twice before introducing wood to saw blade.
Build it thoughtfully, and your bunk bed stairs will do more than help someone reach the top bunk. They will make the whole room work better.