Table of Contents >> Show >> Hide
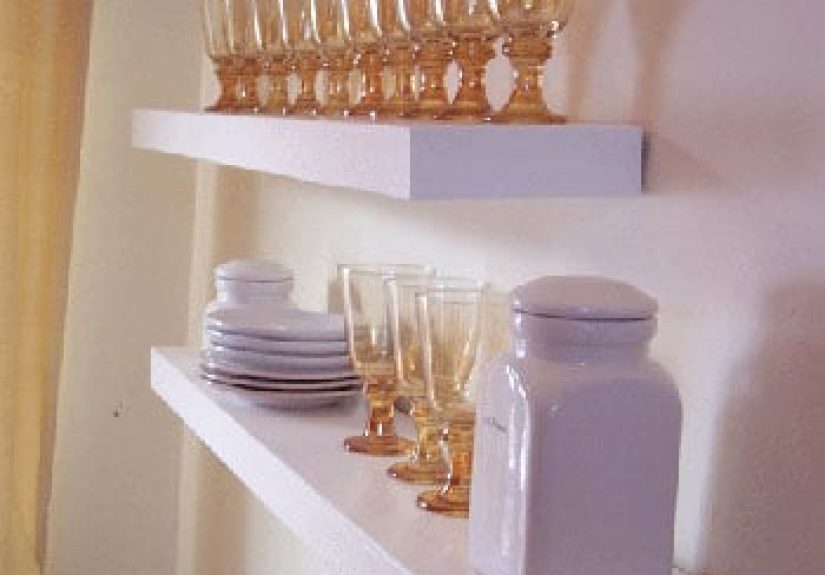
Floating shelves are a fantastic way to add both function and style to your home, and when you combine the genius of Ana White’s DIY designs with the practical inspiration from Young House Love, you get the perfect recipe for transforming any room. Whether you’re looking to display your favorite décor or need some extra storage space, this guide will walk you through how to build floating shelves that look professionally installed without the hefty price tag.
What Makes Floating Shelves So Appealing?
Before diving into the step-by-step instructions, let’s explore why floating shelves are so popular. Unlike traditional shelves, floating shelves appear to “float” on the wall with no visible brackets or supports. This minimalist design creates a clean, modern look that works well in virtually any space, from the kitchen to the living room, bathroom, or even a home office.
The best part? You can make them yourself, saving money and personalizing your shelves to fit your style and needs. Ana White, a renowned DIY expert, is a go-to source for woodworking plans, while Young House Love adds an extra layer of practical and relatable advice to the mix. Together, they make building floating shelves an easy and enjoyable project for any skill level.
Tools and Materials You’ll Need
Before you get started, make sure you have all the necessary materials and tools. Here’s a basic list of what you’ll need:
- Wood boards (typically 1×12, 1×10, or 2×12 depending on your design preference)
- Wood screws
- Drill with appropriate drill bits
- Level
- Measuring tape
- Saw (circular saw or miter saw)
- Wood glue
- Sandpaper or electric sander
- Paint or wood stain (optional)
- Wall anchors or heavy-duty screws (depending on the weight of the shelves)
- Stud finder (for proper wall placement)
Step-by-Step Guide to Building DIY Floating Shelves
Now that you have all the materials, it’s time to roll up your sleeves and get started with building your floating shelves. These steps are inspired by Ana White’s plans, with helpful tips from Young House Love to ensure that your project goes off without a hitch.
1. Measure and Plan
First things first, decide on the dimensions of your floating shelves. This is a crucial step since you’ll need to measure the space on your wall where you want to install the shelves. Make sure you consider how much weight the shelf will need to hold. If it’s for decorative items, you may not need a lot of depth, but if you plan to store heavier items, such as books, you’ll want a wider and deeper shelf.
Once you have your measurements, use a pencil to mark where the shelves will go. Measure the distance between each shelf to ensure a balanced look. Double-check your measurements before cutting any woodthis will save you time and frustration later.
2. Cut Your Wood to Size
Using your saw, cut the wood according to your measurements. This is where the fun begins! Depending on your design, you can make straight cuts or even angled cuts for a more dynamic, modern look. Remember to sand the edges to avoid splinters and give the shelves a smooth finish.
If you’re unsure about cutting the wood perfectly, don’t worryAna White’s plans include detailed guides and even templates to follow. If you want a more polished look, consider staining or painting the wood to match your existing décor.
3. Install the Bracket System
Floating shelves are supported by brackets that are hidden within the shelf itself. For the bracket system, Ana White suggests using either a simple L-bracket or creating a custom bracket from wood. If you’re going for a minimalist design, it’s better to create a custom bracket to ensure that nothing is visible. The bracket will slide into the back of the shelf, and then the shelf will be mounted directly onto the wall.
Measure the position of your shelf brackets and drill holes into the back of the shelf. Then, install the brackets into the wall, ensuring that they are level and securely anchored into the studs. If you don’t hit a stud, be sure to use wall anchors to support the weight of the shelf.
4. Attach the Shelf to the Wall
With your brackets in place, it’s time to attach the shelf to the wall. Gently lift the shelf and slide the bracket into the opening you created on the back of the shelf. Secure the shelf in place with screws, making sure it’s level as you tighten everything down. You want to avoid any sagging, so be sure to use heavy-duty screws for added security.
5. Finish and Decorate
Once the shelf is mounted, step back and take a look. If it’s not perfectly level, adjust the screws slightly until it’s right. If you’ve stained or painted the wood, allow it to dry thoroughly before putting anything on the shelf. Finally, accessorize your new floating shelf with your favorite items! Whether it’s books, plants, or decorative pieces, this shelf is now ready to make your space shine.
Common Mistakes to Avoid
While building floating shelves is a fun DIY project, there are a few common mistakes that could trip you up. Here’s what to avoid:
- Not measuring properly: Take your time with measurements. A crooked shelf can throw off the entire room.
- Not using enough support: Floating shelves need sturdy support, so make sure your brackets are robust and anchored securely.
- Skipping the stud finder: Failing to find studs could lead to a wobbly shelf. Use a stud finder to ensure your shelf is properly supported.
- Rushing the finishing process: Sanding, staining, and painting might take time, but it’s worth it for a smooth, polished look.
Experience-Driven Tips for Building Floating Shelves
Building DIY floating shelves may seem daunting at first, but the rewards are well worth it. As a DIYer myself, I’ve tackled several floating shelf projects, and I’ve learned a few things along the way that can help make your project even easier.
First, it’s essential to pick the right wood. Pine is a budget-friendly option, but it can be softer and prone to dents. If you want a more durable, long-lasting shelf, consider using oak or walnut. These hardwoods are sturdy and will provide a more refined, luxurious look. But keep in mind that hardwoods are typically heavier, which means your brackets will need to be even more robust.
Another tip is to take your time when sanding. I’ve rushed this step before and regretted it later. The smoothness of the wood will directly impact the final aesthetic, so make sure to sand wellespecially if you plan on painting or staining. A smooth surface is key to achieving a professional-quality look, and it makes finishing much easier.
Finally, always be sure to test the weight tolerance of your floating shelves. If you plan on storing heavier items like books, it’s essential to use more screws and wall anchors to ensure the shelves don’t buckle over time. For shelves that hold lighter décor items, you can get away with fewer supports, but it’s always better to be over-prepared than under-prepared!
Conclusion
Building DIY floating shelves with the help of Ana White’s plans and inspiration from Young House Love is a fun and rewarding project that anyone can tackle. By following the step-by-step guide and using the right tools and materials, you can create sleek, stylish shelves that elevate the look of any room. With some patience, attention to detail, and a little creativity, you’ll have custom floating shelves that are both functional and aesthetically pleasing.