Table of Contents >> Show >> Hide
- Why Irons Get Gross in the First Place
- Before You Start: Safety First, Heroics Second
- How to Clean an Iron with Salt
- Other Household Items That Work
- What Not to Use on an Iron
- How to Clean the Inside of an Iron
- How Often Should You Clean Your Iron?
- Troubleshooting Stubborn Iron Problems
- Real-Life Cleaning Experiences and Lessons from the Laundry Front Lines
- Final Thoughts
- SEO Tags
If your iron has started leaving mystery streaks, dragging like it is emotionally exhausted, or decorating your shirts with tiny brown freckles, congratulations: your iron is asking for a spa day. The good news is that you usually do not need a fancy cleaner or a dramatic late-night online purchase to fix it. In many cases, you can clean an iron with salt, baking soda, vinegar, distilled water, dish soap, and a couple of cotton swabs already hanging out in your house like they have been waiting for this moment.
That said, not every iron likes the exact same treatment. Some soleplates are tougher than others, and some manufacturers specifically warn against certain methods, especially harsh abrasives or vinegar on particular finishes. So the safest approach is simple: start gentle, check your manual if you still have it, and move up only as needed. In this guide, I will walk you through the salt method, explain when it works best, and show you several other household-item fixes for burnt residue, mineral buildup, clogged steam vents, and sticky mystery gunk that appears the second you have one white shirt left to press.
Why Irons Get Gross in the First Place
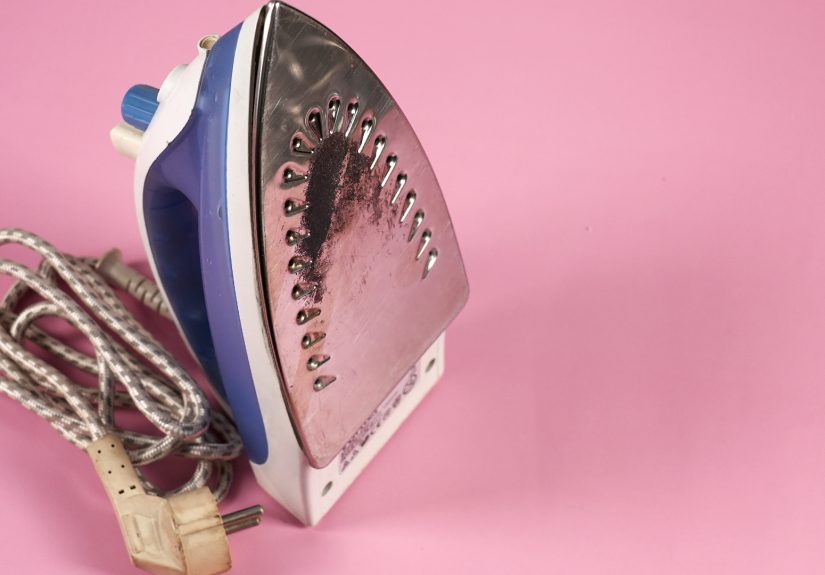
Irons usually get dirty for a few very normal reasons. The soleplate can collect scorched fabric residue, spray starch, fusible web, detergent traces, lint, and mineral deposits from water. Steam vents can also clog over time, especially if the iron is used with hard water or stored with leftover water in the tank. The result is a tool that should be smoothing fabric but is instead behaving like a tiny hot sabotage machine.
Once buildup starts, it tends to snowball. A little sticky residue grabs more lint. A few mineral deposits block steam holes. A damp reservoir invites odors and grime. Before long, your iron is not gliding so much as dragging itself across your clothes like it just worked a double shift.
Before You Start: Safety First, Heroics Second
Before cleaning an iron, unplug it unless the method specifically requires warmth. Let it cool completely for paste, soap, or vinegar-wipe methods. Empty the water tank if you are working on the soleplate. Place the iron on an old towel or another protected surface, and keep metal tools far away from the plate and steam vents. A knife, fork, safety pin, or “just this one little scraper” can scratch the finish faster than you can say, “Well, that was a mistake.”
If your iron has a nonstick, ceramic, or specialty-coated soleplate, begin with the gentlest option first. That usually means a soft cloth, warm water, mild soap, or a light baking soda paste. Salt can be very effective, but it is not always the first move for delicate finishes.
How to Clean an Iron with Salt
The salt method is one of the most popular household tricks for removing sticky residue and light scorch marks from an iron’s soleplate. It works because salt provides mild abrasion while the warmth of the iron helps loosen buildup. Think of it as a tidy little exfoliation session for your appliance.
What You Need
- Table salt or coarse salt
- A plain brown paper bag, parchment-covered old towel, or a clean dry cotton towel
- A soft cloth
Step-by-Step
- Make sure the steam setting is turned off.
- Set the iron to a warm or moderately hot dry setting.
- Sprinkle a generous layer of salt on the paper or towel.
- Run the warm iron over the salt in slow circles or back-and-forth passes.
- Check the soleplate. As residue lifts, wipe the plate with a soft cloth once the iron cools enough to handle safely.
This method is best for sticky film, light burnt-on residue, and that weird draggy feeling that makes ironing feel like pushing a shopping cart with one bad wheel. If the iron still looks grimy, repeat once more rather than pressing harder like you are trying to win a strength competition against laundry.
Important caveat: Salt can be too abrasive for some finishes. If your manual warns against abrasives, or if your iron has a delicate coating, skip salt and use one of the gentler methods below first.
Other Household Items That Work
Baking Soda Paste for Burn Marks and Sticky Spots
Baking soda is the classic “I am trying to be responsible and not wreck my appliance” option. Mix about 2 parts baking soda with 1 part water to form a spreadable paste. Apply it to the cool soleplate with a soft cloth or rubber spatula, focusing on stained areas. Let it sit for a few minutes, then wipe it away with a damp cloth.
If the buildup is stubborn, use a soft toothbrush very gently. The goal is to loosen residue, not sandblast the iron into a new personality. This method is especially handy for scorch marks, mineral film, and sticky starch buildup.
White Vinegar for Grime and Mineral Film
White vinegar is often recommended for loosening residue and dissolving mineral deposits, but this is where brand-specific instructions matter. Some manufacturers are fine with diluted vinegar on certain surfaces, while others warn against using vinegar on the soleplate or in the tank. Translation: vinegar can work, but your iron gets a vote.
If your manual allows it, dampen a soft cloth with a diluted vinegar solution and wipe the cool soleplate. For more stubborn grime, let the soleplate rest on a vinegar-dampened towel for 15 to 30 minutes, then wipe clean. Follow with a water-dampened cloth so you do not leave vinegar behind like an overly enthusiastic salad dressing.
Distilled Water and the Self-Clean Function for Steam Vents
If your iron has a self-clean feature, use it. It is there for a reason, and this is its big moment. In many irons, self-clean helps flush internal mineral buildup and debris out through the steam vents. Usually, that means filling the reservoir as directed, heating the iron, holding it over a sink, and activating self-clean while water and steam push deposits out.
For regular maintenance, distilled water is your friend. It helps reduce future mineral buildup, especially if your tap water is hard. Some manuals may recommend regular tap water for specific models, so again, check the instructions for your brand instead of assuming every iron drinks the same water.
Mild Dish Soap for Light Dirt
If your iron is not badly scorched and just has a little film or dust, do not overcomplicate it. A soft cloth with warm water and a drop of mild dish soap may be enough. Wipe the cool soleplate, then go back over it with a clean damp cloth and dry it thoroughly. Sometimes the best cleaning method is the one that does not involve turning your laundry room into a chemistry experiment.
Cotton Swabs for Steam Vents
Steam vents are tiny and annoying, which means they are exactly the sort of place buildup loves. Dip a cotton swab in distilled water or, if your manufacturer allows it, a little diluted vinegar, and gently clean around each vent. Do not jam the swab deep into the holes, and never use pins, paper clips, or other sharp objects. Scratching the inside of a vent is a terrible trade for removing a fleck of scale.
What Not to Use on an Iron
This is the part where we save your soleplate from unnecessary drama.
- Do not use metal scrapers, knives, or steel wool.
- Do not attack the plate with heavy-duty scouring pads.
- Do not pour random cleaners into the water tank.
- Do not assume vinegar is safe for every model.
- Do not clean a hot iron with a method meant for a cool surface unless the method specifically says otherwise.
Also, do not keep ironing “just one more shirt” with a dirty soleplate. That is how a small cleaning chore becomes a bigger clothing problem.
How to Clean the Inside of an Iron
If your iron spits brown water, leaves flakes, or produces weak steam, the inside may need attention. Start with the self-clean function if your iron has one. That is usually the safest first option because it is built for the appliance.
If your manual allows a homemade flush, use a diluted mixture of distilled water and white vinegar exactly as your brand recommends, then follow with one or two rounds of clean water to rinse. After flushing, steam the iron over an old towel or cloth to help clear lingering residue from the vents. Empty the tank when finished and let the iron dry upright.
If your manufacturer specifically says not to use vinegar in the reservoir, believe it. Household hacks are helpful, but they should not win arguments against the company that made the appliance.
How Often Should You Clean Your Iron?
That depends on how often you use it. If you iron every week, a light wipe-down after use and a deeper clean every month or two is smart. If you only drag your iron out for weddings, holidays, and job interviews, you can usually clean it less often, but always clean it as soon as you notice dragging, sticking, spotting, or weak steam.
A few simple habits help prevent buildup:
- Empty the water tank after each use.
- Store the iron upright once it is cool.
- Wipe the soleplate occasionally, especially after using starch.
- Use the self-clean feature as recommended for your model.
- Use the right water for your brand and local water conditions.
Troubleshooting Stubborn Iron Problems
The Soleplate Still Feels Sticky
Repeat the baking soda or salt method once more, then wipe thoroughly. Sticky residue often takes more than one pass, especially if the buildup came from fusible interfacing, spray starch, or melted synthetic fabric.
The Iron Leaves Brown Spots
This usually points to mineral buildup, dirty vents, or gunk in the reservoir. Clean the vents, run the self-clean cycle, and empty any leftover water. Then test the iron on an old cloth before trusting it with your favorite shirt.
The Steam Vents Look Clogged
Use cotton swabs and the self-clean cycle. Avoid sharp tools, which can damage vent openings or internal parts.
The Plate Has Scratches
At that point, be extra gentle. Scratches can catch fibers and create more sticking. Skip abrasive methods and consider a manufacturer-approved soleplate cleaner if household methods are not cutting it.
Real-Life Cleaning Experiences and Lessons from the Laundry Front Lines
One of the most common experiences people have with iron cleaning is realizing the iron is dirty only after it has already tattled on them. Everything seems fine until a pale shirt comes off the board with a mysterious tan streak. That moment tends to create immediate character growth. In real households, the first clue is often not the look of the iron but the look of the clothing.
A frequent scenario involves spray starch. It starts innocently enough: one crisp collar, one neat cuff, one little burst of confidence. But over time, starch can bake onto the soleplate and create a sticky film that grabs lint and scorches into dark residue. People often assume the iron is “burning too hot,” when really it is dragging old product buildup across fabric. In those cases, a gentle baking soda paste or a careful salt pass often makes the iron feel dramatically smoother.
Another very real experience happens in homes with hard water. The iron may look mostly clean from the outside, but the steam starts sputtering, the vents spit, and little flakes appear like the appliance is seasoning clothes with mineral confetti. Users often describe this as the iron “getting old,” when the bigger issue is usually internal buildup. Running the self-clean function, flushing the vents, and changing water habits can make the iron behave like a much younger appliance with better boundaries.
Crafters and sewists run into a special category of mess: melted fusible web, interfacing residue, and mystery adhesive blobs. This kind of grime can be extra stubborn because it is not just mineral scale or starch; it is heat-softened material that bonds to the plate. People often panic and reach for a knife or some other terrible idea from the “what could go wrong” department. In practice, the better move is patience: soften the residue with warmth if the method calls for it, clean gently, and repeat rather than gouging the surface.
There is also the thrift-store or guest-room iron experience. You find an iron that looks perfectly respectable from three feet away, then flip it over and discover a soleplate that seems to have lived several lives. In those situations, starting with warm soapy water makes sense because it removes surface dirt and helps you figure out what kind of mess you are dealing with. From there, you can move to baking soda, then vinegar if the model allows it, and finally a salt clean for stubborn stuck-on residue. The lesson is simple: do not start with the harshest method just because the iron looks like it has seen things.
And then there is the “I cleaned it, but I forgot to test it” experience. This one is common and mildly tragic. After cleaning, always run the iron over an old towel or cloth before using it on anything that matters. That final test catches leftover paste, loosened debris, vinegar odor, or any last surprise drips. It is the laundry equivalent of tasting the sauce before serving dinner. A tiny extra step can save a very annoying outcome.
The biggest practical takeaway from real-world use is that iron cleaning is less about one magical hack and more about matching the method to the mess. Salt is great for some sticky residue. Baking soda is great for a general reset. Distilled water and self-clean help with vents and the tank. Cotton swabs are your detail crew. And your manual, boring as it may be, is still the boss.
Final Thoughts
If you want the simplest answer, here it is: yes, you can clean an iron with salt, and it often works very well for sticky residue and light scorch marks. But the best cleaning method depends on your iron’s finish and the kind of buildup you are dealing with. Start gentle, use household items thoughtfully, and let your iron’s manual break the tie when internet advice gets noisy.
A clean iron glides better, steams better, and is far less likely to sabotage your clothes at the worst possible time. Which means this small maintenance task is one of those annoyingly grown-up chores that actually pays off. Very rude, but true.