Table of Contents >> Show >> Hide
- What You’ll Learn
- First, a 20-Second Reality Check: Which “Rubber Band” Are We Talking About?
- Before You Start: 5 Quick Checks (Do These, Save Your Sanity)
- How to Connect a Rubber Band to Your Braces: 12 Steps
- Step 1: Wash your hands like you’re about to handle a newborn kitten
- Step 2: Stand in front of a mirror with good lighting
- Step 3: Gather your gear
- Step 4: Identify the exact hooks/buttons you’re supposed to use
- Step 5: Relax your jaw and slightly part your lips
- Step 6: Hook one end of the elastic onto the first attachment point
- Step 7: Stretch gently to the second attachment point
- Step 8: If you’re prescribed both sides, repeat on the other side
- Step 9: Close your teeth together and confirm the elastic sits correctly
- Step 10: Check for poking, pinching, or “this feels wildly wrong” signals
- Step 11: Set a routine for changing elastics
- Step 12: Build a “don’t forget” system
- Common Mistakes When Wearing Rubber Bands for Braces
- Discomfort and Soreness: What’s Normal (and What’s Not)
- Quick FAQ: Rubber Bands on Braces
- Conclusion: Your Bite Loves Consistency (Even When You Don’t)
- Real-World Experiences & Tips (Extra)
- The “first week” feels like your teeth are writing complaint emails
- Most “I can’t do it!” moments are really “I can’t see the hook” moments
- Elastic applicator tools are underrated
- The best habit is “fresh elastics after meals”
- “Elastic stashes” prevent 90% of compliance problems
- Social life hack: practice at home until it’s automatic
- When to call your orthodontist (based on common “uh-oh” stories)
Orthodontic rubber bands (a.k.a. elastics for braces) are tiny, mighty, and a little dramatic.
They don’t just “sit there looking cute.” They apply steady force to help correct your biteoften the part that brackets and wires can’t finish on their own.
If you’ve ever stared into a mirror holding a rubber band like it’s a live spider, this guide is for you. We’ll walk through the
12-step process to connect a rubber band to your braces the right way, plus pro-level tips to make it easier, faster, and less… floppy.
First, a 20-Second Reality Check: Which “Rubber Band” Are We Talking About?
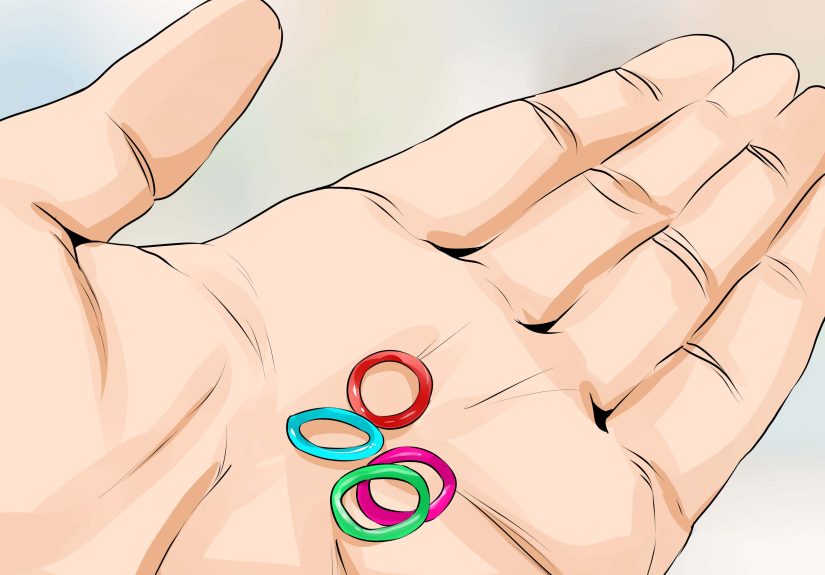
Braces involve more than one kind of rubbery thing. The colorful bands you may see wrapped around brackets are usually handled by your orthodontist.
This article is about orthodontic elasticsthe removable rubber bands you put on and take off yourself, typically hooking from upper teeth to lower teeth.
These elastics help guide how your upper and lower teeth meet (your bite). That’s why your orthodontist cares less about your opinion on pineapple on pizza,
and more about whether you’re wearing your elastics as instructed.
Why elastics matter
Braces excel at lining teeth up within each arch. Elastics add directional force between the arches to help correct issues like
overbite, underbite, open bite, crossbite, and midline shifts.
Translation: elastics can be the difference between “straight teeth” and “straight teeth that actually fit together properly.”
Before You Start: 5 Quick Checks (Do These, Save Your Sanity)
1) Follow your orthodontist’s patterndon’t freestyle
Elastic patterns can be vertical, diagonal, triangle, box, cross, or something that looks like modern art.
Even a tiny change in hook placement can change the direction of force. If you’re unsure, ask for a diagram or a re-demo at your next visit.
2) Use only orthodontic elasticsnever office or hair rubber bands
This is important: do not substitute “close enough” rubber bands from a drawer, backpack, or bathroom cabinet.
Orthodontic elastics are made for your mouth and prescribed by size/strength. Random rubber bands can apply unsafe force and cause damage.
3) Confirm size and strength
Elastics come in different diameters and force levels (often labeled on the bag your orthodontist gave you).
Wearing the wrong type is like putting diesel in a gas carsomething will happen, and it won’t be the thing you wanted.
4) Check for latex sensitivity
Many elastics are latex. If you get itching, swelling, rash-like irritation, or weird mouth discomfort after wearing them,
call your orthodontist and ask about latex-free elastics.
5) Plan to change them regularly
Elastics lose strength over time. Most orthodontic instructions involve changing them at least dailyand often multiple times per day
especially if you’re wearing them full-time. Fresh elastics = consistent force.
Mini rule that helps: If you take them out, put a fresh set back in (unless your orthodontist told you otherwise).
How to Connect a Rubber Band to Your Braces: 12 Steps
This is the practical, repeatable method most people use to put rubber bands on braces without turning it into a full-contact sport.
You’ll get faster within a few days.
-
Step 1: Wash your hands like you’re about to handle a newborn kitten
You’re reaching into your mouth, touching brackets and hooks. Clean hands reduce bacteria and irritationsimple win.
-
Step 2: Stand in front of a mirror with good lighting
Early on, mirror time is non-negotiable. Use bathroom lighting or a phone flashlight (pointed at your face, not your soul).
-
Step 3: Gather your gear
Most people just use fingers. If you have long nails, limited dexterity, or hard-to-reach hooks, use an elastic hook tool (orthodontic applicator).
Keep a small bag of elastics in your backpack, purse, car, and anywhere you regularly exist. -
Step 4: Identify the exact hooks/buttons you’re supposed to use
Look for small hooks on brackets or tiny clear “buttons” on teeth. Your orthodontist may prescribe a specific hook-to-hook pattern.
If you’re guessing, you’re probably guessing wrong. -
Step 5: Relax your jaw and slightly part your lips
Tension makes this harder. Take a breath. Pretend you’re about to whistlecalm mouth posture helps you see and move.
-
Step 6: Hook one end of the elastic onto the first attachment point
Use your thumb and index finger to place the elastic over the first hook/button. Make sure it’s seated securely.
A half-hooked elastic will launch itself into another dimension the moment you blink. -
Step 7: Stretch gently to the second attachment point
With steady tension (not yanking), stretch the elastic across your mouth and hook it onto the second point.
The elastic should sit flat and not twist like a tiny rubber pretzel. -
Step 8: If you’re prescribed both sides, repeat on the other side
Many plans require left and right elastics. Replace both sides at the same time so force stays balanced.
If your pattern is different on each side, follow the exact instructions. -
Step 9: Close your teeth together and confirm the elastic sits correctly
Bite down gently and check that the elastic is still on the hooks and not snagged on a bracket wing.
Some people find placing elastics easier with teeth lightly together (ask your orthodontist if that’s appropriate for your pattern). -
Step 10: Check for poking, pinching, or “this feels wildly wrong” signals
Mild tightness is normal. Sharp pain, gum pinching, or elastic digging into soft tissue is not.
Re-check the hook points and make sure the elastic isn’t wrapped around something unintended. -
Step 11: Set a routine for changing elastics
Consistency is the secret sauce. Many orthodontists recommend changing elastics multiple times per dayoften morning, midday, afternoon, and bedtime
especially for full-time wear. If you’re instructed to remove them for meals and brushing, put a fresh set back in afterward. -
Step 12: Build a “don’t forget” system
Your teeth move with steady force, not occasional enthusiasm. Use reminders: phone alarms, a note on your toothbrush,
extra elastics in every bag, and a quick check after meals. If you skip wear time, treatment can slow or backtrack.
Pro tip: Keep a spare pack everywherehome, school, work, car. Elastics break. Life happens. Your bite doesn’t care.
Common Mistakes When Wearing Rubber Bands for Braces
“I doubled them up to speed things along.”
Tempting, but no. Wearing extra elastics or “stacking” force without instructions can cause problems: discomfort, unwanted movement, or slowed progress.
Your orthodontist prescribes force like a recipechanging the measurements changes the outcome.
“I moved the elastic to a different hook because it felt better.”
Different hook placement = different direction of movement. If something feels off, contact your orthodontist rather than improvising.
“I only wore them at night… most nights.”
Unless you were specifically told nighttime-only, this is a common reason braces take longer.
Elastics work best with consistent wear. Sporadic wear can lead to repeated “first-day soreness” and less progress.
“I ate with them in and now they’re gone.”
Some people are instructed to remove elastics for meals; others may be told they can keep them in. Follow your plan.
Sticky, hard foods can snap elastics or pop them off. If yours disappears mid-meal, replace with a fresh one after you clean up.
Discomfort and Soreness: What’s Normal (and What’s Not)
Normal: mild soreness or pressure for a few days
Elastics introduce new forces, so it’s common to feel soreness when you first start or when your pattern changes.
Many people find it fades once their teeth adjustespecially if they wear elastics consistently.
Helpful comfort tips
- Stick to softer foods for a day or two if your bite feels tender.
- Cold water can feel soothing.
- Orthodontic wax can help if brackets irritate cheeks (separate issue, but often happens at the same time).
- If your orthodontist says OTC pain relievers are okay for you, use them as directed.
Not normal: allergic reactions or sharp, escalating pain
If you notice swelling, itching, rash-like irritation, or symptoms that feel like an allergy, call your orthodontist and ask about latex-free options.
If pain feels sharp, sudden, or “something is stabbing my gum,” stop and get guidance.
Quick FAQ: Rubber Bands on Braces
How long do I have to wear elastics each day?
Many plans call for full-time wear (including sleep), removing only for meals and brushing. Some plans are nighttime-only.
Your orthodontist’s instructions are the only correct answer here.
How often should I change them?
Often at least daily, and frequently multiple times per day for full-time wear, because elastics lose force as they stretch and absorb moisture.
If your orthodontist told you a schedule, follow that exactly.
What if I swallow an elastic?
It can happen. In most cases it’s not a problem, but if you feel unwell or have concerns, call your orthodontist for reassurance.
What if an elastic keeps popping off?
Double-check the hook points and make sure you’re using the correct size/strength. If it still happens repeatedly, contact your orthodontist.
A broken hook, loose bracket, or incorrect placement can be the culprit.
Conclusion: Your Bite Loves Consistency (Even When You Don’t)
Learning to connect a rubber band to your braces is a small daily habit that can make a big difference in your final result.
The key isn’t superhero strengthit’s consistency: correct hooks, fresh elastics, and wearing them as prescribed.
If you’re struggling, don’t suffer in silence. Ask your orthodontist to re-show the pattern, request a diagram, or get an applicator tool.
In a week, you’ll probably be able to put elastics on faster than you can unlock your phone.
Real-World Experiences & Tips (Extra)
Let’s talk about what actually happens outside the orthodontist’s officethe daily-life moments where elastics are either a smooth routine
or a chaotic little obstacle course.
The “first week” feels like your teeth are writing complaint emails
A common experience is mild soreness during the first few days, especially when elastics are introduced or the pattern changes.
People often describe it as “pressure” more than painlike your teeth are getting a firm handshake from the inside.
The funny part? The soreness usually lasts longer if you don’t wear elastics consistently. When wear is steady, many report they adjust faster,
and the discomfort becomes background noise instead of a headline.
Most “I can’t do it!” moments are really “I can’t see the hook” moments
The biggest frustration early on is visibility. Those tiny hooks can hide like they’re playing championship-level hide-and-seek.
A bright light and a mirror are the easiest upgrades. Some people keep a small flashlight in the bathroom or use a phone light,
then aim their head slightly up or down until the hooks are obvious. Once you know where the hooks are, the process feels dramatically easier.
Elastic applicator tools are underrated
If you have long nails, braces that sit farther back, or limited finger dexterity, an elastic hook tool can feel like cheatingin a good way.
People who struggle with fingers often find the tool turns a two-minute battle into a ten-second routine.
A bonus: tools can help avoid the “elastic snap” that happens when you lose grip mid-stretch.
The best habit is “fresh elastics after meals”
A lot of successful elastic-wear routines revolve around one simple rule: eat, brush, reapply with a fresh set.
It’s easy to remember because it attaches to an existing habit (meals and brushing). People who try to rely on memory alone
“I’ll put them back in later”often discover that “later” is a magical place where socks vanish and elastics never return.
“Elastic stashes” prevent 90% of compliance problems
Ask anyone who got good at elastics: they didn’t get better at remembering. They got better at not needing to remember.
They keep elastics everywhere: backpack, pencil case, car console, desk drawer, sports bag, and sometimes in a little container by the couch.
The moment an elastic breaks or disappears, the replacement is already within reach. No scramble, no skipped hours.
Social life hack: practice at home until it’s automatic
Early on, people worry about putting elastics on in public bathrooms or at school. The confidence boost comes from repetition at home.
Once you can hook elastics without thinking, you won’t feel like you’re performing dental gymnastics in front of a mirror.
Many report that after a week or two, they can do it quicklysometimes without a mirror at all (though it’s still wise to check occasionally).
When to call your orthodontist (based on common “uh-oh” stories)
- If your pattern is unclear and you’re guessing.
- If a hook seems bent or a bracket feels loose.
- If you have sharp pain, swelling, or allergy-like symptoms.
- If elastics constantly pop off despite correct placement.
Bottom line: elastics are a small daily task with outsized impact. The people who finish treatment happiest usually aren’t the ones with “perfect willpower.”
They’re the ones with simple systemsmirror + light, elastics everywhere, fresh set after mealsand a willingness to ask questions instead of improvising.