Table of Contents >> Show >> Hide
- Why curly hair “won’t stay” on your forehead (and how to outsmart it)
- Before you style: a 5-minute prep that makes every forehead-covering look easier
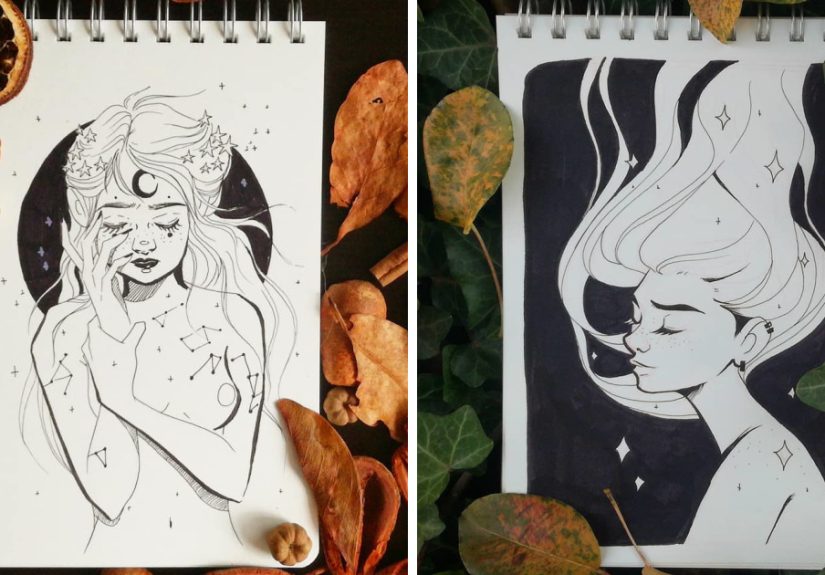
- How to cover your forehead with curly hair: 15 cute styles
- 1) Curly Curtain “Bangs” (no scissors required)
- 2) Deep Side Part + Side-Swept Curl Fringe
- 3) The Curly Shag Fringe (a cut that does the work for you)
- 4) Headband + Curly Fringe (the sporty-cute classic)
- 5) The “Scarf Setback” (headscarf with curls left out front)
- 6) Bandana Front Tie (retro, cute, and very forgiving)
- 7) Half-Up Top Knot + Face-Framing Curls
- 8) Pineapple Ponytail + Curly Forehead Fringe
- 9) Claw Clip Twist + “Fake Bang” Pieces
- 10) Two Space Buns + Curly Bang Zone
- 11) Mini Pigtails + Curly Fringe
- 12) Low Puff + Faux Bangs (especially great for coils)
- 13) The “Halo Braid” Crown + Curly Forehead Pieces
- 14) Twist-Out With a Defined Front Fringe
- 15) Clip-In Curly Bangs (commitment-free fringe)
- How to keep forehead-covering curls cute for 2–3 days
- Common forehead-coverage problems (and fixes that actually work)
- : Real-life experiences from the “cover my forehead” curly hair club
- Final thoughts
Curly hair is basically a tiny, joyful rebellion. You ask for “a little forehead coverage,” and your curls respond,
“Best I can do is a surprise bang that shrinks two inches by lunch.” The good news: you don’t need to fight your
texture to cover your forehead. You just need the right front-section strategyplus a few cute styles that
work with your curl pattern instead of against it.
Below, you’ll get 15 forehead-covering curly hairstyles (from bang illusions to headband magic), plus practical tips
for keeping your fringe from doing… whatever it wants. This is written for waves, curls, and coils2C through 4C
because forehead coverage should be a vibe, not a weekly argument.
Why curly hair “won’t stay” on your forehead (and how to outsmart it)
Forehead coverage with curly hair comes down to three things: shrinkage, curl direction,
and drying position. If the front pieces dry pushed back, they’ll keep living their best life away from your face.
If they dry forward (or slightly angled), they’re much more likely to behave like bangs or a soft fringe.
- Shrinkage: The tighter the curl, the bigger the shrink. Coils can look “long” wet and “hello, micro-fringe” dry.
- Cowlicks + growth pattern: Many hairlines naturally push up and back at the temples or center front.
- Humidity + product choice: Too little hold = poof. Too much heavy cream = droop. The sweet spot is light moisture + flexible hold.
Before you style: a 5-minute prep that makes every forehead-covering look easier
1) Create a “front zone” on purpose
Separate the front section you want to cover your foreheadusually a triangle or soft “U” shape from temple to temple.
Clip the rest back. This keeps you from over-styling your whole head when only your forehead is the main character today.
2) Style the front while it’s damp (not bone dry)
Curly fringe behaves best when shaped while wet or damp. Smooth a small amount of leave-in or curl cream through the front zone,
then add a light gel for hold. Finger-coil a few pieces to encourage them to fall forward instead of splitting into random directions.
3) Dry your curls in the direction you want them to live
If you want forehead coverage, let the front dry forward or down-and-over (for side-swept looks).
You can air-dry, diffuse, or “micro-plop” the front with a soft T-shirt. If you diffuse, keep it gentle and don’t blast the bang zone into chaos.
4) Choose your coverage goal
- Full coverage: a true fringe/bang effect across the forehead
- Soft coverage: curtain bangs or face-framing curls that overlap the forehead
- Strategic coverage: side-sweep, headband/scarf placement, or faux bangs
How to cover your forehead with curly hair: 15 cute styles
Each style below includes quick steps and a “best for” note, because not every curl pattern wants to do the same thingand that’s okay.
1) Curly Curtain “Bangs” (no scissors required)
Create a middle part in your front zone while damp. Split the front into two sections and finger-coil each side forward, then slightly outward,
so the curls frame your forehead like soft curtains.
- How-to: Damp hair → leave-in → light gel → coil 4–8 small pieces → clip roots forward → diffuse or air-dry.
- Best for: 2C–3C (and looser 4A) when you want a fringe look without committing to a cut.
- Make it cuter: Add a tiny barrette behind one side to keep the part crisp and intentional.
2) Deep Side Part + Side-Swept Curl Fringe
A deep side part is an instant forehead-covering hack. It shifts volume over the forehead and creates a soft swoop that reads like bangs.
- How-to: Make a deep part while wet → brush the front forward and to one side → pin at the root if needed → let curls dry in place.
- Best for: 2C–4B. Great when you need coverage fast and your hairline likes to push back.
- Pro tip: Criss-cross two bobby pins at the root for a secure, invisible anchor.
3) The Curly Shag Fringe (a cut that does the work for you)
If you want forehead coverage most days, a curly shag with a fringe is the “set it and forget it” option. Layers reduce bulk and help bangs blend.
- How-to: Ask for a dry, curl-by-curl cut and a longer fringe that can shrink safely without becoming micro-bangs.
- Best for: 3A–4C, especially if your curls feel heavy at the front and need shape.
- Maintenance: Trim the fringe regularly so it stays in the “cute” zone, not the “poking my eyeballs” zone.
4) Headband + Curly Fringe (the sporty-cute classic)
Put on a soft headband about 1–2 inches behind your hairline, then pull a few curls forward over your forehead. It’s casual, cute, and forehead-friendly.
- How-to: Place headband → gently tug front curls forward → separate into smaller pieces for a natural fringe.
- Best for: All curl types. Especially helpful for day-2 or day-3 hair.
- Make it last: A tiny mist of water + a pea-sized gel refresh keeps the fringe defined.
5) The “Scarf Setback” (headscarf with curls left out front)
Tie a scarf so it covers your roots while leaving curls at the front. You get forehead coverage and a polished lookeven if your wash day is a distant memory.
- How-to: Fold scarf into a band → place near hairline → tie at nape or top → pull curls forward.
- Best for: 3A–4C, plus anyone in humidity who wants frizz control and style in one step.
- Style note: Choose satin/silk-like fabric to reduce friction and keep curls smoother.
6) Bandana Front Tie (retro, cute, and very forgiving)
A bandana tied at the front can create instant forehead coverage while still showing your curls. It also hides a not-so-fresh hairline like a pro.
- How-to: Fold into a wide band → tie at the front → fluff curls around and pull a few pieces forward.
- Best for: 2C–4C. Great for short curls and curly bobs.
- Bonus: Adds structure to looser waves that won’t “bang” on their own.
7) Half-Up Top Knot + Face-Framing Curls
Pull the top half into a bun, then leave a defined front section to fall over your forehead. The contrast makes the fringe look intentional.
- How-to: Section crown → tie into bun → use gel on front zone → coil a few curls forward.
- Best for: 3A–4C. Especially cute on medium to long hair.
- Make it softer: Don’t slick the front too hardlet it stay touchable.
8) Pineapple Ponytail + Curly Forehead Fringe
The pineapple keeps length up and away while letting your front curls drape forward. It’s a curly staple for a reason.
- How-to: High ponytail (loose) → pull a few curls forward → fluff roots gently.
- Best for: 3A–4C, especially when you want volume and forehead coverage at once.
- Hold trick: Use a satin scrunchie to reduce dents and breakage.
9) Claw Clip Twist + “Fake Bang” Pieces
Twist hair up, secure with a claw clip, then pull a few curls down to mimic bangs. It looks effortlesslike you casually woke up stylish on purpose.
- How-to: Twist upward → clip → tug the crown slightly for volume → pull 4–10 curls forward.
- Best for: 2C–4B. Ideal when you want quick coverage without a full updo.
- Extra cute: Choose a clip that complements your outfit (yes, accessories can do emotional support too).
10) Two Space Buns + Curly Bang Zone
Space buns give playful structure, and leaving a curl fringe in front makes the forehead coverage look deliberate (not accidental).
- How-to: Part down the middle → create two buns → style front zone forward with gel + coils.
- Best for: 3A–4C. Works especially well on thick hair that needs “containment.”
- Short hair version: Use mini buns or half-up space buns.
11) Mini Pigtails + Curly Fringe
This is the cute, low-effort style that makes it look like you planned your life. Keep the pigtails small and let curls fall onto your forehead.
- How-to: Two low or mid pigtails → loosen the front → define 6–12 small curls as fringe.
- Best for: 2C–4C. Great for short to medium length.
- Upgrade: Wrap a small piece of hair around the elastic for a polished finish.
12) Low Puff + Faux Bangs (especially great for coils)
For coily hair, a low puff with a styled bang zone can look sleek, soft, and forehead-coveringwithout fighting your texture.
- How-to: Smooth sides into a low puff → keep the front zone out → define with cream + gel → lay forward.
- Best for: 4A–4C. Perfect if you like protective-adjacent styling with minimal tension.
- Edge-friendly: Avoid over-brushing the hairline; use fingers and a soft brush only where needed.
13) The “Halo Braid” Crown + Curly Forehead Pieces
A crown braid (or flat twist) around the perimeter is pretty and practical. Leave a few curls at the front for forehead coverage and softness.
- How-to: Create a braid/twist crown → pin ends → pull curls forward → define the fringe with gel.
- Best for: 3B–4C. Excellent when you want a dressed-up look that still feels natural.
- Bonus: Helps control frizz at the roots.
14) Twist-Out With a Defined Front Fringe
If your curls don’t naturally fall forward, build a fringe during your twist-out. Set the front twists forward so the result lands on your forehead.
- How-to: Twist the front section forward → let set/dry → unravel carefully → separate lightly for volume.
- Best for: 3C–4C. Great for consistent, predictable forehead coverage.
- Frizz control: Use a light oil on fingertips when unraveling.
15) Clip-In Curly Bangs (commitment-free fringe)
Want bangs today and “absolutely not” tomorrow? Clip-in curly bangs can give instant forehead coverage without the haircut commitment.
The key is matching texture and blending with face-framing layers.
- How-to: Clip in at the front → blend with your natural front curls → lightly shape with water + gel if needed.
- Best for: All curl types (as long as you match pattern and density well).
- Natural look tip: Leave a few of your own curls out in front to camouflage the seam.
How to keep forehead-covering curls cute for 2–3 days
Sleep protection: your fringe deserves a night shift
- Satin/silk bonnet or pillowcase: Reduces friction, frizz, and weird overnight angles.
- Pineapple at night: Keeps curls from flatteningthen restyle the front in the morning.
- Refresh only the front zone: A spray bottle + a dab of gel beats re-washing your whole head.
Refresh routine (under 3 minutes)
- Mist the bang zone with water until just damp.
- Smooth a pea-sized leave-in and a small amount of gel.
- Finger-coil 4–8 pieces, then let air-dry or diffuse on low.
Common forehead-coverage problems (and fixes that actually work)
Problem: “My bangs shrink into nothing.”
Choose longer fringe pieces (think eyebrow-to-cheekbone wet length) and style them forward while wet. If you’re cutting, a dry cut helps avoid surprise shrinkage.
Problem: “My front curls split into a center part I didn’t ask for.”
Create your part while wet and clip the roots where you want them to dry. A tiny root clip is basically a tiny manager for your hairline.
Problem: “My fringe gets frizzy first.”
The forehead area is high-touch (hands, skincare, humidity). Use a light gel on the front zone and avoid rubbing your bangs dry with a towel.
Micro-plop with a T-shirt instead.
Problem: “Headbands and scarves slide back.”
Start on slightly textured hair (not freshly oiled). For extra grip, place two bobby pins in an X near the temples and tuck the band/scarf edge under them.
: Real-life experiences from the “cover my forehead” curly hair club
If you’ve ever tried to cover your forehead with curly hair, you already know it’s not just a hairstyleit’s a daily negotiation.
Many curlies describe the same pattern: the style looks adorable at 8:00 a.m., then by 10:30 your fringe has migrated,
split, or shrunk into a new shape that feels oddly personal. The biggest “aha” moment people share is realizing that forehead
coverage isn’t a single hairstyleit’s a system: sectioning, shaping, and drying direction.
One common experience: trying to force bangs with totally dry hair. On day two, you wake up, your front curls are pointing
at the ceiling like they’re trying to detect Wi-Fi, and you immediately consider becoming a hat person. The fix most people
swear by is simply dampening only the front zone. Not a full wash. Not a dramatic shower reset. Just a spray bottle,
a fingertip of leave-in, and a tiny bit of gelthen finger-coiling a few curls so they land where you want them to live.
That small reset often turns “forehead panic” into “okay, cute.”
Another classic: the “too much product” trap. When your goal is coverage, it’s tempting to pile on creams to weigh the front down.
But heavy products can make bangs separate into chunky pieces or fall flat in a way that looks more “wet cat” than “soft fringe.”
A lot of people find the sweet spot is light moisture + flexible hold. Think: a lightweight leave-in for slip, then gel
for shape. The gel isn’t about crunchy helmet hairit’s about keeping the front from frizzing into a fuzzy halo by lunchtime.
And then there’s the weather. Humidity can inflate a curly fringe; dry winter air can make it static-y and fragile.
This is why accessories become emotional support. Headbands and scarves don’t just look cutethey give structure when the atmosphere is
doing the most. Plenty of people keep a “car scarf” or “desk headband” for quick touch-ups, the way others keep lip balm.
Also, sleep protection gets rave reviews: a satin bonnet or pillowcase can be the difference between “defined curls”
and “my bangs have formed a new continent.”
The most encouraging experience people share is that forehead coverage gets easier once you find your signature move.
Maybe it’s a deep side part and two strategic pins. Maybe it’s a pineapple with a soft fringe. Maybe it’s a scarf that instantly makes you look
like you’re starring in your own indie film. The point is: once you identify what your curls naturally want to do,
you can steer them gently instead of wrestling them. And yes, you’re allowed to have a “lazy cute” option for days when your hair has opinions.
Final thoughts
Covering your forehead with curly hair isn’t about hidingit’s about styling your texture into shapes that feel like you.
Start with the front zone, dry it in the direction you want, and keep a couple of accessory-based styles in your back pocket.
With curls, the goal isn’t perfect symmetry; it’s a look that feels effortless (even if you and your spray bottle know the truth).