Table of Contents >> Show >> Hide
- Safety First (Because Hospitals Don’t Give Out Medals)
- What a Back Handspring Really Is (So Your Body Stops Guessing)
- Gear & Setup: The Boring Stuff That Keeps You Unbroken
- Warm-Up (10–15 Minutes That Make Everything Easier)
- Prerequisites Checklist (If You Skip These, You Pay in Chaos)
- Progressions & Drills Coaches Use (Where Real Learning Happens)
- How to Do a Back Handspring (Coach-Supervised Step-by-Step)
- Spotting & Coaching Tips (What Good Coaches Emphasize)
- Common Mistakes (And How to Fix Them Without Panic)
- Back Handspring in Cheer vs. Gymnastics (Same Skill, Different Context)
- A Practical 4-Week Plan (Assuming You Have a Coach)
- When to Stop (And Why That’s a Smart Athlete Move)
- Final Thoughts
- Experiences From Real Training (The Part People Don’t Tell You)
A back handspring is basically your body saying, “Gravity? Never heard of her,” while physics quietly nods in approval.
It’s one of the most iconic tumbling skills in gymnastics and cheerleadingpowerful, snappy, and (when done right) weirdly satisfying.
It’s also a skill that can absolutely wreck your day if you rush it.
So this tutorial is the “learn it the smart way” version: what a back handspring really is, what you need before you attempt it,
drills coaches use, the key shapes that make it work, and the most common mistakes that make people look like a confused folding chair.
One important note up front: a back handspring should be learned with a qualified coach and proper mats/spotting, not as a solo “hold my phone” moment.
Injury risk is real in gymnastics and tumbling, and young athletes are especially prone to both acute and overuse injuries.
Safety First (Because Hospitals Don’t Give Out Medals)
Who should learn a back handspring right now?
- You should if you can already do basic skills cleanly (cartwheel/round-off, bridge, backward roll, handstand basics), and you have a coach + safe surface.
- You should not if you have wrist, elbow, shoulder, neck, or back pain; if you’re learning on hard ground; or if you’re trying to teach yourself from clips.
What “safe setup” actually means
Safe learning usually includes a spring floor or tumble track, panel mats, a wedge mat (incline), and a trained spotter/coach.
A big reason: handsprings require load through wrists and shoulders while you rotate invertedexactly the kind of situation where small technique errors can become big problems.
Pediatric sports medicine groups emphasize injury prevention strategies and appropriate training loads for young athletes.
Rule-of-thumb: no coach, no handspring
If you don’t have a coach or trained spotter, shift your goal: build the prerequisites (strength, flexibility, shapes, and drills) first.
In cheerleading contexts, rulebooks and safety guidelines are very specific about what tumbling is allowed and how skills are definedbecause “it looked fine” isn’t a safety plan.
What a Back Handspring Really Is (So Your Body Stops Guessing)
A back handspring is a non-aerial tumbling skill where you travel backward, place your hands on the floor, pass through an inverted position,
then snap your legs down to land on your feet. In cheer/tumbling definitions, it’s commonly described as rotating backward through inversion by lifting hips over head and shoulders.
The two “shapes” you must understand
- Arch (hollow-to-arch moment): You open through your hips/chest as you reach back so your hands can contact the floor.
- Hollow (snap-down moment): You tighten your core and “snap” your legs down fast to stand up again.
Think of it like a quick “open then close” action: open enough to reach back safely, then close (tight hollow) to rotate your feet back under you.
Most back handspring problems are really “shape problems,” not “bravery problems.”
Gear & Setup: The Boring Stuff That Keeps You Unbroken
- Best surfaces: spring floor, tumble track, or padded gymnastics floor
- Learning tools: wedge mat (incline), panel mats, spotter belt/lines (if your gym uses them), foam pit progressions
- What to avoid: concrete/tiles, thin carpet, wet grass, or any surface that makes your hands slip
If your training space can’t safely support your hands, shoulders, and neck in an inverted skill, it’s not the right spacefull stop.
(A back handspring is not a “driveway skill.” Your driveway is for chalk art and heartbreak.)
Warm-Up (10–15 Minutes That Make Everything Easier)
1) Heat up your engine
- Light jog or jump rope: 2 minutes
- High knees, butt kicks, skips: 2 minutes
- Leg swings (front/back + side/side): 10 per leg
2) Prep wrists and shoulders (non-negotiable)
- Wrist circles + gentle rocking on hands (on mats): 30–60 seconds
- Shoulder circles and arm swings: 20–30 seconds
- Wall shoulder stretch (arms overhead): 30 seconds
3) Wake up your core and glutes
- Hollow hold: 2 x 15–25 seconds
- Glute bridges: 2 x 10–15 reps
- Squat to calf raise: 2 x 8 reps (control the landing)
Prerequisites Checklist (If You Skip These, You Pay in Chaos)
You don’t need to be a superhero. You do need a foundation.
Here’s a realistic checklist many coaches aim for before a consistent back handspring:
Strength + control
- Hold a tight hollow body for 20+ seconds
- Do 5–10 clean push-ups (or elevated push-ups with good form)
- Hold a stable handstand against a wall (belly-to-wall is ideal)
Mobility + positions
- Bridge with straight-ish arms (no elbow collapse)
- Shoulders open enough to keep arms by ears overhead
- Comfort with backward motion (backward roll is smooth)
If your bridge is a “sad taco” (hips low, arms bent, shoulders closed), don’t panicjust treat it as your training map.
A better bridge and better shoulder openness will make your back handspring feel 10 times less terrifying.
Progressions & Drills Coaches Use (Where Real Learning Happens)
Drill A: Backward roll to “strong push”
On a soft mat, practice a backward roll focusing on placing hands by your shoulders and pushing the floor away.
The goal is to teach your body: “hands contact → shoulders push,” not “hands contact → everything collapses.”
Drill B: Bridge snaps (bridge rock + snap)
From a bridge (on mats), rock gently to shift weight into hands and shoulders, then practice snapping one or both legs down (as coached).
This builds the idea of snapping your feet back under you rather than drifting into a back limbo contest.
Drill C: Handstand snap-downs
With a coach, practice a tight handstand (often against a wall or with a spot), then snap your feet down to land strong.
This trains the “hollow snap” that finishes a back handspring.
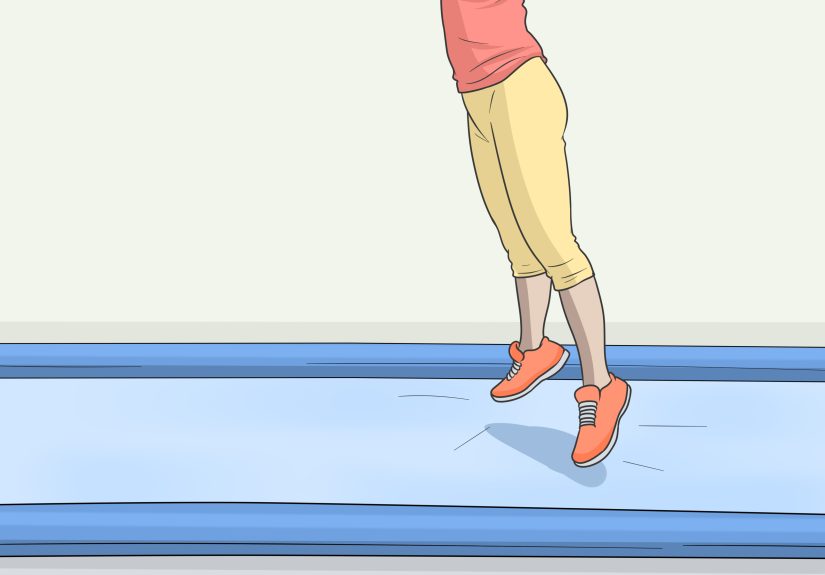
Drill D: Wedge mat progressions (incline work)
Many gyms teach the back handspring on an incline (wedge) first because it slows the rotation and helps you feel the right shapes.
It can make the skill feel more manageable while you learn timing and confidence.
Drill E: Spotted reps (the bridge between drills and the full skill)
A trained spotter helps you travel backward safely and keeps your rotation moving while you build correct technique.
Spotting is a skill by itselfcoaches learn where to support so you’re safe while still doing the work.
(Translation: your friend who “goes to the gym sometimes” is not a spotter.)
How to Do a Back Handspring (Coach-Supervised Step-by-Step)
This is the full movement broken into coach-style phases. Use it as a mental modelthen practice under supervision on proper mats.
You’re aiming for backward travel, strong shoulder push, and a fast snap-down.
Phase 1: The set (start position)
- Stand tall, feet about hip-width apart.
- Arms up by your ears (not in front of your face), ribs tucked, core tight.
- Eyes forward (avoid throwing your head back).
Phase 2: The sit and swing (load power)
- Do a small “sit” like you’re starting a jumpknees bend, hips go slightly back.
- Arms swing down and then back up aggressively to create momentum.
- Key cue: jump back, not straight up.
Phase 3: Reach for the floor (hands to mat)
- As you travel backward, keep arms straight and reach back for the mat.
- Think “long body” through shoulders and hipsno collapsing at the waist.
- Hands contact the mat; shoulders stay active (don’t sink).
Phase 4: Push + snap (the secret sauce)
- Push the floor away through your shoulders (strong, fast).
- Bring legs together (or keep them together if they already are).
- Snap your feet down under you by tightening your core (hollow shape).
Phase 5: Land like you meant to do that
- Land with soft knees and a stable core (no “knee jelly”).
- Chest up, arms up by ears to finish clean.
- If connecting skills (like round-off back handspring), you’ll land with slightly more forward momentum than a standing back handspring.
Coaching resources often describe these same priorities: tight shapes, strong shoulder push, and fast snap-down/landing control.
Spotting & Coaching Tips (What Good Coaches Emphasize)
What a spotter is trying to accomplish
- Keep your rotation moving safely
- Prevent head/neck impact and uncontrolled landings
- Help you “feel” correct timing without you muscling it
What you should focus on during a spotted rep
- Arms straight the whole time
- Jump back (travel), don’t hop in place
- Push the floor as soon as hands contact
- Snap tight to land under control
If you’re thinking “I have no idea what my body is doing,” that’s normal early on.
Ask your coach for one cue at a time (example: “straight arms” only), then build layer by layer.
Trying to fix five things at once is how you accidentally invent interpretive dance.
Common Mistakes (And How to Fix Them Without Panic)
Mistake 1: Jumping up instead of back
What it looks like: You pop straight up, then fall backward like a startled cartoon character.
Fix: Practice “sit-jump-back” drills on a line. Imagine you’re trying to land your hands behind you, not under you.
Mistake 2: Bent arms on contact
What it looks like: Your elbows bend and your shoulders collapse, making everything slower and riskier.
Fix: Strengthen shoulders (wall handstand holds, plank shoulder taps) and drill “push the floor away” on mats.
Mistake 3: Throwing the head back
What it looks like: You crank your neck, lose body tension, and feel out of control.
Fix: Keep eyes forward at takeoff; think “long neck” rather than “find the floor with your face.”
Mistake 4: Legs separating (“scissor legs”)
What it looks like: One leg leads, the other follows, and you land twisted.
Fix: Squeeze a foam block/pillow lightly between knees in some drills (as coached) and practice snap-down timing.
Mistake 5: Landing too low or sitting on the landing
What it looks like: You land deep and can’t stand up cleanly.
Fix: Improve snap-down speed (hollow holds, handstand snap-downs) and strengthen quads/glutes for stable landings.
Back Handspring in Cheer vs. Gymnastics (Same Skill, Different Context)
The mechanics are similar, but the context can change:
- Gymnastics: often focuses on tight shapes, power, and connections (like round-off back handspring).
- Cheerleading: often uses it in standing tumbling or running tumbling sequences, with strict safety rules about when/where skills are allowed.
Cheer and spirit rule documents define tumbling and outline restrictions because environment and surface matterand because some “variations” are not allowed.
Staying inside these safety frameworks protects athletes and teams.
A Practical 4-Week Plan (Assuming You Have a Coach)
This plan is not a promise and not a substitute for coachingpeople progress at different speeds.
It’s simply a structured way to build skill safely and consistently.
Many return-to-sport and progression resources emphasize gradually increasing difficulty and moving from softer surfaces to firmer ones.
Week 1: Build shapes + confidence
- Warm-up + wrist/shoulder prep every session
- Hollow holds, glute bridges, squat-to-jump mechanics
- Bridge work and backward rolls with strong hand push
Week 2: Snap-down and shoulder push
- Handstand holds (wall) + handstand snap-down drills
- Bridge rocks/snaps (as coached)
- Wedge mat progressions (if available)
Week 3: Spotted back handsprings
- Multiple spotted reps focusing on one cue (straight arms or jump back)
- Video review with coach to spot shape issues
- Strength maintenance (core + shoulders)
Week 4: Reduce the spot, improve consistency
- Gradually lighter spot as technique improves
- Work landings and “finish position” (arms up, stable core)
- If connecting skills, add round-off drills separately before combining
When to Stop (And Why That’s a Smart Athlete Move)
Stop training that day and tell your coach/guardian if you feel sharp pain, tingling/numbness, dizziness, or repeated wrist/shoulder/back discomfort.
Gymnastics injuries can include overuse issues, and training through pain often makes recovery longer and harder.
Final Thoughts
A back handspring is not a talent lotteryit’s a skill built from the right prerequisites, the right shapes, and the right progressions.
If you train it with a coach, use mats, and treat drills like the “main course” instead of boring homework, you’ll get there with far less fear and far more control.
And when you finally land one clean? Congratulations. You just taught your body to do a very polite, very athletic back-flip-ish thing without actually flipping.
(Yes, it’s complicated. Yes, it’s awesome.)
Experiences From Real Training (The Part People Don’t Tell You)
Learning a back handspring has a funny emotional timeline. At first, it feels impossiblenot because your body can’t do it,
but because your brain is convinced you’re about to time-travel directly into the floor. Most beginners describe the first few attempts as a “trust issue,”
not a strength issue. That’s why good coaches don’t start with the full skill. They start by giving your nervous system proof:
proof you can go backward safely, proof you can support weight on your hands, proof you can control your landing.
The moment you feel those pieces click, the fear usually drops fast.
Another common experience: your “almost” back handspring may look dramatically different from how it feels.
Many athletes swear they’re jumping backward like a superherountil a video shows they’re jumping straight up and gently falling back like a lawn chair.
This is normal. Your body’s internal GPS isn’t great at new skills. Video feedback (used kindly, not as a roast session) helps you line up reality with intention.
A lot of athletes improve quickly once they can actually see whether their arms are straight, whether their hips are traveling back, and whether their snap-down is fast.
People also underestimate how much the wrists and shoulders “talk” during training. When you’re learning, your hands take load at angles
you’re not used to, and your shoulders must stay active the entire time. In practice, that can feel like your upper body is doing way more work than expected.
Many beginners think tumbling is “all legs,” then discover the back handspring is a shoulder skill wearing a leg costume.
As your technique improves, the pressure in your wrists often feels more controlled because you’re contacting the mat in a better position and pushing through your shoulders instead of collapsing.
One of the most motivating experiences is the “first clean spotted rep.” A solid spot often gives you your first true sense of what a back handspring is supposed to feel like:
jump back, hands hit, quick push, snap down, stand up. It’s like your body finally reads the instruction manual in the correct language.
After that, progress often becomes less mysterious. Your coach can say, “Do that same shape, just with less help,” and you actually know what “that” is.
The spot isn’t there to do the skill for youit’s there to let you experience the correct timing safely, so you can reproduce it.
Expect plateaus. It’s very common to improve for a week, then feel stuck for a week, then suddenly level up again.
Usually the “stuck” phase is when your body is rewiring: tightening shapes, improving shoulder push, or learning to snap faster.
That’s why drills matter. Drills keep progress moving even when full attempts feel messy.
The athletes who get consistent aren’t the ones who try the full back handspring 100 times with the same mistake;
they’re the ones who do targeted drills until the mistake has nowhere left to live.
Finally, there’s the confidence shift. The first time you land a back handspring with controlarms up, stable core, no wobbleyou don’t just gain a skill.
You gain proof that you can learn scary things safely through structure and repetition. That confidence tends to spill into other skills:
round-off back handspring, back walkovers, even non-gym stuff like presentations or tryouts (because your brain remembers, “Oh yeah, we do hard things now.”).
If you’re in the learning phase, keep it boring on purpose: warm up, drill, spotted reps, rest, repeat. Boring is what “safe progress” looks like.