Table of Contents >> Show >> Hide
- What “Marilyn Monroe curls” actually are (so you know what you’re aiming for)
- What you’ll need (no, not a time machine)
- How to Get Marilyn Monroe Curls: 11 Steps
- Step 1: Pick your “Marilyn moment” and match the curl size
- Step 2: Start clean-ish and lightweight (heavy hair is sleepy hair)
- Step 3: Apply the “triangle of success”: protect, lift, and set
- Step 4: Blow-dry smooth with volume (your curls need a good foundation)
- Step 5: Create a deep side part (instant Old Hollywood)
- Step 6: Section like you mean it (messy sections = messy results)
- Step 7: Set the curls (choose your method)
- Step 8: Cool completely (this is where the hold is born)
- Step 9: Take down gentlyno yanking, no chaos
- Step 10: Do the legendary brush-out (yes, it looks wrong before it looks right)
- Step 11: Sculpt the front swoop, then set it like hair architecture
- Troubleshooting (because hair loves to humble us)
- How to make it last (and how to revive it tomorrow)
- Conclusion
- Real-life experiences: what it’s like to chase the perfect Monroe curl (500-ish words of reality)
- SEO tags (JSON)
Marilyn Monroe curls are the hair equivalent of a perfectly buttered pancake: soft, glossy, a little dramatic, and somehow
still “natural” (even though nothing about it happened by accident). The good news? You don’t need a glam squad
hiding behind your shower curtain. You need a smart curl base, a full cool-down, and a brush-out you’ll swear is ruining
everythingright before it suddenly becomes iconic.
This guide breaks the look into 11 realistic steps you can do at home, with options for short hair, long hair, fine hair,
thick hair, and the “my hair holds a curl for eight seconds” crowd. Expect Old Hollywood volume, face-framing swoops, and
the kind of bounce that makes you want to answer every text with “Hello, doll.”
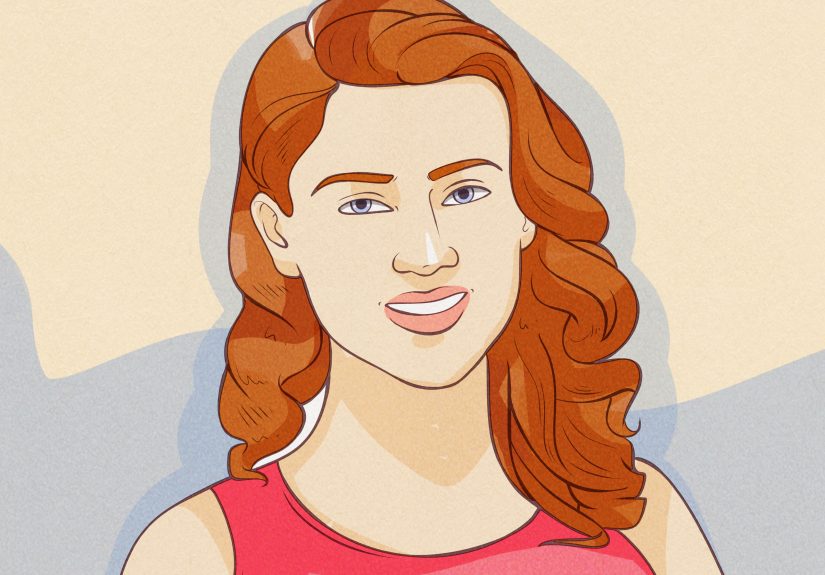
What “Marilyn Monroe curls” actually are (so you know what you’re aiming for)
Marilyn’s signature style isn’t tight ringlets. It’s a structured curl set that’s been brushed out
into soft, sculpted waves with a lifted crown and a face-framing front swoop.
Think: bouncy ends, smooth surface, and curls that behave like they’ve signed a contract.
- Volume at the root (especially near the part and crown)
- Curls set and cooled before you touch them
- Brush-out + shaping to transform “Shirley Temple energy” into “screen siren energy”
- Finish that’s shiny and touchable-looking (even if you’re not supposed to touch it)
What you’ll need (no, not a time machine)
Tools
- Hot rollers or a 1-inch curling iron/wand (a smaller iron for very short hair)
- Sectioning clips (duckbill clips are especially helpful)
- Pin curl clips or bobby pins (for cooling curls and shaping)
- A boar-bristle or smoothing brush for the brush-out
- A tail comb (for clean sections and a sharp part)
- Optional: round brush for blow-drying volume
Products
- Heat protectant (always)
- Volumizing mousse or setting foam (for lift + hold)
- Lightweight hairspray (you can build hold in layers)
- Optional: setting lotion (especially for roller sets or stubborn hair)
- Optional: shine mist or a tiny amount of serum (tiny = actually tiny)
- Optional: dry shampoo or texture spray (for roots that need grip)
How to Get Marilyn Monroe Curls: 11 Steps
Step 1: Pick your “Marilyn moment” and match the curl size
Marilyn’s curls variedsometimes tighter and curlier, sometimes softer and more wave-y. Your tool choice controls the vibe:
hot rollers are great for volume and a classic set, while a 1-inch curling iron is a fast shortcut
for similar shape. Short hair usually needs smaller rollers or a smaller barrel to get definition; long hair can go
slightly larger to avoid looking like you’re auditioning for a powdered-wig reenactment.
Step 2: Start clean-ish and lightweight (heavy hair is sleepy hair)
If your hair is freshly washed, use a light conditioner and avoid coating your roots in heavy oils. If it’s day-two hair,
that’s often perfectjust refresh the roots with dry shampoo and brush it through. Either way, the goal is hair that has
grip and lift, not hair that feels like it just ran a marathon in a humidity sauna.
Step 3: Apply the “triangle of success”: protect, lift, and set
Work in three layers:
heat protectant (mid-lengths to ends),
mousse/setting foam (roots through mid-lengths for volume),
and a light mist of hairspray if your hair is stubborn.
If you’re doing a roller set, a small amount of setting lotion can boost hold and that smooth, vintage finish.
Step 4: Blow-dry smooth with volume (your curls need a good foundation)
The Monroe look is polished, so get your base smooth first. Blow-dry with a round brush for lift at the roots, especially near
the crown and your part. If your hair is naturally curly or frizzy, take the extra time heresmooth hair shapes into sculpted
waves more easily than hair that’s already trying to form its own opinions.
Step 5: Create a deep side part (instant Old Hollywood)
A deep side part does half the glamour work for you. Use a tail comb, then clip the heavier side out of the way so it doesn’t
immediately flop back and erase your effort like a tiny, rude gravity monster.
Step 6: Section like you mean it (messy sections = messy results)
Divide hair into 4–6 workable areas: top/crown, both sides, and back (split into upper and lower if thick). Keep sections around
1 inch wide for hot rollers, or slightly smaller if you want more definition. Clean sections give you even curls,
and even curls brush out into that dreamy, uniform wave pattern.
Step 7: Set the curls (choose your method)
Option A: Hot rollers (most “Marilyn” with the least math)
- Start at the crown for maximum lift.
- Roll hair from ends to roots, keeping tension smooth.
- On the front sections, roll down and away from the face for that classic swoop.
- Secure firmlyloose rollers make sad curls.
Option B: Curling iron (fast shortcut)
- Curl 1-inch sections and pin each curl to your head to cool.
- Keep your curl direction consistent around the face for a more sculpted look.
- If the ends get too curly, gently soften them later during the brush-out and shaping stage.
Option C: Pin curls / wet set (most classic, most patience)
- Work with slightly damp hair + setting lotion.
- Create pin curls that follow your part and the direction you want the wave to flow.
- Let fully dry before taking down (this is the “overnight glam” route).
Step 8: Cool completely (this is where the hold is born)
If you do nothing else, do this: let the curls cool all the way down. Not “kind of cool.” Not “I’m late but
optimistic.” Fully cool. Cooling locks the shape. If you’re impatient, use a blow dryer’s cool shot to speed things up.
For extra hold, keep curls pinned while cooling.
Step 9: Take down gentlyno yanking, no chaos
Remove rollers or pins slowly and let each curl fall into your palm. Don’t drag tools through the curl or tug at the root.
If a curl looks too tight, resist the urge to immediately brush it out like you’re mad at it. Let the whole head come down first,
then brush evenly so everything blends.
Step 10: Do the legendary brush-out (yes, it looks wrong before it looks right)
Here’s the plot twist: Monroe curls are not “perfect curls.” They’re perfectly brushed curls. Use a boar-bristle or smoothing
brush and brush through until the curls expand and get fluffy. It can look frizzy for a momentthat’s normal. If you need extra control,
lightly mist hairspray into the air or onto your brush and brush again. This is the stage where volume shows up like, “Hello. I heard you called.”
Step 11: Sculpt the front swoop, then set it like hair architecture
Now you turn “brushed curls” into “Marilyn.” Focus on the front and the heavier side of your part:
- Use your brush to guide hair into a soft S-shape wave near the face.
- Clip the ridges lightly with duckbill clips to “train” the wave (place clips where you want definition).
- Mist hairspray, wait a few minutes, then remove clips carefully.
- Finish with a tiny bit of shine mist for camera-ready gloss (avoid heavy oils that collapse volume).
Troubleshooting (because hair loves to humble us)
If your curls fall fast
- Use mousse/setting foam at the start and pin curls to cool.
- Make sure hair is fully dry before hot rollers (damp + heat can flatten shape).
- Let curls cool longer than you think you need.
- Use smaller sectionsbig sections = lazy curls.
If your hair is thick
- Work in more sections than feels necessary (it is necessary).
- Use larger heated rollers for shape, then pin-cool for staying power.
- Brush-out in layers so you don’t lose the wave pattern.
If your hair is short
- Curl closer to the root for definition.
- Use smaller rollers or a smaller barrel so the curls actually form.
- Focus on shaping the front and sidesMonroe energy lives near the face.
If your hair is long
- Use rollers to build lift and keep the ends from turning into tight spirals.
- Consider rolling the mid-lengths and ends slightly looser, then shaping the front more precisely.
If your hair is damaged
Be gentle with heat. Use lower temperatures, fewer passes, and more setting time. If your hair is very brittle, consider a heatless set
(pin curls/wet set) and prioritize conditioning and trims before going full bombshell.
How to make it last (and how to revive it tomorrow)
The “secret” to longevity is resetting the shape without starting over. Before bed, gather hair loosely and create a few large pin curls
or wrap sections around your fingers and pin them flat. Sleep on a satin pillowcase if you can. In the morning, release, brush lightly,
re-sculpt the front with clips for 5–10 minutes, and finish with a light mist of hairspray.
Conclusion
Marilyn Monroe curls are a game of patience, physics, and a little theatrical confidence. Build a solid curl base (rollers or iron),
cool it completely, brush it out like you’re “ruining” it, then sculpt it back into glossy, face-framing perfection. Once you nail the rhythm,
it stops feeling like a complicated hairstyle and starts feeling like a superpowerone that pairs beautifully with winged liner,
a red lip, and the decision to dramatically flip your hair at absolutely nothing.
Real-life experiences: what it’s like to chase the perfect Monroe curl (500-ish words of reality)
The first time most people attempt Marilyn Monroe curls, there’s a very specific emotional roller coaster (pun unavoidable). It starts with confidence:
“I have hot rollers. I have hairspray. I have thumbs. How hard can this be?” Then comes the mid-process doubt spiral, usually around the moment you remove
the rollers and discover your head is covered in tight curls that make you look like you should be selling milkshakes from a vintage dinercute, but not
exactly the soft, sculpted bombshell you pictured.
Then you begin the brush-out and things get… dramatic. Your hair expands. The curl definition disappears. The mirror offers you a brief cameo as a
glamorous dandelion. This is the point where beginners stop brushing because they panic. But the “Monroe magic” tends to happen after the panic,
not before it. In real-world attempts, the people who get the best results are usually the ones who commit to brushing evenly, then immediately move into
shapingalmost like they’re styling fabric rather than “fixing hair.”
Another common experience: realizing that curls behave differently depending on what your day looks like. If you’re doing this for a night out, the style
often lasts longer than you expect because you’re indoors, your hair stays cooler, and you’re not sprinting through humidity like you’re in an action movie.
But if you try it before running errands, you learn a fun lesson about weather: wind will try to remix your curls into a completely new genre.
The easiest “real life” solution is to treat hairspray like a layering system instead of a single dramatic final blast. A little before setting,
a little after brush-out, and a little after shaping usually works better than turning your hair into a crunchy helmet.
People also tend to discover their personal “curl personality.” Fine hair often loves the roller set but needs more product at the roots for lift.
Thick hair looks amazing but demands more sectioning and more cooling time than seems socially acceptable. And hair that refuses to hold a curl?
That hair usually responds best to two things: pinning curls to cool (so the shape locks in), and not making sections too large (big sections make curls
fall out faster than enthusiasm for a treadmill).
Finally, there’s the funniest experience of all: after you do this once, you start seeing the world differently. Suddenly you notice everyone’s part line.
You develop opinions about roller size. You catch yourself thinking, “If I just had five more duckbill clips, I could achieve world peace.”
And the next time someone says, “Your hair looks so effortless,” you’ll smile politelybecause you’ll know the truth:
your curls were sculpted, cooled, brushed, clipped, set, and emotionally supported through the awkward stage. Just like Marilyn would want.