Table of Contents >> Show >> Hide
- Before You Hide Anything: The 5-Point Reality Check
- Fast, Low-Effort Ways to Hide a Garbage Can Eyesore
- Mid-Level Upgrades That Look Built-In (Without Actually Being Complicated)
- Best Long-Term Fix: Build (or Buy) a Trash Can Enclosure
- How to Hide Garbage Cans Without Making Smells Worse
- “Make It Match” Tricks That Upgrade the Whole Yard
- Where NOT to Put Trash Cans (Even If It’s Convenient)
- Budget Guide: Pick Your Level
- Quick Checklist: A Great Trash Can Hiding Setup
- Extra : Real-World Experiences Hiding a Garbage Can Eyesore
- Conclusion
Let’s be honest: trash cans are the one household item that works hard and looks like it’s actively trying to ruin your curb appeal.
You can have a charming porch light, fresh mulch, and a door wreath that says “Welcome,” and thenbamtwo plastic bins squatting by the garage like they pay rent.
The good news? You don’t need a landscape architecture degree (or a secret money tree) to hide a garbage can eyesore.
You just need a plan that balances three things: looks, access, and sanity.
In this guide, you’ll get practical, real-world ways to conceal trash and recycling binseverything from quick fixes to DIY enclosures
plus a longer “been-there” section at the end with experience-based lessons that can save you time, money, and a few words you don’t want your neighbors to hear.
Before You Hide Anything: The 5-Point Reality Check
1) Pickup-day access matters (future-you will thank you)
If your solution makes it annoying to roll bins out on collection day, you’ll stop using it. The best trash can hiding ideas are the ones you’ll actually maintain
when it’s raining, you’re late, and the can is somehow heavier than your regrets.
2) Airflow prevents stink-marination
Totally sealed storage sounds nice until the inside becomes a humid odor chamber.
Designs with gaps, slats, or vents help odors dissipate and reduce mildew.
3) Pest and wildlife pressure is real
If you live in an area with raccoons, stray dogs, or bears, your hiding spot can accidentally become a “buffet with privacy.”
You may need tighter lids, latches, or even wildlife-resistant containers depending on local rules.
4) Local rules (and HOAs) might limit where bins can live
Many cities restrict storing trash (or enclosures) in front-yard setbacks or visible locations for extended periods.
Even if your neighbors are chill, your code enforcement officer might not be.
5) Water management keeps your area from turning into “Trash Lake”
Put enclosures on a simple gravel base, pavers, or a slightly raised platform so rainwater drains away.
This keeps bins cleaner, reduces smells, and prevents mud from becoming a permanent accessory.
Fast, Low-Effort Ways to Hide a Garbage Can Eyesore
Option A: Outdoor privacy screens (the “instant glow-up”)
A folding outdoor screen or a fixed privacy panel is one of the quickest ways to hide garbage cans outside.
Set it up beside the garage, near a side gate, or against a fence line so the bins disappear from the street view.
- Best for: renters, busy households, small yards
- Pro tip: choose weather-resistant materials and anchor it so wind doesn’t turn it into a dramatic yard event
- Looks better if: the screen matches your fence stain, house trim, or deck color
Option B: Tall planters (pretty + functional)
Planters work like stylish “bodyguards” for your bins. Use two tall planters to frame a nook, or place one wide planter in front of bins
so the street-facing view is blocked. Ornamental grasses, boxwoods, bamboo (clumping varieties), and evergreen shrubs are common picks.
- Best for: improving curb appeal without building
- Watch out: don’t block bin lids from fully opening
- Easy win: repeating the same planter style elsewhere ties the look together
Option C: Trellis + climbing plant (the “secret garden” approach)
A trellis creates height and texture while staying airy. Add a climbing plant and your trash area turns into a green wall.
If you want low maintenance, choose hardy climbers that match your climate. If you want low commitment, you can even use faux greenery panels.
- Best for: softening hard edges near a driveway
- Keep it practical: leave enough space to roll bins out easily
Option D: Short fence panels (clean lines, easy access)
A simple L-shaped or U-shaped run of fence panels can hide bins without looking like a “project.”
Match the panel style to your existing fence, or paint/stain it to coordinate with your house.
Add a small gate if you want full concealment.
Mid-Level Upgrades That Look Built-In (Without Actually Being Complicated)
Option E: Use the side yard like a “service corridor”
If you have a side yard path or side gate, that’s often the best place for bins: out of sight, easy to reach, and not stealing prime front-yard aesthetics.
The trick is to make it feel intentional:
- Add stepping stones or pavers so you’re not dragging wheels through mud.
- Install a motion light so pickup mornings aren’t a horror movie.
- Use a narrow screen or hedge to block the view from the street.
Option F: Hide bins behind an existing fence return
If your fence already meets the house, you can extend a short “return” panel to create a small pocket just large enough for bins.
This is one of the most natural-looking solutions because it reads as part of the fence layout.
Option G: Resin deck box or horizontal shed (the “no splinters” choice)
For homeowners who want a tidy look with minimal maintenance, weather-resistant resin storage is popular.
You can store smaller bins inside or use a compact horizontal shed designed for garbage can storage.
The big advantage: it looks neat and it’s fast to install.
- Best for: people who do not want to stain wood every year
- Look for: ventilation, sturdy hinges, and room to maneuver bins
Best Long-Term Fix: Build (or Buy) a Trash Can Enclosure
If you want the “where did the bins go?” effect, a dedicated trash can enclosure is the gold standard.
It can be a simple three-sided screen, a full cabinet-style unit with doors, or a mini “trash shed” with a lift-up lid system.
Key design features that make an enclosure actually usable
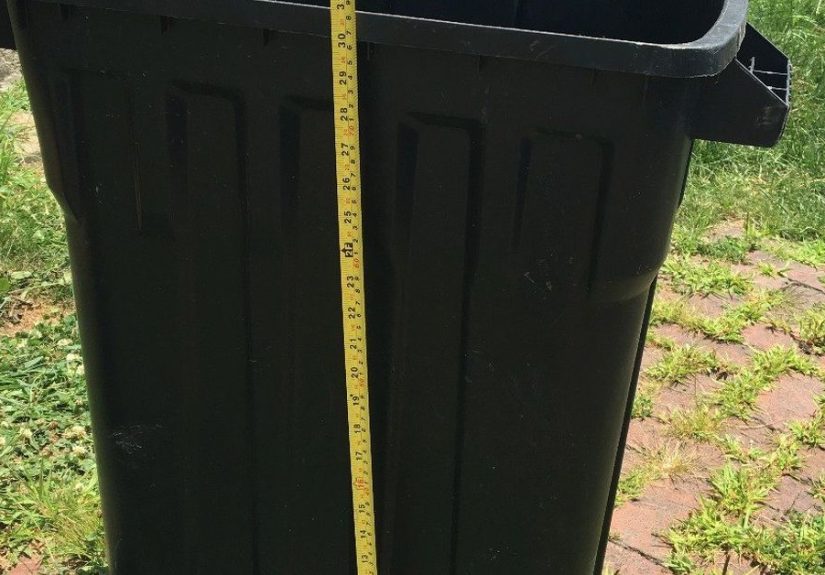
- Correct sizing: measure bin width, depth, and lid clearance (then add extra space for your hands and future larger bins).
- Easy access: doors that open wide, a simple latch, and enough room to roll bins without scraping knuckles.
- Airflow: slats or gaps reduce odor buildup and moisture.
- Weather resistance: exterior-rated screws, rot-resistant wood (cedar is common), and a stain/seal suited to your climate.
- Stable base: pavers or gravel to keep the structure level and clean.
Simple DIY enclosure plan (clear, not complicated)
- Pick location: ideally near driveway/side gate, away from windows, and not blocking walkways.
- Prep base: level the ground; add gravel and pavers so the wheels roll smoothly.
- Build a frame: pressure-treated posts or a 2×4 frame, depending on size.
- Add screening: cedar slats, lattice, composite panels, or corrugated metal accents for a modern look.
- Install doors: two front doors or a single wide gate; use exterior hinges and a latch that can handle daily use.
- Finish: stain/paint; add a simple handle; consider soft-close hardware if you hate noise.
Want it to look custom? Match the stain to your fence, echo the same hardware finish as your exterior lights, and add a cap rail on top
for a cleaner, finished edge.
How to Hide Garbage Cans Without Making Smells Worse
Keep bins cleaner so the hiding job is easier
- Rinse sticky spills quicklyold spills become permanent odor “memories.”
- Use bag liners or double-bag messy kitchen trash.
- Sprinkle baking soda in the bottom (simple, cheap, effective).
- Let bins dry in the sun after washingsunlight helps reduce odor.
Plan your enclosure like you plan your fridge: airflow + easy wipe-down
Slats beat solid walls for ventilation. And materials matter: smooth panels are easier to hose off than rough wood grain that collects grime.
“Make It Match” Tricks That Upgrade the Whole Yard
Use repetition to make the concealment look intentional
The easiest way to make a trash can hiding solution look expensive is to repeat the same element somewhere else:
the same fence stain, the same planter style, or the same slat spacing used on a deck railing.
Camouflage with a mini landscape moment
Think of the bin area like a tiny stage set:
- Background: a screen, fence panel, or trellis
- Middle layer: tall plants or a raised bed
- Front edge: low plants or decorative gravel
This layered approach hides bins better from multiple angles and makes the space look designed, not accidental.
Where NOT to Put Trash Cans (Even If It’s Convenient)
- Right next to a front window: your nose will eventually file a complaint.
- Blocking a walkway: you’ll resent it every time you carry groceries.
- Against delicate siding: bins can scuff walls and trap moisture.
- On bare soil: mud, weeds, and bugs will move in like it’s a new condo development.
Budget Guide: Pick Your Level
Under $100
- Outdoor screen panel
- DIY lattice panel with stakes
- One or two tall planters positioned strategically
$100–$400
- Short fence return + gate hardware
- Two-panel enclosure with a simple door
- Basic resin storage solution
$400 and up
- Full cedar slat enclosure with doors and a finished top rail
- Compact shed with ventilation + room for extra storage
- Custom-built enclosure that matches fences/decks
Quick Checklist: A Great Trash Can Hiding Setup
- Bins are not visible from the street (or at least less obvious).
- Rolling them out is easy and doesn’t require a gym membership.
- Area drains well and stays clean.
- Ventilation reduces odor issues.
- Materials match your home’s style so it looks intentional.
Extra : Real-World Experiences Hiding a Garbage Can Eyesore
Here’s the part nobody tells you when you Google “trash can enclosure ideas”: hiding garbage cans is not just a design projectit’s a lifestyle.
It’s the kind of small change that quietly improves your day, because you stop seeing the bins every time you pull into the driveway.
But it can also go sideways in very predictable ways, so let’s talk about what people actually run into.
First lesson: wind is a bully. Lightweight screens that look cute online can turn into backyard kites if they aren’t anchored.
A friend used a folding screen that lasted exactly one thunderstorm before it did a slow-motion fall into the bins like a tragic rom-com.
The fix was simple: ground stakes, heavier feet, or attaching the screen to a fence post. If you live anywhere breezy, plan for this upfront.
Second lesson: plants are not magic if you pick the wrong ones. People love the idea of “hide the bins with greenery,”
and it absolutely workswhen the greenery is tall enough, dense enough, and not the kind of plant that looks great for three weeks and then takes a nap for the season.
If you choose deciduous shrubs that drop leaves, you may end up with “hidden in summer, exposed in winter.”
Evergreens, tall ornamental grasses, and hardy hedges tend to be more reliable year-round (and they don’t require you to become a part-time botanist).
Third lesson: doors matter more than you think. A gorgeous enclosure becomes useless if opening it feels like wrestling a shopping cart with one bad wheel.
The most common regret is a door that doesn’t open wide enough to roll bins easily. The second most common regret is a latch that’s annoying.
If the latch is fiddly, you’ll start leaving the doors open “just for a minute,” and then your nice enclosure becomes a permanent open-mouth box.
The easy upgrade is a simple, sturdy latch you can use one-handedbecause yes, you will always be holding something gross.
Fourth lesson: cleaning is not optional. Enclosures don’t eliminate smells; they can concentrate them if bins are dirty.
People who love their setups usually do one small maintenance habit: they rinse bins occasionally and keep the base area hose-friendly.
Even a quick spray and a little baking soda in the bottom can keep the whole space from becoming “that corner” everyone avoids.
Finally: the best setup is the one that fits pickup day. The most successful designs respect the weekly routine.
If your bins need to travel from the side yard to the curb, build a path that makes that movement easypavers, a smooth threshold, enough turning radius.
When rolling the bins feels effortless, you’ll keep them tucked away the rest of the week. And that’s the real victory:
your yard looks better, your routine stays easy, and your trash cans stop being the main character.
Conclusion
To hide a garbage can eyesore, you don’t need a complicated remodelyou need a smart, repeatable setup.
Start with the easiest improvement (a screen, planters, or a trellis), then upgrade to a fence return or a proper enclosure if you want a built-in look.
Prioritize access, airflow, and drainage, and you’ll end up with a solution that looks good on day one and still works on pickup day three months from now.