Table of Contents >> Show >> Hide
- Before You Start: Safety, Permits, and “Is This a Pro Job?”
- Step 1: Choose the Right Fan (Size, Noise, and Features)
- Step 2: Plan the Vent Route (This Is Where Good Installs Are Made)
- Tools and Materials Checklist
- Step 3: Pick the Best Fan Location
- Step 4: Cut the Opening (New Install or Larger Replacement)
- Step 5: Mount the Fan Housing (Secure, Level, No Rattles)
- Step 6: Run and Seal the Ductwork
- Step 7: Install the Exterior Vent Cap (Roof or Wall)
- Step 8: Wire the Fan (Safely, Code-Aware, and With the Power OFF)
- Step 9: Finish the Ceiling and Install the Grille
- Step 10: Test Performance (Don’t Skip This)
- How to Use Your Fan So It Actually Works
- Troubleshooting Common Problems
- Real-World Experiences: What Installation Is Actually Like (and What Usually Goes Sideways)
- Conclusion
A bathroom without a vent fan is basically a tiny, steamy rainforest with better towels. That sounds cute until
your mirror never clears, your paint starts peeling, and mildew shows up like it pays rent. A properly installed
bathroom vent fan (also called a bathroom exhaust fan) pulls humid air and odors out of the room and sends them
outsidewhere they belong, along with the ghost of your 45-minute “quick shower.”
This guide walks you through how to install a bathroom vent fan the right way: choosing the right size (CFM),
placing it smartly, routing ductwork efficiently, and handling wiring safely. I’ll keep it practical, code-aware,
and just funny enough to make crawling in the attic feel like a choice you made on purpose.
Before You Start: Safety, Permits, and “Is This a Pro Job?”
Installing a bathroom vent fan can range from “Saturday afternoon” to “why is there a squirrel in my soffit?”
Depending on whether you’re replacing an existing fan or cutting in a brand-new one.
When it’s DIY-friendly
- You’re replacing an existing fan in the same spot.
- The duct route and exterior vent already exist and are in good shape.
- Wiring is modern and accessible (no mystery circuits, no ancient splices).
When it’s smarter to hire a licensed pro
- You need a new circuit, new switch run, or you’re unsure about electrical connections.
- You’re cutting a new roof penetration (leaks are expensive and emotionally devastating).
- You discover older wiring, damaged framing, or signs of moisture problems.
- Your local rules require a permit or inspection for this type of work.
Non-negotiable safety note: Turn power off at the breaker before doing anything electrical.
If you’re not comfortable verifying power is truly off and making correct connections, pause and call an electrician.
There is no prize for “bold wiring.”
Step 1: Choose the Right Fan (Size, Noise, and Features)
CFM sizing (how powerful the fan should be)
Fan airflow is measured in CFM (cubic feet per minute). Too small and it won’t clear humidity.
Too large and you may pull conditioned air out fastplus some fans get noisy.
Common sizing rules used in U.S. guidance:
- Minimum: many standards start at 50 CFM for small bathrooms.
- 50–100 sq ft: about 1 CFM per square foot of floor area.
- Over 100 sq ft: size by fixtures (often 50 CFM each for toilet/shower/tub, and 100 CFM for jetted tub).
Example: A 7 ft × 9 ft bath = 63 sq ft → choose at least a 70 CFM fan (and it’s totally fine to round up to a common size like 80 CFM).
Sones (how loud it is)
Fan loudness is rated in sones. Lower is quieter. Rough guide:
- 0.3–0.8 sones: “Is it even on?” quiet.
- 1.0–1.5 sones: comfortably quiet for most homes.
- 2.0+ sones: you’ll hear itand possibly remember to turn it off.
Pick features that fit your bathroom
- Humidity sensor: turns on automatically when showers spike moisture.
- Timer switch: helps you run it long enough after bathing.
- Light or heater combo: useful, but often requires extra wiring and/or circuits.
- Energy efficiency: ENERGY STAR certified fans often deliver better performance at real-world static pressure.
Step 2: Plan the Vent Route (This Is Where Good Installs Are Made)
A fan can be great on paper and disappointing in real life if the ductwork is long, saggy, crushed, or full of sharp bends.
Your goal: short, straight, smooth, and fully vented to the outdoors.
Vent to the outdoors (not the attic, not “near” a vent)
The exhaust air must go outside. Dumping warm, wet air into an attic or crawl space is a mold invitation and a building-code problem in many places.
If your existing setup vents into the attic, this is your chance to fix it correctly.
Choose the termination point
- Through the roof: common and effective, but flashing must be done right.
- Through a gable/end wall: often easier than roof work.
- Through soffit: frequently discouraged because exhausted moisture can get drawn back into the attic through vented soffits.
Duct type matters
When possible, use smooth, rigid duct for better airflow and less condensation buildup. Flexible duct is convenient,
but it can restrict airflow if it sags or kinks. If you use flex, keep it stretched tight and supported.
Cold climates: insulate the duct
Warm moist air hitting cold duct walls can condensethen drip back toward the fan or ceiling. Insulating ductwork in unconditioned spaces
helps reduce condensation and energy loss.
Tools and Materials Checklist
- Vent fan kit (correct CFM, duct size, and rating for your setup)
- Ductwork (rigid duct or quality flex duct), elbows as needed
- Exterior vent cap (roof cap or wall cap) with backdraft damper
- Foil HVAC tape or approved sealant (and clamps for duct connections)
- Electrical supplies: cable (often NM-B), connector/clamp, wire nuts, ground screw (as required)
- Switch/timer/humidity control (optional but recommended)
- Drywall saw/jigsaw, drill, screwdriver, utility knife
- Stud finder, tape measure, pencil, level
- Safety gear: eye protection, gloves, mask/respirator for dusty ceilings/attics
- Ladder and a bright headlamp (attics love drama)
Step 3: Pick the Best Fan Location
Ideally, the fan goes near the main moisture source (shower/tub), but not directly over a shower unless the unit is rated for that location.
For most bathrooms, place it:
- Centered between joists (to avoid cutting structure)
- As close as practical to the shower/tub area
- Where duct routing to the exterior is shortest and straightest
If you’re replacing an existing fan, measure the current housing opening and compare it to the new unit.
“Same size” saves your ceiling from becoming a patchwork art project.
Step 4: Cut the Opening (New Install or Larger Replacement)
For a new install, you’ll mark and cut a ceiling opening sized to the fan housing’s intake grille and framing requirements.
Many installers locate the position from above (attic), drill a small reference hole, then use that point to lay out the cut on the ceiling below.
Cutting tips
- Confirm you’re not cutting into wires, pipes, or joists.
- Cut cleanly and support the drywall as you finish the opening so it doesn’t tear beyond the line.
- If your ceiling is plaster or you suspect asbestos-containing materials, stop and get proper guidance before cutting.
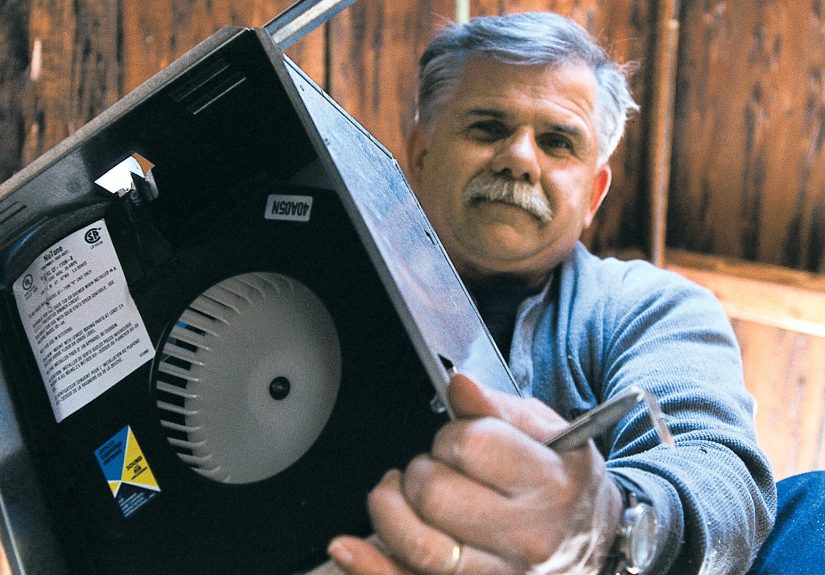
Step 5: Mount the Fan Housing (Secure, Level, No Rattles)
Most fans attach to ceiling joists with adjustable brackets or mounting tabs. Your mission:
fasten it solidly so it doesn’t vibrate. A fan can be whisper-quiet in the showroom and sound like a lawn mower
if it’s loosely mounted.
Best practices
- Follow the manufacturer’s mounting method (brackets vs. direct-to-joist tabs).
- Keep the housing flush with the finished ceiling plane so the grille fits neatly.
- Don’t bury non-IC-rated housings under insulation if the unit isn’t designed for it.
Step 6: Run and Seal the Ductwork
Connect the fan’s duct outlet to the exterior vent cap using the correct duct diameter (don’t “make it work” with a smaller duct unless the manufacturer allows it).
Airflow is a performance chain, and duct restrictions are the weakest link.
How to route duct for best airflow
- Keep runs short and as straight as possible.
- Minimize elbows; use gentle bends when you can.
- Support ducting so it doesn’t sag and collect condensation.
- In unconditioned spaces, insulate the duct and consider a slight slope toward the exterior to help manage condensation.
Seal every joint
Use clamps plus foil HVAC tape or approved sealant at connections (fan outlet and vent cap collar).
Leaky joints waste airflow and can dump moisture where you least want itlike inside your attic insulation.
Step 7: Install the Exterior Vent Cap (Roof or Wall)
The exterior cap should include a backdraft damper to prevent cold air, pests, and “mystery attic smells” from traveling backward into the bathroom.
Choose a cap designed for your termination location (roof cap vs. wall cap).
Wall cap basics
- Cut the opening from inside (pilot hole) and finish from outside carefully.
- Flash and seal the cap to prevent water intrusion.
- Angle or position it so exhaust air doesn’t stain siding or get sucked into nearby vents.
Roof cap basics (high stakes, because gravity)
- Locate between rafters and avoid major roof features if possible.
- Install with proper flashing under shingles as required.
- Seal appropriately, but don’t rely on caulk as your only defense against leaks.
If roof work makes you nervous, that’s your instincts doing their job. Roof penetrations are a common place for leaks when installed incorrectly.
Calling a roofer for this step can be money well spent.
Step 8: Wire the Fan (Safely, Code-Aware, and With the Power OFF)
Wiring varies by fan model (fan-only, fan/light combo, fan/heater combo) and by your home’s existing circuits.
Always follow the manufacturer instructions and local electrical requirements.
General wiring overview (non-detailed on purpose)
- Turn off the breaker and verify power is off before touching wires.
- Bring the correct cable into the fan’s junction box using an approved connector/clamp.
- Make secure connections (hot/neutral/ground) exactly as the fan wiring diagram shows.
- Use separate switch legs if you want independent control for fan and light/heater features.
Tip: A timer switch is one of the best upgrades you can make. It helps the fan run long enough after a shower
(often 15–30 minutes) to clear lingering humiditywithout relying on memory, which is famously unreliable right after a hot shower.
Step 9: Finish the Ceiling and Install the Grille
Once the housing is mounted, ducted, and wired:
- Install the fan motor/blower assembly (many are plug-in or screw-in).
- Attach the grille per instructions (usually spring clips).
- Caulk small gaps if needed for a clean finish.
Step 10: Test Performance (Don’t Skip This)
Quick tests
- Sound and vibration: It should run smoothly without rattles. If it rattles, re-check mounting and grille fit.
- Airflow: Hold a single sheet of toilet paper near the grilleit should pull and hold it lightly.
- Exterior exhaust: Confirm air is actually exiting at the roof/wall cap and the damper opens.
If airflow is weak
- Duct is too long or has too many sharp bends.
- Flex duct is kinked or sagging.
- Damper is stuck (at the fan or at the exterior cap).
- Duct size is smaller than required.
How to Use Your Fan So It Actually Works
A vent fan isn’t magic if it only runs for 90 seconds while you brush your teeth. For everyday moisture control:
- Run the fan during showers and for at least 15–30 minutes afterward.
- Keep the bathroom door cracked open to allow makeup air to enter (fans can’t exhaust what can’t be replaced).
- Clean the grille and fan periodicallydust buildup reduces airflow over time.
Troubleshooting Common Problems
“My new fan is loud”
- Check that the housing is firmly mounted to framing.
- Ensure the grille isn’t vibrating.
- Confirm dampers move freely and aren’t blocked by screws or tape.
“I still get foggy mirrors”
- The fan may be undersized for the room.
- Duct routing may be restricting airflow.
- You may need to run the fan longer (use a timer).
“It vents, but my attic smells damp”
- Confirm the duct terminates outdoors, not into the attic.
- Check duct joints for leaks and reseal with approved foil tape/sealant.
- Insulate ducting in cold spaces to reduce condensation.
Real-World Experiences: What Installation Is Actually Like (and What Usually Goes Sideways)
Let’s talk about the part no one puts on the box: the “experience” of installing a bathroom vent fan. The instructions
read like a calm bedtime storymount housing, connect duct, wire, enjoy fresh air. In real life, you’ll likely meet
a few plot twists. Here are common, very human moments (and how to handle them without turning your project into a
three-week ceiling patch saga).
1) The attic is never as roomy as you imagine
People often picture an attic like a bonus room with a little dust. Then they open the hatch and discover it’s a
low-clearance obstacle course full of insulation, nails, and the kind of silence that makes you whisper “nope.”
If you’re working from above, bring a stable kneeling board, good lighting, and move slowly. The best installs
happen when you’re comfortable enough to be careful. Rushing in an attic is how ducts get kinked, joints don’t get
sealed well, and you accidentally lean on drywall like it’s a dance floor.
2) Duct routing looks easy until you try to make it “short and straight”
In theory, you’ll run a neat, straight duct to a convenient exterior wall. In practice, there’s a truss in the way,
or a beam, or a roofline that turns your “quick route” into a duct maze. The temptation is to use a long run of
flex duct and call it a day. The better move is to spend extra time planning supports and reducing bends. Many
homeowners report the biggest performance jump comes not from buying a stronger fan, but from fixing duct problems:
fewer bends, less sag, and tighter connections. If you can’t avoid a bend, use gentle turns and keep everything
stretched and supported so airflow doesn’t get choked.
3) The old fan removal reveals… surprises
Replacements can be straightforwarduntil you pull the old unit and find crumbly drywall, a housing that was
“installed” with hope instead of screws, or a duct that dumps into the attic like it’s 1974. This is actually good
news: you discovered a problem you can fix. Patch and reinforce the opening if the ceiling edge is damaged. If the
existing duct is flimsy or poorly routed, treat replacement day as a reset button. A new fan connected to a bad
duct still performs like a bad duct.
4) The fan is quiet… until the grille goes on
This one is common and oddly irritating. You test the motor and it’s whisper-quiet. Then you install the grille and
suddenly you hear a rattle that sounds like a tiny tambourine solo. Usually it’s a grille not fully seated, a spring
clip vibrating, or the housing slightly proud/sunken relative to the ceiling plane. The fix is typically small:
reseat the grille, adjust clips, verify the housing is flush, and make sure screws aren’t contacting moving parts.
It’s a reminder that “quiet fan” is partly the motor and partly the installation quality.
5) The best upgrade is often a timer (because humans)
People love the idea of a vent fan, then forget to run it long enough. Real-life habit beats best-case specs every
time. Adding a timer switch changes everything: you tap 20 minutes and walk away. No guessing, no remembering, no
returning to a bathroom that feels like a greenhouse. If you want to go one step further, a humidity-sensing control
is a favorite among busy householdsespecially in bathrooms used by kids, guests, or anyone who thinks steam is a
lifestyle.
Bottom line: installing a bathroom exhaust fan is absolutely doable for many homeowners, but the “experience” is
smoother when you treat duct routing and sealing as the main eventnot an afterthought. Do that, and your future self
will thank you every time the mirror clears quickly and the bathroom stops smelling like “damp towel, vintage edition.”
Conclusion
A bathroom vent fan is one of those behind-the-scenes upgrades that quietly improves your whole home: less humidity,
fewer mold risks, better air quality, and faster mirror clearing. The keys are choosing the right CFM, keeping the duct
run short and smooth, venting outdoors, sealing connections well, and handling wiring safely. If you’re replacing an
existing fan, this is a highly approachable project. If you’re cutting a new vent pathespecially through the roofdon’t
hesitate to bring in a pro for the parts where mistakes get expensive. Either way, once it’s installed correctly,
you’ll wonder how you lived without it (probably in a fog).