Table of Contents >> Show >> Hide
- First, Decide: Rebind an Existing Book or Bind From Scratch?
- What “Leather Binding” Actually Means
- Tools and Materials
- Step-by-Step: Leather Case Binding (Beginner-Friendly)
- 1) Measure and Plan the “Squares”
- 2) Prepare the Text Block
- 3) Sew the Signatures (If Needed)
- 4) Glue Up, Round, and Back the Spine
- 5) Add Endpapers and Spine Linings
- 6) Build the Case: Boards + Spine Piece
- 7) Cut and Pare the Leather (Skiving Without Tears)
- 8) Cover the Case in Leather
- 9) Case In: Attach the Cover to the Book Block
- 10) Let It Cure, Then Finish
- Optional Upgrades That Make Your Book Look “Fancy on Purpose”
- Troubleshooting: Common Problems and Fixes
- How to Care for a Leather-Bound Book (So It Stays Nice)
- Common Experiences and Lessons from the Workbench (About )
- Conclusion
- SEO Tags
Leather binding is one of those crafts that looks like wizardry from across the roomthen you try it and realize it’s mostly
measuring carefully, gluing patiently, and asking yourself why you thought glue dries instantly.
The good news: you don’t need a medieval workshop to make a durable, beautiful leather-bound book. You just need a sane plan,
the right materials, and a willingness to practice on something that isn’t your great-grandmother’s diary.
This guide walks you through a beginner-friendly approach: a leather case binding (a hardcover “case” covered in leather,
then attached to the text block). It’s a classic structure, it looks impressive, and it forgives normal human mistakeslike
the occasional slightly crooked board. We’ll also cover smart options for rebinding an existing book, troubleshooting, and how to
keep your finished binding from turning into a sad, sticky artifact.
First, Decide: Rebind an Existing Book or Bind From Scratch?
“How to leather bind a book” can mean two different projects. Choose your adventure:
-
Rebinding (most common): You have an existing book (hardcover or paperback) and you’re replacing the cover with leather.
This is great for journals, special editions, gifts, and books whose covers are falling apart. -
Binding from scratch: You’re assembling folded pages into signatures, sewing them into a text block, then covering in leather.
This is perfect for handmade journals, sketchbooks, or a printed manuscript you want to upgrade.
If your book is rare, historically valuable, or emotionally priceless, consider consulting a professional conservator.
Some DIY fixes can be hard to reverse later (and future-you may want future options).
What “Leather Binding” Actually Means
Leather bindings come in a few common styles. The structure inside may be similar, but the covering changes the look, cost, and difficulty.
- Full leather: Leather covers the entire case (front, spine, back). Classic and gorgeous; also the most demanding.
- Half binding: Leather covers the spine and part of the boards, with cloth or paper covering the rest.
- Quarter binding: Leather covers just the spine (often the easiest leather look for beginners).
Beginner tip: if you’re new, start with quarter or half binding. You’ll practice the hardest partcovering the spine,
forming neat joints and headcapswithout wrestling a full sheet of leather.
Tools and Materials
Leather: What to Buy (and What to Avoid)
Look for leather sold specifically as bookbinding leather (often goatskin or calf). These leathers are typically dyed-through,
flexible, and meant to be pared thin at the edges. For beginners, goatskin is popular because it’s tough and handles well.
Avoid stiff upholstery leatherif it feels like it belongs on a sofa, it will fight you like a sofa.
Aim for leather that’s thin enough to bend easily but thick enough to feel substantial. If you can’t pare leather yet, buy a thinner skin
or choose a quarter binding so you’re working with less material.
Adhesives: Strong, Flexible, and Not a Sticky Regret
For modern bookbinding, a neutral-pH PVA (bookbinding PVA) is common for structural strength. For more reversible work
(especially repairs), binders often use wheat starch paste or a paste/PVA mix to get a balance of open time,
tack, and flexibility. A small amount of methylcellulose can also be used to slow drying and reduce staining in certain steps.
Whatever you use, the golden rule is: thin coats. Thick glue layers cause warping, lumps, and bubbleslike your book is developing
an opinion about physics.
Boards, Cloth, and the Other Supporting Cast
- Binder’s board (a.k.a. book board): for the front and back covers
- Spine stiffener: thin card or paper to shape the spine (optional, depending on structure)
- Endpapers: heavier paper that connects text block to boards (also a design opportunity)
- Mull/super: open-weave cloth to reinforce the spine and help attach the case
- Spine lining paper: strong paper (often kraft or other durable stock)
- Headbands: decorative (and slightly protective) bands at head/tail (optional)
Essential Tools (No, You Don’t Need a Castle)
- Metal ruler, square, sharp pencil
- Cutting mat and sharp knife (use careif you’re under 18, get an adult’s help for cutting steps)
- Bone folder (or a smooth folder tool) for crisp folds and turn-ins
- Glue brush, small container, waste paper/scrap
- Awl and bookbinding needles (if sewing)
- Waxed linen thread (if sewing)
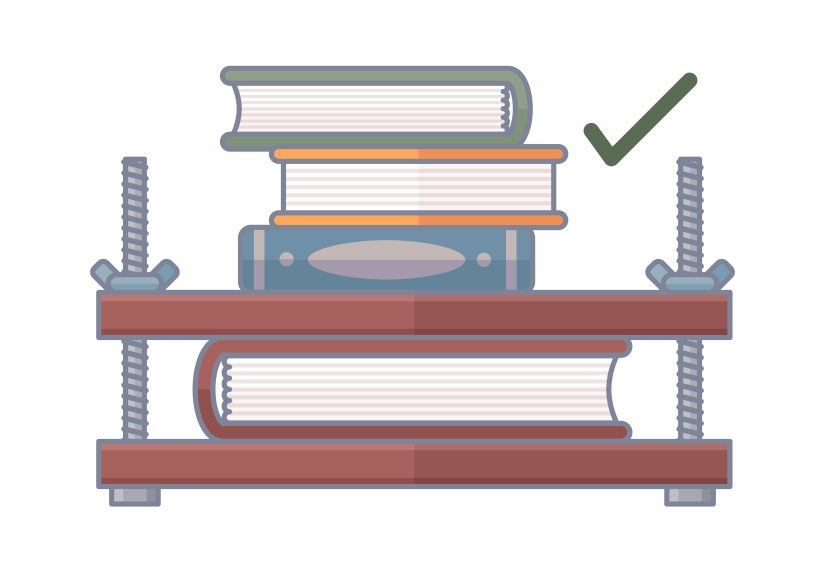
- Press or heavy weights (a stack of clean boards + weights works)
- Sandpaper (light use) and clean cloth
Step-by-Step: Leather Case Binding (Beginner-Friendly)
This workflow fits both scenarios:
(1) you’re making a text block from scratch, or (2) you’re rebinding a book whose cover is damaged or you simply want to upgrade.
The steps below assume you’re creating a case and then casing-in (attaching the case to the text block).
1) Measure and Plan the “Squares”
Measure the height, width, and thickness of your text block. Most hardcovers have a small overhang called a square
typically about 1/8 inch (3 mm) around the fore edge and bottom. Plan for even squares on both boards so your book looks intentional, not surprised.
Decide your covering style:
quarter (spine only), half (spine + corners or part of boards), or full leather.
For first-timers: quarter binding is the sweet spot.
2) Prepare the Text Block
If you’re rebinding an existing book:
- Remove the old case carefully (often it detaches at the hinge/joint first).
- Clean off loose old glue on the spine gently. Don’t over-scrapepaper fibers are not a renewable resource.
- Repair torn endpapers or loose pages before you build the new cover.
If you’re binding from scratch:
- Fold printed sheets into signatures (groups of pages) and collate in order.
- Press signatures flat so your book doesn’t become a permanent accordion.
3) Sew the Signatures (If Needed)
Mark sewing stations along the spine fold, punch with an awl, and sew signatures together with linen thread.
Many beginner-friendly methods sew on tapes for stability. Keep tension eventight enough to be secure, not tight enough to create page “smiles.”
If you’re rebinding a modern paperback, you may be working with a glued spine rather than sewn signatures. In that case, you’re effectively doing
a repair/recase workflowstill compatible with a leather case, but treat the spine gently and reinforce with appropriate linings.
4) Glue Up, Round, and Back the Spine
Apply a thin coat of adhesive to the spine to consolidate the sections. Let it set, then (optional) round the spine (gently shaping it)
and back it (creating shoulders so the boards seat neatly). This step improves how the book opens and helps the case fit cleanly.
If you’re new, don’t chase perfection here. A slightly rounded spine still looks fantastic once covered in leather.
5) Add Endpapers and Spine Linings
Endpapers connect the text block to the cover. You can use classic folded endpapers or decorative sheets paired with a stronger hinge paper.
Attach them neatly; sloppy endpapers are like wrinkled gift wrapeveryone notices.
Next, reinforce the spine:
- Add a first lining paper for strength and shape.
- Apply mull/super so it extends beyond the spine onto the shoulder area; those “wings” help attach the case.
- Add additional lining layers as needed for your book’s size and condition.
6) Build the Case: Boards + Spine Piece
Cut two boards to size based on your planned squares. Cut a spine piece (card stock or thin board) to match the spine width.
Lay boards and spine piece on a sheet of strong paper (often kraft), leaving even gaps (the hinge areas) between the spine piece and boards.
Those hinge gaps are what allow the cover to open smoothly.
Glue the boards and spine piece onto the paper, keeping everything square. Rub down with a bone folder and let it dry under weight.
7) Cut and Pare the Leather (Skiving Without Tears)
Leather needs thinner edges so it can wrap around boards without bulky ridges. This is paring (also called skiving).
Beginners can:
- Buy thinner leather or pre-pared leather when possible.
- Use a simple paring technique: thin the last 1–2 inches around the perimeter (more for full leather than quarter).
- Practice on scraps first. Leather paring is a skillexpect a learning curve, not instant enlightenment.
Cut your leather with extra margin for turn-ins (the wrapped edges). For quarter binding, cut a spine piece wide enough to cover the spine
plus turn-ins onto the boards.
8) Cover the Case in Leather
This is the glamour step. It’s also the “don’t answer texts while gluing” step.
- Dry fit: Place the leather over the case to confirm coverage and alignment.
-
Paste out the leather: Apply adhesive evenly to the flesh side (inside) of the leather. Work from center outward.
Thin, even coatno puddles. - Lay leather onto case: Start at the spine, then smooth onto the boards. Use your hands first, then a folder through waste paper.
- Define the joints: Carefully form the hinge areas by rubbing along the gaps so the leather “finds” the joint.
- Turn-ins: Trim corners with a neat miter (not too close), then fold and rub down the leather edges onto the inside of the boards.
- Headcaps: At the top and bottom of the spine, shape the leather into small caps. These protect the spine ends and look sharp.
Let the covered case dry under light weight with clean interleaving sheets to prevent sticking.
9) Case In: Attach the Cover to the Book Block
Do a dry run first. Place the text block into the case and check that squares are even and the spine aligns.
Once you’re happy:
- Apply adhesive to the outer side of the endpaper (pastedown) on one side.
- Position the text block into the case and close that board carefully.
- Repeat for the other side.
- Close the book, check alignment, then press under weight until dry.
Pro tip: Use wax paper or silicone release paper between endpapers and any areas you don’t want accidentally glued.
Accidental adhesion is how DIY projects become “limited edition.”
10) Let It Cure, Then Finish
Give the book time to dry fully. Rushing is how boards warp and corners lift.
Once cured, you can add:
- Title label (paper, leather, or foil label on the spine)
- Simple tooling (blind lines or minimal decoration)
- Headbands (premade or hand-sewn for extra flair)
Optional Upgrades That Make Your Book Look “Fancy on Purpose”
Quarter/Half Binding for Easier Leather Work
A quarter binding uses leather only on the spine, with cloth or decorative paper on boards. You get the leather look and durability
where it matters most, while keeping the project beginner-friendly.
Raised Bands (Old-School Spine Ridges)
Raised bands come from sewing on cords and then covering so the cords create ridges. They’re gorgeous, tactile, and slightly dramatic
(in the best way). They do add complexity, so consider them a “version 2.0” feature.
Hollow Back vs Tight Back
A hollow back creates a flexible “tube” over the spine so the cover spine can move independently of the text block spine.
Many modern case bindings use variations of hollow structures for good opening and durability. Tight-back leather bindings are beautiful,
but they’re less forgiving for beginners and demand very clean leather work.
Troubleshooting: Common Problems and Fixes
“My leather has wrinkles or bubbles.”
Usually caused by too much moisture/adhesive, or not smoothing from the spine outward. Fix: work in thinner coats, smooth gradually,
and use a folder through waste paper. Small bubbles can sometimes be pressed out while adhesive is still workable.
“My boards warped like potato chips.”
Too much glue or uneven drying. Fix: use less adhesive, paste both boards in a balanced way when casing in, and press between clean boards.
Let it dry fully under weight.
“My spine text is crooked (send help).”
First, breathe. Many crooked spines happen because the case shifted during drying. Fix: dry fit carefully, mark center lines,
and press with the book squared up between boards. If the title label is crooked, congratulationsyou’ve invented a “handcrafted” look.
“The joints are cracking when I open the book.”
This can happen if the leather is too thick at the joint, the hinge gap is too small, or the book is being forced open too far too soon.
Fix: pare more at turn-ins near the joint, ensure a proper hinge gap, and let adhesives cure fully before flexing the cover.
How to Care for a Leather-Bound Book (So It Stays Nice)
Leather is durable, but it’s not invincible. The biggest enemies are bad storage conditions, grime, and “helpful” oils.
- Avoid leather dressings/oils: Many preservation experts no longer recommend oiling or “dressing” leather-bound books,
because it can attract dirt, turn sticky, or cause other issues. If leather is powdery or crumbling, focus on protective enclosures or consult a conservator. - Store upright, supported: Use bookends and don’t let books slump.
- Control humidity and heat: Keep books away from radiators, sunny windows, and damp basements.
- Handle with clean hands: Leather loves to collect skin oils like it’s building a scrapbook of your fingerprints.
- Dust gently: A soft brush works well; avoid aggressive wiping.
Common Experiences and Lessons from the Workbench (About )
If you ask a room full of first-time binders what leather binding feels like, you’ll get the same theme: it’s equal parts craft, patience,
and tiny moments of triumph that make you want to show the book to anyone who will stand still long enough. One very common experience is
discovering that leather has “grain direction” and “personality.” Cut it one way and it drapes smoothly. Cut it the other way and it behaves
like it’s auditioning for a role as a stubborn curtain.
Another classic beginner moment: realizing that glue has a schedule. At first, you might spread adhesive, reach for the leather,
adjust the boards, reposition the corner, answer a notification, and come back to a surface that has already started to tack up.
Most people learn quickly to do a dry run, set tools within reach, and treat the glue step like a short performance:
once the music starts, you don’t wander off stage. The upside is that this “workflow discipline” carries into everything else you make.
Many beginners also report that paring is where confidence goes to do push-ups. The first few attempts can be uneventoo thin in spots,
too thick in others. The good news is that leather is forgiving in the same way cooking is forgiving: if you keep the fundamentals solid,
minor imperfections disappear once everything is assembled. A slightly imperfect paring job often looks perfectly fine after the turn-ins are
rubbed down and the inside is neatly finished with endpapers. With each project, hands get steadier, edges get cleaner, and the “lumpy corner”
becomes an extinct species.
There’s also a very relatable moment of joy when the joints finally “click” into place. You close the boards, open them, and the cover moves
smoothly without fighting you. It’s the bookbinding equivalent of a door that doesn’t squeak. People often remember that moment because it’s
when the project stops being a pile of materials and becomes a book that feels alive and usable.
Finally, a lot of first-time leather binders learn to appreciate resting time. Pressing and curing aren’t glamorous, but they’re
what separates a cover that stays crisp from one that slowly peels at the corners. The most satisfying projects often come from slowing down:
thin glue coats, careful alignment, clean interleaving paper, and letting everything dry fully. In other words, the “experience” of leather binding
is learning to enjoy a craft where patience isn’t just a virtueit’s part of the design.
Conclusion
Leather binding is a blend of structure and style: build a solid text block, reinforce the spine, make a square case, then cover with leather
using thin adhesive coats and careful turn-ins. Start with a quarter or half binding if you’re new, practice paring on scraps, and let drying time
do its quiet magic under a good press. With each book, your cuts get cleaner, your corners sharper, and your confidence strongerand suddenly,
you’re the person giving handmade leather journals as gifts like it’s no big deal (it is a big deal, and you should absolutely brag a little).