Table of Contents >> Show >> Hide
- Why Burlap Bag Curtains Work (and When They Don’t)
- Before You Start: Pick Your Burlap (and Prep It Like a Pro)
- Measure Like a Designer (So Your Curtains Don’t Look Like a DIY… in the Bad Way)
- Tools and Materials
- Method 1: No-Sew Burlap Bag Curtain (Fastest Path to “Look What I Made!”)
- Method 2: Sewn Burlap Curtain Panels (Stronger, Cleaner, More Washable)
- Method 3: Grommet-Top Burlap Curtains (Rustic Meets “Actually Slides Nicely”)
- Finishing Touches That Make Burlap Curtains Look Expensive
- Style Ideas and Specific Examples
- Care and Maintenance
- Troubleshooting (Because Burlap Has Opinions)
- Real-World Experiences: What DIYers Learn After Making Burlap Bag Curtains (About )
- Conclusion
Burlap bag curtains are the DIY equivalent of putting on boots and instantly looking like you know how to churn butter (even if your “farmhouse” is a third-floor apartment and your livestock is a houseplant named Kevin). If you love that rustic, cozy, slightly lived-in textureespecially the look of coffee or grain sacksthis project is a surprisingly doable weekend win.
In this guide, you’ll learn how to turn burlap bags (or burlap yardage) into curtain panels that actually hang straight, don’t unravel into a floor-sized tumbleweed, and can be customized with linings, grommets, rod pockets, or clip rings. We’ll cover no-sew and sewn methods, designer-style measuring tips, and real-life “wish I knew that earlier” lessons.
Why Burlap Bag Curtains Work (and When They Don’t)
Burlap is woven from natural fibers (often jute). That gives it texture, weight, and a warm, organic vibe. Burlap bags add bonus charm because they come pre-printedcoffee roaster stamps, origin names, quirky typographyso your curtains can look like they traveled the world before they moved into your kitchen.
Best rooms for burlap curtains
- Kitchens and breakfast nooks (especially café curtains/valances)
- Mudrooms and laundry rooms (where “a little rustic” feels right at home)
- Farmhouse, cottagecore, cabin, or coastal-rustic spaces
- Porches (with lining and sturdy hardware)
When to reconsider
- Bedrooms needing blackout (unless you add a blackout liner)
- Homes with extreme dust sensitivity (burlap can shed unless finished well)
- Near open flame or high heat sources (keep distance from stoves, candles, heaters)
Before You Start: Pick Your Burlap (and Prep It Like a Pro)
Option A: Real burlap bags (coffee/grain sacks)
Check local coffee roasters, cafés, or online marketplaces. Look for bags with a tighter weave and minimal stains. If the sack is very stiff or dusty, plan extra prep time.
- Pros: built-in graphics, authentic texture, often inexpensive/free
- Cons: inconsistent sizes, seams/logos you may need to work around, possible odors or residue
Option B: Burlap fabric by the yard
This is the easiest route for full-length panels because you can buy the exact width/length and match panels cleanly. It’s also simpler if you want a softer “linen-ish” look with fewer prints.
Pre-wash (or at least pre-shrink) to avoid drama later
Natural fibers can shrink. Also, burlap bags may carry dust and leftover “what used to be in here” particles. A gentle wash helps soften the fabric and reduces shedding. Many DIYers prefer hand-washing in cool water to avoid flooding their washer with lint. If you machine-wash, use a delicate cycle and wash burlap alone.
How to wash and dry burlap safely
- Shake it outside to remove loose dust and debris.
- Soak in cool water with a small amount of gentle detergent for a few minutes.
- Rinse well in cool water until it runs clear.
- Do not wring aggressively; press water out with towels instead.
- Air-dry flat or hang dry. Expect wrinkles. Burlap loves wrinkles like toddlers love markers.
- Press with an iron (use a press cloth; steam carefully). Pressing makes measuring and hemming about 300% less annoying.
Stop fraying before it starts
Burlap frays because the weave is open. You can manage it with any combination of: a double-fold hem, a zigzag/overcast stitch, bias tape, or a lining that traps the raw edges. Even if you’re “not a sewer,” one row of zigzag along raw edges is a tiny effort with a big payoff.
Measure Like a Designer (So Your Curtains Don’t Look Like a DIY… in the Bad Way)
Rod placement: go higher and wider
A simple trick to make windows look larger: mount the rod above the window and extend it past the sides so panels can sit mostly off the glass when open. Common guidance is 4–6 inches above the window (or higher if you’re going for height), and 8–12 inches wider on each side when space allows.
Panel width: aim for fullness
Flat, tight curtains can look skimpy. A classic rule is that total curtain width should be about 2× the window width (or more if you want extra gathers). For a relaxed rustic look, 1.5× can still work but 2× gives that “soft, intentional drape.”
Length options (pick your vibe)
- Café: covers lower half of the window (great for kitchens)
- Sill: ends at the windowsill
- Apron: ends a few inches below the sill
- Floor: “kisses” or just grazes the floor
- Puddle: extra fabric pools at the bottom (pretty, but a lint magnet)
Standard curtain lengths often fall around 63, 84, 96, 108, and 120 inches. If you’re DIYing, you can make custom lengthsjust measure from where the rod will sit to where you want the hem to land, then add hem/header allowances.
Tools and Materials
Choose your method, then grab what you need.
For any method
- Burlap bags or burlap fabric (plus extra for mistakesbecause reality)
- Measuring tape, ruler/yardstick
- Fabric scissors (or sharp shears)
- Iron + ironing board (or a folded towel on a sturdy table)
- Clips or pins (clips are nicer on thick burlap)
- Curtain rod + brackets (or café rod/tension rod)
No-sew add-ons
- Fusible hem tape/web (a.k.a. “Stitch Witchery” style tape)
- Press cloth or parchment paper (to protect iron/board)
- Fabric glue (optional, for spot reinforcement)
Sewn add-ons
- Sewing machine (or needle + strong thread if you’re patient)
- Zigzag/overcast stitch option (or serger, if you’re fancy)
- Matching or neutral thread
Hanging style add-ons
- Clip rings (fast and forgiving)
- Grommet kit + grommets (clean, modern farmhouse look)
- Optional lining fabric (cotton for softness; blackout lining for light control)
- Drapery weights or small washers (helps panels hang straight)
Method 1: No-Sew Burlap Bag Curtain (Fastest Path to “Look What I Made!”)
This method is ideal for café curtains, valances, pantry doors, or smaller windows. It’s also great if your sewing machine is currently being used as a very expensive bookshelf.
Step 1: Open and flatten the bag
- Use a seam ripper or scissors to cut the bag open along a side seam and across the bottom.
- Lay it flat and decide which side you want facing the room (printed or plain).
- Trim stray threads and straighten the edges as needed.
Step 2: Plan the size
- Measure your target finished length.
- Add 3–6 inches total for hems and a top header/rod pocket (depending on your hanging style).
- Mark with chalk or a pencil and cut carefully.
Step 3: Hem the sides and bottom with fusible tape
- Fold the edge over about 1/2 inch, press.
- Fold again (another 1/2 inch) to hide raw edges, press.
- Slide fusible tape between the folds.
- Press down with the iron (lift-and-press, don’t drag) until bonded.
- Repeat for the other side and bottom.
Tip: Test fusible tape on a scrap first. Burlap varies, and some weaves bond differently. Also: never iron directly onto exposed adhesive unless the product specifically includes a protective paper backing.
Step 4: Add a hanging top (choose one)
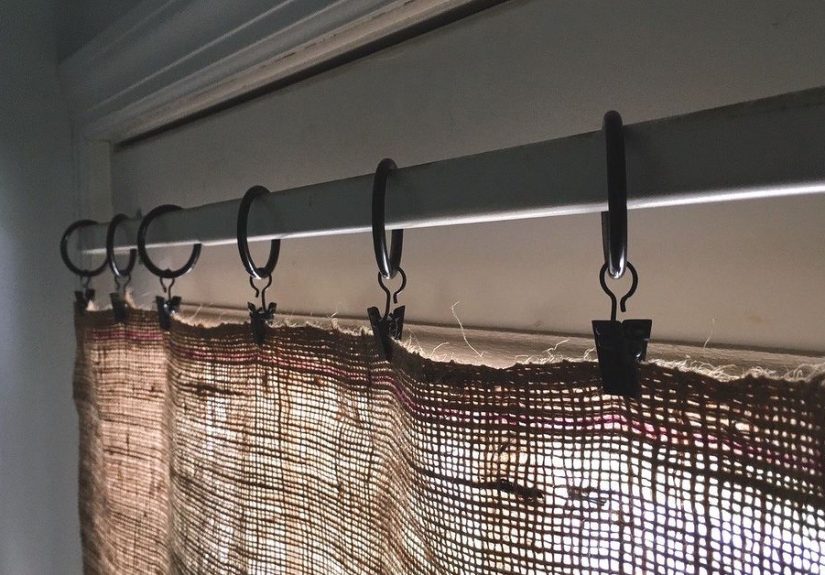
- Clip rings (easiest): Finish the top with a double-fold hem and clip rings evenly across.
- Rod pocket: Fold the top down 3–4 inches, fuse the sides of the fold (leave the middle open) so a rod can slide through.
- Tabs: Create small folded strips from burlap scraps and fuse (and/or stitch) them to the back top edge.
Step 5: Hang and “train” the folds
Hang the panel. Then gently shape the folds with your hands. If it looks stubbornly flat, add more clip rings (more clips = better drape) or add discreet weights at the bottom corners.
Method 2: Sewn Burlap Curtain Panels (Stronger, Cleaner, More Washable)
If you want full-length panels, frequent opening/closing, or you’re combining multiple bags into one wide panel, sewing is your best friend. It also helps control fraying long-term.
Step 1: Make the fabric wide enough
Most bags won’t be wide enough alone. To create full panels:
- Open multiple bags into flat pieces.
- Match the grain/weave direction so panels hang consistently.
- Place pieces right sides together and sew side seams to join.
- Finish seams with a zigzag or overcast stitch to reduce fraying.
Step 2: Square it up
Burlap can skew. Use a ruler/yardstick and trim edges so the panel is a true rectangle. This single step is the difference between “rustic chic” and “I hung a potato sack, didn’t I?”
Step 3: Sew hems (double-fold is your friend)
- Press a 1/2-inch fold, then fold again and press.
- Sew close to the inner folded edge.
- Repeat for both sides and bottom.
Step 4: Create the top header
Pick a hanging style:
- Rod pocket: Fold top down 3–5 inches; stitch along the lower edge to form a pocket.
- Back tabs: Sew fabric loops on the back for a tailored farmhouse look.
- Clip rings: Sew a sturdy top hem and clip in place.
Step 5: Optional lining (highly recommended)
Lining solves three common burlap issues: shedding, see-through-ness, and stiffness. A simple cotton lining softens the look. Blackout lining adds privacy and light control.
- Cut lining slightly narrower than the burlap panel (so it doesn’t peek out at the sides).
- Attach at the top and sides, then hem the lining separately or together (depending on thickness).
- Press well so the panel hangs flat.
Method 3: Grommet-Top Burlap Curtains (Rustic Meets “Actually Slides Nicely”)
Grommets are great for doors and frequently used windows because they glide smoothly. They also look polished. The key is reinforcing the top so the grommets don’t pull through an open weave.
Step 1: Reinforce the header
- Sew a deep top hem (4–5 inches), or
- Add fusible interfacing between layers at the top, or
- Use a lining and treat the top as a thicker “sandwich.”
Step 2: Mark grommet placement
- Use an even number of grommets so the panel edges face the wall.
- Space them evenly across the header.
- Keep grommets a consistent distance from the top edge for a clean line.
Step 3: Cut and install
Follow your grommet kit instructions closely. Measure twice, cut oncebecause once you cut a circle in burlap, you can’t un-cut a circle in burlap. (If you can, please teach the rest of us.)
Finishing Touches That Make Burlap Curtains Look Expensive
Add weight for a better drape
Burlap can hang stiffly, especially if it’s new. Sew drapery weights into bottom corners, or tuck small washers into a tiny stitched pocket inside the hem.
Use tiebacks to keep light flowing
Leather straps, twine, or simple fabric ties look great with burlap. You can also use hooks or knobs mounted beside the window for easy tieback points.
Trim = instant customization
- Lace for “rustic romantic”
- Pom-pom trim for playful cottagecore
- Black ticking stripe for modern farmhouse
- Leather edging for a lodge look
Style Ideas and Specific Examples
Example 1: Kitchen café curtain from one coffee sack
If your window is above the sink, café curtains are practical. Measure the window width, then aim for total fabric width around 1.5–2× that number. Use clip rings on a café rod so you can easily remove the curtain for washing.
Example 2: Two full panels for a 36-inch window
For a 36-inch-wide window, a common approach is extending the rod 8–12 inches past each side. For fullness, target a total panel width around 72 inches. That could be two 36-inch panels, or two wider panels gathered more generously.
Example 3: Sliding door “soften the room” panels
Use grommets or sturdy clip rings for smooth movement. Consider lining (even a simple cotton) so the panels feel more substantial and provide privacy.
Care and Maintenance
- Vacuum gently with a brush attachment if dust builds up.
- Spot clean with cool water and mild detergent.
- Wash only when necessary, and favor gentle methods to reduce shedding and shrinkage.
- Sun exposure can fade prints over time; lining helps protect and improves opacity.
Troubleshooting (Because Burlap Has Opinions)
Problem: The panel looks crooked
- Square the fabric before hemming (trim into a true rectangle).
- Measure from the rod to the floor in several spots if floors are uneven.
- Add weights to help it hang straighter.
Problem: Fraying everywhere
- Use double-fold hems (no raw edges exposed).
- Finish seams with zigzag/overcast stitching.
- Line the curtain to trap loose fibers.
Problem: It smells like a coffee warehouse (not necessarily bad, but still)
- Air it outside for a day.
- Hand-wash gently and dry fully.
- Store with baking soda nearby (not directly on the fabric) if needed.
Real-World Experiences: What DIYers Learn After Making Burlap Bag Curtains (About )
Making burlap bag curtains is one of those projects that looks wildly simple on paper: cut, hem, hang, admire. In real life, it’s still beginner-friendlybut it comes with a few “character-building moments” that experienced DIYers tend to mention again and again.
First: the shed is real. The first time you cut burlap, you might think, “Why is my floor covered in tiny fibers like a hamster had a meltdown?” That’s normal. Most people quickly learn to do the messy steps outdoors or over a drop cloth, and to finish edges early. A quick zigzag stitch along raw edges (even before final hems) can stop the fabric from unraveling while you work. If you’re going no-sew, double-fold hems and lining become the MVPs because they trap fraying inside neat folds.
Second: old sacks have personalities. Coffee and grain bags can be stiff, wrinkly, and sometimes a little dusty. DIYers often report that washing and pressing changes everything: the fabric relaxes, the panels hang better, and measuring becomes less like trying to fold a map in the wind. The trade-off is that washing can reveal how uneven a bag’s shape really is. That’s why squaring up (turning it into a true rectangle) is a step people rarely regret.
Third: hardware matters more than you expect. Burlap can be heavier than it looks, and once you add lining or grommets, your cute rustic curtain becomes a legit window treatment with some weight to it. DIYers often find that flimsy tension rods sag over time on wider spans, and that good anchors (or studs) keep rods from slowly drooping like a tired mustache. Clip rings are forgiving and easy to adjust, which is why many people start thereespecially if they’re testing the look before committing to grommets.
Fourth: the “perfect length” is a moving target. Floors aren’t always level, rods aren’t always perfectly straight, and burlap can relax slightly after hanging. A common trick is to hang the panels for a day, then finalize the hem once the fabric settles. People who skip that step sometimes end up with one panel grazing the floor and the other floating like it’s afraid of commitment.
Finally: the charm is worth it. DIYers love the cozy texture, the way printed sacks add story, and the fact that the finished curtains don’t look like you grabbed something off a big-box shelf. Even the “oops” momentslike a logo landing slightly off-centeroften become part of the handmade appeal. The project tends to leave people with two results: a set of curtains they’re proud of, and a sudden confidence boost that says, “Okay, what else can I make out of weird fabric bags?”
Conclusion
A burlap bag curtain DIY is a budget-friendly way to add texture, warmth, and personality to your windowsespecially if you love farmhouse, cottagecore, or rustic design. The secret isn’t fancy skills; it’s smart prep (wash, press, square), solid measuring (high and wide rods, enough fullness), and clean finishing (double hems, edge control, optional lining). Start with a café curtain if you want instant gratification, then level up to lined, grommet-top panels when you’re ready for the full “custom drapery, but make it charming” effect.