Table of Contents >> Show >> Hide
- Quick Jump
- Materials Shopping List (Mostly Dollar Store)
- Method A: Farmhouse Twine Carrot Ring (Easy + Classic)
- Method B: Deco Mesh Carrot Wreath (Full + Fluffy)
- Cute Variations to Make Your Carrot Wreath Look Custom
- Troubleshooting + Pro Tips (Because Hot Glue Is Not a Therapist)
- FAQ: The Stuff Everyone Wonders After They’ve Already Started
- Real-World Carrot Wreath Lessons (The 500+ Word “Experience” Section)
- Conclusion
There are two kinds of spring people: the ones who casually “refresh” their front door like it’s a seasonal magazine cover,
and the rest of us who just want something cute that doesn’t cost the same as a week of groceries.
Enter: the carrot wreath DIYbright, cheerful, weirdly charming, and totally doable with
dollar store items (yes, even if your crafting résumé is mostly “I once owned scissors”).
In this guide, you’ll learn two foolproof ways to make a Dollar Tree carrot wreath:
a farmhouse-style carrot ring using those iconic twine-wrapped foam carrots, and a fluffy deco mesh carrot wreath
built on a carrot-shaped frame. Then we’ll level up with variations (burlap, tulips, bunny accents), plus the little pro tricks
that make your wreath look “boutique” instead of “I panicked in aisle seven.”
Materials Shopping List (Mostly Dollar Store)
The goal is simple: use Dollar Store supplies for the base and the “carrot vibe,” then optionally add a few
upgrades if you already have them at home. If your local store is picked clean (a real springtime sport), you can mix and match
across brandsDollar Tree, Dollar General, Family Dollarwhatever’s nearest.
Choose Your Base (Pick One)
- Option 1: Recycled cardboard (shipping box) cut into a donut-shaped wreath base
- Option 2: A wooden round or foam wreath ring (if your store has them)
- Option 3: A carrot-shaped metal wreath form (perfect for mesh)
Core Dollar Store Supplies
- Twine-wrapped foam carrots (usually sold in packs)
- Orange acrylic paint (optional but makes a big difference on cardboard bases)
- Hot glue gun + glue sticks (or strong craft glue if you’re patient)
- Ribbon (wired ribbon is easiest for bows; any spring pattern works)
- Greenery picks or faux leaves (for the “carrot top” moment)
- Pipe cleaners / chenille stems or floral wire (helpful for attaching bows and mesh)
Optional “Make It Extra” Add-Ons
- Orange & green deco mesh (for a fluffy carrot look)
- Mini sign or tag (“Carrot Patch,” “Hello Spring,” or a DIY price tag)
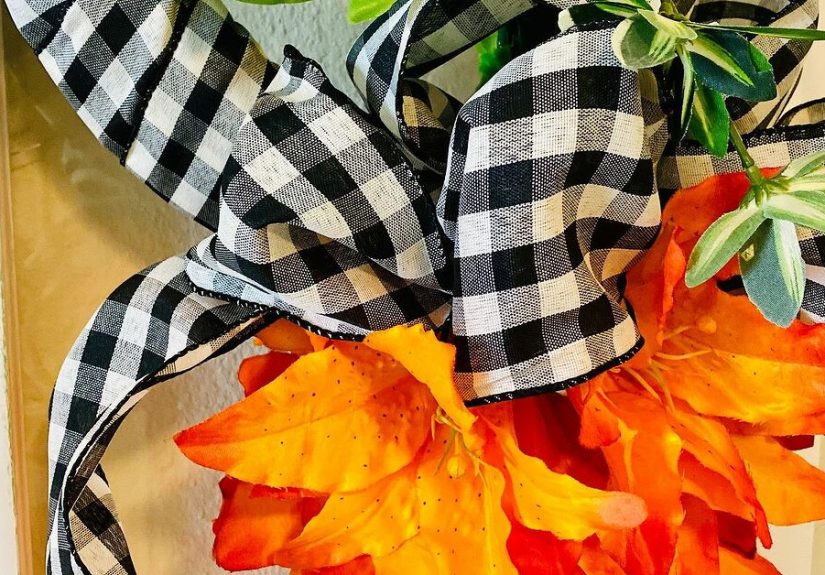
- Buffalo check ribbon (instant farmhouse style)
- Mini bunny pick or bunny head accent
- LED fairy lights (battery pack hidden behind the bow)
Method A: Farmhouse Twine Carrot Ring (Easy + Classic)
This is the “I want cute now” method. It’s fast, it’s low-stress, and it looks shockingly polished with minimal supplies.
The secret is creating a clean base, spacing your carrots evenly, and finishing with a bow + tag that makes it feel like a real
design decision (not an accident you’re committed to).
Step-by-Step Instructions
- Make your wreath base.
Cut a large circle out of cardboard, then cut out the center so you get a donut shape. If you’re using a wood or foam ring,
congratulationsyou’ve skipped the “cardboard confetti” stage. - Paint it orange (recommended).
A quick coat (or two) of orange paint keeps any gaps from screaming “Hello, I am recycled shipping materials.”
Let it dry fully so your carrots don’t slide around like they’re escaping. - Dry-fit your carrots.
Arrange the twine carrots around the ring before gluing. Rotate a few so the seams and twine ends aren’t all facing forward.
If you’re working with a smaller ring, you may need fewer carrotsaim for snug, not squished. - Glue them down in sections.
Hot glue 3–5 carrots at a time, pressing firmly for a few seconds. Work your way around. If the last carrot is a tight fit,
gently squeeze the foam carrot shape a little so it tucks in cleanly (yes, the carrot can be negotiated with). - Add the bow.
Wired ribbon makes this easy: form two big loops, pinch the center, and secure with a pipe cleaner or floral wire.
Fluff the loops, trim the tails, and cut a V-notch (dovetail) to prevent fraying. - Make the “Carrots 25¢ Each” tag (optional but iconic).
On a small shipping tag or cardstock, write “CARROTS 25¢ EACH” in green marker and outline with orange.
Tie it to the bow with thin ribbon or twine. - Create a hanger.
Glue or tie a loop of ribbon to the back, or hang directly from the wreath form if you used one.
Why This Works (Mini Design Breakdown)
The twine carrots add texture, the orange base gives depth, and the bow creates a focal point. The tag adds personality and
turns “wreath” into “story”like your door is hosting a tiny farmer’s market, and honestly, that’s a vibe.
Method B: Deco Mesh Carrot Wreath (Full + Fluffy)
If you like your wreaths extrabig, bold, and visible from the street like a seasonal billboardgo with mesh.
This method is perfect for a carrot-shaped wreath frame (often sold at dollar stores in spring) and uses
orange mesh for the body and green mesh for the leafy top.
What You’ll Need
- Carrot-shaped metal wreath form
- Orange deco mesh (2–5 rolls depending on fullness)
- Green deco mesh (1 roll for the carrot top)
- Pipe cleaners / chenille stems or floral wire
- Ribbon for a bow (optional but encouraged)
- Greenery picks (optionaladds realism)
Step-by-Step Instructions
- Prep attachment points.
If your frame has bars or segments, pre-tie pipe cleaners along the frame so you can attach mesh quickly.
Think of them like little seatbelts for your craft materials. - Build the orange carrot body.
Use one of these beginner-friendly approaches:- Ruffle method: Gather mesh into ruffles and secure each ruffle with a pipe cleaner along the frame.
- Curl method: Cut mesh into short pieces, roll into curls, and attach tightly for a playful, textured look.
- Combo method: Ruffles for fullness + a few curls on top for movement.
- Shape as you go.
Carrots are wider at the top and taper at the bottom. Add more mesh volume toward the top third of the frame, and keep the
bottom tighter so you get that classic carrot silhouette. - Make the green “carrot top.”
Attach green mesh curls or ruffles at the top of the carrot. For tighter, bouncy curls, cut into smaller pieces and roll.
Add greenery picks tucked into the frame for a more natural “leafy” look. - Finish with a bow or sign.
A bow at the “neck” (where orange meets green) looks intentional and helps hide mechanics.
If you’re adding a sign, attach it with wire rather than hot glue so it holds up better. - Fluff, step back, and fluff again.
Mesh needs shaping. Pull ruffles forward, rotate curls outward, and fill obvious holes.
The final 10% of tweaking is where the “wow” happens.
Pro note: Mesh wreaths look amazing but can snag. If your door faces wind or traffic,
consider hanging it indoors or under a covered porch for a longer life.
Cute Variations to Make Your Carrot Wreath Look Custom
Once you’ve got the basic carrot shape down, you can take this DIY in about twelve different directionsfarmhouse, whimsical,
minimalist, floral, or “my bunny has a tiny hat and that’s non-negotiable.”
1) Burlap-Wrapped Carrot Wreath (Rustic + Neutral-Friendly)
Wrap your carrot frame or a teardrop base with burlap ribbon (or jute rope), securing as you go with hot glue.
Then add a bold bowbuffalo check + burlap is basically farmhouse shorthand.
Glue mini carrots or twine carrots down the center for that “carrot patch” look.
2) Tulip Carrot Wreath (Floral, Bright, and Weirdly Fancy)
This one looks high-end because it’s basically a bouquet that committed to a shape.
Use bunches of faux orange tulips (or orange flowers), remove extra leaves, then wire stems together starting at the tip and
build upward into a carrot silhouette. Finish with draping greenery at the top and a statement bow for contrast.
3) Bunny Accent Upgrade (Easter Mode: Activated)
Add a small bunny head pick, a bunny butt attachment (yes, it’s a thing), or even a mini bunny sign.
Keep the bunny near the top third of the wreath so it doesn’t fight your bow for attention.
4) Lights for Nighttime Cuteness
Wrap warm white fairy lights along the inside edge of the wreath and tuck the battery pack behind the bow.
Your door will look like it’s hosting a spring festival, which is objectively better than regular door behavior.
5) Minimalist Carrot Ring (Clean + Modern)
Use fewer carrots with more visible negative space, choose a solid ribbon (or no ribbon at all), and add a single small tag.
It’s the “quiet luxury” version of a carrot wreath. (Yes, I said that with a straight face.)
Troubleshooting + Pro Tips (Because Hot Glue Is Not a Therapist)
Keep Your Carrots Even
Before gluing, lay everything out and take a quick photo. Your camera will instantly reveal if you’ve created a “carrot traffic jam”
on one side and a “carrot desert” on the other.
Stop Ribbon From Fraying
Cut dovetail ends (a V-notch), and if you’re using cheaper ribbon, add a tiny dab of clear glue to the cut edge.
Wired ribbon holds shape better and makes your bow look fuller with less effort.
Make the Bow Look Expensive
Use two ribbons: one bold (buffalo check or plaid) + one solid coordinating color. Layer them. Fluff hard.
A bow that’s 20% bigger than you think you need is usually the right size.
Mesh Looking Flat?
Add curls. Short mesh curls create movement and texture, especially near the top of the carrot where you want volume.
Weatherproofing (A Little)
If the wreath will live outside, use a light clear spray sealer (test first) and avoid direct rain.
Hot glue can soften in high heat, so a covered porch is your wreath’s best friend.
FAQ: The Stuff Everyone Wonders After They’ve Already Started
How long does a dollar store carrot wreath last?
Indoors? Multiple seasons if you store it well. Outdoors? It depends on sun, heat, and rain.
Twine carrots and ribbon hold up decently on a covered porch, while mesh can fade if it bakes in direct sunlight.
How do I hang it without damaging my door?
A standard over-the-door wreath hanger is easiest. If you’re using a ribbon loop, hang it from a hook and keep the knot tight
so the wreath doesn’t slowly slide into “crooked smile” territory.
How do I store it so it doesn’t get crushed?
Use a wreath storage bag or a large plastic bin. If it’s mesh, don’t stack heavy items on top.
If it’s carrot-ring style, store it upright like a pizza you respect.
Can I make this without a glue gun?
Yes, but it’s slower. Use a strong craft adhesive and give it time to cure. For mesh frames, pipe cleaners and floral wire can
do most of the work with minimal glue.
Real-World Carrot Wreath Lessons (The 500+ Word “Experience” Section)
Let’s talk about the part of crafting that tutorials politely skip: the chaos in the middle.
Not the cute “I’m so crafty” chaosmore like the “Why is this carrot suddenly upside down and judging me?” chaos.
If you’re making a carrot wreath DIY with dollar store items, you’re in excellent company.
Plenty of crafters start with a simple plan and end up in a weird little negotiation with ribbon, glue strings, and gravity.
Here are the most common real-world momentsand how to win them.
First: the glue-gun confidence curve. Minute one, you’re a professional. Minute five, you’ve bonded your finger to a foam carrot
and you’re Googling “does hot glue count as skincare.” The trick is working in small sections and letting each area set before moving on.
When you glue five carrots in a row, you can still adjust spacing and angle. When you glue fifteen in a row, you’ve created a carrot
highway with no exits. Also: keep a little bowl of cold water nearby. If you touch hot glue, a quick dip helps (and it makes you feel
like a crafting wizard instead of a tragic character in a glue-based drama).
Second: the bow will humble you. Bows are like catsbeautiful, slightly unpredictable, and aware you need them more than they need you.
The most common “experience” people have is making a bow that looks great in your hands and then instantly collapses into a sad ribbon noodle
when you attach it. Wired ribbon is your best friend here. If you only have unwired ribbon, double it (two layers), tie it tighter than you think,
and fluff aggressively. And don’t be afraid to hide the center with a tiny strip of ribbon wrapped around and glued in place. That one little wrap
is basically concealer for bows.
Third: spacing carrots is weirdly emotional. You’ll think, “It’s just arranging carrots.” And then you’ll spend ten minutes adjusting
one carrot by a quarter inch because suddenly the wreath looks… annoyed? That’s normal. The best hack is to do a dry layout, snap a photo,
and look at it on your phone. For reasons no one fully understands, the camera reveals crookedness like it’s a detective with a grudge.
If you notice gaps between carrots, paint the base orange (or wrap it) so the gaps look intentional. Painted bases are the difference between
“handmade charm” and “I can see the shipping label through the carrots.”
Fourth: mesh has a personality. It wants to be fluffy, but it also wants to snag on everything you own. If you’re doing a
deco mesh carrot wreath, expect the first pass to look flat, and the second pass to look lumpy, and the third pass to look
like something you’d actually hang on your door. The “experience” here is learning that fluffing is not optionalit’s the final step.
Pull ruffles forward. Twist curls outward. Rotate the wreath and view it from different angles. Most “holes” aren’t real holes; they’re just
mesh that hasn’t been encouraged to behave yet.
Fifth: your local dollar store will test your adaptability. You might walk in expecting carrot frames and walk out with exactly one pack
of carrots, three questionable ribbons, and a ceramic gnome you don’t remember picking up. That’s fine. The wreath is flexible:
no carrot frame? Use cardboard. No orange mesh? Wrap with burlap ribbon and go rustic. No greenery? Use a few floral stems, faux eucalyptus,
or even ribbon loops in green at the top. The “perfect” supply list is a mythgood crafting is mostly creative substitution with a confident attitude.
Finally: the best moment is the last five minutes. It’s when you add the tag, or tuck in one extra greenery pick, or notch the ribbon tails,
and suddenly the whole thing clicks. That’s the part people remember when they compliment your door: not the hot glue strings, not the five redesigns,
not the moment you considered quitting and becoming a minimalist. Just the finished wreathbright, charming, and proof that you can make something
genuinely adorable with a few dollar store supplies and a little stubbornness.
So if your carrot wreath looks “almost there,” you’re closer than you think. Fluff it. Adjust it. Add one small finishing detail.
And if all else fails, throw on a bigger bow. Bigger bows solve more problems than they have any right to.
Conclusion
A carrot wreath DIY with Dollar Store items is one of those projects that hits the sweet spot: low-cost, high-impact, and
ridiculously cheerful. Whether you go farmhouse with twine carrots and a “Carrots 25¢ Each” tag, or full glam with a fluffy deco mesh carrot frame,
the result is spring front-door decor that feels personaland doesn’t demand a designer budget.
Pick a method, grab your glue gun, and remember: crafting is just problem-solving with ribbon.
Your door is about to look very seasonal.