Table of Contents >> Show >> Hide
- Before You Start: Safety First When Working With Glass
- Method 1: Make a DIY Mirror with Spray Paint (Beginner-Friendly)
- Method 2: Silvering a Pane of Glass with Mirror Kits (Advanced)
- Choosing the Right Method for Your Project
- Common Problems and How to Fix Them
- Extra : Real-World Experiences & Practical Tips
Got an old picture frame, a random glass shelf, or a lonely window pane just staring at you?
Good news: with a little DIY magic (and some safety gear), you can turn that plain sheet of
glass into a shiny new mirror. No, you don’t need a chemistry degree or a secret factory –
just the right method, a bit of patience, and a willingness to get a tiny bit messy.
In this guide, you’ll learn how to make a mirror out of a pane of glass using
two main approaches:
- A beginner-friendly method using mirror-effect spray paint
- A more advanced method using silvering kits and chemicals
We’ll also cover glass safety tips, tricks to avoid streaks and cloudiness,
and some real-world experiences and troubleshooting ideas so your DIY glass mirror looks
polished instead of “Pinterest fail.”
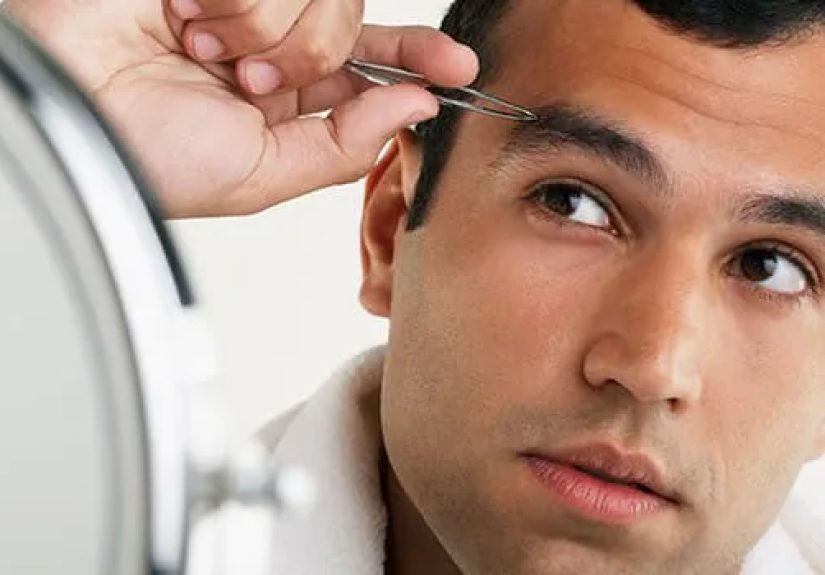
Before You Start: Safety First When Working With Glass
Glass is beautiful, but it does not care about your fingers. Whenever you work with a pane of
glass, especially if you’re cutting or handling large sheets, treat it like a serious
projectnot a casual craft.
Protective Gear You Should Use
At minimum, gear up with:
- Safety glasses or goggles to protect against chips and splinters
- Cut-resistant gloves so your hands don’t become part of the design
- Closed-toe shoes, ideally sturdy ones, in case a piece drops
- Long sleeves and pants if working with large sheets or cutting glass
For spray painting or chemical silvering, add:
- Respirator or mask approved for paint fumes or chemical vapors
- Nitrile gloves when handling chemicals and mirror-coating solutions
- Good ventilationwork outdoors or in a well-ventilated area
Safe Handling and Cutting Tips
If your pane of glass already fits your frame or space, you can skip cutting entirely and
save yourself some stress. If you do need to cut:
- Always work on a clean, flat, stable surface with a soft underlay (like a rubber mat).
- Score only once with a glass cutter, using firm, even pressure in a single smooth motion.
- Snap along the score line using proper glass pliers or by carefully overhanging the edge.
- Never try to “break glass smaller” by stomping on it or snapping randomlybad idea.
Once your pane is the right size and you’ve vacuumed up any stray slivers, you’re ready to
start the fun part: turning plain glass into a DIY mirror.
Method 1: Make a DIY Mirror with Spray Paint (Beginner-Friendly)
The easiest way for most people to make a mirror from a pane of glass is to use
mirror-effect spray paint. Products often labeled “looking glass,” “mirror
effect,” or “glass-to-mirror converter” are designed specifically to create a reflective
surface on the back of clear glass.
What You’ll Need
- Clean pane of glass (picture frame glass, window glass, or glass shelf)
- Mirror-effect spray paint (check the label for glass compatibility)
- Glass cleaner or a mix of vinegar and water
- Lint-free cloths or paper coffee filters (they shed less lint than paper towels)
- Painter’s tape and scrap paper or cardboard
- Optional: white or black spray paint for a protective backing
- Optional: spray bottle of water or vinegar for an antique or distressed look
Step 1: Deep-Clean the Glass
The cleaner the glass, the better your mirror. Any dust, fingerprints, or invisible grease
will show up later as weird streaks and spots.
- Lay the glass flat on a soft, clean surface.
- Spray one side with glass cleaner or a vinegar-water mix.
- Wipe with a lint-free cloth until it squeaks. If it doesn’t squeak, it’s not clean yet.
- Flip the glass and clean the other side just as thoroughly.
The mirror coating goes on the back of the glass, so pay extra attention to
that side.
Step 2: Prep Your Workspace
Mirror spray paint behaves like regular spray paint with a touch of drama. It loves drifting
onto things you didn’t mean to paint.
- Work outdoors or in a very well-ventilated area.
- Cover the surface with cardboard or a drop cloth.
- Set the glass pane face downyou’ll spray the back.
- Mask off any areas you don’t want coated with painter’s tape.
Step 3: Apply Thin, Even Coats of Mirror Spray
Shake the can longer than you think you need toabout a full minute. Then:
- Hold the can about 8–10 inches from the glass.
- Use light, sweeping passes, starting and ending off the glass.
- Aim for a very thin first coat. It should look slightly translucent and speckled.
- Let it dry according to the directions (usually a few minutes).
- Apply 4–6 thin coats rather than one or two heavy ones.
As the layers build up, the back will look opaque and metallic. On the front side, you’ll see
the glass gradually become reflective. Resist the urge to poke it. Every fingerprint on the
back will be there forever.
Step 4: Add a Protective Backing
Once the mirror-effect coats are dry, they’re still a bit delicate. To protect them:
-
Spray a layer or two of white or black paint over the mirror coating. White
tends to make the mirror slightly brighter; black can deepen the reflection. -
Let everything dry completely before handling. If you rush it, you risk smudging the
reflective layer underneath.
Step 5: Clean the Front and Install Your New Mirror
Flip the glass over and gently clean the front side with glass cleaner. Don’t scrub too hard
near the edges where paint meets glass.
Now you can:
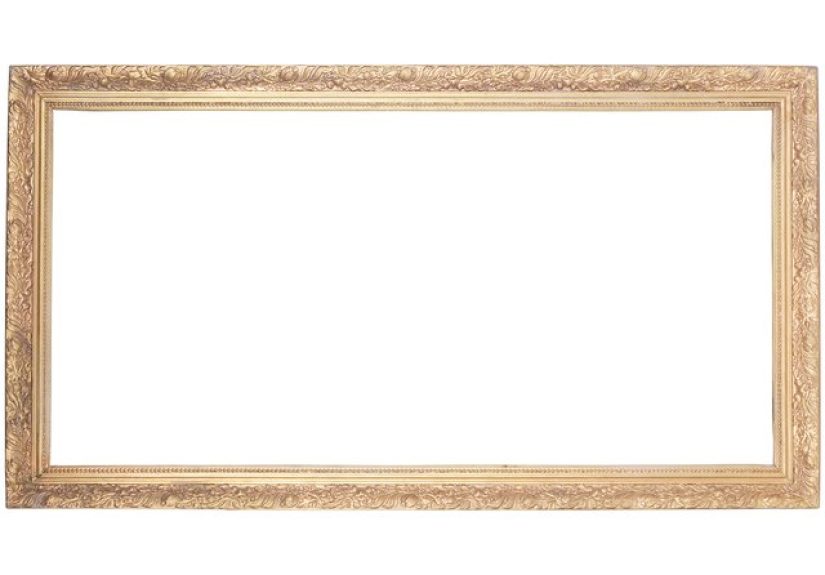
- Pop it back into a picture frame for an instant framed mirror
- Mount it into a cabinet door or closet door
- Use it as part of a gallery wall or decorative mirror grid
Congratsyou’ve just created a DIY glass mirror from a simple pane of glass.
Method 2: Silvering a Pane of Glass with Mirror Kits (Advanced)
If you want a more traditional, high-quality mirroror you’re restoring an old pieceyou can
use a silvering kit. These kits typically involve silver nitrate, reducing
agents, and a series of cleaning and rinsing steps that chemically deposit a thin layer of
metal on the glass.
This method gives beautiful results but requires more care, precision, and respect for
chemical safety. Always follow the manufacturer’s instructions exactly.
What You’ll Need
- Silvering or mirror-making kit (often sold for hobbyists and restorers)
- Distilled or deionized water (tap water can ruin the finish)
- Plastic tubs or trays for solutions
- Soft, non-shedding cloths and sponges
- Protective gear: chemical-resistant gloves, goggles, respirator, apron
- A dust-free, well-ventilated workspace
Overview of the Silvering Process
The exact steps vary by kit, but generally you will:
-
Clean and degrease the glass completely. This is the most important step.
Any residue will cause bare spots. -
Apply a sensitizing or “tinning” solution. This helps the silver bond to
the glass surface. -
Mix the silvering solutions. Typically, you combine silver nitrate with
other chemicals according to the instructions. -
Pour or spray the solution over the glass. The silver deposits on the glass
over several minutes, turning it from clear to brownish, then shiny. -
Rinse gently with distilled water. The new silver layer is delicate at
first, so you must avoid touching it. -
Allow the glass to dry vertically. This helps prevent water spots and
streaks. -
Paint the back. Once dry, you protect the silver with a special backing
paint, often followed by a second protective layer.
Silvering is more time-consuming than using mirror spray paint, but it can produce a more
traditional, professional-looking mirrorespecially for larger pieces.
Choosing the Right Method for Your Project
Not sure whether to use spray paint or a silvering kit? Ask yourself a few questions:
Use Mirror Spray Paint If…
- You’re a beginner and want a quick win.
- You’re working on a small to medium-sized project (picture frames, cabinet doors, crafts).
- You don’t want to handle strong chemicals.
- A slightly “antiqued” or decorative mirror finish is acceptable or even desired.
Use a Silvering Kit If…
- You want a more traditional, high-reflectivity mirror.
- You’re restoring an antique or building a custom piece where quality matters.
- You’re comfortable following detailed instructions and safety procedures.
- You have a suitable space to work with chemical solutions.
Common Problems and How to Fix Them
Problem: Cloudy or Dull Reflection
If your homemade mirror looks more like a foggy window than a mirror, the most common culprits
are:
- Glass wasn’t fully cleaned (oil or dust left behind).
- Spray coats were too heavy, causing uneven build-up.
- Spray paint wasn’t fully dry between coats.
For spray paint mirrors, you may be able to strip the paint from the back with a compatible
remover and start over. For silvered mirrors, you may need to re-clean and re-silver following
the kit instructions.
Problem: Bare Spots and Drips
Bare spots usually happen when:
- Fingerprints or grease prevented adhesion.
- Silvering solution didn’t flow evenly across the surface.
- Spray paint pooled or dripped instead of forming thin layers.
The fix is almost always the same: strip, deep-clean, and try again with more patience and
thinner coats.
Problem: Uneven “Antique” Look (When You Didn’t Want One)
DIY mirror projects often accidentally look “antique”patchy or mottled. If that’s not the
look you’re going for, focus on:
- Better cleaning (no shortcuts).
- More thin coats and less heavy spraying.
- Spraying in low-humidity conditions to avoid moisture effects.
On the other hand, if you do want an antique mirror effect, you can lean into this by
lightly misting the back of the glass with vinegar or water between coats and gently dabbing
with a cloth before adding more mirror spray.
Extra : Real-World Experiences & Practical Tips
Once you’ve tried making a mirror from a pane of glass, you’ll notice something: the project
feels intimidating before you start, but strangely addictive afterward. Many DIYers begin
with a single picture frame and end up wandering around their homes thinking, “That cabinet
door could be a mirror… and that old window… and maybe that random thrift-store frame.”
One of the biggest “aha” moments people report is just how critical the cleaning step really
is. When you first read instructions that say, “Clean the glass thoroughly,” it sounds like a
casual suggestion. After your first attempt, you realize it’s more like a sacred commandment.
Smudges you can’t even see with the naked eye have a way of showing up loudly once the mirror
coating is on. Many crafters end up adopting a ritual: clean with glass cleaner, then wipe
with alcohol, then polish with coffee filters until the surface squeaks.
Another common experience: learning to love thin coats of mirror spray. The first instinct is
to spray until the back looks solid right away. The problem is that heavy coats tend to run,
pool, or dry unevenly, which shows up on the front as streaks and blotches. The projects that
turn out best usually involve a lot of restraintquick passes, several layers, and plenty of
drying time. If you’re the impatient type, this project doubles as character development.
People who experiment with antique mirror effects often discover how fun it
is to control “imperfection on purpose.” A light mist of vinegar or water on the back of the
glass, dabbed with a paper towel before the next layer of mirror paint, creates convincing
age spots and fading. When you add a rustic or vintage frame around it, the glass looks like
it’s been around for a centuryeven if you just pulled it from a big-box store last weekend.
This technique is especially popular for decorative pieces, like over-mantle mirrors or wall
groupings rather than bathroom vanity mirrors.
If you move on to silvering kits, you’ll notice the process feels more like a
science experiment than a craft. There’s measuring, mixing, precise timing, and lots of
rinsing with distilled water. Many hobbyists recommend setting aside a quiet block of time
when you won’t be interrupted, laying out every tool and bottle before you begin. It’s not
something you want to stop halfway through to answer a text. The reward, though, is a mirror
that looks and behaves much more like a traditional commercial mirror, especially on larger
pieces.
Another real-world lesson: weight and mounting matter. A pane of glass plus
multiple layers of coating and backing paint can be surprisingly heavy. Before you hang your
new mirror, make sure your wall hardware, anchors, or screws are rated for the weight.
Oversized mirrors are best supported with French cleats or multi-point hanging systems. No
one wants their proud DIY project to make a dramatic exit from the wall.
Many DIYers also discover creative ways to use smaller off-cuts and leftover glass. Little
pieces of mirror-coated glass can become coasters, jewelry trays, candle plates, or decorative
accents on shelves. Because you’re working on the back of the glass, you can combine mirror
coating with stencils, etched designs, or frosted details to create unique patterns. The
ability to customize both the reflective area and the frame opens the door to designs you’ll
never see in a store.
Finally, one of the best “experiential” tips is to think of your first mirror as a test run,
not a final masterpiece. Use a spare piece of glass or thrift-store frame to practice your
technique. Learn how your chosen spray paint behaves, how long it really takes to dry in your
climate, and how much ventilation you need to stay comfortable. Once you’ve made one practice
mirror, your second and third attempts will look dramatically betterand you’ll feel more
confident turning special panes of glass into long-lasting, personalized mirrors.
In the end, making a mirror out of a pane of glass is the kind of project
that gives you both something beautiful to hang on the wall and a satisfying sense of “I made
that.” Whether you stick with quick mirror spray paint or graduate to full-on silvering
chemistry, you’ll never look at a simple sheet of glass the same way again.