Table of Contents >> Show >> Hide
- What a Reed Diffuser Actually Does (And Why Yours Sometimes Smells Like “Nothing”)
- Supplies and Ingredients (The “Don’t Make Me Go Back to the Store” List)
- The Best DIY Reed Diffuser Recipe (Reliable, Adjustable, Not Fussy)
- Step-by-Step: How to Make Your Reed Diffuser
- Essential Oil Blend Ideas (Room-by-Room, Not Random-by-Random)
- How to Make It Last Longer (And Smell Better While It’s Lasting)
- Safety Tips (Because “Natural” Still Deserves Respect)
- Troubleshooting: Fix the Most Common Reed Diffuser Problems
- Cost Breakdown: DIY vs Store-Bought
- Real-World Notes: What It’s Like to DIY Reed Diffusers with Essential Oils (500+ Words)
- Conclusion
Want your home to smell amazing without plugging in anything, lighting a flame, or accidentally becoming “that person” who sprays air freshener like they’re fogging for mosquitoes? A DIY reed diffuser is the calm, classy, always-on option. It just sits there looking cute, quietly doing its joblike the world’s most low-maintenance roommate.
In this guide, you’ll learn the best way to make a reed diffuser with essential oils (with reliable scent throw), plus smart ratios, room-by-room blends, troubleshooting, and safety tipsespecially if you share your space with kids, pets, or a nose that’s a little dramatic.
What a Reed Diffuser Actually Does (And Why Yours Sometimes Smells Like “Nothing”)
The simple science: capillary action + evaporation
Reed diffusers work because reeds act like tiny straws. Liquid travels up the reeds through microscopic channels (capillary action). When that scented liquid reaches the top, it slowly evaporates into the air. No heat, no mist, no fanjust quiet chemistry doing quiet things.
What controls “scent throw” (how far the smell travels)
If your diffuser smells great up close but disappears three feet away, the issue usually isn’t your nose. It’s one (or more) of these:
- Base thickness: Thick oils move slowly and can clog reeds.
- Essential oil percentage: Too little won’t project; too much can overwhelm or separate.
- Reed type and quantity: Not all reeds wick equally, and more reeds usually means stronger scent.
- Placement: Drafts, sunlight, and HVAC vents can speed evaporation (and shorten lifespan).
- Oil choices: Some essential oils are naturally “louder” (peppermint, eucalyptus), others are more subtle (lavender, chamomile).
Supplies and Ingredients (The “Don’t Make Me Go Back to the Store” List)
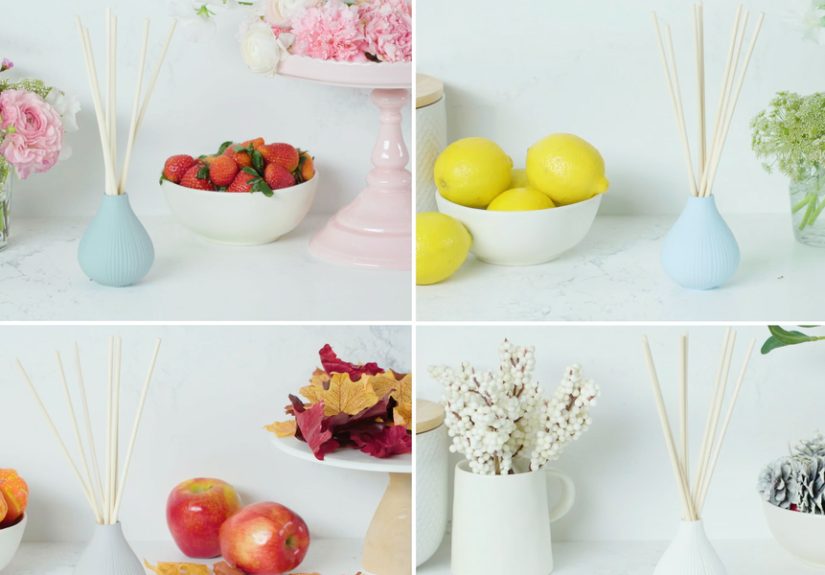
1) A container that actually helps diffusion
Choose a narrow-neck glass bottle (or small vase) so the reeds are held close together and evaporation is controlled. Wide mouths let fragrance evaporate too fast and can feel like you’re “losing” scent (and money) into the air.
- Best size: 3–5 oz (90–150 mL) for bathrooms/bedrooms; larger for open spaces.
- Tip: Put a coaster or small tray underneath to protect surfaces.
2) Reeds (the unsung heroes)
Use rattan diffuser reeds or high-quality fiber reeds made for diffusers. Bamboo skewers can work in a pinch, but they’re not as consistent. For the best DIY results, start with the real deal.
- Start with 6–10 reeds for a small-to-medium room.
- More reeds = stronger scent (and faster oil use).
- Don’t reuse old reeds if they’re saturated or clogged.
3) The base (this is where most DIY diffusers win or flop)
The base is the liquid that carries essential oils up the reeds. You have three common options:
- Best performance: A store-bought reed diffuser base (often labeled for home fragrance). These are designed to wick well and blend reliably.
- Good DIY option: A light carrier oil (like fractionated coconut oil, sweet almond oil, or safflower oil).
- Budget shortcut: Unscented baby oil (often mineral oil-based). It can work, but results vary.
4) Essential oils (choose wisely)
Pick pure essential oils you actually enjoy for more than five minutes. (A “fresh linen” vibe is great until it turns into “hotel lobby that won’t let you check out.”)
- Use 3–5 oils max per blend so it doesn’t turn into scented chaos.
- Consider adding one “anchor” note (like cedarwood or sandalwood) to help the blend feel rounded.
The Best DIY Reed Diffuser Recipe (Reliable, Adjustable, Not Fussy)
This recipe aims for steady scent throw without going overboard. It’s designed for a 3.4 oz / 100 mL bottle.
Recipe for a 100 mL (3.4 oz) reed diffuser
- 80 mL reed diffuser base or light carrier oil
- 15–20 mL essential oil blend (about 15–20% of total volume)
- Optional: 2–5 mL high-proof alcohol (like vodka) to help thin the mixture and improve wicking (skip if you prefer oil-only)
Quick note on measurements: Drops vary by oil and dropper, so for repeatable results, measuring in mL is more consistent. If you only have droppers, a rough estimate is 20 drops ≈ 1 mL (not exact, but useful for DIY math).
Want a simpler “drops-only” version?
For a small bottle using 1/2 cup (120 mL) carrier oil, many DIYers start with 30–50 drops of essential oil, then adjust up or down depending on strength preference and room size.
Step-by-Step: How to Make Your Reed Diffuser
Step 1: Pick a scent goal (so you don’t invent “citrus dentist office”)
Before you mix anything, decide what you want the room to feel like:
- Calm: lavender, chamomile, cedarwood
- Clean: lemon, eucalyptus, tea tree (use with extra caution around pets)
- Cozy: orange, vanilla-like notes (benzoin), sandalwood
- Fresh: grapefruit, rosemary, peppermint (peppermint can be intense)
Step 2: Blend your oils first
In a small cup, combine your essential oils into a blend. Smell it. Then smell it again in 30 seconds. If you still like it, proceed.
Step 3: Add base to the bottle
Use a funnel. Future-you will be grateful.
Step 4: Add essential oils (and optional alcohol)
Pour your essential oil blend into the bottle. If using alcohol, add it now. Gently swirl to combine.
Step 5: Insert reeds and “prime” them
- Place reeds into the bottle.
- Wait 30–60 minutes for initial absorption.
- Flip the reeds so the saturated ends are facing up.
Pro tip: After priming, flipping 1–2 times per week is usually enough. Daily flipping can make scent too strong and burn through liquid faster.
Step 6: Place it smartly
- Keep away from direct sunlight (heat speeds evaporation).
- Avoid placing right next to HVAC vents (it’ll vanish faster).
- Put it where it won’t get knocked over by kids, pets, or your own elbows.
Essential Oil Blend Ideas (Room-by-Room, Not Random-by-Random)
Bedroom: “I would like to sleep, please”
- Soft Lavender: lavender + cedarwood + a touch of bergamot
- Gentle Floral: lavender + geranium + sandalwood
Bathroom: clean and spa-like
- Fresh Spa: eucalyptus + spearmint (go easy) + lemon
- Bright Clean: tea tree + grapefruit + rosemary
Kitchen: fight funk without smelling like salad dressing
- Citrus Herb: lemon + sweet orange + basil or rosemary
- Odor Reset: grapefruit + lime + a tiny bit of peppermint
Living room: warm, welcoming, “come in, we’re normal”
- Cozy Woods: cedarwood + sweet orange + frankincense
- Soft Citrus: bergamot + orange + a hint of vanilla-like benzoin
Seasonal ideas
- Fall-ish: orange + cinnamon leaf (very strong) + cedarwood
- Winter fresh: fir needle + grapefruit + rosemary
- Spring clean: lemon + lavender + geranium
How to Make It Last Longer (And Smell Better While It’s Lasting)
Use the right number of reeds
Start with 6. If it’s too subtle, add 2 more. If it’s too strong, remove a couple. This is the easiest control knob you have.
Flip on a schedule (not a lifestyle)
Flipping reeds boosts scent quickly because it exposes fresh saturated reed surface to air. Do it once a week, or twice if your room is large.
Keep the base light
Heavy oils (like olive oil) are usually too thick. A lighter base helps the reeds wick consistently and prevents clogging.
Refresh instead of replacing
When scent fades but liquid remains, add 10–20 drops of your blend, swirl, then flip reeds. If reeds are old or clogged, replace them firstfresh reeds can make an “old” diffuser feel new again.
Safety Tips (Because “Natural” Still Deserves Respect)
Skin and eyes
- Essential oils are concentrated. Avoid getting them on skin and definitely keep them away from eyes.
- If you spill, wipe immediately and wash hands.
- If you have sensitivities, start with a lower essential oil percentage and place the diffuser in a larger, well-ventilated area.
Kids, pets, and curious creatures
If you have petsespecially catsbe extra cautious. Some essential oils can be risky for pets, and pets can be exposed by inhaling, getting oils on fur, and then grooming. Keep diffusers out of reach, avoid spills, and consider skipping strong oils if your pets share small spaces.
Fire safety and surfaces
- If you add alcohol, remember it’s flammablekeep away from heat sources and flames.
- Use a coaster or tray to protect furniture, and keep the bottle stable.
- Label your bottle so nobody mistakes it for something else (especially in a bathroom cabinet situation).
Troubleshooting: Fix the Most Common Reed Diffuser Problems
“I can’t smell it at all.”
- Add 2–4 more reeds.
- Flip the reeds (wait 10–20 minutes).
- Increase essential oils slightly (move from 15% to 20%).
- Switch to a lighter base or a dedicated reed diffuser base.
- Replace reeds if they’re old or clogged.
“It’s too strong. My living room is now a eucalyptus boxing ring.”
- Remove 2–3 reeds.
- Stop flipping for a week.
- Move it to a larger, more open area.
- Next time, lower peppermint/eucalyptus and add softer oils (lavender, cedarwood).
“It looks cloudy or separated.”
- Some oils don’t blend perfectly in every base. Gently swirl before flipping.
- Try a different base designed for diffusion.
- Reduce resinous/thick oils (like heavy woody or balsamic oils) that may thicken the mix.
“My reeds got gunked up.”
- Replace reeds (don’t reuse clogged ones).
- Use a lighter base and slightly lower essential oil concentration.
- Avoid dusty placement (dust can stick to reeds and slow evaporation).
Cost Breakdown: DIY vs Store-Bought
DIY can be cheaper over time, especially if you reuse bottles and buy reeds in bulk. The biggest cost is essential oils. If you already have oils for other uses, this becomes a very budget-friendly way to keep a steady background scent.
- One DIY 100 mL diffuser: often ranges widely depending on essential oils used.
- Store-bought diffuser: typically costs more upfront, but may have stronger throw using fragrance oils and optimized bases.
Real-World Notes: What It’s Like to DIY Reed Diffusers with Essential Oils (500+ Words)
The first time someone makes a reed diffuser, there’s usually a moment of suspense that feels way too dramatic for a bottle of oil and some sticks. You set it on the counter, step back like you’re admiring fine art, and then… nothing happens. For a minute. Sometimes for an hour. That’s normal. Reed diffusers are slow-burners (without the burn). They’re not here to hit you with a fragrance jump-scare. They’re here to quietly build a background scentlike a playlist you don’t notice until it stops.
Most DIYers learn quickly that patience and placement matter. Put a diffuser in a dead-air corner and it might smell fantastic only if you lean in like you’re whispering a secret to the bottle. Move it near a gentle pathwaylike where people naturally walkand suddenly it feels like the whole room smells better. The same blend can feel “too subtle” in one location and “perfect” in another, which is both annoying and kind of fascinating.
Another real-world discovery: essential oils don’t all behave the same. Citrus oils can smell bright and cheerful, but they may fade faster because they’re more volatile. Wood oils feel cozy and grounded, but they can be heavier and sometimes slow down wicking if the base is thick. The “sweet spot” usually comes from blending: pairing a bright top note (like lemon or grapefruit) with a steadier middle (like lavender or rosemary) and a base note (like cedarwood). That’s when the scent starts to feel intentionalless “I dumped my oil collection into a jar” and more “Yes, I have a signature home fragrance, thank you for noticing.”
There’s also the practical side that nobody brags about on social media: reeds get tired. After weeks of wicking, reeds can clog up or simply lose efficiency. People often assume the oil blend is the problem when the real fix is embarrassingly simple: swap the reeds. Fresh reeds can make an older diffuser suddenly feel alive again, like it had a strong cup of coffee and remembered its purpose.
DIYers also tend to develop a strong opinion about flipping reeds. The first flip feels magicalinstant fragrance boost. The tenth flip, if done too often, can turn into “Why does my hallway smell like a minty thunderstorm?” The trick is to treat flipping like seasoning food: you can always add more, but you can’t un-flip yesterday. Once or twice a week is plenty for most spaces, and if you want a stronger scent, adding reeds is usually a better long-term strategy than aggressively flipping every day.
Over time, people get creative in ways that are genuinely useful. Some keep one blend for “everyday clean” and another for “company’s coming.” Some match blends to routines: a bright citrus-herb diffuser near the kitchen in the morning, and a softer lavender-wood blend in the bedroom at night. And because you’re making it yourself, you can fine-tune itless eucalyptus if it’s too sharp, more cedarwood if it needs warmth, a drop of bergamot if it needs sophistication. DIY reed diffusers become less of a craft project and more of a small home ritual: mix, tweak, place, enjoy.
The best part? When someone walks in and says, “Your place smells so good,” you get to casually respond, “Oh, thanksI made it.” And then you can decide whether to share the recipe… or keep it as your little aromatic superpower.
Conclusion
A DIY reed diffuser is one of the easiest ways to keep a steady, welcoming scent at homeno batteries, no flames, no drama. Choose a light base, start with a sensible essential oil ratio, use quality reeds, and tweak the strength by adjusting reed count and flipping frequency. Once you’ve made one that fits your space, you’ll wonder why you ever relied on “panic-spraying” air freshener five minutes before guests arrive.