Table of Contents >> Show >> Hide
- Why a Simple Handmade Card Works So Well
- What You’ll Need (Minimal-Supply Version)
- Before You Start: Choose a Size That’s Easy
- How to Make a Simple Handmade Birthday Card: 15 Steps
- Step 1: Decide who the card is for (and pick a vibe)
- Step 2: Choose a simple theme
- Step 3: Pick a color palette (2–3 colors + neutral)
- Step 4: Gather your supplies and clear a tiny workspace
- Step 5: Cut your card base
- Step 6: Score and fold for a crisp crease
- Step 7: Add a front panel (the “instant designer” trick)
- Step 8: Choose your focal element (keep it bold and simple)
- Step 9: Create the focal element
- Step 10: Place everything before you glue (the “dry fit”)
- Step 11: Add dimension (optional, but wow)
- Step 12: Add the birthday sentiment
- Step 13: Add tiny accents (but don’t overfeed the card)
- Step 14: Finish the inside message
- Step 15: Final check, envelope, and “will this survive delivery?”
- Three Quick Design Recipes (Same Steps, Different Looks)
- Troubleshooting: When Supplies Get Dramatic
- Quick Birthday Message Ideas (Friendly, Not Cringey)
- of Real-World Card-Making Experiences and Lessons
- Conclusion
Store-bought birthday cards are fine. But a handmade birthday card? That’s a tiny piece of “I thought of you” that someone can actually keep on their desk
without needing to find space for another scented candle. The best part: you don’t need fancy tools, art-school handwriting, or a craft room that looks like
a glitter factory exploded.
This guide walks you through a clean, classic handmade birthday card using simple suppliesplus a few optional upgrades that make your card look
“boutique stationery shop” instead of “I panicked at 11:48 p.m.” (No judgment. We’ve all been there.)
Why a Simple Handmade Card Works So Well
“Simple” isn’t code for “boring.” Simple is intentional. Most great card designs follow the same rules as a great outfit:
one main statement, a couple supporting details, and no weird stuff fighting for attention.
What makes a handmade card look polished?
- A clear focal point: one big element (balloon, cake slice, candle, big “HBD,” etc.).
- Layering: a base + a panel + an element = instant depth.
- Consistent color palette: 2–3 colors (plus a neutral) keeps it cohesive.
- Clean adhesive work: no glue puddles, no tape peeking out like it’s waving hello.
- Whitespace: blank space is not “empty.” It’s “designer.”
What You’ll Need (Minimal-Supply Version)
You can make an excellent card with basics. If you have extras (washi tape, stickers, stamps), they’re funbut not required.
Essentials
- Cardstock: 80–110 lb cover weight is sturdy and forgiving.
- Paper for accents: scrapbook paper, construction paper, or even a page from an old book (for vintage vibes).
- Scissors (or a paper trimmer, if you’re feeling fancy).
- Adhesive: glue stick, double-sided tape, or a tape runner.
- Pen/marker: black fineliner or felt-tip marker for lettering; any color markers for accents.
Optional (but very helpful)
- Ruler and pencil for light guidelines.
- Bone folder (or the back of a spoon) for crisp folds.
- Foam squares for pop-up dimension.
- Stickers, washi tape, stamps, or small die-cuts.
- Envelope (or make one from paper if needed).
Before You Start: Choose a Size That’s Easy
If you’re new to cardmaking, pick a standard size so everything feels straightforward. A popular option is an A2 folded card
(about 4.25″ × 5.5″ when folded). It’s big enough for a nice design, small enough to finish quickly, and it fits common envelopes.
Fast cutting tip
If you have a standard letter sheet (8.5″ × 11″), you can cut and fold it into a card base with minimal math. The goal is simply:
a clean rectangle that folds evenly and feels sturdy.
How to Make a Simple Handmade Birthday Card: 15 Steps
We’re making a “classic modern” card: a layered front panel, one main icon (balloon or cake slice), and a bold birthday message.
You can swap the icon and colors and still use the same steps.
Step 1: Decide who the card is for (and pick a vibe)
A kid’s card can be bright and playful. A coworker card can be clean and minimal. A best-friend card can be… slightly unhinged in the best way.
Pick one sentence that describes the person, like: “loves plants,” “obsessed with cats,” “always traveling,” or “queen of dessert.”
That sentence becomes your design filter.
Step 2: Choose a simple theme
Good beginner themes: balloons, confetti, candles, cupcake, gift box,
stars, or big typography (“HAPPY BIRTHDAY” as the design).
Step 3: Pick a color palette (2–3 colors + neutral)
A fast method: choose one bold color, one supporting color, and one neutral (white/cream/kraft). Example palettes:
teal + coral + white, navy + gold + cream, or lavender + yellow + white.
Keeping the palette small makes your card look intentional even if your cutting skills are “enthusiastic.”
Step 4: Gather your supplies and clear a tiny workspace
You don’t need a craft bunker. A kitchen table works. Put scrap paper underneath to protect the surface.
Also: grab a paper towel. Glue is sneaky.
Step 5: Cut your card base
Cut cardstock into your chosen size. Aim for clean, straight edges. If you’re using scissors, take your time and rotate the paperdon’t “saw” the scissors
like you’re trying to escape a locked room.
Step 6: Score and fold for a crisp crease
A crisp fold instantly levels up the card. Lightly score where you want the fold (a ruler + the dull edge of a butter knife works), then fold carefully.
Press along the fold with a bone folder or the back of a spoon.
Step 7: Add a front panel (the “instant designer” trick)
Cut a rectangle from patterned paper or a solid color that’s slightly smaller than the card front (leave a slim border all around).
This creates a frame and makes the design look neat. Adhere it smoothly with tape runner or double-sided tape.
Step 8: Choose your focal element (keep it bold and simple)
Pick one main shape: a balloon, a candle cluster, a cake slice, or a gift box. If you’re freehanding, sketch lightly in pencil first.
If you’re using stickers or a cutout, make sure it’s large enough to read from arm’s length.
Step 9: Create the focal element
Example: Balloon. Cut an oval from bright cardstock. Add a small triangle at the bottom for the knot.
Draw a thin “shine” line with a white gel pen or leave a highlight uncolored. Add a string with a black pen.
Keep edges clean; tiny imperfections look charming, but jagged edges look like the balloon fought you and won.
Step 10: Place everything before you glue (the “dry fit”)
Put the panel, focal element, and message area on the card without adhesive. Move pieces around until it feels balanced.
A simple balance rule: keep your focal element slightly above center, with the message either below it or beside it.
Take a quick phone photo if you like itthen you can recreate it after you inevitably bump the table.
Step 11: Add dimension (optional, but wow)
Want the card to look expensive? Use foam squares behind the focal element so it “floats” slightly.
This adds depth without needing complicated techniques. Use 2–4 squares depending on the size of the piece.
Step 12: Add the birthday sentiment
You have three easy options:
(1) Hand-letter “Happy Birthday,”
(2) Stamp a greeting,
or (3) Write on a small strip of paper and glue it down like a label.
If hand-lettering scares you, write in all caps with a black pen and call it “modern.”
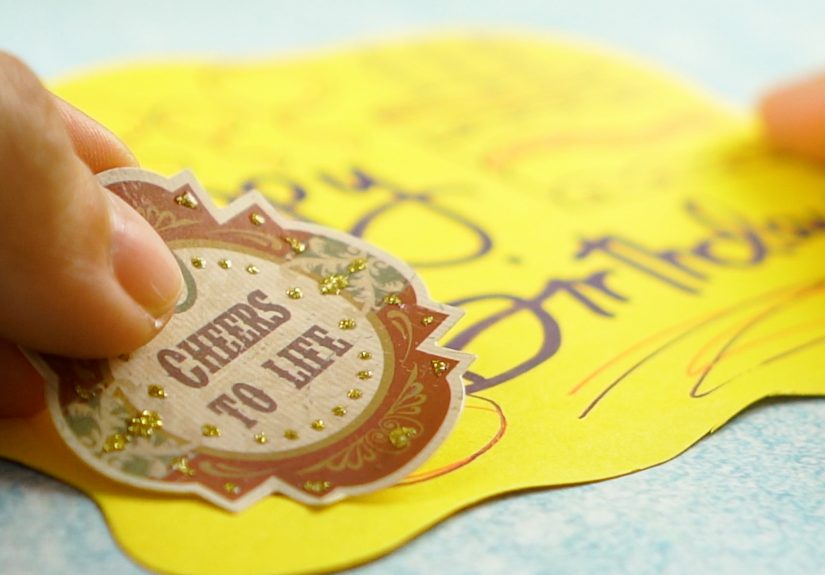
Step 13: Add tiny accents (but don’t overfeed the card)
Accents should support the main design, not start a side quest. Add 3–7 small details: confetti dots, tiny stars, a washi tape strip,
or a few sequins. Odd numbers often look nicer than even ones (designers love chaos, but organized chaos).
Step 14: Finish the inside message
Write your message on the inside. A good formula:
Celebrate them + be specific + look forward.
Example: “You make every room brighter. Hope this year brings you big wins and easy joy.”
Sign itfuture you will appreciate the evidence.
Step 15: Final check, envelope, and “will this survive delivery?”
Look for stray pencil marks, excess glue, and loose embellishments. If you’re mailing it, keep bulky decorations to a minimum so it stays flat.
If the front has dimension, consider placing the card in an inner sleeve or wrapping it with a scrap sheet of paper inside the envelope.
Your card deserves a safe journey.
Three Quick Design Recipes (Same Steps, Different Looks)
1) Confetti Corner Card
Add a plain front panel, then cluster confetti dots (made with a hole punch or marker) in one corner.
Place “HAPPY BIRTHDAY” on a label strip across the lower third. Minimal supplies, maximum party energy.
2) Washi Tape Cake Card
Stack 3–4 horizontal strips of washi tape like cake layers. Add a small rectangle “cake stand” underneath.
Draw candles on top with a marker. Finish with a simple “Make a wish.”
3) Big Typography Card
Cut large block letters from colored paper (“HBD” or “YAY”) and mount them with foam squares.
Add small stars or dots around the letters. This is great for anyone who appreciates clean design.
Troubleshooting: When Supplies Get Dramatic
My paper warped
Too much liquid glue or wet media can cause warping. Use less adhesive, spread it evenly, and let painted areas dry fully.
If it still warps, press the finished (dry) card under a heavy book for a little while.
My glue made bumps or wrinkles
Glue sticks and tape runners are usually smoother for paper panels than liquid glue. If you use liquid glue, apply tiny dots near edges
and a few in the centerthen press gently from the center outward.
My lettering looks shaky
Give yourself training wheels: lightly pencil guidelines and write slowly. Or write the greeting on a separate strip of paper, trim it,
and glue it down. This is not cheating; it’s strategy.
My card looks “busy”
Remove one thing. Then remove one more. A good card rarely needs more than one focal element plus a message and a few accents.
If everything is special, nothing is special (that’s also true of adding bacon to every food, by the way).
Quick Birthday Message Ideas (Friendly, Not Cringey)
- Short + sweet: “Hope your day is full of good food and better people.”
- Funny: “Another year older, another year better at pretending you have your life together.”
- Heartfelt: “I’m grateful you exist. You make life better.”
- For a coworker: “Wishing you a great year aheadand a very low-email birthday.”
- For a friend: “You deserve a birthday as awesome as your group-chat contributions.”
- For a kid: “Hope your birthday is packed with fun, cake, and zero bedtime negotiations.”
of Real-World Card-Making Experiences and Lessons
People who make handmade birthday cards all seem to collect the same “craft life lessons,” usually the hard way and usually while standing over a trash can
full of tiny paper scraps that look like confetti’s less successful cousin. One of the first discoveries is that simple wins. The card that
looks best is rarely the one with twelve techniques, five layers, and an ambitious 3D element that requires engineering skills. It’s the one with one strong idea:
a balloon with a clean message, a candle cluster with bold color, or a fun confetti corner that feels like a party without turning into a craft supply avalanche.
Another common experience: adhesive has a personality. Tape runners feel neat and efficientuntil they decide to “skip” and leave a panel half-attached like a
loose sticker. Liquid glue is incredibly helpfuluntil you use one extra drop and it squishes out the side like it’s auditioning for a slime video. The practical
lesson is to test your adhesive on scrap and use less than you think you need. You can always add more, but you can’t un-glue a wrinkle without
risking a full paper meltdown.
Card makers also learn that handwriting confidence is a muscle, not a magical gift that some people are born with while others are cursed to write like a startled
doctor. The first time you try hand-lettering “Happy Birthday” directly on the card front, your brain suddenly forgets how letters work. The workaround is
surprisingly easy: write the greeting on a separate strip of paper. Trim it. Glue it down. Congratulationsyou’ve created a “sentiment label,” which sounds fancy
enough to charge admission.
Color is another big “aha.” Many makers start with “every bright marker I own,” then wonder why the card looks chaotic. The cards that look most professional
usually stick to two main colors plus a neutral. A bright focal element pops against a simple background, and the message becomes easier to read.
And here’s the sneaky truth: a white border around a panel can make almost any design look cleaner, like putting your craft idea in a tidy frame.
Finally, there’s the emotional part: handmade cards tend to get saved. People tuck them into drawers, clip them to bulletin boards, or prop them on a shelf.
That’s because a handmade card doesn’t just say “happy birthday”it says “I spent time.” Even a simple design carries personality: the color choices, the little
doodle, the specific message inside. If you ever feel like your card isn’t “perfect,” remember that the goal isn’t perfection. The goal is connection. A neat fold,
a clear focal point, and a message that sounds like you is more memorable than any store-bought glitter cannon.
Conclusion
A simple handmade birthday card is one of the easiest ways to make someone feel genuinely celebrated. Keep the design clean, choose one main theme, use a small
color palette, and let your message do the heavy lifting. With the 15 steps above, you can make a card that looks polished, feels personal, and doesn’t require
turning your home into a permanent craft studio. (Unless you want that. In which case: may your tape runner always roll smoothly.)