Table of Contents >> Show >> Hide
- Table of Contents
- What You Need
- Origami Basics (Quick Glossary)
- Step-by-Step: Easy Origami Whale
- Step 1: Start with a square
- Step 2: Make a diagonal crease (guide fold)
- Step 3: Form a kite shape
- Step 4: Create the head point
- Step 5: Fold the body in half
- Step 6: Make the tail crease (first tail fold)
- Step 7: Open and collapse the tail area (shaping move)
- Step 8: Optional tail split (easy fluke look)
- Step 9: Inside reverse fold for a cleaner tail
- Step 10: Add personality (eyes, fins, and attitude)
- Quick checkpoints (so you know you’re on track)
- Troubleshooting: Fix Common Issues
- Variations & Styling Ideas
- Fun Ways to Use Your Paper Whale
- FAQ
- Folding Experiences (An Extra of Real-Life Moments)
- SEO Tags (JSON)
If you’ve ever wanted to fold something adorable without committing to a 97-step paper marathon, you’re in the right ocean.
This easy origami whale is beginner-friendly, kid-approved, and surprisingly good at boosting confidencebecause nothing says
“I’ve got my life together” like a perfectly creased tiny whale.
In this guide, you’ll learn how to make an origami whale using a single square sheet of paper, plus pro-level (but beginner-safe)
tips for crisp creases, clean symmetry, and an optional tail “fluke” tweak if you want your whale to look extra whale-y.
Along the way, we’ll cover common mistakes, fun variations, and creative ways to use your finished whale in crafts and decor.
What You Need
The beauty of origami is that the supply list is hilariously short. Here’s what works best for a clean, easy origami whale:
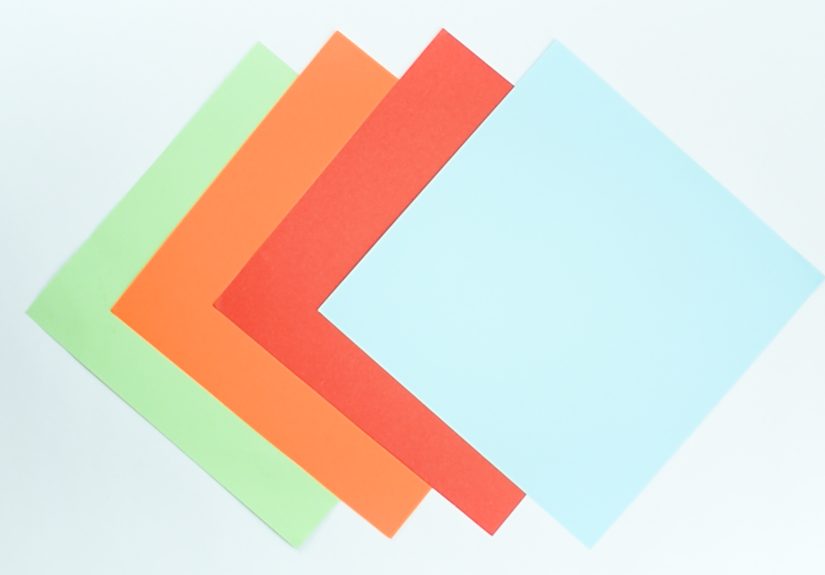
- 1 square sheet of paper (recommended: 6 x 6 inches or 7 x 7 inches for beginners)
- A flat surface (tables are great; your lap is… brave)
- Optional: a ruler or credit card edge for sharp creases
- Optional: marker/pen for eyes and details
- Optional: safety scissors for a simple tail split (totally optionalsee notes)
Best paper for beginners
Use thin but sturdy paper so folds flatten easily without “springing back.” Standard origami paper is perfect.
If you only have printer paper, that’s finejust keep the model a bit larger so it’s easier to handle.
Avoid thick cardstock at first; it turns small folds into a wrestling match.
Don’t have square paper?
No problem. If you have letter-size paper (8.5″ x 11″), make a square:
fold one corner diagonally to form a triangle, then trim (or tear carefully) the extra rectangle strip. Unfold andboomsquare.
(You can also use a pre-cut 6″ square from craft paper pads if you want the easiest route.)
Origami Basics (Quick Glossary)
You don’t need a black belt in paperfolding, but a few fold names make instructions easier to follow:
- Valley fold: fold paper toward you so it makes a “V” when opened.
- Mountain fold: fold paper away from you so the crease forms a ridge (an upside-down “V”).
- Crease sharply: press the fold firmly, then flatten it. Crisp creases = cleaner models.
- Inside reverse fold: tuck a point inward along existing creases to change its direction (useful for tails and heads).
Tiny tip that feels unfairly powerful: align edges first, then crease. If you crease while the edges are slightly off,
your whale will look like it’s swimming in a mild existential crisis.
Step-by-Step: Easy Origami Whale
This whale is designed to be approachable. Read through once, then fold along. If a step says “unfold,” do itthose creases are
your GPS. (Paper needs directions. Humans do too, honestly.)
Step 1: Start with a square
- Place your square paper on the table. If it has two colors, start with the color side down.
- Rotate the paper so it looks like a diamond (one corner pointing up).
Step 2: Make a diagonal crease (guide fold)
- Fold the diamond in half by bringing the bottom corner to the top corner.
- Crease firmly, then unfold. You should now have a diagonal crease line.
Step 3: Form a kite shape
- Bring the left edge to meet the center crease line. Crease.
- Bring the right edge to meet the center crease line. Crease.
You should now have a “kite” shapelike a paper diamond wearing a skinny belt.
Step 4: Create the head point
- Fold the top point down toward the center line (so the tip sits neatly along the middle).
- Crease well. This helps shape the whale’s head and gives the body a cleaner silhouette.
Step 5: Fold the body in half
- Fold the model in half lengthwise by bringing the right side over to the left.
- Crease firmly. You now have a long triangle-ish shapethe whale’s body base.
Step 6: Make the tail crease (first tail fold)
- Rotate the model so the wider end feels like the “front” (head) and the narrower end feels like the “back” (tail).
- Fold the tail end upward (a small triangle fold). Crease, then unfold to create a guide.
- Flip the model over and repeat: fold the tail upward again and unfold.
These creases give you the lines you’ll use to shape a tail that doesn’t look like a random paper elbow.
Step 7: Open and collapse the tail area (shaping move)
- Gently open the layers around the tail end (don’t yankpaper remembers).
- Use your existing creases to push the center inward so the folds “collapse” into a flatter, more structured tail section.
- Press everything flat.
Step 8: Optional tail split (easy fluke look)
Want a classic whale tail fluke shape? You have two options:
- No-scissors option (pure origami): make two small angled folds on the tail tip to suggest a split.
- Optional scissors option (super simple): carefully cut a short slit (about 1/2 inch) into the tail tip, then fold the two new points outward slightly.
Step 9: Inside reverse fold for a cleaner tail
- At the tail end, use an inside reverse fold to tuck the tail point inward along the creases you made.
- Flatten. This makes the tail look intentional instead of “accidental triangle.”
Step 10: Add personality (eyes, fins, and attitude)
- Draw a small eye (or two) near the head. If you’re going cartoon style, a tiny smile works too.
- Optional: lightly curve the body by running it over the edge of a table (gently!) for a more “swimming” look.
Quick checkpoints (so you know you’re on track)
- Symmetry: the body edges line up cleanly when folded in half.
- Tail: the tail points angle upward and look distinct from the body.
- Head: the front is slightly broader and smoother than the tail.
Troubleshooting: Fix Common Issues
Problem: My whale is lopsided
This almost always comes from the kite folds (Step 3). Unfold to the kite stage and re-align edges to the center crease.
Pro trick: pinch the top point first, then smooth downward to keep alignment.
Problem: The tail won’t stay shaped
Tail shaping depends on strong creases. Re-crease the tail guide folds, then flatten the collapse step firmly.
If your paper is thick, make the tail fold slightly larger so it has room to behave.
Problem: My creases look messy
Slow down and crease with purpose. Use a fingernail or a card edge to sharpen folds.
Also: paper has a grain. Some sheets fold cleaner in one direction; if it feels “crackly,” rotate your paper next time.
Problem: I cut the tail too far
Your whale is now a “two-tailed experimental species.” If you want to save it, trim a tiny bit off the tail tip to even it,
then fold the flukes outward to hide the cut length. Or lean in and name it. Art is forgiving.
Variations & Styling Ideas
1) Make it an orca (killer whale)
- Use black paper.
- Add a white oval patch near the eye with a marker or a small paper sticker.
- Draw a dorsal fin triangle along the top edge.
2) Make it a “baby whale”
Use a smaller square (like 4 x 4 inches) once you’re comfortable. Keep folds crisp and simpletiny paper amplifies every mistake,
like a microphone for your folding habits.
3) Add a blowhole “spray”
Tape a tiny bit of cotton (or a thin strip of tissue paper) above the head for a playful “spout.”
Great for classroom ocean units or marine-themed birthday tables.
4) Display stand (easy version)
Fold a small paper triangle stand: fold a strip into a wide “V” and rest the whale’s belly in it. This keeps it upright for photos,
desks, or that one shelf you swear you’re going to organize someday.
Fun Ways to Use Your Paper Whale
- Ocean-themed party decor: string several whales into a garland (“pod goals”).
- Classroom craft: pair with short whale facts to make a mini marine biology display.
- Gift topper: tape the whale onto wrapping paper for a handmade touch.
- Mobile: hang whales at different heights with fishing line for a “floating” effect.
- Mindfulness break: fold one whale when you need your brain to stop buffering.
FAQ
What’s the easiest paper size for beginners?
Start with 6 x 6 or 7 x 7 inches. Bigger paper gives your fingers room to work and makes alignment easier.
Do I need special origami paper?
Nope. Origami paper is nice because it’s thin and holds creases well, but printer paper works. If it feels too stiff,
go bigger or choose a lighter sheet.
Can kids make this origami whale?
Yesespecially with larger paper and a little help on the tail shaping. If using scissors for the optional tail split, use safety scissors
and adult supervision.
Is it still origami if I cut the tail?
Traditional origami avoids cutting, but plenty of modern crafts mix folding with small snips (often called kirigami when cutting is involved).
You can do it either wayyour whale, your rules.
How do I make the whale look more “3D”?
Gently curve the body by pulling it over a rounded edge (like a marker barrel) and slightly flare the tail flukes outward.
Small shaping moves make a big difference.
Folding Experiences (An Extra of Real-Life Moments)
Folding an origami whale is one of those small projects that sneaks up on you. You start with a square of paperflat, boring,
quietly judging you from the tableand about five minutes later you’re holding something that looks like it could swim away
if you set it down near a puddle. The first “experience moment” usually hits around the kite fold: you realize that tiny misalignments
are not tiny at all. They’re drama. They’re soap opera-level consequences in paper form. So you do what every sensible beginner does:
you unfold, refold, and promise the paper you’ll do better this time.
Then comes the crease satisfaction. There’s a very specific feeling when you press a fold flat and it clicks into placelike closing a
well-made drawer. It’s oddly calming. That’s why paper folding is such a good reset: your brain gets a clear job, your hands follow,
and for a few minutes the rest of the world can wait outside the craft room like an uninvited seagull.
Tail shaping is where the story gets funny. The tail wants to be everything except a tail. It wants to be a crumpled triangle,
a weird elbow, a “paper spoon,” or a shape that resembles a tiny hat. This is completely normal. Most beginners discover that the secret
is not strengthit’s patience. You guide the folds along the creases you already made, flatten gently, then press firmly.
You’re basically teaching the paper how to be a whale without yelling at it (because paper does not respond well to yelling).
The optional tail split is another classic experience. Some people avoid scissors like it’s a moral test. Others happily snip a small slit
and immediately get the fluke look they wanted. Either way, the moment you shape the tail outward, the whale suddenly looks alive.
That’s usually when you add eyesbecause once something looks alive, it deserves at least one tiny eyeball. Two eyes if you’re feeling
generous. Three eyes if your whale is auditioning for a sci-fi movie.
Finally, you’ll notice the “pod effect.” You fold one whale and think, “Cute.” Then you fold a second and think, “Okay, this is a collection.”
By whale number five you’re making family backstories. The small differences between whales become part of the charmone is sleek,
one is chubby, one has a heroic tail, one looks like it just heard shocking gossip. That’s the best part of simple paper crafts:
they’re repeatable, forgiving, and every fold teaches you something. Not bad for a square sheet that started the day doing absolutely nothing.