Table of Contents >> Show >> Hide
- Why Perler Bead Earrings Hit the Nostalgia Sweet Spot
- Supplies You’ll Need (and What You Can Substitute)
- Pick a Pattern That Actually Works as an Earring
- Step-by-Step: How to Make Perler Bead Earrings
- 1) Build your design on the pegboard
- 2) Set up your ironing station safely
- 3) Fuse the first side (the “don’t squash it” moment)
- 4) Flip and fuse the second side (for strength)
- 5) Cool it flat (your anti-warp insurance policy)
- 6) Confirm your attachment point (a.k.a. “Where does the hook go?”)
- 7) Attach jump rings and earring hooks
- 8) Make the second earring and do a comfort check
- Pro Tips for Clean Lines and Earrings That Don’t Warp
- Comfort and Skin-Friendly Hardware (Because Ears Are Opinionated)
- Troubleshooting: Fix Common Perler Earring Problems
- Fun Variations: Take Your Perler Earrings Up a Level
- Care and Storage
- Experience Notes: What You Learn After Making a Few Pairs (About )
If your brain lights up at the sight of pixel hearts, tiny mushrooms, and that unmistakable “I played way too many
retro games” vibe, Perler bead earrings are about to become your new favorite craft. They’re bright, customizable,
surprisingly quick to make, and they bring the same joyful energy as your childhood bead-board masterpiecesexcept
now they can come with you to brunch.
This guide walks you through making sturdy, wearable Perler bead earrings (a.k.a. fuse bead earrings), from choosing
a pattern that won’t flop around like a sad pancake to attaching jump rings and hooks like you totally know what
“findings” are (you will, in about 10 minutes).
Why Perler Bead Earrings Hit the Nostalgia Sweet Spot
Perler beads are tiny plastic beads that fuse together when heated. That “melt just enough to stick, but not enough
to become modern art” quality makes them perfect for earrings: light, colorful, and crisp-edged like pixel art.
The best part? You can make a pair that screams 1999 without needing a time machinejust a pegboard and an iron.
Supplies You’ll Need (and What You Can Substitute)
The bead-and-fuse basics
- Perler beads (fuse beads): Any standard-sized fuse beads work. Try a mix of solids, neons, pastels, or glow beads.
- Pegboard: Small square, circle, or mini boards are ideal for earrings.
- Ironing paper: Perler ironing paper is made for this. Plain parchment paper also works well. Avoid wax paper.
- Household iron: Dry iron only (no steam).
Jewelry findings (the “make it wearable” parts)
- Jump rings: 4–6 mm jump rings are a sweet spot for most fuse bead holes. Choose thinner gauge if you want easier threading.
- Earring hooks: Fishhooks (classic), leverbacks (more secure), or huggie hoops (trendier).
- Optional extras: Small charms, extra jump rings for more swing, or earring backs for hooks that need them.
Tools that make everything easier
- Tweezers (optional but delightful): For placing beads preciselyespecially tiny corners.
- Two pairs of pliers: Chain-nose pliers are the go-to. Two pairs make opening/closing jump rings much cleaner.
- Heat-safe work surface: An ironing board, a folded towel on a table, or a heat-resistant mat.
- Something flat and heavy (optional): A ceramic tile, a book, or a cutting board to help your piece cool flat.
Pick a Pattern That Actually Works as an Earring
Not every adorable bead design wants to be jewelry. Earrings need to be light, balanced, and sized so they don’t
bump your jaw every time you laugh (which, ideally, is often).
Pattern rules that save you from earring chaos
- Keep it small-ish: 1–2 inches tall is comfortable for most people.
- Watch the weight: Large solid blocks of beads can pull on ears. Open shapes and simple icons are friendlier.
- Plan the hanging point: Decide which bead hole (usually a top corner bead) will hold the jump ring.
- Make a matched pair: Mirror designs look polished. “Close enough” looks like you got dressed in the dark (sometimes a vibe, not always).
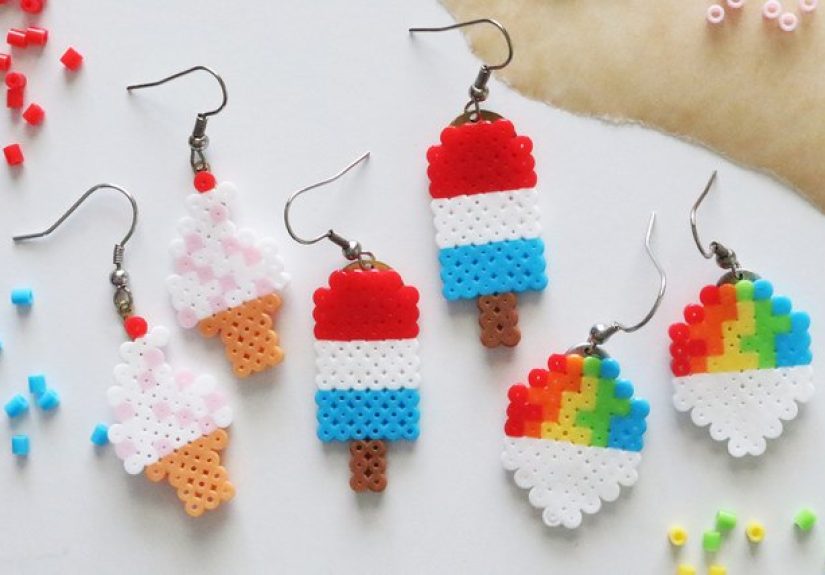
Easy starter ideas (nostalgia edition)
- Pixel hearts (classic, instantly recognizable)
- Stars, moons, and lightning bolts
- Smiley faces or “retro computer” icons
- Mini fruit (cherries, strawberries) with a single bead “stem”
- Mushrooms or tiny flowers
Step-by-Step: How to Make Perler Bead Earrings
You’re going to: build the design, fuse it, cool it flat, then attach hardware. That’s it. The only “advanced”
part is learning how to treat a jump ring like a door hinge instead of a tiny metal tantrum.
1) Build your design on the pegboard
- Place beads on the pegboard, following your pattern or freehanding it.
- Choose a bead at the top edge to be your “hanger bead” (where the jump ring will go).
- Double-check symmetry if you’re making a matched pair.
2) Set up your ironing station safely
- Preheat your iron to medium heat, and make sure steam is off.
- Work in a ventilated area if you can, and keep hands away from the hot iron (obvious, but worth saying).
- If kids are involved: ironing is an adult-only step.
3) Fuse the first side (the “don’t squash it” moment)
- Place ironing paper or parchment paper over the beads.
- Move the iron in gentle circles for about 20–40 seconds, depending on your iron and bead brand.
- Don’t press down hard. You’re encouraging the beads to melt together, not trying to flatten them into a plastic tortilla.
- Peek carefully: you want the beads to fuse while still keeping a visible center hole for easier jump-ring threading.
4) Flip and fuse the second side (for strength)
- Let the design cool briefly, then remove it from the pegboard with the paper helping you lift.
- Flip it over so the unfused side faces up.
- Cover again with paper and iron in the same gentle circular motion.
- Stop once it’s fused and stableagain, ideally with the bead holes still visible.
5) Cool it flat (your anti-warp insurance policy)
- While the piece is still warm, place it between two flat surfaces (paper on both sides), like a tile and a book.
- Let it cool completely before you move onthis helps prevent curling or warping.
6) Confirm your attachment point (a.k.a. “Where does the hook go?”)
The simplest method is to use the hole in a top corner bead. If your holes stayed open, you’re golden. If they
fused closed, you still have options:
- Option A (best): Reheat very briefly with paper on top, just enough to soften, then use a toothpick or skewer to gently reopen the hole. Let cool flat again.
- Option B (adult-only): Use a small hand drill or micro drill bit to create a hole near the top edge. Go slow to avoid cracking.
- Option C: Build a “loop” into the pattern by adding a small protruding bead at the top and keeping its hole open for the jump ring.
7) Attach jump rings and earring hooks
Here’s the jump ring secret that makes you look like you’ve been making jewelry forever: you twist jump rings
open sideways. You do not pull them apart like you’re opening a tiny bag of chips.
- Hold the jump ring with two pairs of pliersone on each side of the split.
- Twist one hand forward and the other back slightly (a sideways “door opening” motion).
- Slide the jump ring through the bead hole at the top of your design.
- Add the earring hook onto the jump ring (before closing).
- Twist the ring closed until the ends meet neatly. If needed, “over-close” a hair, then back to perfect alignment so it snaps shut.
8) Make the second earring and do a comfort check
- Compare both earrings side by side for matching size and melt level.
- Put them near your ear (no need to pierce-test immediately) and make sure they hang straight.
- If they tilt forward, add a second jump ring between the bead and hook to give it more swing and balance.
Pro Tips for Clean Lines and Earrings That Don’t Warp
- Use steady heat, not pressure: Heavy pressing can distort the bead holes and cause uneven melting.
- Move continuously: Leaving the iron in one spot can over-melt an area and create a lumpy edge.
- Double-sided fusing helps: Fusing both sides makes earrings sturdier and less likely to snap.
- Cool under something flat: Most “why is it curled?” problems are solved by better cooling habits.
- Choose jump ring size intentionally: If the ring wire is too thick, it won’t fit through the bead hole without forcing it (and forcing it is how crafts become crimes).
Comfort and Skin-Friendly Hardware (Because Ears Are Opinionated)
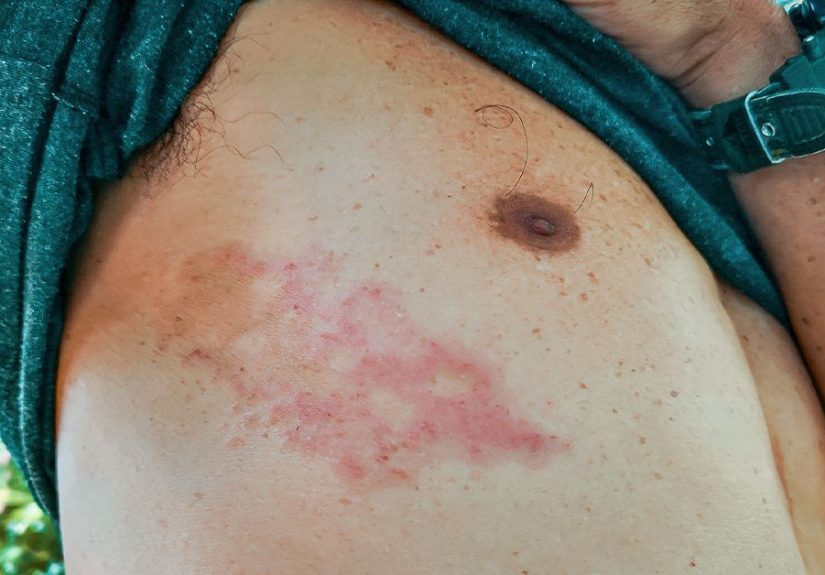
If you or your readers have sensitive ears, it’s smart to choose nickel-free hooks and findings. Nickel is a
common trigger for contact dermatitis in jewelry wearers. Safer bets often include surgical-grade stainless steel,
sterling silver, gold (higher karat), or other hypoallergenic options depending on sensitivity.
- Quick comfort upgrade: Switch from basic hooks to leverbacksthey’re secure and tend to move less.
- Clean new hooks: Wipe findings before wearing to remove oils or residue from manufacturing/packaging.
- Keep it lightweight: Even hypoallergenic hooks can feel irritating if the earring is heavy and tugging.
Troubleshooting: Fix Common Perler Earring Problems
“My beads didn’t fuse together.”
Your iron may be too cool, your ironing time too short, or your paper too thick/textured. Re-iron in gentle circles,
a little longer, without pressing hard.
“My holes disappeared and I can’t attach jump rings.”
You likely over-fused. Next time, stop when the beads are connected but the centers are still visible. For this pair,
try briefly reheating and gently reopening a hole, or use an adult-only micro drill method.
“My earrings are warped.”
Cooling is usually the culprit. Reheat lightly with paper, then cool flat under a tile or heavy book.
“The paper stuck to my beads.”
Let the piece cool fully, then peel slowly. If you used wax paper, switch immediatelywax can melt and stick under heat.
“My jump ring keeps gapping open.”
Make sure you’re twisting it closed until the ends meet flush. If you need extra security, use sturdier rings or a
slightly thicker gauge (as long as it still fits the bead hole).
Fun Variations: Take Your Perler Earrings Up a Level
- Double-jump-ring dangles: Add a second jump ring for extra movement and a more “finished” look.
- Charm mashups: Add a tiny charm below the bead design for a mixed-media vibe.
- Seasonal sets: Tiny pumpkins, snowflakes, or pastel eggseasy to batch-make as gifts.
- Mismatch intentionally: One heart + one lightning bolt can look artsy (and hides the fact you made them at 1 a.m.).
- Stud style (advanced): Glue a stud post to the back with a strong jewelry adhesive (follow product safety directions and allow full cure time).
Care and Storage
- Store flat in a small box or pouch so they don’t bend under pressure.
- Avoid heat (car dashboards are not jewelry storage).
- Wipe findings occasionally to keep hooks clean and comfortable.
- Don’t soak the bead portion in waterwipe with a barely damp cloth if needed.
Experience Notes: What You Learn After Making a Few Pairs (About )
The first time you make Perler bead earrings, you’ll probably think, “That was easy!”and you’ll be right. The second
time, you’ll notice the little details that turn “cute craft” into “people ask where you bought those.” A big one is
consistency. If one earring is fused slightly more than the other, they won’t match in shine, hole size, or stiffness.
The trick is to treat the pair like a tiny production line: build both, fuse both first sides, flip both, fuse both second
sides, cool both under the same flat weight. It sounds extra, but it takes almost no extra time and the results look
noticeably more polished.
You’ll also learn that warping is mostly a cooling problem, not an ironing problem. Yes, too much heat can curl edges,
but the real magic is how you cool the plastic. Cooling under a flat tile (with paper still on) is the difference between
crisp pixel art and a design that curves like it’s trying to become a potato chip. And if you ever do end up with a slight
curve, don’t paniclight reheating and a better cooling setup can often rescue it.
Another “experience-only” discovery: jump rings have personalities. Some open smoothly and close like they were born for
this moment. Others fight you and leave a tiny gap that will absolutely snag hair at the worst possible time. Using two
pairs of pliers is the easiest upgrade you can make; it gives you control and keeps rings round instead of turning them into
sad ovals. You’ll get a feel for sizes quickly, too: small rings look sleek, but if they’re too small (or too thick), they
won’t thread through the bead hole without forcing it. Slightly larger, thinner rings can be more beginner-friendly, especially
if you like leaving the bead holes more open for that classic Perler look.
Pattern-wise, you’ll start noticing what “wears well.” Designs with a centered hanging point tend to hang straight. Designs
that hang from a far corner can tilt unless you add a second jump ring or adjust the design so the top is balanced. This is
why hearts are such a gateway pattern: they’re symmetrical, they’re light, and they naturally offer a top bead hole that works
as an attachment point. Once you’ve made a few sets, you’ll probably start designing with “hanger beads” in mindplacing a
perfect top corner bead that stays open and strong.
Finally, you’ll learn the most important truth of nostalgic crafting: once you make one pair that turns out great, you will
suddenly need seven more pairs “for gifting.” (And by gifting, you may mean gifting to yourself, repeatedly.) The good news is
that Perler bead earrings are one of the rare crafts that reward repetition: the more you make, the faster you get, and the
cleaner your results becomeuntil you’re casually batch-making pixel cherries like it’s your side hustle.