Table of Contents >> Show >> Hide
- What Exactly Is a Thai Triangle Cushion?
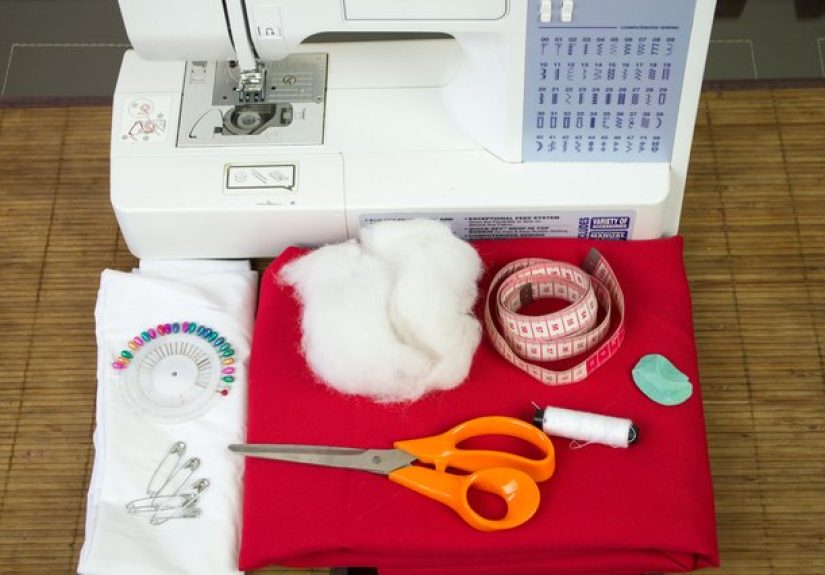
- Materials and Tools
- Planning the Size: The “Classic Ten-Triangle” Layout
- Cut List (A Reliable Starting Pattern)
- Step-by-Step: How to Sew Thai Triangle Cushion Segments
- Stuffing for That “Real Thai Cushion” Firmness
- Close the Open Ends Neatly
- Assemble the Thai Triangle Cushion: The 4–3–2–1 Stack
- Design Upgrades That Make It Look Store-Bought
- Care and Cleaning
- Common Mistakes (and How to Avoid Them)
- Quick FAQ
- Experience Notes: What DIY Makers Learn After the First Triangle (500+ Words)
- SEO Tags
A Thai triangle cushion is the kind of floor seating that looks like it belongs in a serene meditation studioyet somehow ends up
being the most fought-over spot during movie night. It’s sturdy, supportive, foldable, and oddly good at making you feel like you
have your life together (even if you’re eating popcorn in sweatpants).
Traditionally, Thai triangle cushions (often sold as Thai triangle pillows) are made from a series of stuffed triangular “tubes”
that stack into a wedge. The magic is in the geometry: multiple firm segments distribute pressure so your back and shoulders don’t
sink into a sad pancake. In this guide, you’ll build a classic 10-segment cushion and learn how to customize size, firmness, fabric,
and finishing details so it’s actually practical for real life.
What Exactly Is a Thai Triangle Cushion?
Think of it as a modular floor lounger. Instead of one big pillow, it’s a stack of stuffed triangular segments stitched together
into rows. When arranged into the signature wedge, it works as a supportive backrest for meditation, reading, low dining, stretching,
or “I’m just going to lie down for five minutes” naps that turn into a full reboot.
The classic build uses ten separate triangular cushions assembled into four rows (4–3–2–1). Each segment is a long
fabric tube capped at the ends, stuffed until firm, then secured into the stacked shape.
Materials and Tools
Fabric (choose tough, not fussy)
- Canvas, duck cloth, upholstery cotton, or sturdy quilting cotton are great starters.
- If you want a more traditional vibe, choose a bold stripe or geometric printThai cushions are not known for being shy.
- Prewash and dry your fabric so your cushion doesn’t “shrink-fit” itself later.
Stuffing (firm is the goal)
- Polyester fiberfill: easy to find, budget-friendly, and washable. Pack it tight for firmness.
- Batting (poly or cotton): can be rolled and tightly stuffed for a denser feel.
- Kapok: traditional plant fiber; springy, light, and firm when packed. (It can be messycontain it well.)
- Foam (optional): great if you want consistent firmness, but cutting triangles is more work than stuffing fiber.
Tools
- Sewing machine (strong needle recommended: size 14/90 or 16/100 for heavy fabric)
- Thread (polyester is durable for upholstery-style projects)
- Fabric scissors or rotary cutter + mat
- Measuring tape, ruler, chalk or fabric marker
- Pins or clips
- Hand-sewing needle (for end caps and finishing)
- A stuffing tool (dowel, ruler, or the handle of a wooden spoon)
Planning the Size: The “Classic Ten-Triangle” Layout
A common DIY-friendly version uses long, narrow rectangles sewn together into tubes, then capped with triangles. One well-known
approach uses three rectangles per tube, making ten tubes total. The final wedge is assembled into four rows:
- Bottom row: 4 triangles
- Second row: 3 triangles
- Third row: 2 triangles
- Top row: 1 triangle
You can scale this up or down, but keep the row math consistent. If you change the width of each tube, you must also redraw the
triangular end caps to match. (Geometry is petty like that.)
Cut List (A Reliable Starting Pattern)
This cut list creates 10 triangular tubes that assemble into the 4–3–2–1 wedge.
Adjust seam allowances and lengths as needed for your fabric width and preferred size.
Rectangle pieces (for the tube bodies)
- 30 rectangles at approximately 6″ × 28″ each
- These will be sewn in groups of three to create 10 long panels.
Triangle end caps
- 20 triangle pieces sized to match the tube width (around 5.5″–6″ tall, with a base that matches your tube width).
- Make a paper template first. Your triangle’s base should align with the tube’s opening after seams.
Practical tip: If you change the rectangle width (say from 6″ to 7″), redraw the triangle end cap so the base
matches the tube opening. This prevents puckers, gaps, and the emotional damage of unpicking seams at midnight.
Step-by-Step: How to Sew Thai Triangle Cushion Segments
Step 1: Mark and cut cleanly
- Lay fabric flat and square the edge (a clean straight edge makes everything easier later).
- Mark rectangles and triangle caps with chalk or a fabric-safe marker.
- Cut accuratelysmall inconsistencies add up when you’re stacking ten pieces.
Step 2: Sew rectangles into long panels
- Group rectangles into sets of three.
- Place two rectangles right sides together and sew along the long edge using a 1/2″ seam allowance.
- Add the third rectangle to the chain, creating one long strip.
- Repeat until you have 10 long strips.
- Press seams open or to one side for strength and a flatter finish.
Step 3: Form each strip into a tube
- Fold each long strip lengthwise, right sides together.
- Sew the long edge to create a long tube.
- Reinforce: backstitch at the beginning and end (these seams take stress).
- Turn the tube right side out.
Step 4: Attach the first triangle end cap
- Pin (or clip) a triangle end cap to one end of the tube, right sides together.
- Sew slowly around the edge, easing fabric as needed.
- If the fit is slightly off, adjust your triangle template before repeating nine more times.
Step 5: Repeatleave one end open
Cap one end of each tube fully. Leave the other end open so you can stuff it. You’ll cap the open ends after stuffing.
Stuffing for That “Real Thai Cushion” Firmness
The difference between “supportive floor lounger” and “sad beanbag” is stuffing density. Thai triangle cushions are known for being
firm. Overstuffing is not a mistake hereit’s the mission.
How to stuff without losing your sanity
- Work in small handfuls. Push stuffing down with a dowel or spoon handle.
- Pack corners first, then fill the center.
- Every few handfuls, compress the tube by squeezing along its length to distribute fill evenly.
- Stop when the tube is firm to the touch and holds its triangular shape well.
Stuffing options, realistically
- Fiberfill: easiest; pack it tight. Expect it to soften slightly over time.
- Batting rolls: very firm when compressed; great for that structured feel.
- Kapok: traditional and springy; use an inner liner if you want less fiber escape over time.
Pro move: If you want washable covers, make each triangular tube as a removable cover with an inner “stuffing sleeve.”
That’s extra workbut it’s also future-you saying “thank you” instead of “why did I do this?”
Close the Open Ends Neatly
- Pin the second triangle end cap onto the open end.
- Hand-stitch (or machine stitch carefully) to close, keeping the seam tight and durable.
- Reinforce the last inch with extra stitchingthis area is under pressure from firm stuffing.
If your end cap looks slightly wobbly, it will improve once it’s stacked and stitched into the final shape. (Also: nobody’s grading
your triangle symmetry. Your cushion is not applying for college.)
Assemble the Thai Triangle Cushion: The 4–3–2–1 Stack
Now comes the satisfying part: turning ten independent triangles into one iconic wedge. Lay the triangles on a large flat surface.
Step 1: Arrange the base row
- Place four triangles in a row.
- Alternate the direction of the tips (one “up,” one “down”) so the shapes nest together more securely.
Step 2: Build upward
- Second row: place three triangles above the base, aligned and nested.
- Third row: place two triangles above that.
- Top row: place one triangle at the peak.
Step 3: Stitch rows together
Hand-stitch the triangles together at the ends where they touch. Use strong thread and tight stitches; you’re basically building a
soft sculpture that will be leaned on, dragged around, and occasionally used as a throne by a pet who pays zero rent.
Optional: Add ties for fold-and-store convenience
- Sew fabric ties or webbing straps along the sides so you can cinch it closed when folded.
- Add a handle on the back or side for easy carrying.
Design Upgrades That Make It Look Store-Bought
Piping or contrast binding
Adding piping along triangle edges makes the cushion look sharper and helps seams hold their shape. If piping feels like “advanced
sewing sorcery,” start with a simple contrast binding strip.
Inner lining (highly recommended for kapok)
If you’re using kapok, an inner muslin liner reduces fiber migration and makes future restuffing less chaotic.
Fabric strategy: hide wear where it happens
- Use darker fabric or busier patterns on the base row (it sees the most friction).
- Use a lighter accent on the top triangle to draw the eye upward.
Care and Cleaning
- Spot clean the cushion with mild soap and a damp cloth for everyday mess.
- If your cushion is stuffed and sealed permanently, avoid soaking itdense stuffing takes forever to dry.
- If you want truly washable care, build removable covers with zippers or envelope closures (more work, more reward).
Common Mistakes (and How to Avoid Them)
1) Understuffing
If it feels “squishy” like a throw pillow, it won’t support your back. Pack stuffing until it’s firm, especially at the ends and edges.
2) Triangle end caps that don’t match the tube
Draft a paper template and test on one tube first. A slightly oversized cap is easier to ease in than one that’s too small.
3) Weak seams on heavy fabric
Use strong thread, a longer stitch length for thick fabric, and reinforce stress points. Press seams so they lie flat and behave.
4) Skipping alignment during assembly
Before stitching the rows, step back and look at the wedge. Adjust for straightness nowstitches later are not as forgiving as your optimism.
Quick FAQ
Is this a beginner project?
Confident beginner to intermediate is a fair label. The shapes are simple, but there are many repeated steps, and the stuffing requires patience.
How much fabric do I really need?
It depends on fabric width, pattern direction, and whether you add a lining. A generous estimate (like around 10 yards in some patterns)
gives room for repeats, mistakes, and the occasional “I cut it upside down” moment.
Can I make it smaller?
Yesreduce rectangle length for a shorter wedge or reduce rectangle width for slimmer tubes. Just keep the triangle end caps matched to the tube opening.
Experience Notes: What DIY Makers Learn After the First Triangle (500+ Words)
The funny thing about making a Thai triangle cushion is that the first segment feels like a normal sewing projectcut, stitch, turn,
stuff, repeat. Then you hit triangle number three and realize you’re not making a pillow; you’re training for a very cozy marathon.
Makers who finish one of these almost always report the same “aha” moments, and knowing them upfront can save you a lot of rework.
First: stuffing is not a single stepit’s a skill. In the beginning, it’s tempting to grab big handfuls of fiberfill
and shove them in like you’re trying to pack a sleeping bag into its tiny pouch. That usually creates uneven lumps and hollow pockets.
The segments feel firm in one spot and floppy in another. The fix is surprisingly simple: use smaller handfuls, push them down with a
tool, and “massage” the tube along its length every few minutes to redistribute fill. A lot of makers also find it helps to stuff in
stagesfill halfway, compress and shape the triangle, then top it off and compress again. The goal is not “full,” it’s “consistent.”
Second: your seams are doing more work than you think. A Thai triangle cushion is meant to be leaned on. That means
the seams at the end caps and the long seam that forms the tube are constantly under tension. People who’ve made floor cushions before
often choose stronger thread, reinforce the start/stop points, and avoid tiny stitch lengths that can perforate heavy fabric. Another
real-world trick: pressing seams isn’t just for neatness. Pressing reduces bulk and helps the tube turn smoothly, which makes your
triangles cleaner and easier to assemble.
Third: alignment during stacking is the difference between “artisan” and “awkward.” When you lay out the 4–3–2–1 shape,
the wedge should look stable without you forcing it. If one triangle is slightly longer, or one row doesn’t nest well, the final
cushion can twist or lean to one side. Makers who get a polished result usually do a “dry layout” before stitching anything: place all
ten triangles, alternate the direction of the points, nudge the rows into a clean wedge, and only then pin and stitch. This step feels
slow, but it prevents the kind of crooked wedge that looks like it’s permanently shrugging.
Fourth: fabric choice changes the entire personality of the cushion. Quilting cotton looks great, but if it’s thin,
it can wear faster at the baseespecially if you use the cushion on rough flooring or outdoors. People who want a long-lasting cushion
often choose canvas or duck cloth, or they add a tougher fabric for the base row. Pattern scale matters, too: narrow stripes can make
crooked seams more noticeable, while busy prints are more forgiving. (This is not “cheating.” This is “design.”)
Finally: the project gets easier after the first successful segment. Once you’ve sewn and capped one triangle and it
looks right, you’ve basically created a template for the other nine. Many makers keep that first triangle nearby as a reference for
stuffing firmness and seam shape, which helps keep the whole cushion consistent. The end result is a cushion that feels supportive,
looks intentional, and becomes the one seat everyone gravitates tobecause it’s comfy, it’s cool, and it silently announces:
“Yes, someone here knows how to sew a triangle on purpose.”