Table of Contents >> Show >> Hide
- What You’ll Need (No Fancy Detail Shop Required)
- Before You Start: Identify the Surface (This Changes Everything)
- The Safest Method for Most Stickers: Heat, Lift, Peel, Clean
- Quick Decision Guide: Match the Method to the Sticker
- Easy Ways to Remove Sticker Residue From Car Paint
- Removing Stickers From Car Windows (Glass Tips)
- How to Remove Old Stickers That Shred Into Tiny Pieces
- What About “Ghosting” or a Sticker Outline That Won’t Go Away?
- Big Mistakes to Avoid (A.K.A. How People Accidentally Ruin a Saturday)
- Special Cases: Decals, Wraps, and Plastics
- When You Should Call a Pro
- FAQ: Sticker Removal Questions People Google at 11:47 PM
- Real-Life Experiences and “Yep, I’ve Seen That” Moments (Extra Tips That Make It Easier)
- Conclusion
Stickers on cars are a little like glitter: they seem harmless until you try to remove them and discover they’ve formed a
long-term relationship with your paint. Whether it’s an old bumper sticker, a dealership logo, a parking permit, or that
“I Brake for Tacos” phase you’ve outgrown, you can get it off without wrecking your finishif you use the right method and
a little patience.
This guide walks you through safe, practical ways to remove stickers from a car, lift stubborn adhesive residue,
and avoid common mistakes that cause scratches, haze, or “ghost outlines.” You’ll also find surface-specific tips for
painted panels, glass, plastic trim, and newer vinyl decals.
What You’ll Need (No Fancy Detail Shop Required)
You can do most car sticker removal with basic tools. If you’re a teen, ask a parent/guardian to helpheat and
cleaning chemicals should always be handled carefully.
Basic kit
- Car wash soap and water
- Microfiber towels (a fewsticky jobs get messy)
- A plastic scraper or plastic razor blade (not metal)
- A hair dryer (safer than a heat gun for beginners)
- Automotive-safe adhesive remover (or isopropyl/rubbing alcohol)
- Spray bottle of water or quick detailer (for lubrication and wipe-down)
Optional “upgrade” items
- Clay bar (or clay mitt) to pick up leftover contamination after the glue is gone
- Light polish and applicator pad (for restoring gloss or reducing sticker “shadowing”)
- Wax or paint sealant to re-protect the area
Before You Start: Identify the Surface (This Changes Everything)
The best way to remove bumper stickers depends on where they’re stuck:
- Painted panels (clear coat): Use heat + gentle lifting + paint-safe solvent. Avoid metal blades and harsh chemicals.
- Glass (windows/windshield): You can use more direct scraping tools, but only with proper lubrication and care.
- Plastic trim: Extra cautionsome solvents can discolor trim or leave shiny spots.
- Vinyl decals (large graphics): Usually peel best with steady heat and slow, low-angle pulling.
Also consider age. Fresh stickers usually peel clean. Older stickers have “baked” adhesive that turns into a sticky, dusty
science experimentmeaning you’ll likely need both heat and an adhesive remover.
The Safest Method for Most Stickers: Heat, Lift, Peel, Clean
If you want a reliable, low-risk approach for sticker residue removal on paint, start here.
Step 1: Wash the area first
Dirt acts like sandpaper. A quick wash keeps you from grinding grit into the clear coat while you peel and wipe.
Dry the panel so your adhesive remover can work properly.
Step 2: Warm the sticker to soften the adhesive
Use a hair dryer on a warm setting and move it back and forth. You’re not trying to cook the paintjust gently soften the
glue so the sticker releases. If the sticker starts peeling more easily, you’re in the right zone.
Step 3: Lift an edge (gently)
Use a plastic scraper, an old plastic card, or your fingernail to lift a corner. Avoid metal blades on paintone tiny slip
can leave a permanent scratch.
Step 4: Peel slowly at a low angle
Pull the sticker back over itself (low angle) rather than straight out. This keeps stress on the adhesive layer and reduces
the chance of ripping the sticker into confetti. If it tears, reheat and continue.
Step 5: Remove leftover adhesive (don’t just “scrub harder”)
Sticky residue is normal. Apply a small amount of an automotive-safe adhesive remover to a microfiber towel (or use rubbing alcohol).
Let it dwell briefly, then wipe gently. Repeat rather than using brute force.
Step 6: Wash again and re-protect
Most solvents remove wax. Once the area is clean, wash or wipe with car-safe soap/water, dry, then apply wax or sealant to
restore protection and even out the finish.
Quick Decision Guide: Match the Method to the Sticker
| Sticker Type | Best First Move | Residue Cleanup | Watch Out For |
|---|---|---|---|
| Bumper sticker (paper/vinyl) | Hair dryer + slow peel | Adhesive remover or rubbing alcohol | Scrubbing with rough towels |
| Dealership decal / badge sticker | Heat + plastic lift tool | Paint-safe adhesive remover | Ghost outline from UV fade |
| Window permit / parking sticker | Soak/heat as needed | Glass-safe remover | Scraping dry glass (can scratch) |
| Large vinyl decal | Steady heat + low-angle pull | Adhesive remover + microfiber | Overheating or yanking fast |
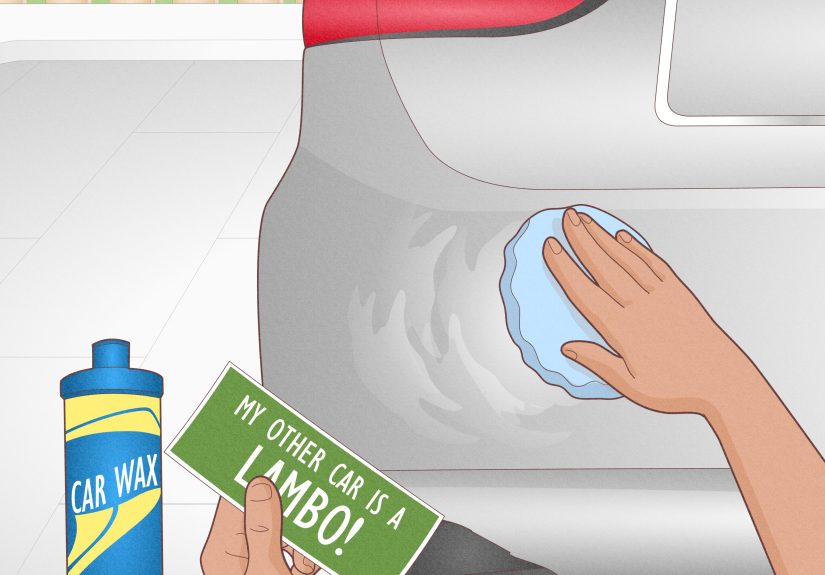
Easy Ways to Remove Sticker Residue From Car Paint
Once the sticker is gone, the real villain often remains: the sticky glue layer that grabs dust and feels like old tape.
Here are paint-friendlier options.
Option A: Automotive adhesive remover (best all-around)
Products labeled for automotive finishes are designed to dissolve adhesive without attacking clear coat when used correctly.
Apply to a microfiber towel, work a small area, and wipe clean. Always follow label directions and test a small spot first.
Option B: Rubbing alcohol (great for light residue)
Isopropyl alcohol can break down mild adhesive. It’s especially handy for “sticky fingerprints” left after peeling.
Use gentle passes and don’t soak plastic trim. Afterward, re-wax the area since alcohol can strip protection.
Option C: Warm soapy water (surprisingly helpful)
If you’re dealing with a thin residue film (or you want the mildest option), warm water with car wash soap can help soften
adhesiveespecially on glass or smooth surfaces. It may take more time, but it’s low risk.
Option D: Citrus-based tar/bug removers (for stubborn grime + glue)
Some bug-and-tar removers also cut through adhesive and road film. Use sparingly, wipe gently, and rinse or wash after to
avoid leaving an oily layer that attracts dust.
Removing Stickers From Car Windows (Glass Tips)
Glass is tougher than paint, but it still deserves respect. The two keys are lubrication and controlled scraping.
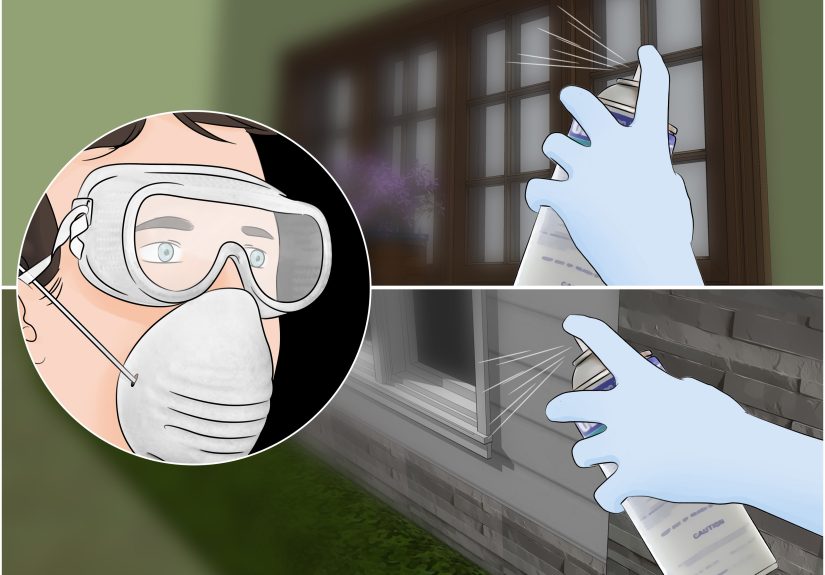
If you use a blade, ask an adult for helpsharp tools can cause injuries and can scratch glass if used incorrectly.
Glass-safe approach
- Soak the sticker with warm soapy water or a glass-safe adhesive remover.
- Let it sit until the sticker softens.
- Use a plastic scraper first; if needed, carefully use a razor scraper at a shallow angle with plenty of lubrication.
- Wipe clean with glass cleaner and a microfiber towel.
Pro move: if the sticker is inside the window, work from the inside (obviously). You’ll get better control, and you won’t be
fighting weather or wind.
How to Remove Old Stickers That Shred Into Tiny Pieces
Old stickers love to tear. That’s not a personality flawit’s what sun and time do to vinyl and paper. If your sticker
breaks into confetti:
- Use more heat, not more force. Gentle heat makes the adhesive pliable and reduces shredding.
- Work in small sections. Lift a little, peel a little, reheat, repeat.
- Don’t pick with sharp objects. That’s how clear coat gets scratched.
- Switch to adhesive remover sooner. Sometimes dissolving the glue underneath is faster than peeling.
What About “Ghosting” or a Sticker Outline That Won’t Go Away?
If the sticker comes off but you still see a faint outline, you may be dealing with one of two things:
1) Leftover adhesive film
This feels tacky or slightly rough. Try another pass of paint-safe adhesive remover, then wash and dry.
A clay bar can also help remove what your towel can’t grab.
2) Paint mismatch from UV exposure
This is the classic “tan line.” The paint around the sticker faded in the sun, while the paint under the sticker stayed darker.
Mild polishing can reduce the contrast, but sometimes it takes professional correction to fully blendespecially on older paint.
Big Mistakes to Avoid (A.K.A. How People Accidentally Ruin a Saturday)
- Using metal blades on paint: One slip can scratch clear coat instantly.
- Overheating the panel: Too much heat can damage clear coat or soften trim.
- Dry wiping adhesive: Rubbing sticky residue without lubricant can cause micro-scratches and haze.
- Using harsh solvents not meant for paint: Some chemicals can dull, stain, or weaken the finish.
- Skipping protection after: Once wax is stripped, the area is more vulnerable to water spots and oxidation.
Special Cases: Decals, Wraps, and Plastics
Vinyl decals (larger graphics)
Vinyl usually behaves best with consistent warmth and a slow pull. If you pull too fast, it tears; if you pull straight out,
it leaves more glue. Warm, peel low, clean residue, then wash and protect.
Car wraps (protective vinyl film)
If the sticker is on a wrap, be extra careful. Some removers and aggressive rubbing can haze the wrap or lift edges.
Start with the mildest method (warm soapy water, gentle heat, wrap-safe cleaner), and stop if the wrap starts lifting.
Plastic trim and textured bumpers
Textured plastic holds adhesive in tiny pores. Use a trim-safe product and a soft brush if needed.
Avoid strong solvents that can discolor plastic. When in doubt, a professional detailer can save you from “permanent shiny spot syndrome.”
When You Should Call a Pro
Most sticker jobs are DIY-friendly. But consider a pro detailer if:
- The sticker is huge and brittle (fleet decals, old racing numbers)
- You see heavy ghosting that won’t polish out with light products
- The car has repainted panels (some aftermarket paint can be more sensitive)
- The sticker sits on delicate trim, a wrap, or a custom finish
FAQ: Sticker Removal Questions People Google at 11:47 PM
Will rubbing alcohol damage car paint?
Used carefully, rubbing alcohol is commonly used for light adhesive cleanup, but it can strip wax or sealant. Use small amounts,
avoid soaking, and re-protect the paint afterward.
Do I need a heat gun?
Not usually. A hair dryer is often enough and is easier to control. Heat guns can work faster, but they raise the risk of overheating.
How long does sticker removal take?
Fresh stickers can take minutes. Old, sun-baked stickers can take longer because you’re peeling slowly, reheating, and repeating
adhesive-removal steps. The good news: patience is cheaper than repainting.
What’s the safest “one-two punch” method?
Wash → warm with a hair dryer → peel low and slow → dissolve residue with an automotive adhesive remover → wash and wax.
It’s boring, reliable, and very kind to your clear coat.
Real-Life Experiences and “Yep, I’ve Seen That” Moments (Extra Tips That Make It Easier)
This part is the human side of how to remove stickers from your carthe little situations that don’t show up on the label
of an adhesive remover but absolutely show up in real driveways.
The “New-to-Me Car, Old-to-Them Dealership Sticker” situation
A common experience: you buy a used car, love everything… except the giant dealership decal basically yelling someone else’s
marketing slogan from your trunk. People often try to peel it cold, and it comes off like a flaky sunburntiny bits, tons of glue,
and growing regret. The smoother path is almost always heat first. Once the adhesive softens, the sticker lifts more cleanly, and you
spend your time wiping residue instead of picking at a corner like it’s a stubborn hangnail. Afterward, many people notice the paint looks
“different” where the sticker was. That’s not always leftover glue; sometimes it’s a real paint-fade mismatch from sun exposure.
A light polish can help blend it, but expectations matter: a sticker can act like sunscreen for your paint, and the surrounding area may have
tanned for years.
The “My Kid Put a Sticker There… Three Summers Ago” surprise
Another relatable moment: a cute sticker that wasn’t a big dealuntil time passed, weather happened, and the sticker turned into a brittle,
cracked relic. People often report the sticker crumbling into little shards as soon as they touch it. The trick here is to stop thinking of
it as “peeling a sticker” and start thinking of it as “softening glue in layers.” Warm it, lift a small area, peel what you can, then switch
to adhesive remover for the crusty leftovers. This is also where microfiber towels earn their paycheck: paper towels can drag and leave lint,
and when you’re already annoyed, lint feels personal.
The “I Scraped It and Now It’s Hazy” lesson
Many people learn the hard way that aggressive rubbing can dull the finish. It usually happens when someone tries to remove sticky residue by
scrubbing dry, or by using a rough cloth that’s fine for kitchen counters but not fine for automotive clear coat. The fix is usually gentle:
re-clean the area properly (so you’re not rubbing grit), then use a mild polish to restore gloss. It’s a good reminder that paint is tough,
but it’s also a layered systemclear coat can get micro-scratches that show up as haze in direct sun. Slow and lubricated beats fast and furious.
The “Sticker on Plastic Trim = Why Is It Shiny Now?” mystery
Plastic trim is the wildcard. People often use a strong cleaner meant for paint, and afterward the trim looks permanently glossy or slightly discolored.
That’s why trim-safe products (and spot testing) matter. A safer pattern is to start mild, let the product do the work, and avoid saturating textured
plastic. If residue sits in the texture, a soft brush with a trim-safe cleaner can help lift it without turning the trim into a weird shiny patch that
doesn’t match the rest of the bumper.
The “It’s Cold Outside and Nothing Is Working” reality
Temperature matters. In cold weather, adhesive is stiffer and more likely to tear. People often notice sticker removal suddenly becomes ten times harder
when the panel is cold. If you can, work in a garage or pick a warmer part of the day. Even warming the sticker with a hair dryer helps, because you’re
changing the behavior of the adhesivenot your patience level (although that helps too). When you’re done, that final wash and a quick coat of wax or sealant
is what makes the area look “finished,” not just “sticker-free.”
Conclusion
If you remember just one thing, make it this: the easiest way to remove stickers from your car is to work with the adhesive, not against it.
Gentle heat softens the glue, plastic tools protect your paint, and paint-safe removers dissolve residue without turning your clear coat into a scratchy mess.
Finish with a wash and protection, and your car will look like the sticker never existedno drama, no damage, and no mysterious sticky rectangle collecting dust.