Table of Contents >> Show >> Hide
- What an Ignition Coil Actually Does
- Signs You May Need to Replace an Ignition Coil
- Confirm the Problem Before Replacing Anything
- Tools and Supplies You May Need
- How to Replace an Ignition Coil: Step-by-Step
- Step 1: Park safely and let the engine cool
- Step 2: Open the hood and locate the ignition coil
- Step 3: Disconnect the electrical connector
- Step 4: Clean around the coil area
- Step 5: Remove the retaining bolt or fastener
- Step 6: Pull the coil straight up
- Step 7: Inspect the old coil and spark plug tube
- Step 8: Inspect or replace the spark plug if needed
- Step 9: Prepare the new ignition coil
- Step 10: Install the new coil
- Step 11: Reconnect the electrical connector
- Step 12: Reassemble and test the repair
- Should You Replace Just One Ignition Coil or All of Them?
- Common Mistakes to Avoid
- When This Job Is Better Left to a Professional
- Final Thoughts
- Real-World Experiences and Lessons From Ignition Coil Replacements
- SEO Tags
If your car is idling like it just drank three espressos, stumbling under acceleration, or flashing the check engine light like it is trying to send Morse code, a bad ignition coil may be the culprit. The good news? On many modern vehicles, replacing an ignition coil is one of the more approachable DIY repairs. The bad news? It is also one of the easiest jobs to do sloppily if you rush, yank connectors like a maniac, or assume every misfire automatically means “new coil time.”
This guide walks you through how to replace an ignition coil the smart way: safely, cleanly, and without creating three new problems while solving one old one. We will cover symptoms, tools, step-by-step replacement, common mistakes, and a few real-world lessons that only show up after your hands are already dirty.
What an Ignition Coil Actually Does
An ignition coil is a transformer that boosts your vehicle’s low battery voltage into the high voltage needed to fire the spark plug. That spark ignites the air-fuel mixture inside the cylinder. No spark, no proper combustion. Weak spark, weak performance. Wrong timing or inconsistent spark, and your engine starts acting like it forgot how to be an engine.
Many modern cars use a coil-on-plug design, which means each cylinder has its own ignition coil mounted directly over the spark plug. Older vehicles may use coil packs or a different ignition layout, but the basic principle is the same: the coil helps create the spark that keeps your engine running smoothly.
Signs You May Need to Replace an Ignition Coil
Before you grab a ratchet and declare war on the nearest engine cover, make sure the ignition coil is actually the problem. A failing coil can cause symptoms that overlap with bad spark plugs, wiring issues, fuel injector problems, and vacuum leaks.
Common bad ignition coil symptoms
- Rough idle
- Engine misfire
- Hesitation or jerking during acceleration
- Reduced fuel economy
- Hard starting or no-start condition
- Loss of power
- Illuminated or flashing check engine light
- Backfiring in some cases
If the check engine light is flashing, do not keep driving around like nothing is wrong. A flashing light can point to an active misfire severe enough to damage the catalytic converter. Translation: ignore it long enough and your “simple coil problem” can become a “why is this repair bill trying to ruin my week?” problem.
Confirm the Problem Before Replacing Anything
The best DIY repairs start with diagnosis, not guesswork. Replacing a coil without confirming the fault is how people end up with a new part, the same misfire, and a fresh batch of frustration.
Helpful ways to confirm a faulty ignition coil
- Scan for trouble codes. A code such as P0301 through P0308 can point to a misfire on a specific cylinder. Some vehicles may also set coil circuit codes in the P035x range.
- Inspect the coil and connector. Look for cracks, melted plastic, corrosion, oil contamination, or damaged wiring.
- Check the spark plug. A worn spark plug can overload a coil and create similar symptoms.
- Swap-test when appropriate. On coil-on-plug engines, some DIYers move the suspected bad coil to another cylinder and see if the misfire code follows it. If the misfire moves, the coil is likely faulty.
If you discover worn spark plugs at the same time, do not shrug and reinstall them like tiny chaos goblins. Old plugs can contribute to coil failure, so replacing both the bad coil and overdue plugs is often the smarter repair.
Tools and Supplies You May Need
- Vehicle-specific repair information
- OBD-II scanner
- Socket set and ratchet
- Torque wrench
- Screwdrivers or trim tools
- Needle-nose pliers in some cases
- Safety glasses and gloves
- Replacement ignition coil
- Dielectric grease if recommended for the boot
- New spark plugs, if they are due
- Clean rag or compressed air
Not every vehicle needs every item on this list. Some engines give you beautiful, wide-open access. Others bury coils under intake plumbing, covers, or accessories like they are protecting state secrets. Check your vehicle-specific procedure before starting.
How to Replace an Ignition Coil: Step-by-Step
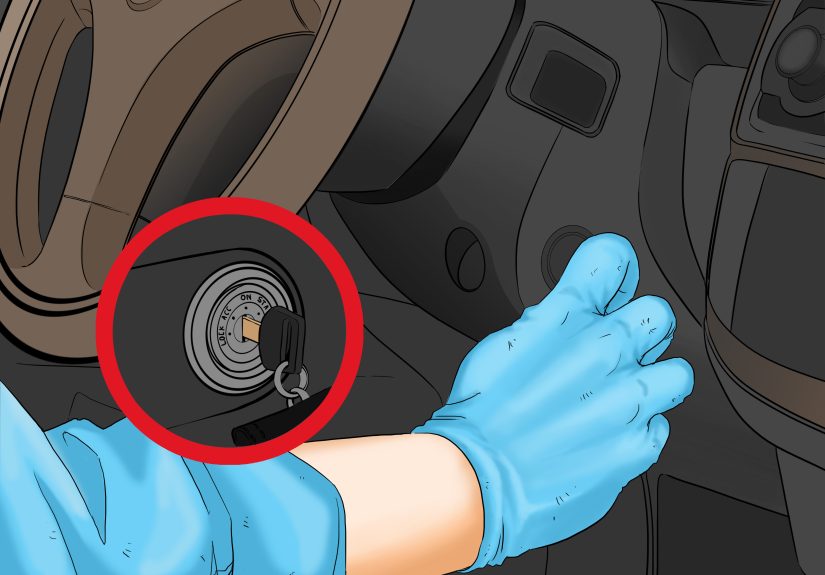
Step 1: Park safely and let the engine cool
Park on a level surface, set the parking brake, and shut the engine off. Let the engine cool fully before working around ignition components. Hot aluminum, hot plastic, and hot hands do not mix well.
Step 2: Open the hood and locate the ignition coil
Remove any plastic engine cover if necessary. On a coil-on-plug engine, the coils are typically mounted on top of the valve cover, one per cylinder. If you are working from a misfire code, identify the cylinder in question before removing anything.
Step 3: Disconnect the electrical connector
Press the lock tab and gently unplug the connector from the coil. Do not pull on the wiring harness itself. If the connector is stubborn, use a small pick or trim tool carefully. “Carefully” is doing a lot of work here, because brittle plastic clips love to snap when they feel disrespected.
Step 4: Clean around the coil area
Before removing the coil, wipe or blow away dirt and debris around the base. This helps prevent junk from falling into the spark plug tube once the coil is out. A tiny bit of grit in the wrong place can turn a quick repair into an annoying repeat job.
Step 5: Remove the retaining bolt or fastener
Most coil-on-plug units are held in place with a single bolt. Remove it with the proper socket and set it aside somewhere safe. “Somewhere safe” does not mean balanced on the radiator support like a tiny metal dare.
Step 6: Pull the coil straight up
Grip the coil body, twist gently if needed, and pull upward. Some boots stick tightly to the spark plug, especially on older engines. Use smooth, steady force rather than violent tugging. If the boot tears, you may need to replace the boot as well.
Step 7: Inspect the old coil and spark plug tube
Look for oil in the spark plug well, a cracked boot, carbon tracking, corrosion, or signs of arcing. If you find oil, the problem may include a leaking valve cover gasket. Replacing the coil without addressing oil contamination may only buy you a temporary victory lap.
Step 8: Inspect or replace the spark plug if needed
If the spark plug is overdue, fouled, damaged, or questionable, now is the time to replace it. Many coil failures live next door to worn spark plugs. Skipping plug inspection is like replacing one sneaker and wondering why running still feels weird.
Step 9: Prepare the new ignition coil
Compare the new coil to the old one. Make sure the connector, boot length, mounting point, and overall design match. If your repair information or the part maker recommends a small amount of dielectric grease inside the boot, apply only a thin film. More is not better. You are lubricating and sealing, not frosting a cupcake.
Step 10: Install the new coil
Slide the new coil straight onto the spark plug until it seats fully. Reinstall the retaining bolt and tighten it to the manufacturer’s specification. Do not over-tighten. Small fasteners threaded into aluminum are very good at becoming expensive life lessons.
Step 11: Reconnect the electrical connector
Push the connector back on until it clicks securely into place. Give it a light tug to confirm it is latched. Loose connectors can mimic bad parts, and nobody enjoys re-diagnosing a repair because a plug was half-connected.
Step 12: Reassemble and test the repair
Reinstall any covers or intake pieces you removed. Start the engine and listen for a smooth idle. If you used a scan tool, clear the trouble codes and take a short test drive. Watch for improved throttle response, smoother idle, and no returning misfire codes.
Should You Replace Just One Ignition Coil or All of Them?
This is the question that starts arguments in garages and group chats everywhere. The honest answer is: it depends.
If only one coil has clearly failed and the others are not especially old, replacing just the bad coil is often reasonable. But if your vehicle has high mileage, multiple original coils, or a pattern of repeated coil failures, replacing the full set may save time and repeat labor later. Some parts suppliers even package matched multipacks for this reason.
A practical middle ground is to replace the failed coil, inspect the plugs, and keep an eye on the rest. If the engine has one dead coil and the others are the same age as your favorite college hoodie, you should at least prepare mentally for round two.
Common Mistakes to Avoid
- Replacing the coil without diagnosing the spark plug. A worn plug can stress the new coil.
- Damaging the connector. Plastic tabs become fragile with heat and age.
- Ignoring oil in the spark plug well. That points to another repair you should not postpone.
- Over-tightening the coil bolt. Stripped threads are the opposite of fun.
- Buying the wrong part. Match the coil to your exact year, make, model, engine, and sometimes VIN.
- Driving too long with an active misfire. You risk catalytic converter damage and worse fuel economy.
When This Job Is Better Left to a Professional
DIY ignition coil replacement is often straightforward, but not every engine wants to cooperate. Consider professional help if:
- The coil is buried under an intake manifold or major components
- You have multiple misfire codes with no clear cause
- The vehicle still misfires after replacing the coil
- You find damaged wiring, heavy oil contamination, or broken connectors
- You are not comfortable using a scan tool or torque wrench
There is no shame in deciding that this repair belongs to someone with a lift, better lighting, and fewer emotional attachments to plastic clips.
Final Thoughts
Learning how to replace an ignition coil can save you money and help you catch bigger ignition problems before they snowball. The key is to diagnose first, replace carefully, and pay attention to related parts like spark plugs, boots, and connectors. Done right, this repair can restore smooth idle, better acceleration, and your faith that the check engine light does not always mean disaster.
Take your time, use the right part, and resist the urge to treat every misfire like a mystery novel with only one possible villain. Sometimes it is the coil. Sometimes it is the spark plug. Sometimes it is both, teaming up like tiny troublemakers under the hood.
Real-World Experiences and Lessons From Ignition Coil Replacements
Here is something you learn quickly once you start dealing with ignition coils in the real world: the repair itself is often easy, but the diagnosis and the details are where people win or lose. One common experience is the “I replaced the coil and the car still misfires” situation. In many of those cases, the old spark plug was badly worn, the plug gap was too large, or the connector was loose. The new coil was not the wrong move, but it was only half the fix. That is why experienced DIYers almost always inspect the spark plug when they are already in there.
Another very common scenario happens after rain, a car wash, or a humid week. A vehicle starts running rough, especially on startup, and the misfire feels random. Once the coil is removed, the boot may show carbon tracking or moisture contamination. Sometimes the boot is cracked; sometimes oil from a leaking valve cover gasket has softened the rubber over time. People often assume the engine has a major problem, but the real issue is that the coil boot is no longer insulating the spark properly. The lesson here is simple: do not just stare at the coil housing. Inspect the entire boot and the spark plug well.
There is also the classic high-mileage experience where one coil fails and the owner debates whether to replace all of them. In practice, some people replace only the failed coil and get years of trouble-free driving. Others replace one, then another dies two months later, then another dies right before a road trip because apparently the engine enjoys drama. That does not mean every coil set must be replaced at once, but it does mean mileage and service history matter. If the coils are original and the vehicle is well into six figures, replacing more than one starts to sound less like overspending and more like planning ahead.
Technicians and seasoned DIYers also talk about how easy it is to break a connector lock on an older car. Heat cycles make plastic brittle, and the tab that should pop free with light pressure instead behaves like a stale cracker. This is why patience matters. A five-second rush can create a new problem that did not exist before. If you break the connector, the engine may misfire even with a brand-new coil installed, which is a great way to waste an afternoon and invent new vocabulary.
One of the most useful real-world habits is doing a quick post-repair road test with your ears open and your scanner nearby. If the idle smooths out immediately, throttle response improves, and the code stays gone, you probably nailed it. If the engine still shakes under load, it is time to keep diagnosing rather than blaming the new part. Real repair experience teaches the same lesson over and over: parts changing is not diagnosis. Smart repairs come from paying attention to patterns, checking the basics, and refusing to let a single symptom boss you around.