Table of Contents >> Show >> Hide
- Quick Overview: The 10 Steps
- Step 1) Confirm What You’re Shipping (and What You Can’t)
- Step 2) Pick the Right Box and Packing Materials
- Step 3) Pack Like Your Item Hates Turbulence
- Step 4) Measure and Weigh Your Package
- Step 5) Choose a FedEx Service Based on Speed and Budget
- Step 6) Create Your Shipping Label (Online, Mobile, or In-Store)
- Step 7) Add Declared Value (and Decide if You Need Extra Coverage)
- Step 8) Handle Special Cases: Returns, Fragile Items, International Shipping
- Step 9) Drop Off or Schedule a Pickup
- Step 10) Track, Confirm Delivery, and Keep Receipts
- Money-Saving Tips (Without Turning Shipping Into a Hobby)
- Common Mistakes to Avoid
- Real-World Experiences: What Shipping With FedEx Feels Like (And What You Learn)
Shipping a package should be a simple life momentlike making toast or finding matching socks. And yet, one tiny detail (wrong box, smudged label, mystery “dim weight”) can turn it into a logistical escape room. The good news: sending a FedEx package is straightforward once you follow a clear routine.
This guide walks you through how to send a FedEx package in 10 steps, from choosing the right box to getting a tracking number you can refresh like it’s a social media feed. You’ll also find practical tips for saving money, avoiding damage, and shipping faster when time is not on your side.
Quick Overview: The 10 Steps
- Confirm what you’re shipping (and what you can’t ship)
- Pick the right box and packing materials
- Pack like your item hates turbulence
- Measure and weigh your package
- Choose a FedEx service based on speed and budget
- Create your shipping label (online, mobile, or in-store)
- Add declared value (and decide if you need extra coverage)
- Handle special cases: returns, fragile items, and international shipments
- Drop off or schedule a pickup
- Track, confirm delivery, and keep receipts
Step 1) Confirm What You’re Shipping (and What You Can’t)
Start with the “common sense” checkbecause common sense gets weird at shipping counters. Ask yourself:
- Is the item fragile, valuable, perishable, or temperature-sensitive?
- Does it contain batteries, liquids, magnets, aerosols, or anything that sounds like a science fair volcano?
- Is it time-sensitive (birthday, deadline, “I forgot our anniversary” situation)?
If your shipment includes items that could be restricted or require special handling, read the shipping rules before you pay. When in doubt, keep it simpleor ask at a FedEx staffed location so you don’t discover “prohibited” after you’ve already taped the box like a mummy.
Pro tip
If you’re shipping something expensive or irreplaceable (like a laptop, camera lens, or a handmade item), plan for stronger packaging, signature options, and declared value earlybefore the box is sealed.
Step 2) Pick the Right Box and Packing Materials
A good box is like a good umbrella: you only appreciate it when things get rough. Choose packaging that fits the item with room for cushioningideally a couple inches on all sides.
What you’ll typically need
- Sturdy corrugated box (new is best; gently used is okay if it’s still rigid)
- Cushioning (bubble wrap, foam, packing paper, air pillows)
- Strong packing tape (not gift wrap tape, not masking tape, not “hopes and dreams”)
- Zip bag for liquids (even if they “never leak”famous last words)
- Optional: corner protectors, double-boxing supplies for fragile valuables
FedEx locations often sell shipping supplies, and FedEx-branded packaging may be available depending on your service type. If you’re using your own box, keep it clean, dry, and free of old labels or barcodes (those confuse scanners like twins confuse teachers).
Step 3) Pack Like Your Item Hates Turbulence
Your package will be lifted, slid, stacked, and moved through sorting systems. Pack for motion, not vibes. The goal is simple: nothing should rattle.
How to pack the smart way
- Wrap the item so surfaces don’t rub or scratch.
- Cushion all sidestop, bottom, and cornersnot just “around-ish.”
- Fill empty space so the item can’t shift.
- Seal using the “H-tape method”: one strip down the center seam, plus strips across both edges.
Example: Shipping a coffee mug
Wrap the mug in bubble wrap, place it in a small inner box with padding, then place that box inside a larger box with cushioning on all sides. Yes, it’s extra. Yes, it works.
Step 4) Measure and Weigh Your Package
Before you choose a service (or price shop), get the basics: weight and dimensions (length, width, height). Even small measurement differences can change costespecially for larger, lighter items where dimensional (DIM) weight may apply.
Easy measuring checklist
- Measure the box after it’s packed and sealed (not “before the tape and padding happened”).
- Round up to the nearest whole inch if needed.
- Weigh the sealed box on a home scale, shipping scale, or at a staffed location.
If your package is unusually large or heavy, double-check service limits and pricing. Oversize and special-handling shipments may need a different approach than “regular box, regular label, regular life.”
Step 5) Choose a FedEx Service Based on Speed and Budget
FedEx offers different service levels, and the “best” one depends on how fast it needs to arrive and how much you’re willing to pay to avoid sweating.
Common service decision points
- Time-sensitive: overnight or 2–3 day options
- Budget-friendly: ground options for less urgent shipments
- Residential vs. business: destination can affect delivery timing and pricing
- Package size/weight: bigger and heavier items can shift the economics fast
One handy rule of thumb: if the delivery commitment time is later in the day, it can be cheaper than an earlier guaranteed time. So if your package doesn’t need to arrive at breakfast, don’t pay “breakfast pricing.”
Example: “I need this there fast, but not overnight”
In many cases, a 2-day or 3-day service hits the sweet spot: quicker than ground, less expensive than overnight. It’s the shipping equivalent of choosing the express lane without paying for a private jet.
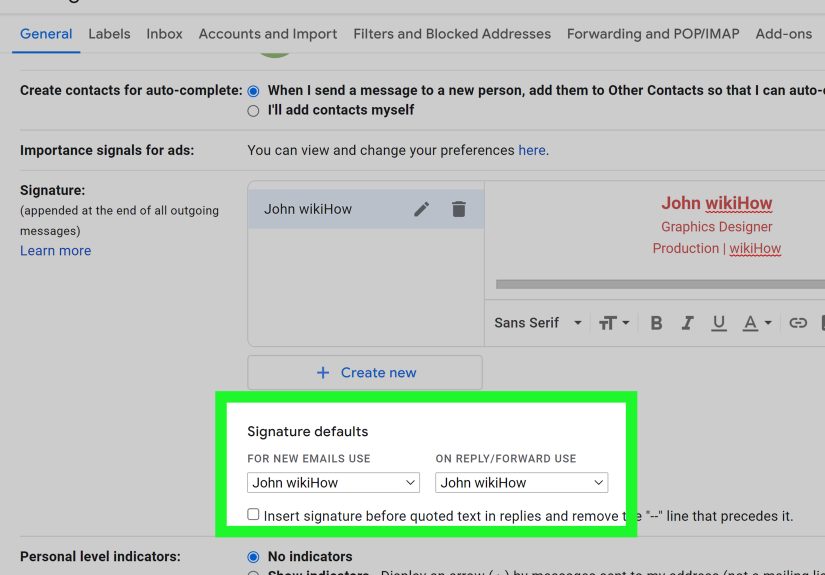
Step 6) Create Your Shipping Label (Online, Mobile, or In-Store)
You can create a FedEx shipping label in a few ways:
- Online through a FedEx shipping account tool (great for printing at home)
- Mobile app that can generate a barcode for label printing in-store
- In-store with help at a staffed FedEx location
What you’ll need for the label
- Sender and recipient names
- Addresses (double-check apartment numbers, ZIP codes, and business suites)
- Package weight and dimensions
- Service choice and delivery options (signature, hold location, etc.)
Print clearly, attach the label flat on the largest surface of the box, and keep it away from seams and edges. If your label is wrinkled, curved, or taped over like a DIY laminate project, scanners may struggle.
Step 7) Add Declared Value (and Decide if You Need Extra Coverage)
“Declared value” is your chance to say, “This item is worth more than a sandwich.” Many shipments include a standard limit of liability, and you can often pay to declare additional value.
When declared value is worth considering
- Electronics, jewelry, collectibles, or specialty tools
- One-of-one handmade items
- Business shipments where replacement cost matters
Practical advice: document the item’s condition and value before shipping. A quick photo and proof of purchase can save you from a lot of “But I swear it looked new” later.
Step 8) Handle Special Cases: Returns, Fragile Items, International Shipping
Returns
Returns are often easiest when a retailer provides a label. If not, you can create a return shipment yourself using FedEx’s online tools or a staffed location. Some return setups allow a QR code or barcode so you don’t have to print at home.
Fragile items
Marking a box “FRAGILE” is fine, but it’s not a force field. The real protection is in the packing: cushioning, snug fit, and possibly double-boxing. For glass and ceramics, assume your box will meet gravity at least once.
International shipping
International shipments typically require customs information and accurate item descriptions and values. You may need a commercial invoice (or similar paperwork) depending on what you’re shipping and where it’s going. Keep descriptions clear and specific“clothes” is okay, “stuff” is not.
Step 9) Drop Off or Schedule a Pickup
Once your label is on and your box looks ready for a starring role in “Cardboard Olympics,” you have two main paths: drop off or pickup.
Drop-off options
- Staffed FedEx locations (helpful if you want a receipt, packaging help, or peace of mind)
- Partner retail locations that accept pre-labeled drop-offs (hours can be convenient)
- FedEx Drop Boxes for smaller pre-labeled packages
Drop Boxes are great for quick, contactless shippingjust be mindful of size limits. If your box is too big, don’t “encourage” it. That’s how boxes get stuck and legends are born.
Pickup options
If you ship from home or a business, scheduling a pickup can be a lifesaverespecially for multiple packages or heavier boxes. Some pickup options can be arranged online while creating your label, and other pickup types may be better for frequent shippers.
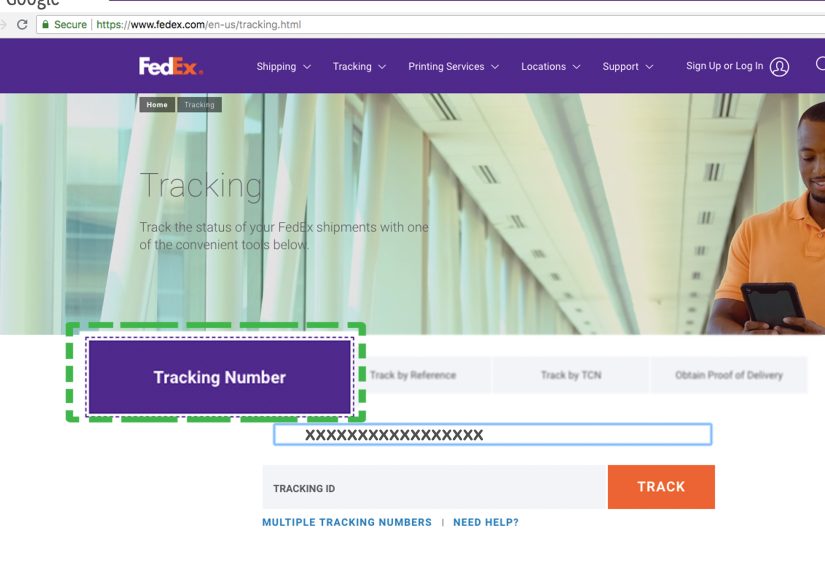
Step 10) Track, Confirm Delivery, and Keep Receipts
After drop-off or pickup, your package gets a tracking numberthe golden ticket of modern logistics. Use it to:
- Check scans and movement updates
- Confirm delivery (and sometimes proof of delivery)
- Spot delays early and adjust plans if needed
Keep your receipt or confirmation email until delivery is complete. If you’re shipping something valuable or time-sensitive, consider delivery options like signature requirements or holding at a secure location for pickup.
Money-Saving Tips (Without Turning Shipping Into a Hobby)
- Choose the slowest service that still meets your deadline. Faster is pricier, and “overnight” is basically shipping’s luxury tax.
- Use the smallest box that still allows cushioning. Bigger boxes can trigger higher cost calculations.
- Print labels at home when possible. It’s usually faster and helps you avoid the line that appears whenever you’re in a hurry.
- Combine shipments smartly. Two small boxes might cost more than one well-packed box (or vice versa) depending on weight and dimensions.
Common Mistakes to Avoid
- Using weak or damaged boxes (if it looks tired, it will fail at the worst time)
- Leaving old barcodes on the box (scanners don’t enjoy puzzles)
- Guessing the weight (shipping systems are not moved by optimism)
- Skipping cushioning because “it’s probably fine” (famous last words in shipping)
- Writing a label by hand when you could print (legibility matters, and so does automation)
Real-World Experiences: What Shipping With FedEx Feels Like (And What You Learn)
If you’ve never shipped a package before, your first time can feel oddly dramatic: you’re holding a box like it’s a fragile secret, you’re triple-checking the address, and you’re wondering if you should add “DO NOT BEND” in five languages. Totally normal. What people tend to learn quickly is that shipping is less about luck and more about repeatable habits.
One common experience is the “box confidence curve.” At first, people underestimate packingespecially for items that seem sturdy, like shoes, books, or small appliances. Then the box gets bumped, the contents shift, and suddenly you understand why shipping stores sell so much bubble wrap. The second time you ship, you add more cushioning. The third time, you discover the magic of filling empty space so nothing moves. By the fourth shipment, you’re packing like a pro and wondering why you ever trusted a single sheet of newspaper.
Another real-life moment: the label. People often assume the label is just “stick it on anywhere,” until they see a box with a label taped across a seam or wrapped around a corner. That’s when you learn that scanners like flat, clear labels on a smooth surface. It’s also when you realize that covering the barcode with glossy tape can create glare and slow things down. The best shipping label is boringclean print, flat placement, and no drama.
Then there’s the service choice experience: deciding between “cheap” and “fast.” Many folks start by choosing the quickest option because it feels saferespecially for gifts or important documents. Later, they realize that if the package doesn’t truly need overnight delivery, a 2–3 day service often gets the job done without the wallet sting. A lot of people develop a simple personal rule: “If I’d still be happy if this arrives in three days, I shouldn’t pay for it to arrive tomorrow morning.”
Drop-off is its own little storyline. Some people love the speed of a quick drop (especially when they already have a label). Others prefer a staffed counter because they want a receipt, a scan confirmation, and the reassuring feeling that a real human saw the package exist. If you’re shipping something important, that first acceptance scan can feel like a mini victory. And if you ever drop off right before a cutoff time, you’ll probably check tracking later like, “Did you get it? Did you really get it?”
Tracking is where patience is tested. Sometimes the updates are frequent and satisfying; sometimes the package seems to “pause,” and that’s when people learn that not every movement is scanned in real time. It’s also why delivery options like holding a package at a secure pickup location can feel comfortingespecially if porch theft is a concern, or if you’re not home during delivery hours.
The biggest takeaway from real shipping experiences is simple: great shipping is mostly great preparation. When the box is strong, the contents are cushioned, the label is clean, and the service matches your timeline, shipping becomes almost boringand boring is exactly what you want. Because “uneventful delivery” is the happiest ending in the shipping universe.