Table of Contents >> Show >> Hide
- Before You Start: Know What Kind of Device You Have
- How to Stand to Pee With a Device: 8 Steps
- Step 1: Pick the right moment to practice
- Step 2: Wear practice-friendly clothing
- Step 3: Get into a stable stance
- Step 4: Position the device and create a leak-resistant seal
- Step 5: Aim first, then start slowly
- Step 6: Keep your hand position steady and let gravity help
- Step 7: Finish, drain, and do the “final drip” routine
- Step 8: Clean up properly (and store it like a civilized person)
- Troubleshooting: Common Problems (and How to Fix Them)
- Hygiene and Safety Tips (Not the Fun Part, But the Important Part)
- Using an STP Device in Real Life
- Choosing the Best Stand-to-Pee Device for You
- of Real-World Experiences (The “Stuff People Wish They Knew Sooner” Section)
- Conclusion
Standing to pee with a device (often called a “stand-to-pee” device, “STP,” or “pee funnel”) can be a total game-changer:
fewer gross public toilet seats, easier bathroom breaks outdoors, and more comfort and confidence for people who prefer to pee standing.
The first attempt can also feel like trying to pour a drink while someone keeps bumping your elbow. Totally normal.
This guide breaks the process into 8 simple steps, plus tips for choosing the right device, avoiding leaks, staying hygienic,
and handling real-life scenarios (airports, hiking, road trips, and those “why is every stall wet?” restrooms).
Before You Start: Know What Kind of Device You Have
Most devices fall into three broad categories:
- Funnel-style devices (often silicone or plastic): Compact, popular for travel and outdoors.
- Extended/tube-style devices: A funnel plus a tube for directing flow farther away (useful over bulky clothing or into a container).
- STP packers/prosthetics: Designed to be worn; may require more practice and a supportive setup (harness/packing underwear).
No matter the style, the basics are the same: position → seal → aim → relax → drain → clean.
How to Stand to Pee With a Device: 8 Steps
Step 1: Pick the right moment to practice
Your first session should be low-stakes. Translation: practice at home, ideally in the shower or over a toilet you don’t mind cleaning.
The goal is to learn your device’s “sweet spot” without panic-rinsing your socks at midnight.
Pro tip: Don’t wait until your bladder is in full emergency mode. A calmer start makes it easier to go slowly and feel what’s happening.
Step 2: Wear practice-friendly clothing
Tight jeans and complicated buttons are not your training montage outfit. Start with:
- Loose shorts or sweatpants
- Underwear you can move aside easily
- Optional: a longer shirt for privacy practice
Later, you can level up to leggings, hiking pants, jumpsuits (brave), and all the other fabric puzzles we wear as humans.
Step 3: Get into a stable stance
Stand with feet about shoulder-width apart. Slightly bend your knees if it helps you feel steady. Many people find a tiny forward lean works better than
standing bolt uprightthink “relaxed athlete,” not “formal family photo.”
If you’re using a toilet, face it or stand slightly angled depending on your device’s design and what gives you the most control.
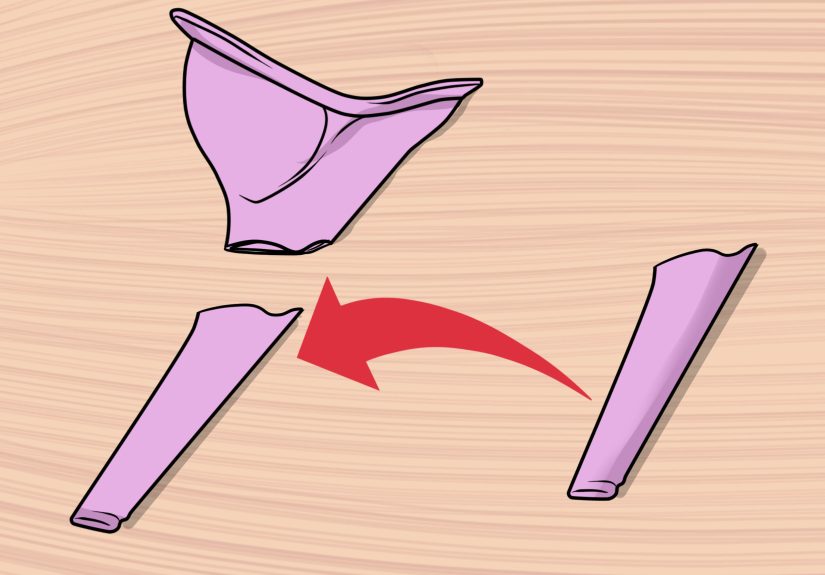
Step 4: Position the device and create a leak-resistant seal
This is the most important part. You want the device snug enough to prevent leaks, but not so tight that it collapses or shifts.
- Funnel devices: Place the opening so it fully covers where urine exits your body.
- Rigid devices: Press gently into place and make sure edges sit evenly against your body.
- Some designs use an air gap: Follow your manufacturer’s guidancecertain devices work best with a small air channel to reduce overflow.
The seal is like a lid on a blender: it doesn’t need brute force, but it does need to be correctly aligned.
Step 5: Aim first, then start slowly
Point the outlet away from your body and toward the toilet bowl, shower drain, or the ground (if outdoors).
Then begin with a slow, controlled start instead of an instant “full blast.”
Why? If flow is faster than the device can channel it, you can get overflow. Going slowly also gives you time to adjust your angle and pressure.
Step 6: Keep your hand position steady and let gravity help
Once you start, try not to “re-seat” the device midstream (that’s when leaks love to appear like uninvited party guests).
Keep the outlet angled down. If you’re using a tube attachment, check that it isn’t kinked or pressed against fabric.
If you notice drips, don’t panic. Pause (if you can), adjust pressure and angle slightly, and continue gently.
Step 7: Finish, drain, and do the “final drip” routine
When you’re done, resist the urge to yank the device away immediately. Give it a second to drain.
Many users find these tricks helpful:
- Angle downward so any remaining liquid runs out.
- Small shake or tilt (device-dependent) to clear the channel.
- One smooth forward motion can help catch residual drops on certain funnel designs.
This step is the difference between feeling like a pro… and discovering a surprise drip later at the worst possible moment.
Step 8: Clean up properly (and store it like a civilized person)
Cleaning depends on where you are:
- At home: Wash with warm water and mild soap; rinse thoroughly; air dry completely.
- On the go: Wipe/rinse if you can, store in a breathable pouch or container, and wash as soon as possible.
- Extra sanitation: Some devices can be sanitized per brand instructions (for example, certain materials may tolerate boiling or dishwashingalways check first).
Also: wash your hands. The boring basics are the real MVPs.
Troubleshooting: Common Problems (and How to Fix Them)
“It leaked!”
- Cause: Seal wasn’t complete or device shifted midstream.
- Fix: Re-practice placement in a shower; start slower; adjust angle; ensure edges sit evenly.
“It overflowed.”
- Cause: Flow too fast, outlet angle too flat, or tube kinked.
- Fix: Begin gently; keep outlet pointed down; avoid fabric blocking the exit.
“I can’t relax enough to go.”
- Cause: Anxiety + new skill + body tension = stubborn bladder.
- Fix: Practice alone; take a breath; run shower water (if practicing); don’t rush.
“It works at home but not in public.”
- Cause: Different clothing, time pressure, noise, awkward angles.
- Fix: Practice with the clothing you’ll wear out. Use a stall first. Add a tube attachment if your device supports it.
Hygiene and Safety Tips (Not the Fun Part, But the Important Part)
- Handwashing matters: Soap + thorough scrubbing helps reduce germ spread.
- Keep the device dry between uses when possible: A damp, sealed container is basically a spa day for bacteria.
- If you’re prone to UTIs: Good bathroom hygiene helps (for example, wiping front to back for people with vulvas). Hydration and not “holding it forever” can help too.
- Stop and check in with a clinician if you have burning, unusual discharge, fever, flank/back pain, or symptoms that feel like a UTI or kidney infection.
Using an STP Device in Real Life
Public restrooms
If you’re new, start in a stall. You can stand over the toilet, take your time, and focus on positioning.
Once you have consistency, you can decide whether urinals make sense for you and your device.
Outdoor use (camping, hiking, festivals)
Outdoors, the device can reduce exposure and make bathroom breaks fasterespecially in cold weather or buggy areas.
Aim for durable surfaces and follow local guidance. A common best practice is to move away from water sources and campsites,
and to follow Leave No Trace principles for waste disposal.
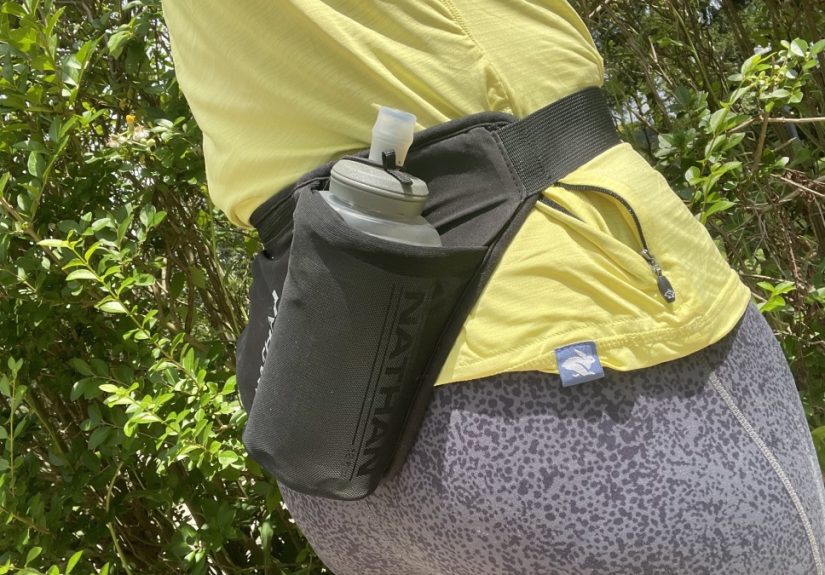
Pack a small “pee kit”:
- Device + storage pouch
- Toilet paper or a pee cloth (if that’s your style)
- Hand sanitizer
- Small bottle of water for rinsing (optional but helpful)
- Zip bag for packing out used paper if required
Travel and accessibility situations
STP devices can be helpful when bathrooms are cramped, unsanitary, or hard to access quickly.
Some people also use them during recovery from injury or surgery (when sitting/squatting is difficult),
but it’s smart to check with a healthcare professional if mobility or pain is a factor.
Choosing the Best Stand-to-Pee Device for You
The “best” device is the one you can place consistently and clean easily. When comparing options, consider:
- Material: Silicone is flexible and comfortable; rigid plastic can be easier to aim but less forgiving.
- Shape and rim: A wider contact area can help reduce leaks for beginners.
- Portability: Foldable vs. rigid; pocketable vs. needs a pouch.
- Cleaning: Look for smooth surfaces and simple channels.
- Use case: Outdoors vs. daily public restroom use vs. wearable STP packer setup.
of Real-World Experiences (The “Stuff People Wish They Knew Sooner” Section)
If you asked a room full of STP users what they learned, you’d hear a comforting theme: almost everyone has a messy first try,
and almost everyone gets dramatically better with practice. The difference between “this is impossible” and “why didn’t I do this sooner?”
is usually just a handful of reps and a few tiny adjustments.
One common experience: the confidence gap. At home, you’re calm, the lighting is good, and nobody is impatiently jingling keys outside the stall.
Then you try it in a public restroom and suddenly your hands forget how to be hands. People often find it helps to “graduate” in stages:
shower practice → toilet at home → public stall during a quiet time → busier restroom → (optional) urinal, if that’s your goal.
Another frequently shared lesson is that pressure is everything. Many first-timers assume “press harder” is the solution,
but too much pressure can warp a flexible funnel, break the seal, or make the outlet angle weird. Too little pressure can also leak.
The trick is gentle, even contactlike holding a phone against your ear, not trying to fuse it to your head.
Clothing is a whole mini-adventure. People often report that STP use is easiest with pants that have a zipper fly (hiking pants, some jeans, many travel pants).
Leggings and one-piece outfits can still work, but they require more maneuvering and time. A surprisingly popular “aha” moment is realizing
you don’t always need to pull everything downsometimes you can shift fabric just enough to place the device properly and stay more covered.
Outdoors, the biggest win people mention is speed and warmth. When it’s freezing, stepping off-trail for a quick bathroom break
without fully exposing skin can feel like a luxury upgrade. At the same time, outdoor users often learn to pay attention to wind direction
and footing (slippery rocks + rushing = bad combo). Many experienced hikers carry a small rinse bottle and a dedicated pouch so the device stays contained,
and they can wash it thoroughly later.
Finally, there’s the emotional side: for some, standing to pee is simply convenient; for others, it’s affirming and reduces dysphoria or discomfort.
Either way, the most repeated “wish I knew” tip is: be patient with yourself. It’s a skilllike using chopsticks, backing into a parking spot,
or opening a produce bag on the first try. (Okay, that last one is actually impossible, but you get the idea.)
Conclusion
Learning how to stand to pee with a device is mostly about practice, positioning, and patience.
Start at home, go slowly, and focus on building a reliable seal and a comfortable routine.
Once you’ve got it, you’ll wonder how you ever tolerated those questionable restrooms and windy trail squats.
Remember: follow your device’s instructions, keep things clean, and if something feels painful or “off,” check in with a healthcare professional.
Your future self (and your shoes) will thank you.