Table of Contents >> Show >> Hide
- Why Testing Your Carbon Monoxide Detector Really Matters
- How Often Should You Test a Carbon Monoxide Detector?
- Safety First: Before You Press the Test Button
- Step-by-Step: How to Test a Carbon Monoxide Detector at Home
- What If the Carbon Monoxide Detector Fails the Test?
- Understanding Beeps, Chirps, and Lights
- Should You Use CO “Test Gas” at Home?
- Simple Maintenance Tips to Keep Your CO Detector Ready
- What to Do If the Carbon Monoxide Alarm Goes Off for Real
- Real-Life Experiences: What Testing Your CO Detector Teaches You
- Wrapping Up: A Tiny Habit That Protects Your Whole Home
Carbon monoxide (CO) is called the “silent killer” for a reason. You can’t see it, smell it, or taste itbut it can make you very sick, very fast. That’s why a working carbon monoxide detector is one of the cheapest, easiest forms of home insurance you’ll ever own. The part most people forget? You actually have to test the detector regularly to be sure it will work when you need it.
The good news: testing a carbon monoxide detector at home is simple, quick, and doesn’t require a toolbox or a degree in electrical engineering. In most cases, it’s as easy as pressing a button and listening for a loud, obnoxious beep (or several). In this guide, we’ll walk step by step through how to test your CO detector safely, how often to do it, what the different beeps mean, and what to do if something seems off.
Why Testing Your Carbon Monoxide Detector Really Matters
Carbon monoxide is produced whenever fuel burnsthink furnaces, gas stoves, fireplaces, water heaters, space heaters, generators, even attached garages where cars idle. If CO builds up indoors, people and pets can get poisoned quickly. National safety agencies recommend that every home have CO alarms on each level and outside sleeping areas, and that they be tested regularly to make sure they’re ready to warn you in time.
Modern residential CO detectors are designed to meet the UL 2034 standard, which tells them when to sound the alarm based on dangerous CO levels over timebefore most healthy adults would feel serious symptoms. That means your detector isn’t supposed to scream at the first tiny whiff of CO; it’s built to react when levels are actually hazardous. But that only works if the sensor, circuitry, and power supply are all functioning correctlywhich is exactly what your routine tests help verify.
How Often Should You Test a Carbon Monoxide Detector?
Safety organizations and fire codes land on a simple rule of thumb: test your CO alarms at least once a month using the built-in test button. It’s also smart to test:
- After installing a new detector
- After changing batteries
- After a power outage (for plug-in or hardwired units)
- After any renovation or work around the detector
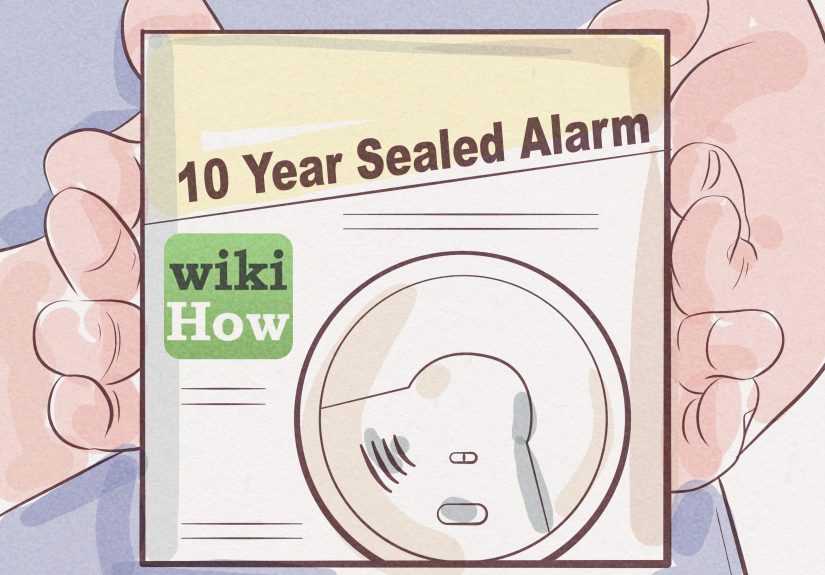
As for longevity, most carbon monoxide detectors have a service life of about 5–7 years, sometimes up to 10, depending on the model. Check the back or side of your unit for a “manufactured” or “replace by” date and follow the manufacturer’s instructions. Many modern detectors will chirp and display an “end” or “end-of-life” message when it’s time for replacement.
Safety First: Before You Press the Test Button
Before you start poking buttons, take a quick moment to stay safe and avoid confusion:
- Make sure there’s no actual CO emergency. If you’re feeling dizzy, nauseous, unusually tired, or have a headache, or if multiple people in the home feel “flu-ish” all at once, treat it as a potential carbon monoxide event. Leave the building, call 911 or your local emergency number, and get help. Don’t stay inside to “test the detector.”
- Tell everyone you’re testing. Let family members or roommates know you’re about to push the test button, especially kids or anyone who might be startled by loud alarms. If you have pets that hate loud sounds, you might gently herd them to a quieter room first.
- Don’t try DIY “real CO” tests. Never use a car exhaust, gas stove, candle flame, or any burning fuel to “see if the alarm goes off.” That’s unsafe and unnecessary. If you ever need a true functional test, professionals use controlled CO test gas (“bump gas”), not improvised smoke and fumes.
Step-by-Step: How to Test a Carbon Monoxide Detector at Home
1. Locate the Test / Reset Button
Find the main button on the front of your detector. It will usually be labeled “Test,” “Test/Reset,” or “Test/Hush.” On combination smoke/CO alarms, there’s typically one button that tests both functions. Manufacturers like Kidde and First Alert use this button to run a self-test on internal circuitry, the sounder, and, in some models, the indicator lights.
2. Press and Hold Until the Alarm Sounds
Press and hold the test button firmly. Depending on the brand, you may need to hold it for 3–5 seconds or slightly longer. During a successful test, you should hear a loud series of beeps:
- Many CO alarms sound four quick beeps, pause, then four quick beeps.
- Indicator lights (often red) may flash in sync with the beeps.
- Some units with digital displays show “888” or a test sequence of numbers before returning to zerothese are internal diagnostics, not actual CO readings.
Check the user manual to confirm what a proper test sequence looks and sounds like for your specific model. If you no longer have the paper manual, you can usually search the brand and model number online to find a PDF.
3. Confirm Interconnected Alarms (If You Have Them)
If your home has interconnected smoke/CO alarms (hardwired or wireless), pressing the test button on one unit may cause all the connected alarms to sound. That’s a good thingit mimics how the system will behave in an actual emergency. Walk around and verify that you can hear the alarm clearly from bedrooms, living areas, and hallways.
4. Release the Button and Wait
Once you’ve heard the full test pattern, release the button. The alarm should stop within a few seconds and go back to its normal monitoring mode. If it keeps sounding or shows an error indication, check the manual for guidancesome models make different patterns for fault codes.
5. Repeat for Every Detector in the Home
Go detector by detector: hallway, bedrooms, each level, basement if applicable. You want to make sure every unit in your home passes the test, not just the one in the hallway you happen to see most often.
What If the Carbon Monoxide Detector Fails the Test?
If you press and hold the test button and nothing happensno beeps, no lights, no dramatake that seriously. Try these steps:
- Replace the batteries. For battery-powered or backup-battery models, swap in fresh batteries, making sure the polarity (+/−) matches the battery compartment markings. Then test again.
- Check the power source. For plug-in or hardwired units, confirm the outlet or circuit is live. A tripped breaker, flipped switch, or loose plug can keep the detector from working.
- Clean the detector. Lightly vacuum or dust the outside vents. Dust buildup can affect performance or trigger weird chirps on some models.
- Check the age. If the detector is older than its stated service lifeor you can’t remember when you installed itreplace it. Don’t argue with a 9-year-old CO alarm. It’s retired.
- Replace malfunctioning units. If a detector still won’t test properly after fresh batteries and cleaning, it’s time for a new one. CO alarms are relatively inexpensive compared to, well, everything they protect.
Understanding Beeps, Chirps, and Lights
Not every sound your carbon monoxide detector makes means “you’re in danger this second.” Learning its language helps you respond appropriately:
- Continuous pattern (such as 4 beeps, pause, 4 beeps): This is typically the emergency CO alarm. Treat it as a real event unless you’re in the middle of a test.
- Single chirp every 30–60 seconds: Often a low-battery warning. Change the batteries as soon as possible, then test.
- Repeated chirps or error codes: Could indicate a sensor problem or end-of-life signal. Check your manual for your model’s specific codes.
- Lights only: Some detectors use a green light for power, red for alarm, and yellow or amber for fault or end-of-life. Again, your manual is your decoder ring here.
Should You Use CO “Test Gas” at Home?
Professional technicians sometimes perform a functional test using a small cylinder of carbon monoxide test gas. This confirms that the sensor responds to actual CO, not just that the alarm can make noise. While some specialty home users may purchase CO bump gas kits, they must be used carefully, in accordance with the detector manufacturer’s instructions.
If you’re a typical homeowner, the test button and regular maintenance are usually enough. If you’re worried about a particular detector or you rely on CO alarms in a high-risk setting (like near a fuel-burning appliance), consider having a licensed HVAC or electrical professional check the system.
Simple Maintenance Tips to Keep Your CO Detector Ready
Testing is just one part of keeping carbon monoxide alarms in working shape. Add these quick tasks to your home maintenance checklist:
- Test each alarm at least once a month.
- Replace batteries at least once a year, or sooner if the manufacturer recommends it.
- Dust or vacuum the exterior every few months.
- Make sure nothing blocks or covers the detector.
- Confirm the detector’s placement (outside bedrooms, on every level of the home).
- Replace the entire unit when it reaches its end-of-life date.
- Have fuel-burning appliances inspected regularly by qualified professionals.
What to Do If the Carbon Monoxide Alarm Goes Off for Real
A test pattern is one thing. A real alarm is anotherand you should never ignore it. If your CO detector suddenly sounds the full alarm and you’re not in the middle of testing:
- Get everyone (including pets) outside to fresh air immediately.
- Call 911 or your local emergency number from outside or from a neighbor’s home.
- Do not re-enter the home until emergency responders say it’s safe.
- Have a qualified technician inspect any fuel-burning appliances before you use them again.
The worst-case scenario isn’t “you went outside and it turned out to be a false alarm.” The worst case is assuming it’s false and staying inside when it’s not.
Real-Life Experiences: What Testing Your CO Detector Teaches You
It’s easy to treat carbon monoxide detectors like wall décor: something you install once and mentally file under “done forever.” But people who actually test them regularly often have very differentand very eye-openingexperiences.
Take the classic “I just moved in” story. A new homeowner unpacks, sets up the Wi-Fi, arranges the couch, and then one day notices the detector on the hallway ceiling. Out of curiosity, they grab a step stool, press the test button… and nothing. No beeps, no flashing lights, just silence and a faint layer of dust. A quick look at the label reveals that the detector “expired” three years ago. That single test turns into a same-day trip for new, up-to-code alarms and a promise to add “CO detector test” to the monthly to-do list.
Renters have their own version of this tale. Many assume the landlord is on top of everything. In reality, landlords are busy humans too. One renter decided to test the CO alarm after reading about carbon monoxide poisoning in the news. The alarm chirped weakly once and quit. Fresh batteries helped, but a closer look revealed that the unit was older than their lease. A quick emailwith a photo of the “replace by” dateled to updated detectors for the whole building. A simple test didn’t just protect one family; it improved safety for every neighbor down the hall.
Then there’s the “false alarm that wasn’t so false.” A family with a combination smoke/CO alarm in the hallway kept hearing random chirps. They assumed it was a glitch and, like many people, occasionally hit the test button just to silence it. Eventually, someone noticed that the “end-of-life” light was flashing. While replacing the alarms, they scheduled a routine furnace inspection. The technician discovered a cracked heat exchanger that could have leaked CO into the home. The detector didn’t sound a full CO alarm, but its age warning encouraged them to actand that may have prevented a bigger problem that winter.
On the flip side, regular testing can deliver peace of mind as well as adrenaline. A DIY enthusiast who loves weekend projects installed new CO alarms on every level, just as safety agencies recommend. Every month, they test them along with the smoke alarms: press, hold, loud beeps, done. Over time, the test becomes as routine as paying the electric bill. Guests notice too: “Wow, you actually test those?” Suddenly, “hey, it’s first Saturday, let’s test the alarms” becomes part of the household culture, just like changing air filters or checking the fridge for questionable leftovers.
Even kids can get involved in a positive way. Some parents use testing day to teach older children what the alarm sounds like and what to do if they hear it at 2 a.m. The rule becomes simple: if the alarm goes off and it’s not testing time, everyone gets up, goes outside, and waits together. That kind of family drill turns a scary unknown into a practiced routine. When kids understand the alarm isn’t just a random noisy gadget, they’re less likely to ignore it or assume “it’s probably nothing.”
The common thread in all these experiences is that pressing a little button changes how people think about safety. It turns a carbon monoxide detector from background scenery into a tool they actively trust. Sometimes the lesson is “replace this old device,” sometimes it’s “talk to the landlord,” sometimes it’s “our HVAC system needs attention,” and sometimes it’s “we’re in good shape; the alarms are doing their job.” All of those are wins.
If you’ve never tested your own CO detectorsor you can’t remember the last time you didit’s not a reason to feel guilty. It’s an opportunity. Grab a chair or a step stool, warn the household that it might get loud, and press the button. You might discover you need new batteries, a replacement unit, or just a clearer understanding of the beeps. Whatever you find, you’ll be in a better, safer place than you were before you tested.
Wrapping Up: A Tiny Habit That Protects Your Whole Home
Learning how to test a carbon monoxide detector at home isn’t complicated, but it is powerful. Once a month, a few seconds of pressing and holding a test button can confirm that your alarms have power, that their sounders work, and that your household knows what to expect when they go off. Pair that with timely battery changes, respecting “replace by” dates, and regular appliance maintenance, and you’ve built a strong defense against a silent threat.
So the next time you walk past that little white or gray device on your wall or ceiling, don’t just think, “I hope it works.” Take a moment to know it works. Your future selfand everyone who sleeps under your roofwill be very glad you did.