Table of Contents >> Show >> Hide
- Why an Old Sweater Is Basically Home Decor Gold
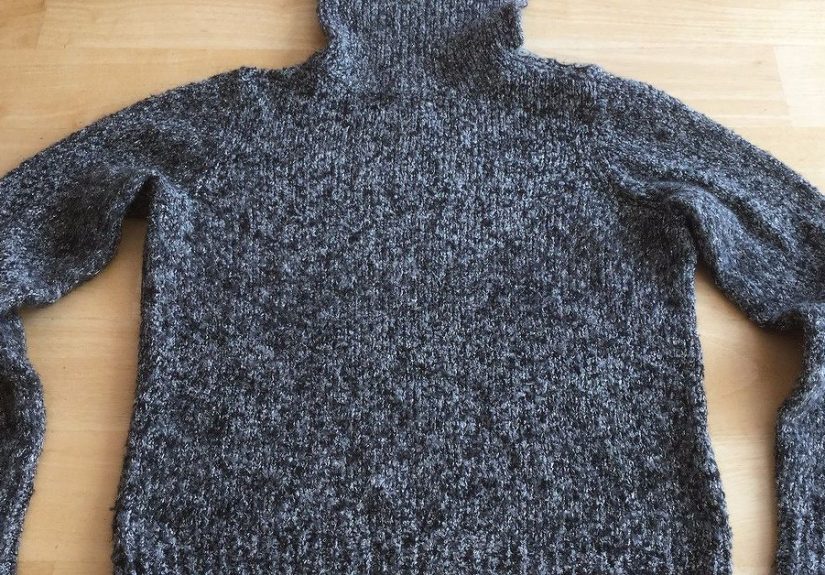
- Before You Start: Pick the Right Sweater (and Prep It Like a Pro)
- The One-Sweater Cut Plan (So You Get 5 Projects, Not Regret)
- DIY #1: The “Looks Expensive” Sweater Throw Pillow Cover
- DIY #2: Sweater-Sleeve Vase & Planter Cozies
- DIY #3: Safe Sweater Candle Wraps (a.k.a. “Soft Lantern Energy”)
- DIY #4: Upcycled Sweater Winter Wreath
- DIY #5: A Sweater Draft Stopper (Door Snake, But Make It Fashion)
- Care Tips: Keep Your Sweater Decor Looking Fresh (Not Fuzzy in a Bad Way)
- Troubleshooting: Fix the 3 Most Common Sweater DIY Problems
- Wrap-Up: One Sweater, Five Cozy Wins
- Real-Life Crafting Notes: What You’ll Actually Experience (500+ Words)
- SEO Tags
You know that one sweaterthe one that’s too itchy to wear, too stretched out to donate, and too sentimental to throw away?
Congratulations. You’re holding a five-project craft buffet. With a little cutting, a little glue (or stitching if you’re feeling brave),
and a tiny bit of “trust the process,” you can turn a single old sweater into cozy winter home decor that looks intentionally boutiquenot “I panic-crafted this at midnight.”
This guide walks you through five warm-and-wintery DIYs you can make from one sweater:
a pillow cover, vase/planter cozies, safe candle wraps, a wreath, and a draft stopper. Along the way, you’ll get a cut plan so you don’t accidentally
use the best part of your sweater on the least exciting project (we’ve all been there).
Why an Old Sweater Is Basically Home Decor Gold
Winter decorating is all about texture: chunky knits, soft layers, warm neutrals, and anything that makes your space feel like it has snacks and good opinions.
Sweaters bring instant “cozy” because they’re already designed to hold warmth, feel soft, and add that lived-in texture that a plain cotton throw pillow can only dream of.
- Texture without trying: Cable knit, ribbing, heathered yarnyour sweater already did the hard work.
- Budget-friendly: The cheapest DIY supply is something you already own (and mildly resent).
- Low-waste: Upcycling keeps textiles out of the trash and gives your home a story that’s better than “I impulse-bought this online at 2 a.m.”
Before You Start: Pick the Right Sweater (and Prep It Like a Pro)
1) Choose fabric with a plan
- Chunky knits: Best for pillow covers and wreaths (maximum cozy, minimal effort).
- Ribbed sweaters: Great for jar wraps and slim vase sleeves (they stretch and grip nicely).
- Wool/wool blends: Excellent for structureespecially if you decide to felt it.
- Very loose knits: Still usable, but you’ll want lining or interfacing so it doesn’t sag like a tired hammock.
2) Wash and dry it first
Even if the sweater “looks clean,” wash it anyway. It removes oils and helps you see how the fabric behaves.
Dry it fully so it doesn’t shrink after you’ve already made something cute and become emotionally attached to it.
3) Decide if you want to felt (optional)
If your sweater is mostly wool, felting (hot wash + agitation + dry) can make it sturdier and easier to cut without fraying.
Felted wool becomes more “fabric-like” and less “unruly noodle knit.” If you’re unsure, test-felt a small piece first (like the inside seam allowance).
The One-Sweater Cut Plan (So You Get 5 Projects, Not Regret)
Lay your sweater flat. Then mentally divide it into “prime real estate” and “excellent supporting actors.”
Here’s the plan that gets you all five DIYs from one sweater:
- Sweater body (front/back panels): Project 1 (pillow cover).
- Both sleeves: Project 2 (vase/planter cozies) and Project 5 (draft stopper sleeve).
- Cuffs + hem ribbing: Project 3 (jar/candle wraps) and tidy finishing bands.
- Neckline + leftover scraps: Project 4 (wreath accents) plus small decorative touches.
Pro tip: If you only own one sweater you’re willing to sacrifice, start with the projects that require the cleanest cuts:
pillow cover and sleeve cozies. Save the smaller bits for wraps and wreath accents.
DIY #1: The “Looks Expensive” Sweater Throw Pillow Cover
This is the fastest way to make your living room feel winter-ready. A sweater pillow cover adds texture instantlylike you hired a stylist who only drinks hot chocolate.
Materials
- Old sweater (body section)
- Pillow insert (16×16, 18×18, or lumbarwhatever you already have)
- Fabric scissors
- Sewing machine or fabric glue + iron-on hemming tape
- Optional: fusible interfacing (helps stabilize loose knits)
- Optional: buttons, ribbon ties, or a zipper
Steps (easy envelope closure)
- Measure your insert: Add about 1 inch total for seams (so 18×18 insert → cut about 19×19).
- Cut the sweater body: Cut one square/rectangle for the front panel.
- Make the back pieces: Cut two overlapping panels (each should be the full width, and about 2/3 of the height).
- Stabilize if needed: If the knit is very stretchy, iron fusible interfacing to the wrong side (game-changer for wavy seams).
- Assemble: Place the front panel right-side up. Lay the two back panels right-side down, overlapping in the center.
- Sew around the edge: Use a zigzag stitch (knits need stretch). Trim corners, turn right-side out, insert pillow.
No-sew option
Use iron-on hemming tape to fuse seams, then reinforce high-stress corners with a few hand stitches or a dab of fabric glue.
It’s not heirloom sewing, but it’s very “I made this on a Sunday and still had time for a nap.”
Style upgrades
- Button band: Use the sweater’s existing placket (if it has one) as the back closure.
- Patch detail: Add a contrasting scrap square for a modern, cozy-cabin vibe.
- Contrast piping: Use ribbon or bias tape if you want it to look store-bought.
DIY #2: Sweater-Sleeve Vase & Planter Cozies
Sleeves are the MVPs of sweater upcycling: they’re already tube-shaped, stretchy, and finished at the cuff.
Translation: they practically beg to become vase or planter covers.
Materials
- Sweater sleeves
- Glass vases or plain planters
- Scissors
- Hot glue or fabric glue (optional)
- Optional: twine, ribbon, faux greenery, winter branches
Steps
- Pick your vessels: Tall cylinders work best because they keep the knit smooth.
- Cut sleeve to length: Leave the cuff intact for a clean top edge.
- Slide it on: Pull the sleeve over the vase/planter like a tiny sweater outfit.
- Fold the cuff: Fold the cuff over the rim for a tidy finish.
- Secure if needed: Add a small line of glue at the bottom edge (especially if the sleeve is loose).
Decor ideas
- Winter branches: Stick to pine, eucalyptus, or bare twigs for a calm, modern look.
- Cozy centerpiece: Group 3 sweater-covered vases together for an easy dining table moment.
- Planter tip: If using real plants, keep the knit above the drainage area (fabric + soggy soil = sadness).
DIY #3: Safe Sweater Candle Wraps (a.k.a. “Soft Lantern Energy”)
This is where your sweater scraps become dramatic. Candlelight plus knit texture is peak winter moodjust keep it safe.
The best approach is to use LED tea lights or wrap only the outside of a thick glass container so the flame never touches fabric.
Materials
- Cuffs/hem ribbing or leftover sweater strips
- Glass jars (mason jars, candle hurricanes, or thick tumblers)
- Scissors
- Fabric glue or small safety pins/hand stitches
- LED tea lights (strongly recommended)
Steps
- Measure your jar: Cut a strip that wraps around with about 1/2 inch overlap.
- Wrap and secure: Use fabric glue on the overlap seam (keep glue away from the jar opening).
- Add detail: Tie twine around the middle or add a small scrap “tag” for a cozy cottage look.
- Light safely: Use LED lights, or if using real candles, keep fabric low and away from the flame with a tall glass insert.
Bonus cozy move: Pair this with winter scents (think cedar, pine, vanilla, clove) in a diffuser or candle nearby for full “winter sanctuary” vibes.
DIY #4: Upcycled Sweater Winter Wreath
A sweater wreath is the easiest way to say “welcome” without having to actually talk to anyone. It’s warm, textural, and forgivingmeaning it still looks cute even if your wrapping isn’t mathematically perfect.
Materials
- Foam or wire wreath form (10–14 inches)
- Sweater body scraps + neckline/hem pieces
- Hot glue gun
- Scissors
- Optional: pinecones, faux berries, bells, ribbon, ornaments
Two easy methods
Method A: Wrap strips
- Cut the sweater into long 1.5–3 inch strips.
- Wrap strips around the wreath form, slightly overlapping each pass.
- Glue at the back occasionally (don’t glue every inchyou’re not building a spaceship).
Method B: “Sweater skin” cover
- Cut a wide strip long enough to wrap the entire wreath form.
- Stretch it around the form like a fitted sheet (but less emotionally damaging).
- Glue the seam along the back and tuck edges neatly.
Make it winter, not holiday-only
- Use neutral ribbons, dried orange slices, or simple pinecones so it works all season.
- Add a small bundle of greenery and a bow made from leftover ribbing.
- Hang it with a thick ribbon for extra “Pinterest but realistic” appeal.
DIY #5: A Sweater Draft Stopper (Door Snake, But Make It Fashion)
Draft stoppers are one of those unglamorous things that quietly improve your life. They help block cold air sneaking under doors or along drafty windows,
and they’re a perfect use for a sweater sleeve because it’s already a long tube.
Materials
- One sweater sleeve (or both sleeves stitched together for extra length)
- Filler: rice/beans, sand (sealed), or poly pellets
- Scrap fabric or plastic bags (to create inner pouches)
- Needle and thread or sewing machine
- Optional: essential oil drops on a small cotton ball (kept away from pets/kids)
Steps
- Measure the door gap: Your draft stopper should be about the width of the door.
- Prep the sleeve: Stitch one end closed (use a tight zigzag if the knit is loose).
- Create filler pouches: Put rice/beans/sand into small bags and tie them closed. (This helps prevent leaks and makes it washable-ish.)
- Insert and distribute: Slide pouches into the sleeve and spread them evenly.
- Close the other end: Stitch shut. Fold the edge inward first for a cleaner finish.
Safety note: If you’re worried about moisture, pests, or allergies, use poly pellets instead of food-based fillers.
And if you have curious pets, keep scented add-ins mild and well-contained.
Care Tips: Keep Your Sweater Decor Looking Fresh (Not Fuzzy in a Bad Way)
- De-pill gently: A fabric shaver can refresh sweater texture, especially on pillow covers.
- Wash smart: If your pillow cover is removable, wash it according to the sweater’s fiber type (cold water is your safest bet).
- Spot-clean wreaths and wraps: Use a lint roller and gentle spot cleaning rather than full washing.
- Store seasonally: Pack wreaths and wraps in breathable bags to avoid musty odors.
Troubleshooting: Fix the 3 Most Common Sweater DIY Problems
1) “My seams are wavy.”
That’s knit stretch. Use fusible interfacing, reduce presser-foot pressure if your machine allows it,
and sew slowly with a zigzag stitch. Don’t tug the fabriclet the feed dogs do their job.
2) “The edges are unraveling.”
Finish edges with zigzag stitching, serging, or a line of fabric glue along the cut. If the sweater is wool, consider felting first.
3) “It looks… lumpy.”
For pillow covers, trim seam allowances, clip corners, and use a snug insert. For wraps, pull the knit taut and secure at the back seam.
Texture is charming; accidental lumps are just… less charming.
Wrap-Up: One Sweater, Five Cozy Wins
If winter had a love language, it would be “soft textiles and fewer drafts.” With one old sweater, you’ve added warmth to your space in five different ways:
a pillow cover for the couch, cozy vases/planters, candle wraps that glow safely, a wreath that welcomes, and a draft stopper that quietly saves your toes.
The best part? None of this requires perfect sewing skills or a craft room the size of a small airport. Just a sweater you’re ready to re-home,
a few basic supplies, and the willingness to say, “Yes, this is on purpose.”
Real-Life Crafting Notes: What You’ll Actually Experience (500+ Words)
Here’s the honest part that most tutorials skip: turning one old sweater into multiple home DIYs feels less like a calm Scandinavian lifestyle montage
and more like a very cozy episode of “What’s That on My Shirt?”and that’s okay. The first thing you’ll notice is how much personality sweaters have as a material.
Some knits behave like polite, structured fabric. Others act like cooked spaghetti that just heard a joke. If your sweater is stretchy, you’ll feel the temptation
to pull it taut “just a little” while cutting or sewing. Don’t. That’s how you end up with a pillow cover that looks fine on the table but turns into a wavy potato
the second you put it on the couch.
You’ll also learn quickly that sleeves are the overachievers of sweater upcycling. The moment you slide a sleeve over a plain glass vase and fold the cuff neatly
at the top, you get that immediate “I bought this at a cute winter market” look. It’s incredibly satisfyinglike the crafting equivalent of finding money in your coat
pocket. You’ll probably make one vase cozy and then start eyeing every cylinder-shaped object in your home with new ambition. (This is normal. Let it happen.)
The candle wrap project is where your inner adult shows up. You’ll have a moment of, “This looks adorable,” immediately followed by, “But also, fire exists.”
That’s why LED tea lights are such a win: you get the warm glow without the mental math of “How far is fabric from flame?” Real talk: LED candles have improved a lot,
and the cozy effect is still thereespecially when the knit texture casts soft shadows on the wall. If you want extra ambiance, you’ll likely find yourself pairing the glow
with a winter scent nearby. It’s the easiest way to make your home feel like you’re hosting a gathering, even if you’re just hosting yourself and a snack.
Wreath-making is the most forgiving project emotionally. The first wrap around the wreath form might look messy. The second might look better. By the third, you’ll realize
that texture hides a multitude of sins. If you mess up a seam, it goes on the back. If your strips aren’t perfectly even, the overlap disguises it.
The wreath is basically your supportive craft friend who says, “You’re doing amazing, sweetie,” no matter what. You’ll likely end up adding one decorative element too many,
then removing it, then adding it back. That little back-and-forth is part of the creative processand also part of why hot glue is both magical and mildly terrifying.
The draft stopper is the unsung hero. It’s not flashy, but the first time you place it at the bottom of a drafty door and feel the room get calmer (and warmer),
you’ll understand why practical DIY is so satisfying. This is the project where you’ll be grateful you made inner pouches for the filler, because something always tries
to escape. Rice wants freedom. Beans want chaos. Poly pellets want to roll under the couch like they pay rent there. Once it’s done, though, you’ll wonder why you waited.
And if you used a sweater sleeve with a nice cuff edge, it’ll look surprisingly polishedlike a small, cozy barrier with strong opinions about comfort.
Finally, you’ll experience the best hidden perk of multi-project upcycling: your sweater scraps start feeling valuable. Instead of “trash,” they become “options.”
That mindset shift is a big reason these projects feel good. You’re not just making decor; you’re practicing the skill of seeing potential in what you already have.
And in winterwhen everything outside is gray and your motivation occasionally hibernatesthat little spark of “I made this” warmth goes a long way.