Table of Contents >> Show >> Hide
- Boosters 101: The Three Moments That Matter
- The Booster Menu: What Each One Does (and When to Use It)
- A Simple Booster Decision Framework (So You Don’t Rage-Boost)
- Best Boosters by Level Type
- Combo Logic: Make Your Boosters Pay Rent
- Common Booster Mistakes (and How to Avoid Them)
- How to Get More Boosters Without Buying Them
- Wrap-Up: The “Right” Booster is the One That Solves the Real Problem
- Booster Field Notes: of Real-World “Been There” Moments
Candy Crush is a wholesome, colorful match-3 puzzle… until you hit a level that feels like it was designed by a polite
villain in a cardigan. That’s where boosters come in: they’re the game’s “emergency snacks” that help
you break stubborn blockers, rescue a near-win, or turn a slow board into a fireworks show.
This guide explains how to use boosters in Candy Crush the smart waywhat each booster does, when it’s
worth spending one, and how to avoid the classic mistake of throwing a party popper at a problem that needed… one
tiny bonk from a lollipop hammer.
Boosters 101: The Three Moments That Matter
In practice, boosters matter at three different moments:
- Before the level starts (starting boosters): You choose these on the pre-level screen to begin with a
stronger setupgreat for “Hard” and “Nightmarishly Hard” stages. - During the level (in-level boosters/tools): You trigger these mid-level to fix a specific problemlike
swapping two candies that don’t match or smashing a single nasty blocker. - Timed/limited effects: Some bonuses run for a set time and change how your level plays (often tied to
streaks or events). These are powerful but easy to waste if you start levels you’re not ready to finish.
The Booster Menu: What Each One Does (and When to Use It)
Candy Crush boosters are not all created equal. Some are “setup boosters” (helping you start strong), and some are
“surgical boosters” (helping you remove one exact problem). Below is a practical breakdown of the most common boosters
you’ll see in Candy Crush Saga and how to use them effectively.
Fish
Fish are all about jelly cleanup. When fish are added to the board and matched, each fish helps clear
extra jelly (especially useful when the last jelly is hiding in a corner like it pays rent there). Use fish when:
- You’re on jelly or mixed objectives and need help hitting hard-to-reach tiles.
- The board has isolated pockets where normal cascades rarely reach.
- You’re consistently ending the level with “1–3 jellies left” syndrome.
Coconut Wheel
A Coconut Wheel is a lane-clearing machine. When matched, it rolls across the board and creates striped
candies as it goesfantastic for cracking through layered blockers or reaching ingredient exits. Use it when:
- You need vertical/horizontal clearing power on boards with long corridors.
- Ingredients must drop and you need to open pathways quickly.
- A level is clogged with frosting/licorice that demands repeated hits.
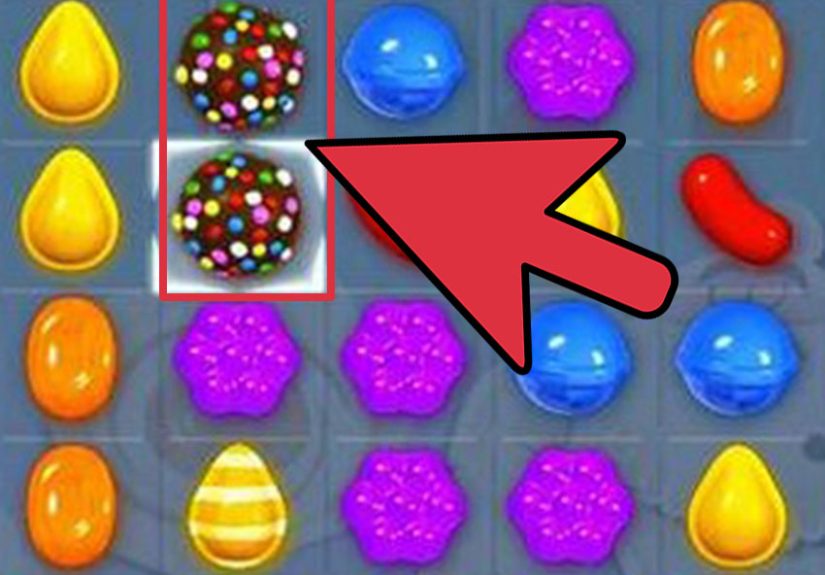
Color Bomb
The Color Bomb is the classic “delete one color” button. Swap it with a plain candy and it blasts candies of that
color. It’s strongest when the board has a high concentration of one color or when removing one color
will create major cascades.
Best uses:
- Opening a jammed board: Remove a dominant color to create space and drop new candies into play.
- Setting up combos: If you can pair a Color Bomb with a special candy (striped/wrapped), you often
clear half the board and knock out blockers in the process. - Order levels: If you need to collect a certain color quickly, this is a direct shortcut.
Striped and Wrapped
This booster starts your level with one striped candy and one wrapped candy already on the board. It’s
a momentum booster: you’re basically buying an early explosion that can open locked areas or break the first layer of
blockers.
Use it when:
- The level’s first challenge is simply “get the board moving.”
- There are early blockers that must be cracked before you can play efficiently.
- You want a better chance of creating a powerful combo early (striped + wrapped is a strong clear).
Lucky Candy
Lucky Candy is the booster for order levels and anything that requires specific matches. When you match
lucky candy, it can “fit” what you needeffectively helping you complete required combinations without begging the
board for the right color alignment.
Use it when:
- You’re collecting specific colors or match patterns and the board keeps trolling you.
- The level goal is precise (and your patience is not).
- You want more consistent progress instead of relying on big cascades.
5 Extra Moves
Extra moves are simpleand that’s why they’re dangerous. They can turn a near-win into a win, but they can also become
a habit. Treat this booster like a seatbelt: helpful when used at the right time, not something you use because you
“kind of feel like it.”
Use it when:
- You consistently lose with the goal nearly complete (for example: 1 ingredient left, or a few blockers remaining).
- You understand the board and just need a little more time to finish your plan.
- You’re on a hard level where your strategy worksjust not fast enough.
Lollipop Hammer
The Lollipop Hammer is your precision tool: it lets you smash one chosen candy or blocker without using
a move. Think of it as “I don’t need a miracle; I need that tile gone.”
Use it when:
- You need one last hit on a blocker to open a key lane.
- A single candy is blocking an obvious special-candy setup.
- You’re at the end of a level and one square is preventing completion.
Example: You’re one jelly short in a corner under a stubborn blocker. Instead of spending three moves
hoping for a cascade, hammer it and move on with your life like a responsible adult.
Free Switch
Free Switch is the “rules don’t apply to me” booster. It lets you swap two adjacent candies without needing to
create a match. This is powerful because it turns almost-moments into guaranteed combos.
Use it when:
- You can see a game-winning combo, but the candies don’t align for a legal match.
- You want to connect two special candies (like moving a wrapped candy next to a striped candy).
- You need to reposition a special candy to hit a specific target area.
Striped Brush
Striped Brush converts a regular candy into a striped candyand you can choose the stripe direction.
That direction choice is the entire point: you’re not just creating power; you’re aiming it.
Use it when:
- You need a vertical clear to hit an ingredient lane or a tall blocker stack.
- You need a horizontal clear to sweep a row of blockers or open a locked section.
- You’re setting up a special-candy combo (striped + wrapped, or striped chain reactions).
Party Booster
The Party Booster is big, loud, and unapologetic: it clears the board once and then drops multiple boosters onto the
board that explode. Translation: when the level has become a cluttered mess, this is your “reset with fireworks.”
Use it when:
- The board is saturated with blockers and you can’t create specials consistently.
- You need widespread damage across multiple areas, not just one lane.
- You’re stuck in a low-momentum loop (the “every move feels the same” trap).
UFO
The UFO booster places three wrapped candies on the board and sets them off. Wrapped blasts are great for
chunky damagehitting multiple tiles around impact points.
Use it when:
- You need multi-tile damage to soften layered blockers.
- Targets are spread out and you need “area-of-effect” clearing.
- You’re trying to break into locked sections where normal matches can’t reach yet.
Super Charger (Super Color Bomb)
Super Charger is a timed effect that makes your first three Color Bombs in a level twice as effective,
adding an extra blast. It doesn’t sit in your inventory like a normal booster; it shows as a timer before you play and
you’ll notice it only when you use or create Color Bombs.
How to use it well:
- Prioritize creating Color Bombs early (five-in-a-row setups become extra valuable).
- Choose levels where you can reliably survivebecause losing a level can end the effect.
- When you have it active, avoid starting a “probably doomed” level just to see what happens. Curiosity is expensive.
A Simple Booster Decision Framework (So You Don’t Rage-Boost)
Before you tap a booster, run this quick mental checklist:
- What’s the real bottleneck? Is it one blocker, a locked section, lack of moves, or not enough special
candy creation? - Is the booster solving the bottleneck directly? If the answer is “kind of,” pause. “Kind of” is how
boosters disappear. - Will this booster create momentum? The best boosters either remove the barrier or trigger chain
reactions that keep paying off for multiple moves. - Am I close enough to win? If you’re regularly ending within a few targets, extra moves or a precision
tool is often justified. If you’re not close, you probably need a setup booster (or a different plan).
Best Boosters by Level Type
Jelly Levels
Jelly levels are notorious because the last jelly is often hidden under blockers or in odd corners. Your priorities:
create specials, aim clears, and avoid wasting moves on tiny matches.
- Top picks: Fish, Color Bomb, Striped Brush, Lollipop Hammer.
- Smart tactic: Save the hammer for the end. If you can get to “one jelly left,” the hammer is the
cleanest finish in the game.
Ingredients Levels
If ingredients must drop, your mission is to open lanes and clear vertical paths. Random matches won’t do it; you need
directed clearing.
- Top picks: Coconut Wheel, Striped Brush (vertical), UFO, Party Booster.
- Smart tactic: Use Free Switch to align a vertical striped candy in the exact column where the
ingredient is stuck.
Order Levels
Orders are all about specificity. If you need “X purple candies” or “make special candies,” your best friend is
consistencynot chaos.
- Top picks: Lucky Candy, Color Bomb, Striped and Wrapped.
- Smart tactic: If you need a color collection, try to keep that color abundant on the board. A Color
Bomb on a sparse color is like bringing a confetti cannon to a silent meditation retreatdramatic, but ineffective.
Blocker-Heavy Hard Levels
Some stages are basically “blockers featuring candy as a guest star.” For these, you need big effects and momentum.
- Top picks: Party Booster, UFO, Striped and Wrapped, Coconut Wheel.
- Smart tactic: Use Party/UFO early if the board is locked down. If you can’t create specials, waiting
“for the perfect moment” is just waiting.
Combo Logic: Make Your Boosters Pay Rent
Boosters get exponentially better when they help you create or activate special-candy combinations. Here are a few
practical combo principles:
- Color Bomb + Special Candy: If you can pair a Color Bomb with a striped candy, you typically turn a
color into stripes and trigger a wide sweepexcellent for clearing blockers and progressing objectives quickly. - Striped + Wrapped: This is one of the best “mid-board detonations” for breaking multiple tiles and
clearing space. - Free Switch as a combo-maker: Don’t treat Free Switch as a random swap. Treat it as “connect these
two specials right now.” - Striped Brush with intent: Choose stripe direction based on the objective. Vertical for drops and tall
stacks; horizontal for sweeping rows and clearing gates.
Common Booster Mistakes (and How to Avoid Them)
1) Using Extra Moves too early
Extra moves are best when your strategy already works and you’re consistently close. If you’re not close, extra moves
often just extend the struggle.
2) Spending a Party Booster on a single-tile problem
If one blocker is the issue, use a hammer or aim a striped clear. Party Booster is for “the whole board is the issue.”
3) Wasting Free Switch on “any match”
Free Switch shines when it creates a special-candy combo or repositions a key special candy. If you use it for a basic
match, you’re basically paying premium prices for tap water.
4) Ignoring the level’s first 5 moves
Many levels are won or lost by whether you open the board quickly. Starting boosters (Striped & Wrapped, Color Bomb,
Coconut Wheel) matter most when they create early momentum.
How to Get More Boosters Without Buying Them
If you want more boosters without opening your wallet, the game’s reward systems matter. The big one is the
Booster Wheel, which hands out free boosters and includes a jackpot (no risk, just luck and persistence).
Beyond that, Candy Crush frequently rotates events and timed rewards that grant boostersso the smartest “free” strategy
is to claim boosters when you actually have time to play effectively, not when you’re about to close the app and forget
you activated a timer.
Wrap-Up: The “Right” Booster is the One That Solves the Real Problem
Here’s the secret that separates “I used a booster” from “I used a booster well”:
identify the bottleneck. If you’re short on moves, extra moves help. If one tile is blocking victory,
use a hammer. If the board is locked down, use a big-board booster (Party/UFO) or a setup booster that creates early
chaos in your favor.
Boosters aren’t cheating. They’re just strategy with better special effects.
Booster Field Notes: of Real-World “Been There” Moments
Players who stick with Candy Crush long enough tend to develop “booster stories”those little lessons learned the hard
way, usually after a perfectly good booster was launched into the void for absolutely no reason. Here are some of the
most common experiences and what they teach.
The One-Jelly Tragedy: Almost everyone has had the moment where the board looks clean, the music is
optimistic, and thenboom“1 jelly left.” It’s usually tucked in a corner under a blocker that hasn’t been touched since
the Obama administration. The lesson players learn: save precision tools for the end. A Lollipop Hammer used
early might feel productive, but a hammer saved for the last 3–5 moves is often the difference between “Victory” and
“I need a walk.”
The Free Switch “Oops”: Another classic: a player uses Free Switch to make a normal match because “it was
glowing and seemed nice.” Ten moves later, they spot two special candies sitting one space apart like star-crossed
loversand now the tool is gone. The lesson: Free Switch is a combo-making booster, not a convenience swap. If it
doesn’t create or activate something big, it probably wasn’t the best moment to use it.
The Party Booster Overkill: Party Booster feels amazinglike pressing a giant red “FIX IT” button. The
problem is that it’s easy to hit that button when you’re annoyed, not when it’s optimal. Plenty of players have used it
on a board that actually needed a targeted clear, then watched the explosions miss the one area that mattered. The
lesson: big boosters are best when the whole board is the problemlocked sections everywhere, blockers stacked,
and no room to build specials.
The Coconut Wheel “Aha” Moment: Many players initially treat the Coconut Wheel like a cute novelty. Then
they hit an ingredients level where nothing is dropping, blockers are layered, and vertical clears are mandatory. Once
the wheel starts rolling and generating striped action, it finally clicks: some boosters aren’t about finishing;
they’re about opening the board. When a board is jammed, momentum is worth more than perfection.
The Timed Booster Reality Check: Timed effects (like Super Charger) can make you feel unstoppableuntil
you start a level you aren’t ready for, lose, and watch the benefit vanish. Long-time players learn to treat timed
boosters like a “focus session”: pick levels you can play seriously, avoid distractions, and don’t start a probable-loss
stage just to “peek.” The lesson: timed power rewards preparation, not impulse.
At the end of the day, the best booster experience is the one where you finish the level, smile, and think, “That was
clean.” The worst is when you finish (or fail) and think, “I just launched a UFO at my own foot.” Choose wisely.