Table of Contents >> Show >> Hide
- What Karlby Is (And Isn’t)
- Why Karlby Works So Well for Islands
- Sizing, Layout, and Seating: Plan Before You Cut
- Overhang Support: The Rules That Save Knees and Countertops
- Installation Tips: Cutting, Mounting, and Seam Smarts
- Finishing Options: Hardwax Oil vs. “Set-It-and-Forget-It” Coats
- Daily Care and Long-Term Maintenance
- Common Pitfalls (And Easy Fixes)
- of Real-World Karlby Island Experiences
If you’ve ever walked through IKEA and thought, “That wood countertop is cute… and also suspiciously affordable,”
welcome. The Karlby countertop has become a go-to choice for kitchen islands
because it hits the sweet spot: warm wood look, solid thickness, DIY-friendly sizing, and a price that doesn’t
require a small loan or a dramatic family meeting.
But here’s the part nobody tells you while you’re happily loading flat boxes into your trunk: a Karlby island can
be amazingor it can become a “why is this edge fuzzy?” situation if you skip the planning and finishing
details. This guide breaks down what Karlby is, how to design with it, how to support it safely, how to finish it
for real kitchen life, and how to avoid the classic mistakes that turn a dreamy island into a cautionary tale.
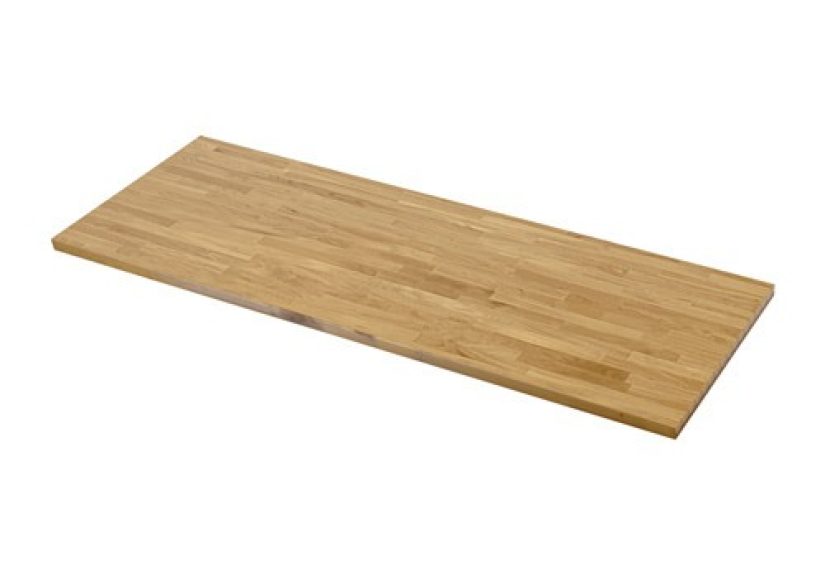
What Karlby Is (And Isn’t)
Karlby is often described like it’s a “butcher block,” but it’s more accurate to think of it as an
engineered wood countertop with a thick wood veneer on top. That construction matters.
Engineered layers add stability (so it’s typically less cranky about humidity swings than a single slab of solid
wood), while the real-wood veneer gives you the grain, color, and warmth people want in an island centerpiece.
Translation: you’re getting the look of wood with smart structure underneath. You also get a surface that can
often be lightly sanded and refreshed if it gets scratched or dulljust remember it’s still a
veneer, not an endlessly sandable hardwood plank. Think “spa day,” not “full personality makeover.”
Quick spec snapshot (island-friendly highlights)
- Thickness: Karlby is commonly sold at about 1 1/2 inches thicksubstantial enough to look custom.
- Material strategy: A particleboard core topped with real wood veneer (walnut or oak options are popular).
- Finish baseline: Many Karlby tops come pre-treated, but edges and cut areas still need attention.
- DIY flexibility: You can cut to length and finish exposed edges for a built-in look.
The big mindset shift is this: you’re not just buying a countertopyou’re buying a small project.
The project is easy enough for most DIYers, but it rewards you for doing the unglamorous steps: sealing edges,
supporting overhangs, and planning for water (because kitchens are basically water parks with appliances).
Why Karlby Works So Well for Islands
Kitchen islands are visual anchors. Even in a tiny kitchen, the island top is what you see, touch, wipe, lean on,
and probably unload groceries onto like you’re competing in a speedrun. Karlby shines here because it brings
instant warmth to white cabinets, matte black hardware, stainless appliances, and basically every
modern-farmhouse-to-minimalist mood board ever posted.
It looks “expensive” without acting expensive
A thick-looking wood top reads custom. The grain pattern (especially walnut) adds movement and depth, and the
neutral wood tone plays nicely with stone-look counters around the perimeter. Many homeowners use Karlby as the
“hero material” on the island while keeping more maintenance-friendly surfaces elsewhere.
It’s island-flexible: prep zone, serving zone, homework zone
A lot of islands aren’t just for cooking. They’re for coffee chats, laptop life, kids’ art projects, and that one
friend who insists on standing exactly where you need to be. Karlby works because it can handle daily useif you
finish it properly and keep up with simple maintenance.
It’s a friendly match for popular IKEA base systems
People commonly pair Karlby with IKEA cabinet systems and island frames because the sizing and “mix-and-match”
approach makes planning easier. It’s one of those rare moments where a kitchen upgrade feels more like assembling
a giant, useful Lego set than a construction saga.
Sizing, Layout, and Seating: Plan Before You Cut
Before you buy anything, decide what your island needs to do. A prep-only island can be smaller. A seating island
needs careful clearance planning (for knees, chairs, and traffic flow). If your kitchen is already tight, the
wrong island size will turn everyday cooking into a game of “excuse me, sorry, pardon me” on repeat.
Island depth and “working side” vs. “seating side”
A practical way to plan is to split the island mentally into zones:
- Working side: where you prep, cook, or set appliances (needs space for hands, tools, and spills).
- Seating side: where legs and stools live (needs knee room and safe support underneath).
Comfortable seating overhang (knee space matters)
Seating isn’t just “add stools and hope.” You want enough knee space so people aren’t sitting like they’re
balancing on a bus seat. A helpful reference point used in kitchen planning guidelines is that knee space needs
vary by counter height:
- 36-inch counter height: roughly 15 inches of knee space depth per seated person is a common planning guideline.
- 42-inch bar height: knee space depth can be a bit less, often around 12 inches.
Also plan width per seat. If you want three stools that don’t feel like airplane economy, give each person enough
elbow room so friendships survive taco night.
A simple island checklist
- Will there be seating? If yes, how many stools?
- Will you have a sink, cooktop, or outlets on the island?
- What’s your “walk-around” clearance on all sides?
- Where will seams or joints land (if you’re combining pieces)?
- Which edges will be visible and need finished banding?
Overhang Support: The Rules That Save Knees and Countertops
Let’s talk about the most ignored part of an island build: support. Everyone plans the pendant
lights. Nobody plans the physics. But physics always shows upusually right when someone sits down and leans back.
The Karlby-specific rule of thumb
If your Karlby island top includes an overhang for seating, you generally need support once the overhang passes a
modest threshold. Karlby island guidance commonly calls for supporting legs when the overhang exceeds about
10 inches, and it typically recommends keeping supports spaced so the span between them doesn’t get
excessive. The goal is to prevent flex, sag, and stress on the countertop over time.
Support options (choose your “look”)
- Decorative legs: easy, strong, and visible (great for farmhouse or traditional looks).
- Steel countertop brackets: strong and subtle, better for modern designs and keeping knee space.
- Corbels: classic style, but they can steal knee room if they’re chunky.
- Full panel or end support: a waterfall-style side panel or finished end can carry loads beautifully.
Don’t forget the “human factor”
A countertop overhang isn’t just holding its own weight. It’s holding:
a leaning adult, a kid doing “chair gymnastics,” a stack of Costco groceries, and sometimes a small appliance
collection that multiplies overnight. Plan support like your island will host Thanksgiving, even if you mostly
cook for one. Future-you will be grateful.
Installation Tips: Cutting, Mounting, and Seam Smarts
Installing Karlby is very doable, but it’s not the moment to “wing it.” The two big themes are
clean cuts and sealed edges.
Cutting Karlby without turning it into confetti
- Measure twice, cut once (yes, it’s cliché; yes, it still works).
- Use a sharp, fine-tooth blade designed for clean cuts in wood and veneered surfaces.
- Support the piece fully so it doesn’t flex while cutting.
- Take your timerushing creates tear-out and regret.
Mounting to cabinets: allow wood to be wood
Even engineered wood can respond to humidity. A common best practice with wood tops is to attach in a way that
keeps things secure but doesn’t trap movement completely. That might mean using appropriate fasteners and
attachment methods that hold firmly while reducing stress from seasonal changes.
Edges and cutouts: the “waterproofing” moment
Your island will meet water. It’s inevitable. The most vulnerable spots are:
cut edges (after trimming), sink cutouts, and any exposed end grain.
Treat these areas like a raincoat moment, not a “maybe later” moment.
If you’re adding a sink, seal every inch of the cutouttop, sides, and underside edgesbefore the sink goes in.
This one step prevents many of the classic “swollen edge” horror stories.
Visible seams: hide them strategically
If your island design requires more than one piece (or you’re doing a waterfall look), plan seams where the eye
won’t fixate:
- Align seams with cabinet divisions or appliance edges.
- Keep seams away from sink cutouts if possible.
- Dry-fit everything before final fastening.
Finishing Options: Hardwax Oil vs. “Set-It-and-Forget-It” Coats
This is where your Karlby island becomes either a low-stress showpiece or a high-maintenance diva. You have two
broad finishing paths, and the “right” one depends on how you actually live.
Option A: Stay with oil / hardwax oil (natural look, easy touch-ups)
Oil-based finishes (including many hardwax oils) keep the wood look and feel. The upside: scratches and wear can
often be blended or refreshed without stripping everything. The tradeoff: you’ll likely need periodic reapplication,
especially on edges and high-use zones.
- Best for: people who love a natural wood feel and don’t mind occasional maintenance.
- Watch-outs: water left sitting on the surface, especially near seams or edges.
Option B: Use a film-forming topcoat (more protection, more commitment)
If your island is a spill magnet (kids, roommates, enthusiastic red-wine friends), a tougher topcoat can provide
stronger protection against water and stains. The tradeoff is that repairing damage can require more work, since
film finishes often need sanding and refinishing a broader area to blend properly.
- Best for: busy kitchens where “wipe and move on” is the only realistic lifestyle.
- Watch-outs: curing time matters; don’t rush the countertop into full service.
Which should you choose?
Ask yourself two brutally honest questions:
- Will you reliably wipe water around the sink and edges every day?
- Are you okay doing a light maintenance refresh a few times a year?
If you answered “no” to both, pick the more protective finish path. Your countertop shouldn’t require a
personality transplant to survive your household.
Daily Care and Long-Term Maintenance
A Karlby island looks best when it’s treated like wood (not like a cutting board, not like a stone slab, and
definitely not like a hot-pan parking lot).
Daily cleaning (simple, not precious)
- Wipe crumbs and spills promptly with a soft cloth.
- Use mild soap and water for routine cleaning.
- Avoid harsh cleaners that can strip or dull finishes.
Weekly habits that keep it looking “new”
- Check the sink-side edge (if you have one) for dryness or dullness.
- Scan for small nickstouch-ups are easiest when damage is fresh.
- Use cutting boards (your knives and your countertop will both live longer).
When it looks tired: refresh instead of panic
The beauty of a wood-look top is that it can often be renewed. Light surface scratches can sometimes be blended
with gentle sanding and a fresh coat of the appropriate finish. If your countertop has a natural oil look, a
refresh coat can bring back that warm glow without a full overhaul.
Common Pitfalls (And Easy Fixes)
Pitfall 1: “I didn’t seal the cut edge… because it looked fine.”
It always looks fine on day one. The problem arrives later, often as swelling, raised grain, or darkening near an
edge that sees water. Fix: sand lightly (carefully), then seal and finish the edge thoroughly.
Pitfall 2: Too much overhang, not enough support
An unsupported overhang can flex over time. Even if it doesn’t snap dramatically, it can lead to stress, movement,
and fastener loosening. Fix: add legs or brackets before the countertop “learns” bad habits.
Pitfall 3: Treating it like a cutting board
Yes, it’s wood. No, it’s not asking to be sliced daily. Fix: keep a cutting board out and readyconvenience is
what makes habits stick.
Pitfall 4: Using heat like it’s a superpower
Hot pans can scorch and damage many finishes. Fix: trivets. Bonus: they make you look like an adult who has their
life together.
Pitfall 5: Expecting “maintenance-free wood”
Wood is wonderful. Wood also has opinions. Fix: pick a finish strategy that matches your household, then follow a
simple maintenance schedule that doesn’t feel like a second job.
of Real-World Karlby Island Experiences
Here’s what tends to happen when Karlby moves from “Pinterest dream” to “daily kitchen reality”based on the most
common patterns DIYers and homeowners describe after living with a wood-look island top for a while.
Experience #1: The honeymoon phase is real. The first few weeks are pure joy. The grain looks
rich. The thickness makes the island feel custom. You find yourself wiping it down more often than necessary
because you’re weirdly proud of it. Someone compliments your kitchen and you casually say, “Oh, that? Just a wood
top,” like you didn’t research it for three nights straight.
Experience #2: The sink-side edge becomes the main character. In kitchens where the island has a
prep sink, the edge nearest the faucet is where finishing choices get tested. People who thoroughly sealed the
cutout and edges tend to report fewer issues. People who assumed “pre-finished” meant “invincible” often notice
the surface getting dull or rough in that zone first. The good news: catching it early usually means a quick
refresh coat, not a full redo.
Experience #3: Overhang support is either invisible brilliance or visible regret. If the island
has seating, support decisions show up fastespecially once real humans start using stools like recliners.
Households that used steel brackets often love the clean look and knee room. Households that used decorative legs
love the furniture vibe (and the extra stability). Households that skipped support because “it felt sturdy”
sometimes end up adding it later, which is still finejust a little more annoying after everything is installed.
Experience #4: The finish you choose shapes your relationship with the countertop. With oil or
hardwax-oil styles, owners often describe a rhythm: wipe, enjoy, refresh occasionally. Small scratches feel less
tragic because they’re fixable. With a tougher topcoat, owners describe peace of mind around spillsbut they also
treat the surface more like “don’t mess this up,” since repairs can be more involved. Neither is wrong. The “best”
finish is the one that matches how your kitchen actually functions on a Tuesday night.
Experience #5: The countertop teaches better habits. This sounds dramatic, but it’s true. A wood
island top nudges people to use cutting boards, grab trivets, and wipe puddles instead of letting them linger.
It’s not that you become a different person overnightit’s that the island makes good habits easier to remember
because you can literally see when you’re treating it well.
The overall takeaway from real-world Karlby island life is simple: it’s an excellent choice when you treat
it like a wood surface that deserves smart finishing and support. Do the edge sealing, respect the
overhang rules, pick a finish that fits your household, and Karlby can look amazing for yearswithout you needing
to develop a new hobby called “countertop anxiety.”