Table of Contents >> Show >> Hide
- Why a Leather-Wrapped Vase Works (Even If You’re Not “A Leather Person”)
- Materials and Tools (Pick Your Difficulty Level)
- Method 1: The Slip-On Leather Sleeve (Beginner-Friendly, Reversible, No Glue)
- Method 2: The Permanent Leather Wrap (Smooth Finish + “Store-Bought” Vibes)
- Method 3: Faux Leather Basket-Weave Wrap (Big Texture, Surprisingly Affordable)
- Design Variations That Look Expensive (Even If Your Budget Says “Cute, No”)
- How to Style a Leather Wrapped Vase (So It Doesn’t Just Sit There Judging You)
- Care, Cleaning, and Keeping the Leather Looking Good
- Troubleshooting (Because Crafts Love a Plot Twist)
- Final Thoughts: A Small DIY That Makes Your Whole Room Look More Put-Together
- Maker Experiences: What DIYers Learn After the First Leather Wrapped Vase
If you’ve ever looked at a “designer” vase and thought, Wow, that’s beautiful… and also why does it cost the same as a small appliance?
you’re going to love the leather wrapped vase trend. It’s sleek, warm, a little rustic, a little modern, and it makes even grocery-store flowers feel like
they’re attending a fancy event where everyone says “tablescape” without laughing.
A leather-wrapped vase is exactly what it sounds like: a simple glass (or metal) vessel wearing a tailored leather jacket. The best part? You can make one
with basic tools, thrift-store glassware, and leather scraps (or faux leather), and end up with home decor that looks boutiquewithout the boutique bill.
This article breaks down multiple methods (no-glue sleeves, stitched wraps, riveted bands, basket-weave faux leather) plus styling tips so your finished
piece looks intentional and not like your vase lost a fight with a craft drawer.
Why a Leather-Wrapped Vase Works (Even If You’re Not “A Leather Person”)
Leather and “leather-look” materials add texture that ceramics and plain glass sometimes lack. That texture reads as cozy and high-end at the same timelike
the decor equivalent of a cashmere sweater that also has pockets. A leather wrapped vase also plays nicely with popular styles: modern farmhouse, boho,
Scandinavian-ish minimalism, and warm contemporary interiors.
Practically speaking, leather is flexible, easy to cut into clean shapes, and forgiving when you’re working around curves. You can also keep the leather
removable (a slip-on sleeve) so you’re not committing to one look forever. Today it’s cognac leather and eucalyptus; next month it’s black faux leather
and dried palms; in February it’s… whatever your home decides it is in February.
Materials and Tools (Pick Your Difficulty Level)
The “Hometalk-style” beauty of this DIY is that you can scale it up or down depending on what you already have. Here are the common supplies, organized by
method.
Base Supplies (Any Method)
- Glass vase, bottle, jar, or cylinder (thrifted is perfect)
- Leather or faux leather sheet/scrap (8–32 oz is a wide range; thin is easier to wrap)
- Measuring tape (the bendy kind) or string + ruler
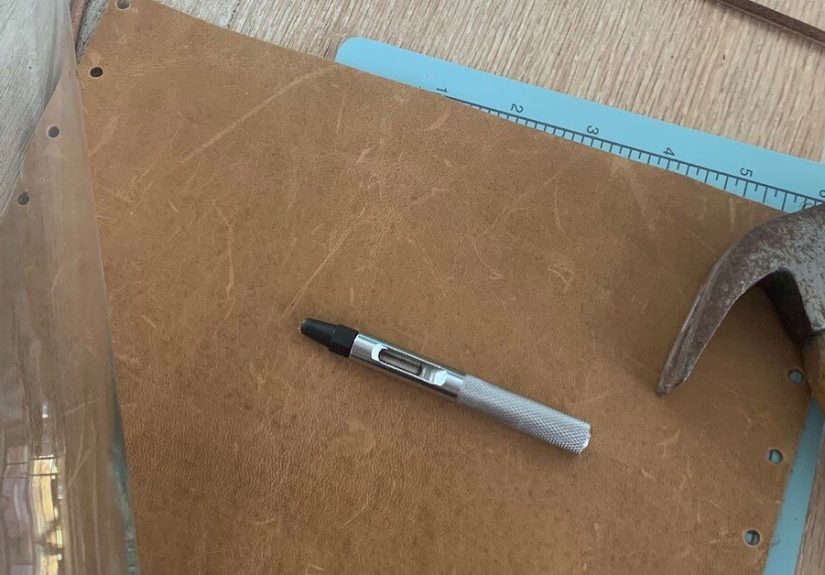
- Scissors (for faux leather) and/or a utility knife + cutting mat (for cleaner leather cuts)
- Pencil/pen + straightedge
For Stitching or Lacing (No Glue Needed)
- Leather punch, awl, or small drill bit (for holes)
- Embroidery floss, waxed thread, leather lacing, or thin leather cord
- Needle (an embroidery needle works; a leather needle is even better)
- Clips or clothespins (to hold your seam while you work)
For Rivets/Snaps (Fast + “Hardware Store Chic”)
- Leather rivets or snaps
- Rivet/snap setter + small mallet (or a hand press if you’re fancy)
For a Permanent Wrap (Adhesive Method)
- Contact cement or a strong multi-surface craft adhesive
- Rubbing alcohol + lint-free cloth (to clean the vase)
- Nitrile gloves and good ventilation (seriouslyyour lungs deserve a nice day)
Quick design note: If your vase will hold water for fresh flowers, keep leather on the outside only. The glass (or a separate inner liner)
should always be the waterproof hero of the story.
Method 1: The Slip-On Leather Sleeve (Beginner-Friendly, Reversible, No Glue)
This is the method for anyone who wants maximum style with minimum commitment. You create a leather “tube” that slides over the vase like a fitted sleeve.
If you get tired of it later, you can swap it out without scraping glue off glass for the next three business days.
Step 1: Measure Like You Mean It
- Measure the circumference of your vase at the widest point where the leather will sit. (If the vase is tapered, measure both top and
bottom of the sleeve area and choose the larger number.) - Decide sleeve height. Most look best leaving 1–2 inches of glass visible at the top.
- Add seam allowance: 1/2 inch if overlapping, or 1 inch if you want a laced seam that needs space.
Step 2: Cut the Leather Rectangle
Use a straightedge for clean lines. For real leather, a utility knife is usually cleaner than scissors. For faux leather, sharp scissors can be perfect.
Do a quick wrap test before punching holesleather is forgiving, but it’s not a magical self-regenerating creature.
Step 3: Add Holes for Stitching or Lacing
Mark a line down each side where your seam will be. Then punch holes every 1/2 to 1 inch. The closer the holes, the neater the seam; the wider the holes,
the more “rustic” it becomes (also known as “I meant to do that”).
Step 4: Stitch or Lace the Seam
- Simple whip stitch: Fast, clean, and forgiving.
- Cross lace: More decorative; looks great in boho or rustic spaces.
- Running stitch: Understated and modern, especially with waxed thread.
Step 5: Slide It On
Once you’ve created the sleeve, slide it over the vase. If it’s slightly loose, add a thin strip of felt inside the leather at the back seam area to
increase grip. Congratulations: your vase is now wearing couture.
Method 2: The Permanent Leather Wrap (Smooth Finish + “Store-Bought” Vibes)
If you want the leather wrapped vase to look like it came from a curated shop display (and not from your living room floor at 11:47 p.m.), adhesive can
help you get a tight, smooth wrap. This method is best for straight-sided vases and thinner leather.
Step 1: Prep the Surface
- Wash and dry the vase.
- Wipe the outside with rubbing alcohol to remove oils and residue.
- Do a dry-fit wrap to confirm your cut is correct before any glue enters the chat.
Step 2: Choose Your Adhesive Wisely
Many DIYers prefer contact cement for leather-to-leather and leather-to-rigid surfaces because it bonds strongly when applied correctly. Strong multi-surface
adhesives are also popular for crafts, especially when you want flexibility after curing. Whatever you choose: use it in a well-ventilated space, protect
your skin, and follow the product directions.
Step 3: Glue in Sections (Not All at Once)
- Apply adhesive according to label instructions. For contact cement, that often means coating both surfaces and waiting until tacky before
joining; for other adhesives, you may apply to one surface and clamp. - Start at the seam area on the back of the vase.
- Wrap slowly, smoothing as you go. A soft cloth helps press out bubbles without scratching.
- Finish the seam with either a neat overlap or a narrow leather “band” covering the seam.
Step 4: Hide the Seam Like a Pro
- Overlapped seam: Easiest and looks intentional if the overlap is straight.
- Butt seam + seam cover strip: Cleanest, most “retail-ready” finish.
- Hardware seam: Add rivets, snaps, or decorative studs for a modern edge.
Important: Don’t wrap leather over the vase’s rim where water could spill and soak it. Leave the top edge exposed or use faux leather if
you want a wrap that can handle occasional splashes.
Method 3: Faux Leather Basket-Weave Wrap (Big Texture, Surprisingly Affordable)
If you want a statement piece, a faux leather basket weave vase wrap delivers a high-impact lookespecially for fall branches, winter stems, or dried
florals. The weave also hides minor cutting imperfections because the texture is the point.
- Cut faux leather into even strips (width depends on your vase; 1/2 to 1 inch is common).
- Create a base “grid” by attaching vertical strips to a backing band (or weaving around a removable sleeve form).
- Weave horizontal strips over-under, keeping tension even.
- Trim ends and finish with a clean top/bottom band.
This method is also great when you want the look of leather but prefer vegan materials or easier wipe-clean maintenance.
Design Variations That Look Expensive (Even If Your Budget Says “Cute, No”)
1) The Belt Wrap
Wrap an old leather belt around a cylinder vase and buckle it. It’s fast, adjustable, and has built-in “hardware styling” without buying anything new.
For extra polish, choose a belt with subtle texture or an interesting buckle.
2) Minimalist Riveted Band
A narrow leather band around the middle of the vasesecured with two rivetscan look modern and intentional. It’s perfect for small bud vases and single
stems.
3) Laced-Up “Corset” Seam
Punch holes down both sides of the seam and lace it like a boot. This turns the seam into a feature, not a problem. Bonus: it’s adjustable, so the sleeve
can move between vases.
4) Two-Tone Leather Color Blocking
Combine a warm tan with a darker brown (or black) at the seam or as top/bottom bands. It’s a subtle detail that reads “designer,” especially with clean
edges.
How to Style a Leather Wrapped Vase (So It Doesn’t Just Sit There Judging You)
Styling is where your leather wrapped vase stops being a craft project and starts being decor. Start with the basics: pick a vase height that fits where it
will live. A tall arrangement is dramatic, but not if it blocks everyone’s line of sight across the dining table.
Easy Floral Formulas
- The “3-5-8” approach: Choose a few focal flowers, add texture stems, then fill with smaller blooms.
- Tape grid trick: For wide-mouth vases, a simple tape grid helps hold stems in place.
- Seasonal stems: Fall branches, winter evergreens, spring tulips, summer garden clippingsyour vase can handle it all (the leather just stays outside).
Want instant “styled shelf” energy? Pair the vase with a small stack of books, a candle, and something natural (a wooden bowl, a small plant, or a stone
object). Leather plays well with warm metals like brass and copper, and it looks especially good against white walls and light wood.
Care, Cleaning, and Keeping the Leather Looking Good
- Keep leather dry: If you’re using fresh flowers, make sure the vase rim stays exposed so drips don’t soak into the wrap.
- Dust gently: A dry microfiber cloth usually does the job.
- Condition occasionally: For real leather, a light conditioner can help prevent drying and cracking (test first in an inconspicuous spot).
- Faux leather is easy mode: Most can be wiped with a slightly damp cloth, but avoid harsh cleaners.
Troubleshooting (Because Crafts Love a Plot Twist)
The leather won’t lie flat
Try thinner leather, reduce the height of the wrap (less curve to fight), or switch to a stitched sleeve where the seam tension helps shape the wrap.
The sleeve slides down
Add a hidden friction strip: felt, thin cork, or even a narrow strip of double-sided tape on the back seam area (if you’re okay with mild stickiness).
My seam is crooked
Don’t panic. Add a vertical leather band over the seam, or turn it into a decorative “spine” with rivets. Crooked seams become design details with the
right attitude.
Final Thoughts: A Small DIY That Makes Your Whole Room Look More Put-Together
A leather wrapped vase is one of those projects that punches way above its weight. It’s a simple vase makeover that adds texture, warmth, and that
“curated home” lookwithout requiring you to become a professional leatherworker or buy a single intimidating tool you’ll only use once.
Start simple with a slip-on sleeve, then graduate to lacing, rivets, or a woven faux leather wrap when you want more detail. Either way, you’ll end up with
a piece that looks custombecause it is. And if anyone asks where you bought it, you can say, “Oh, this old thing?” and pretend you didn’t measure it three
times and still cut it twice.
Maker Experiences: What DIYers Learn After the First Leather Wrapped Vase
People who try a leather wrapped vase for the first time usually discover two truths immediately: (1) the project is easier than it looks, and (2) leather
has opinions. Not “political opinions,” but “I will gently curve when I feel like it” opinions. The most common early win is starting with a straight-sided
cylinder vase. Curvy vases are gorgeous, but they can make thicker leather wrinkle or bubble unless you’re doing a stitched sleeve that can “shape” itself
with seam tension. So the typical experience goes like this: the first vase is clean and modern, the second is slightly more ambitious, and by the third you
are punching holes with the confidence of someone who has absolutely Googled “how to fix uneven leather holes” at least once.
Thrifting is another shared experience. DIYers often describe walking into a thrift store with “I just need a vase” energy and leaving with three glass
cylinders, a weird-but-charming bottle, and a candle holder that might become a vase if nobody asks too many questions. Many people also run their
finds through a dishwasher or do a deep clean so the leather wrap doesn’t end up hugging a vessel that still smells faintly like 2009 potpourri. Once the
glass is clean, the fun part starts: holding leather scraps against different shapes and realizing that color matters more than you expected. Cognac leather
looks warm and classic; black leather reads modern; suede feels cozy but shows dust; faux leather can be a low-stress option if you have kids, pets, or a
general tendency to spill water while “carefully topping off the vase.”
Adhesives are where makers tend to develop strong preferences. Some people love the security of a permanent bond and the ultra-smooth finish you can get
when you wrap slowly and press as you go. Others try glue once, smell the fumes, and immediately join Team “Slip-On Sleeve Forever.” A very common lesson:
whatever adhesive you choose, ventilation is not optional, and gloves are your friend. DIYers also learn that contact-style glues don’t offer much
repositioning time; lining up the seam carefully before you press is the difference between “boutique decor” and “why does it look slightly stressed?”
The most satisfying “level-up” moment tends to be hardware and finishing details. Makers report that adding rivets, snaps, or even a narrow seam-cover band
suddenly makes the project look professional. It’s the decor version of wearing a blazer: same person, more confident energy. And once someone tries a laced
seamboot-lace style or corset styleit often becomes their signature. You get adjustability, the seam becomes intentional, and you can swap the sleeve
between vases like your decor has seasonal outfits. The final shared experience is styling: people commonly start with fresh flowers, then quickly realize
that leather wrapped vases look amazing with branches, dried stems, and minimalist greenery. Suddenly, one DIY vase turns into a whole shelf moment,
and your home starts looking like it “has a look,” even if your real look is “I own scissors and feelings.”